
System Administrator
This document is intended for users with the System Administrator role in the Yanfei Computing Power Scheduling Platform. System Administrators are primarily responsible for managing users (including regular and temporary users), nodes, projects, system configurations, and project activities, while also supporting the viewing of various statistical data.
Login
User Login
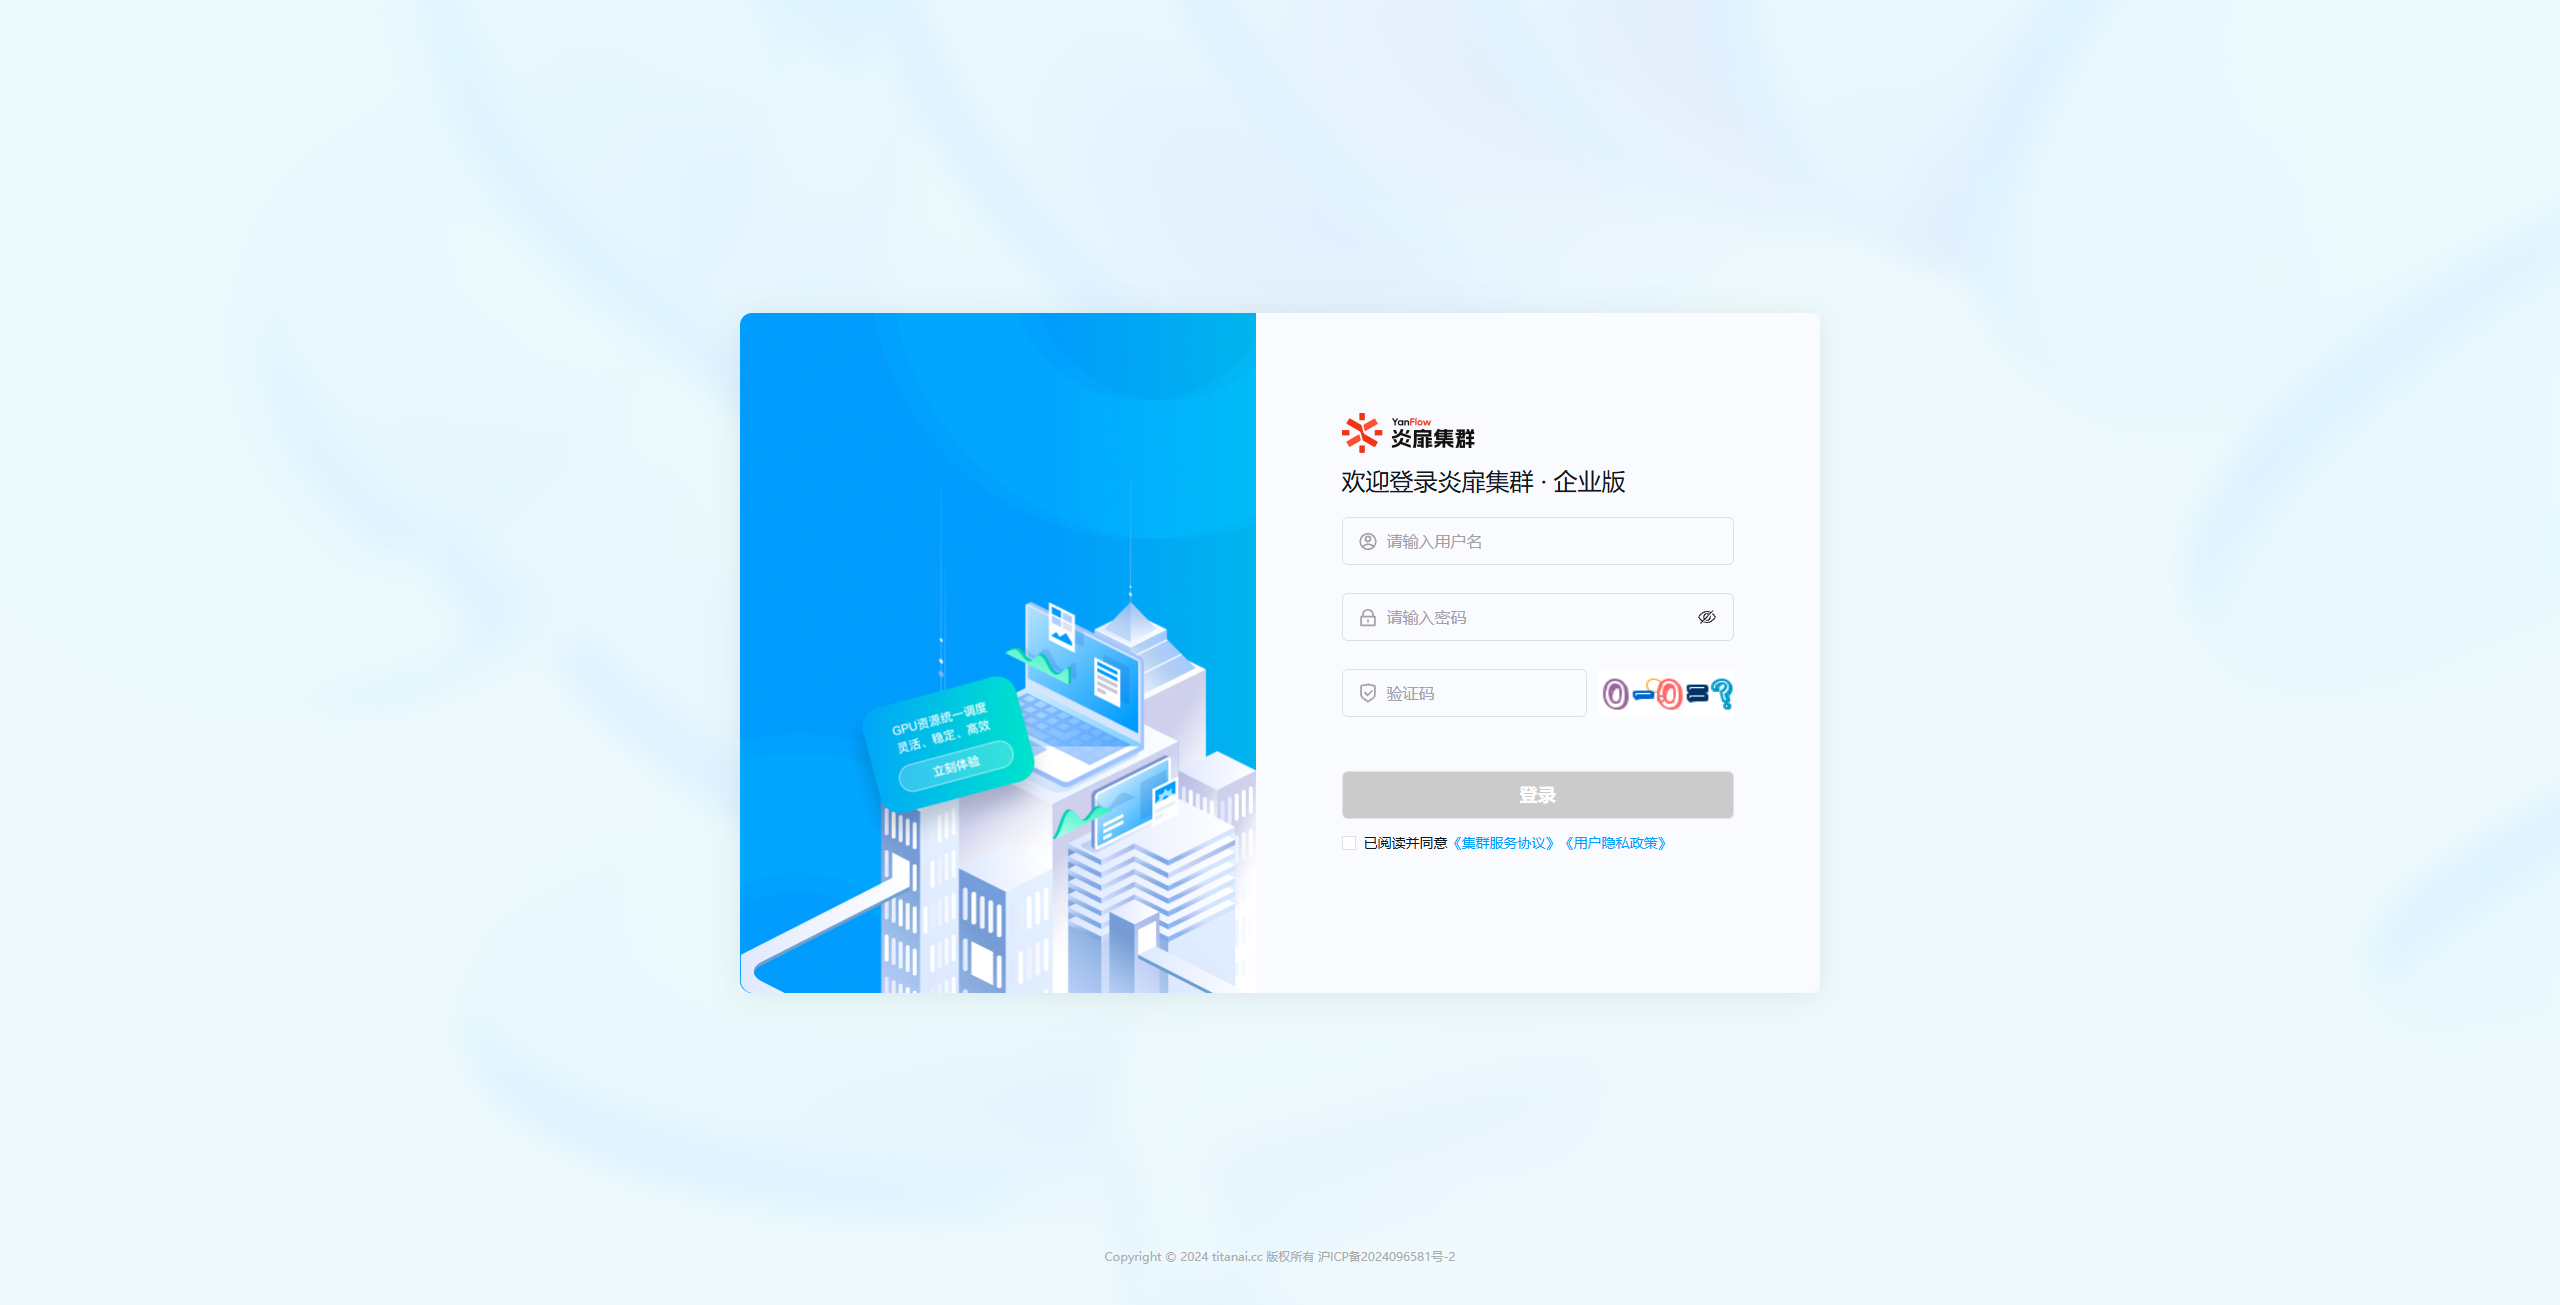
Enter your username, password, and verification code, check the agreement box, and click Login. Once verified, you will enter the system.
Logout
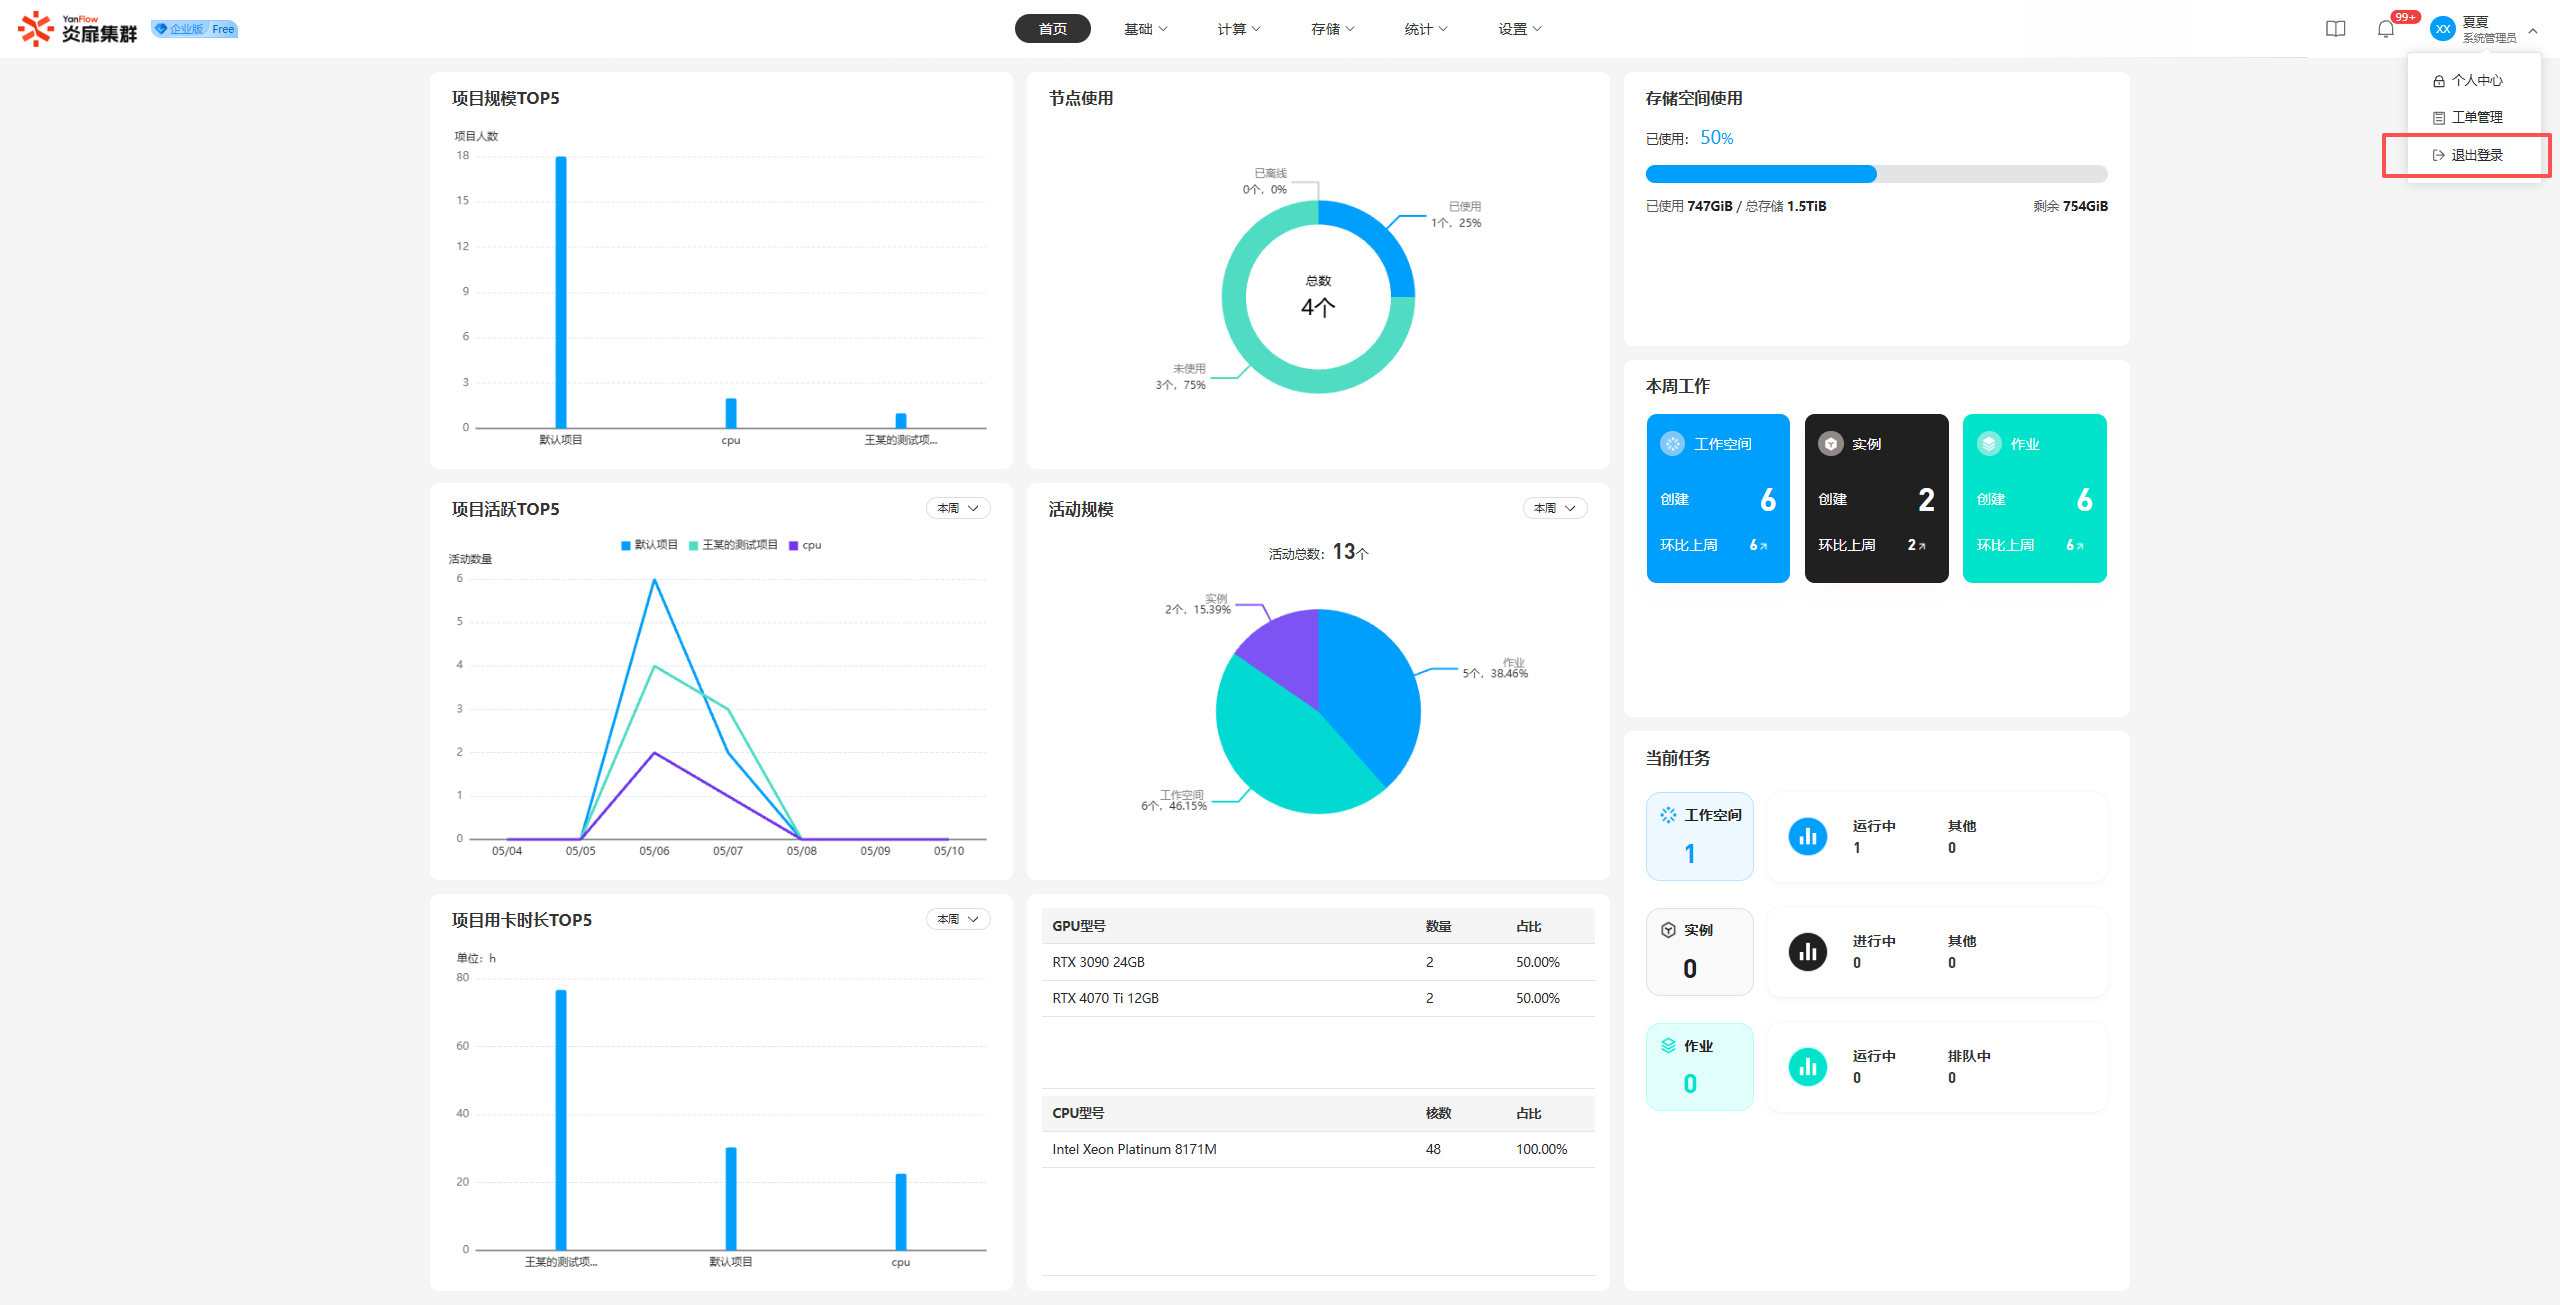
Click the User Avatar in the top right corner and select Logout. Click Confirm to log out and return to the login page.
Home
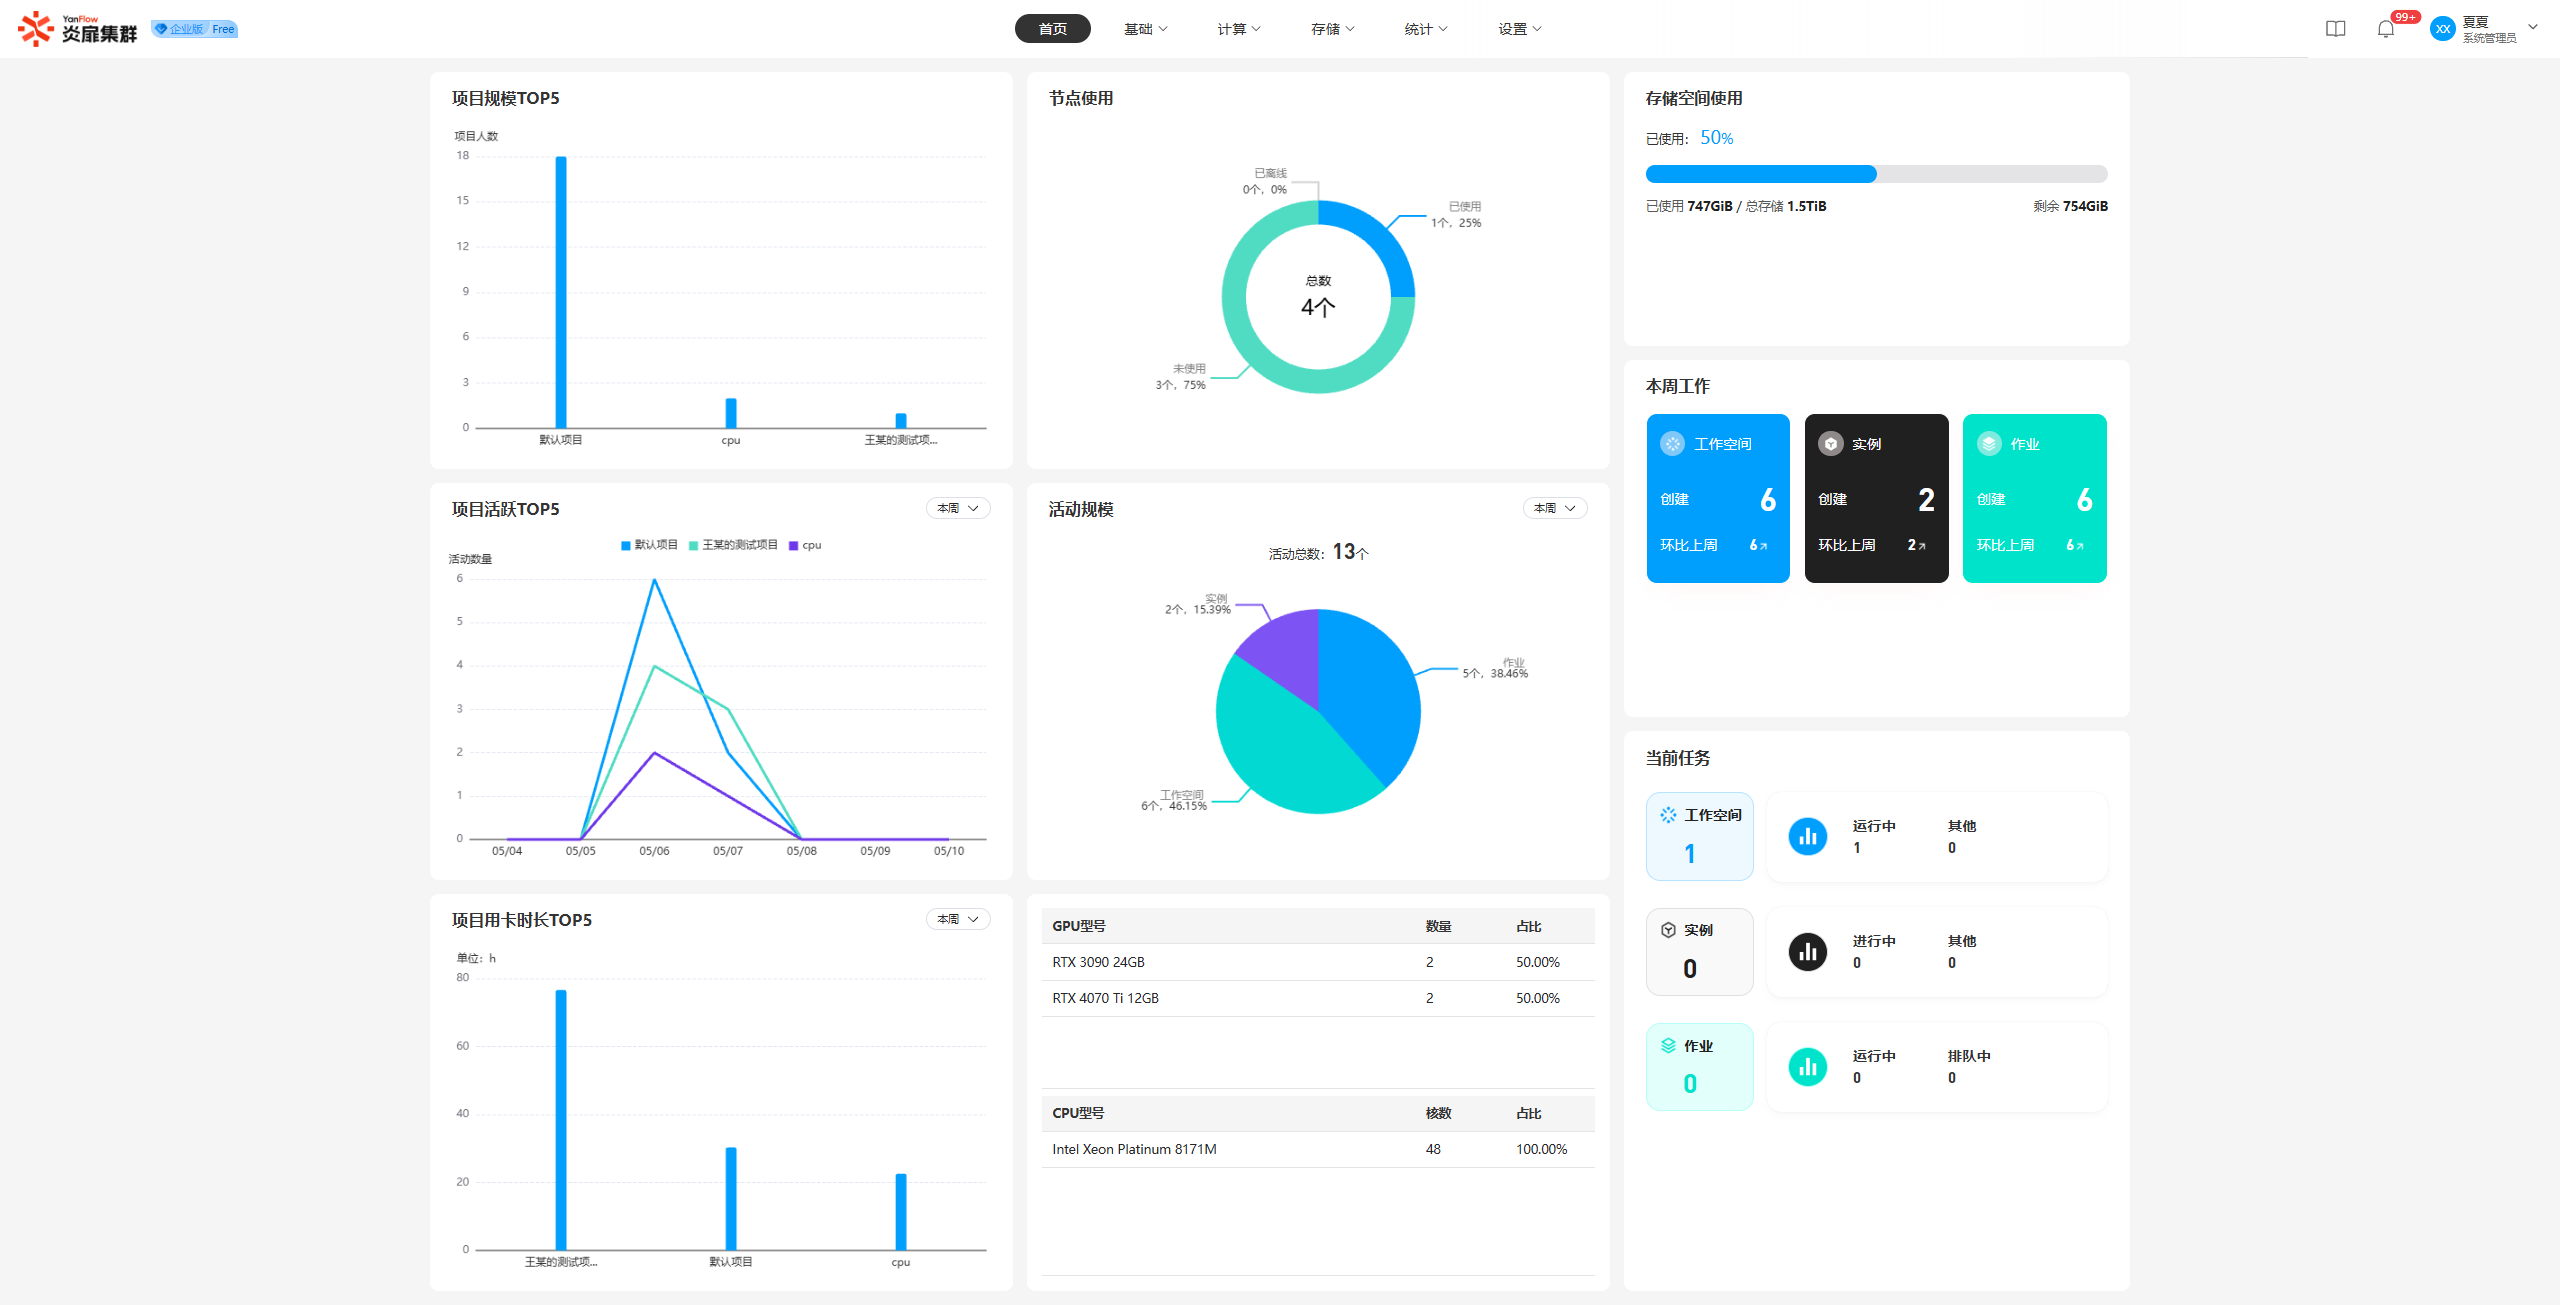
Through the visual dashboard, you can quickly understand the system's operational status and relevant data.
Fundamentals
Project Management
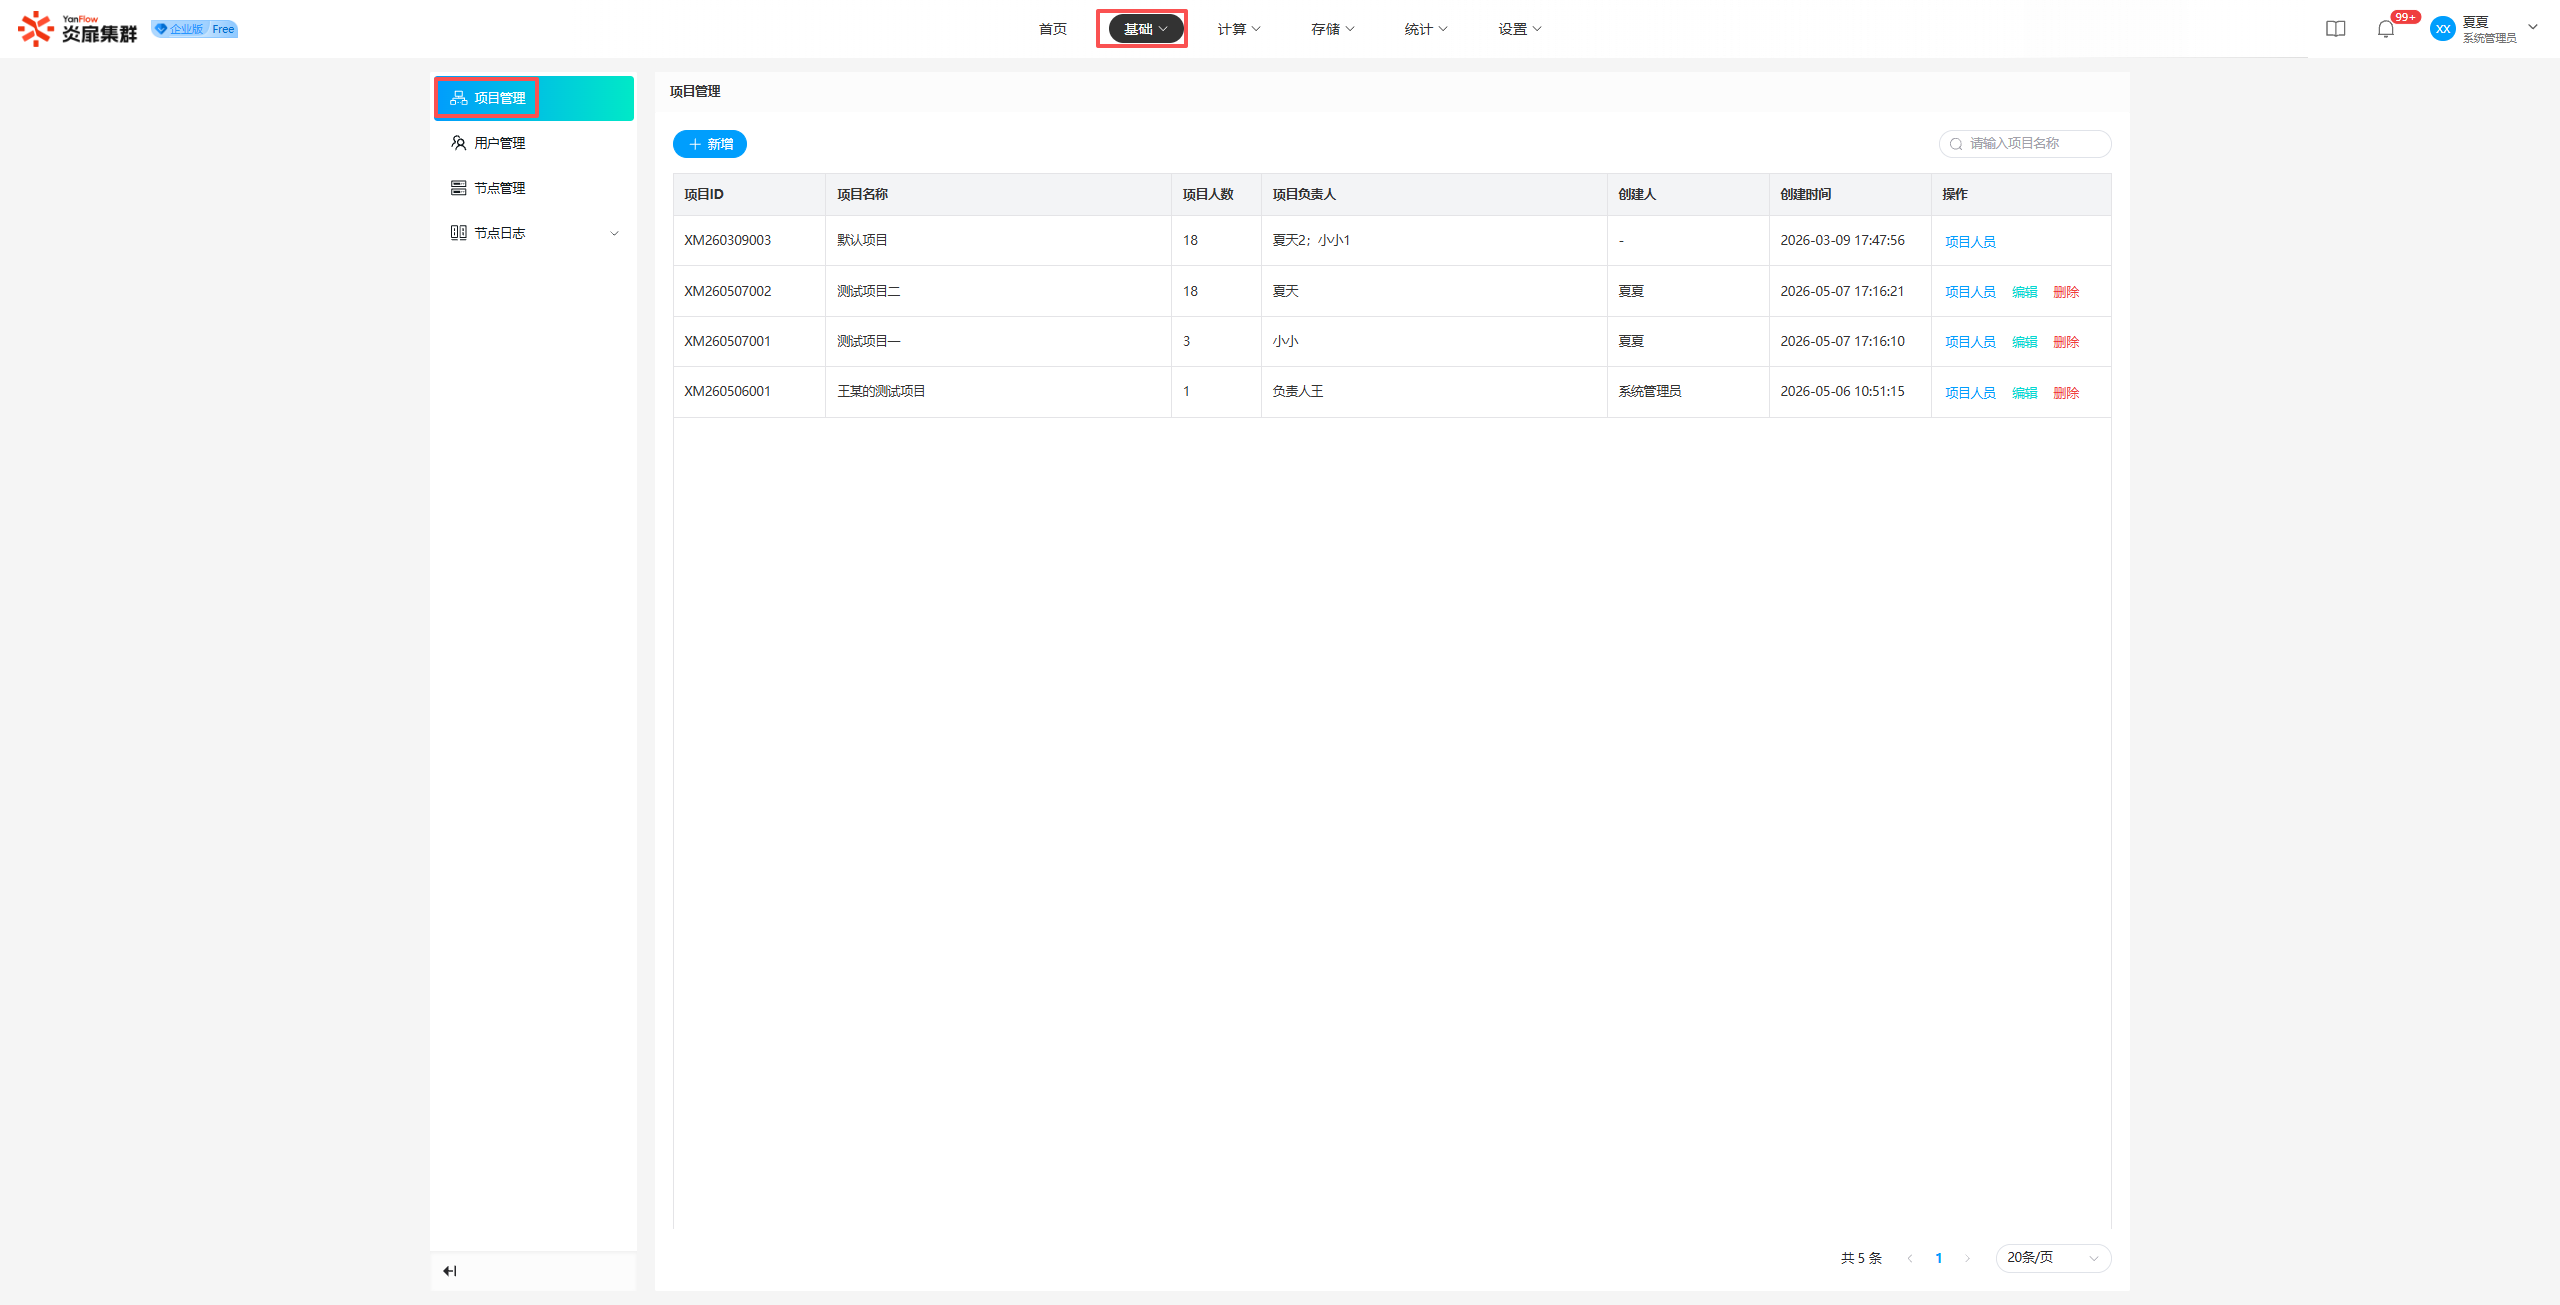
Project List
Displays all project information in the system. Supports keyword search by project name.
Add Project
Click Add to open the creation popup. Set the relevant information and click Confirm. Once validated, a new project will be created.
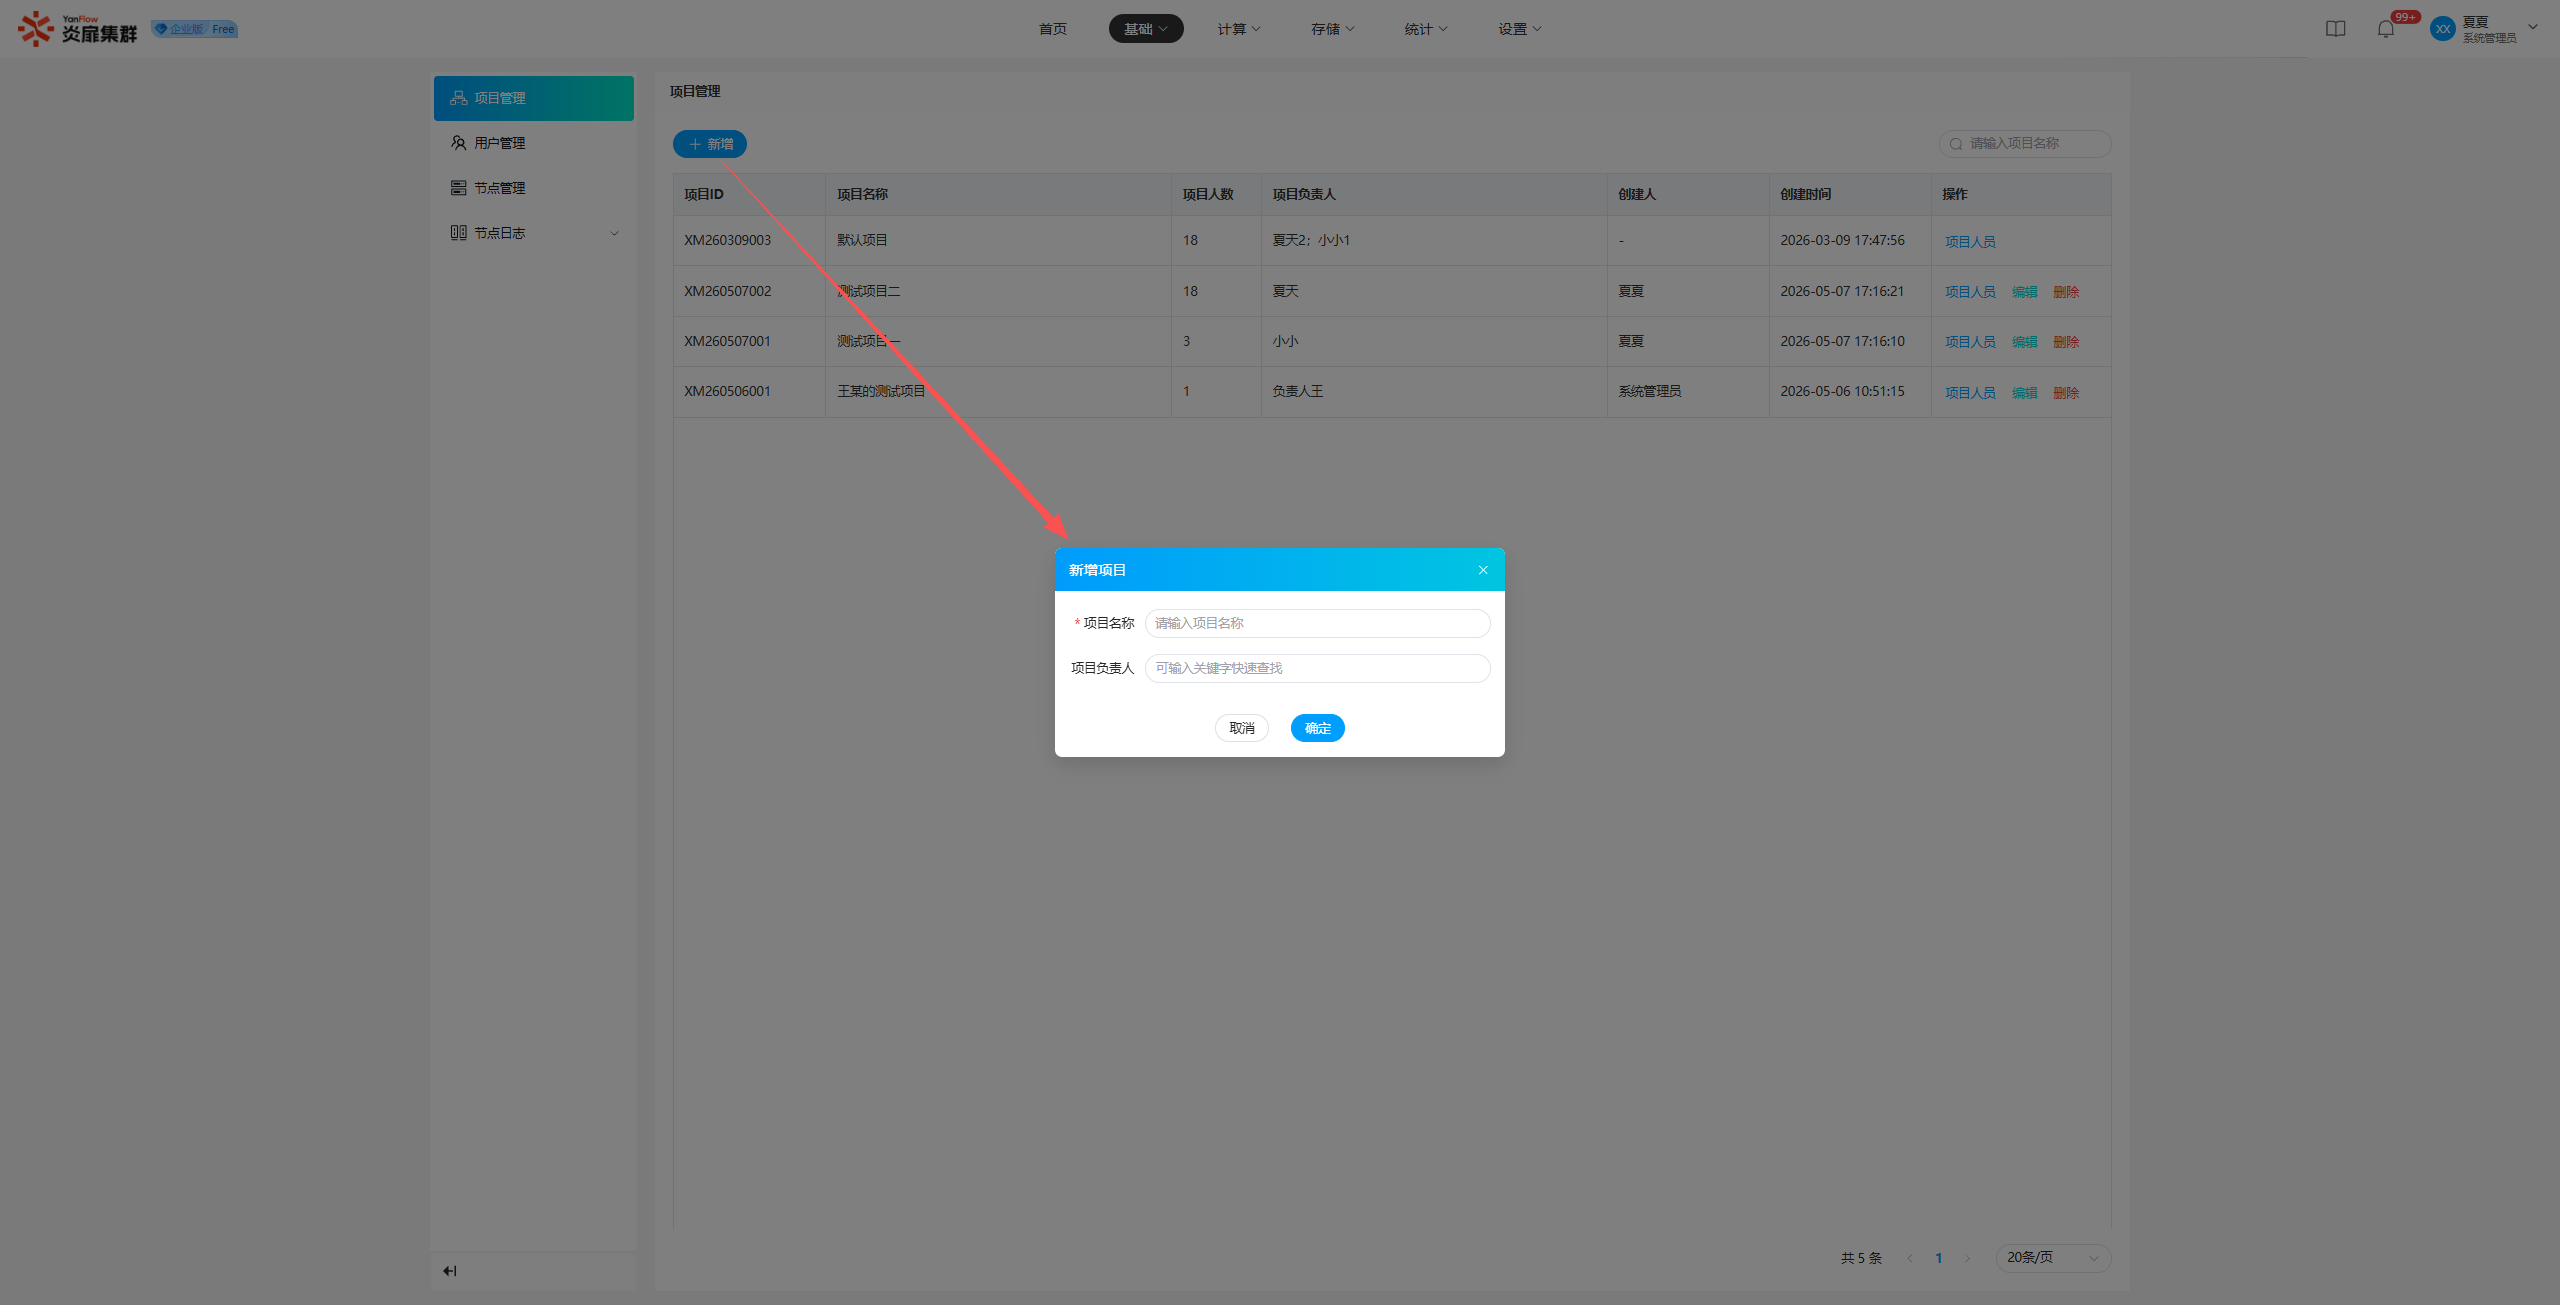
Note: Project leaders can only be selected from "Regular Users" who are currently in an "Enabled" state. Multiple project leaders can be selected.
Edit Project
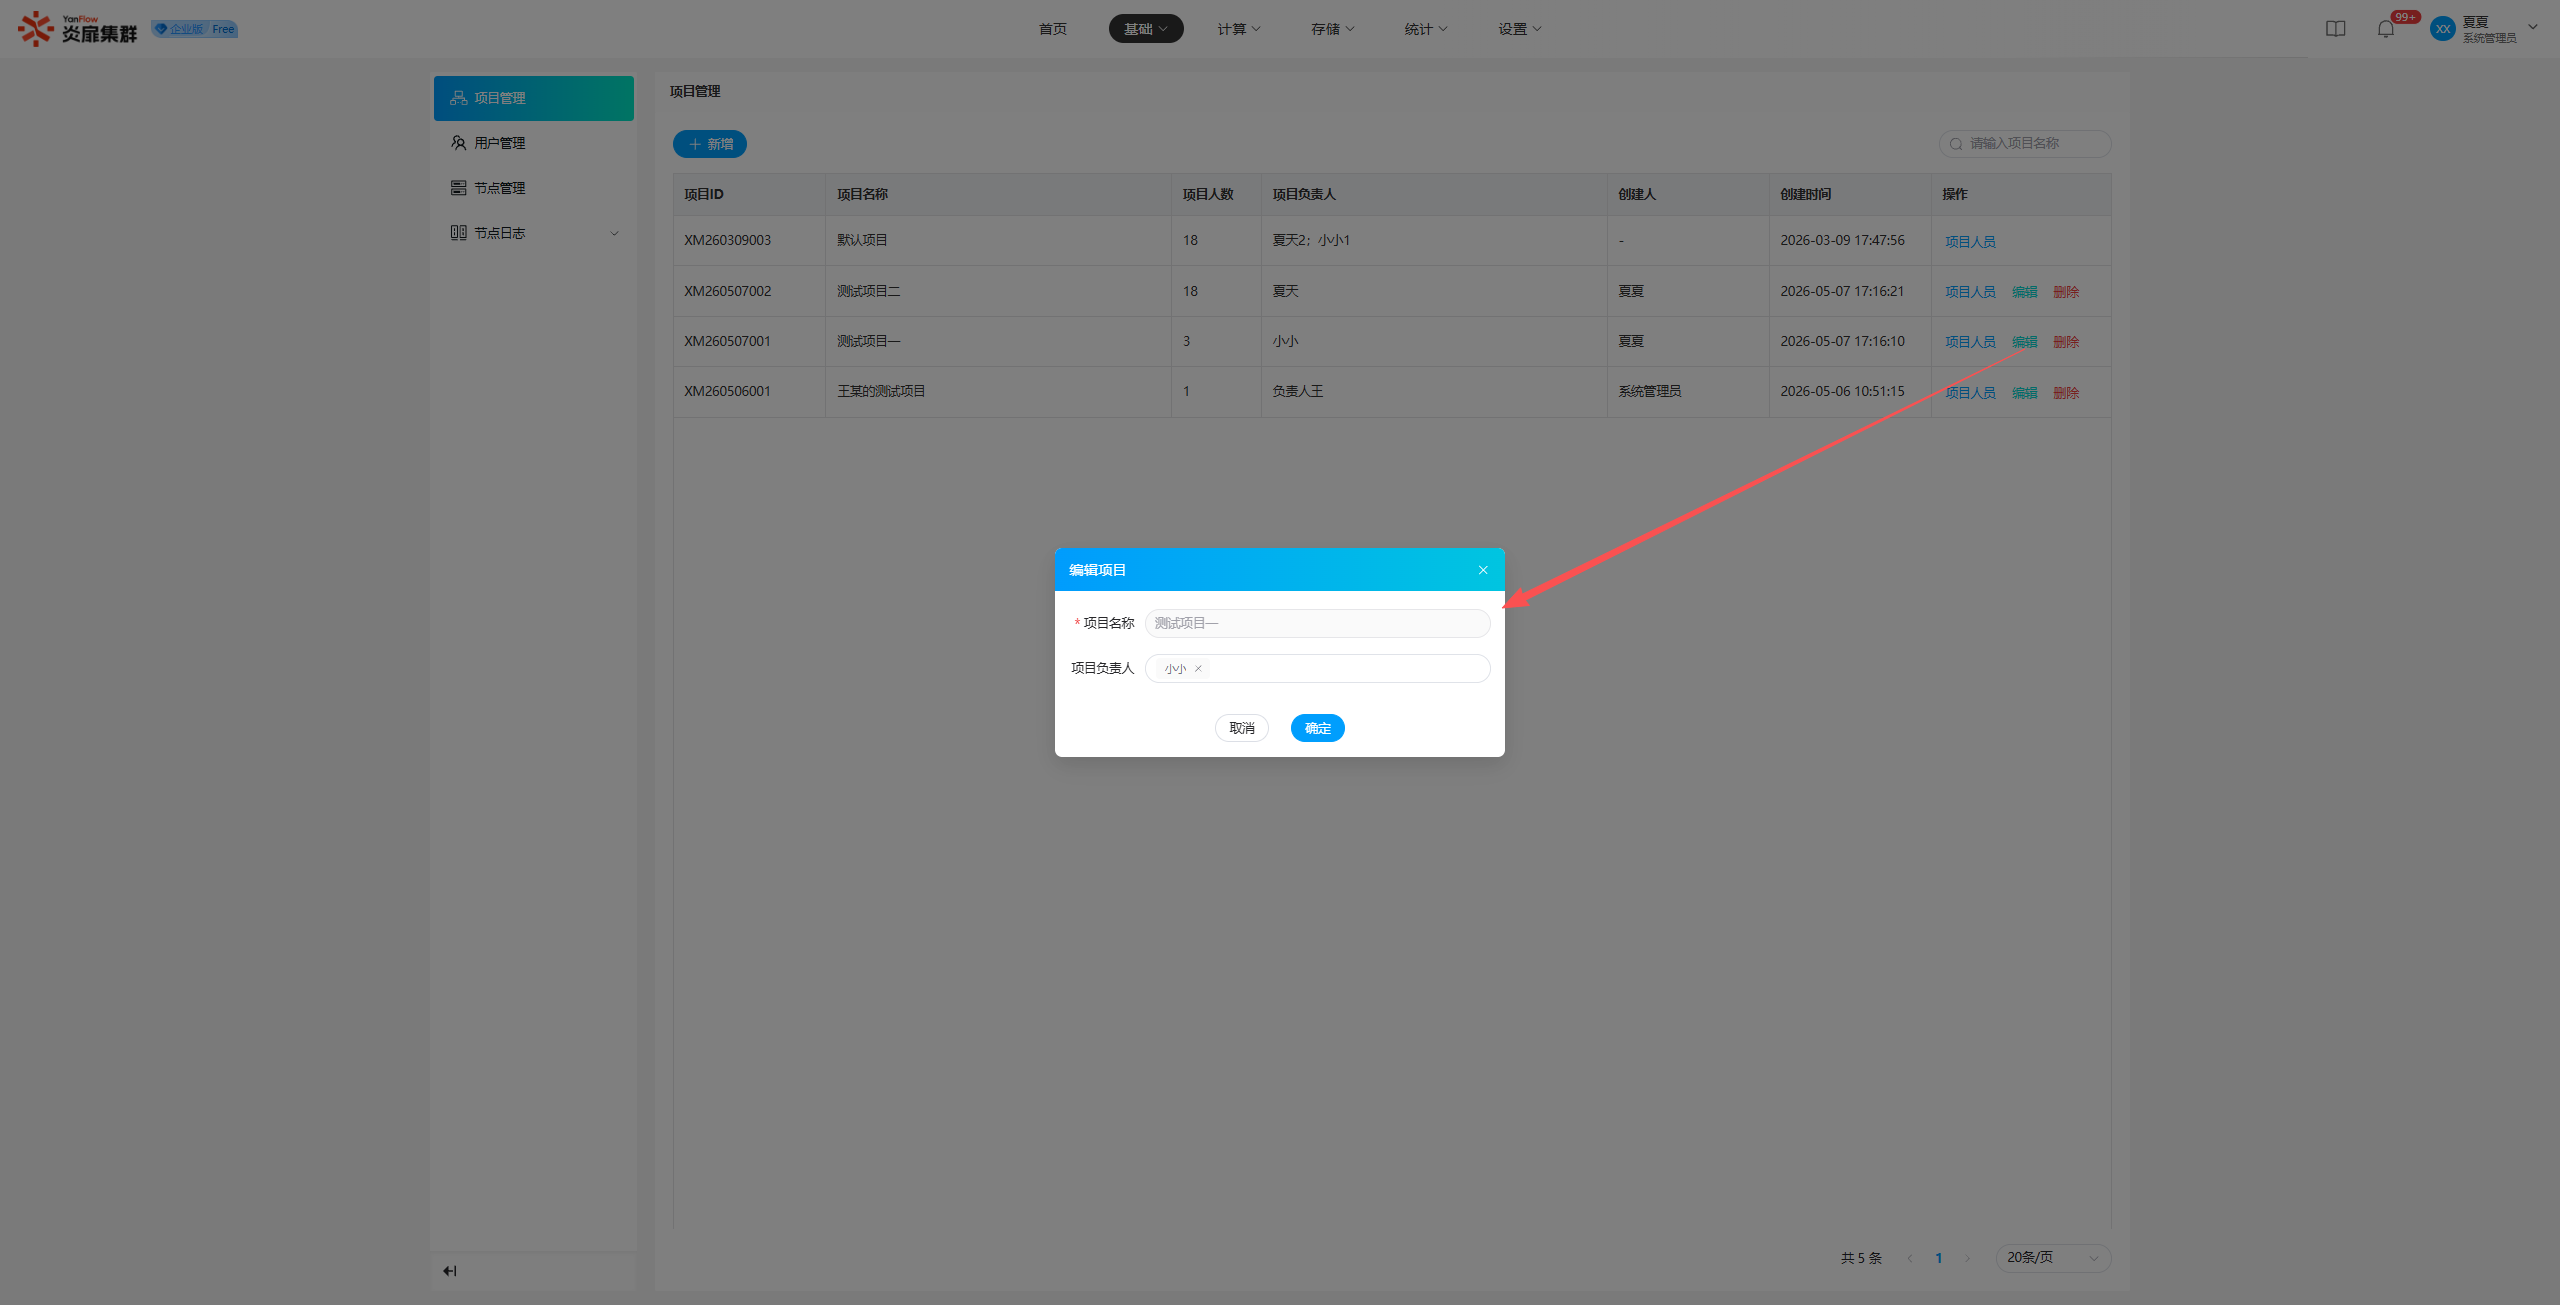
Click Edit to open the editing popup. Modify the information that needs changing and click the Confirm button to update the project information.
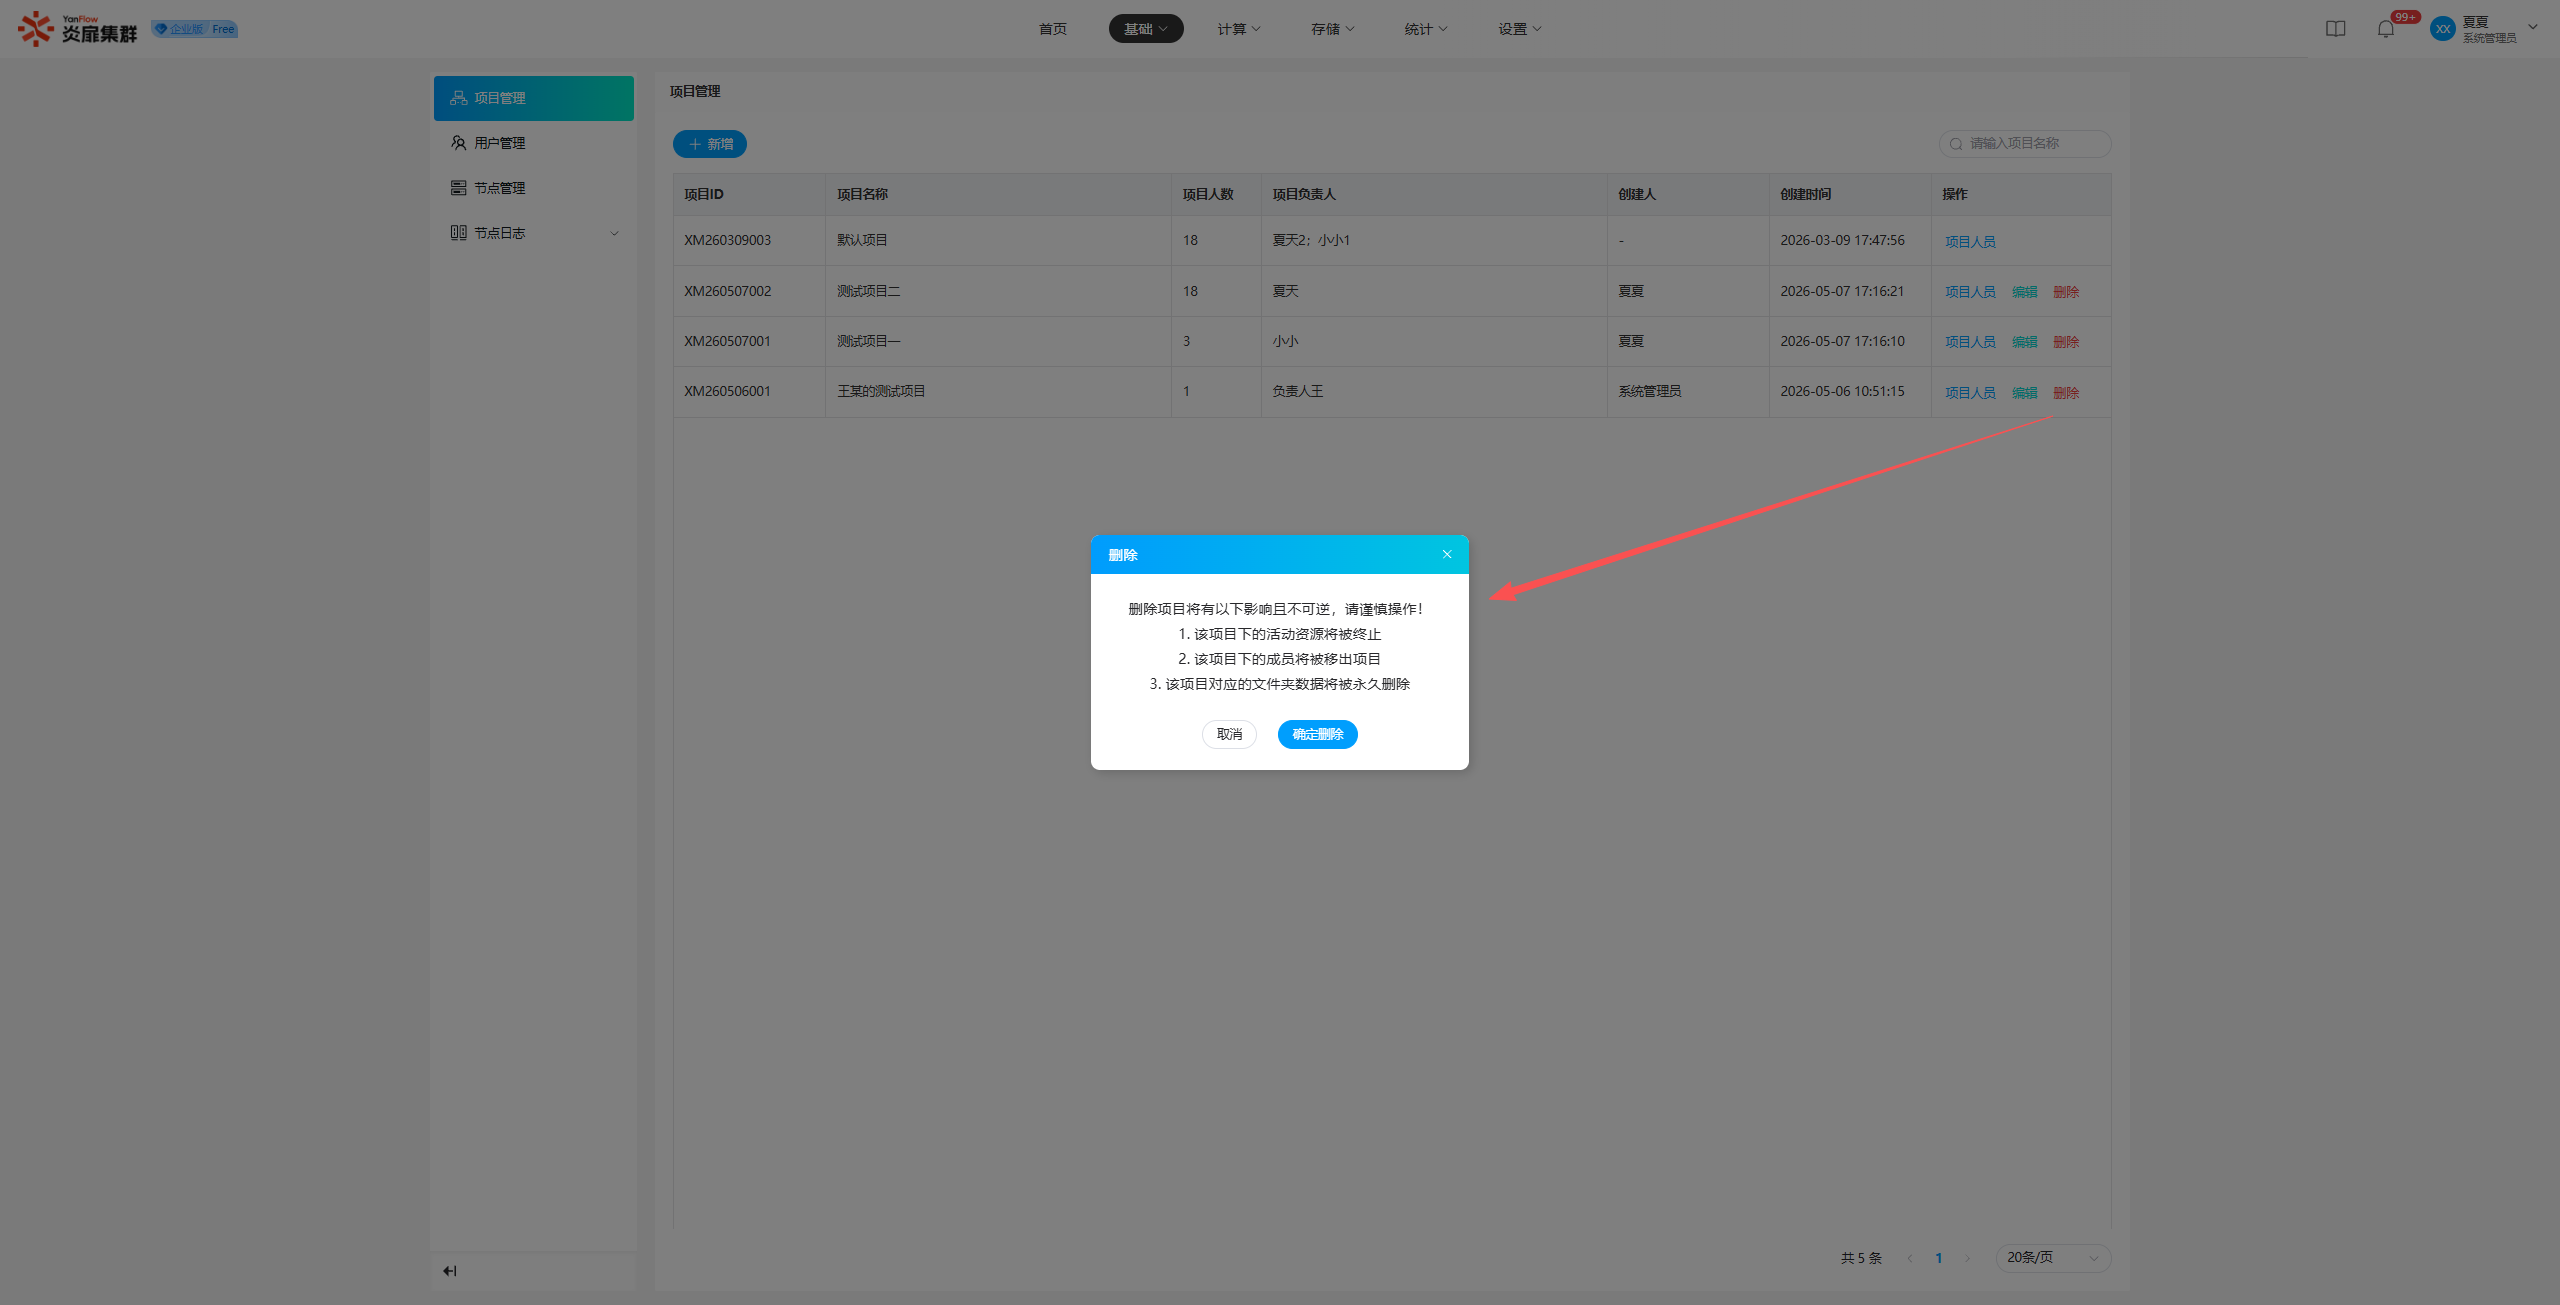
Delete Project
Click Delete to show a confirmation popup. Click Confirm to delete the project.
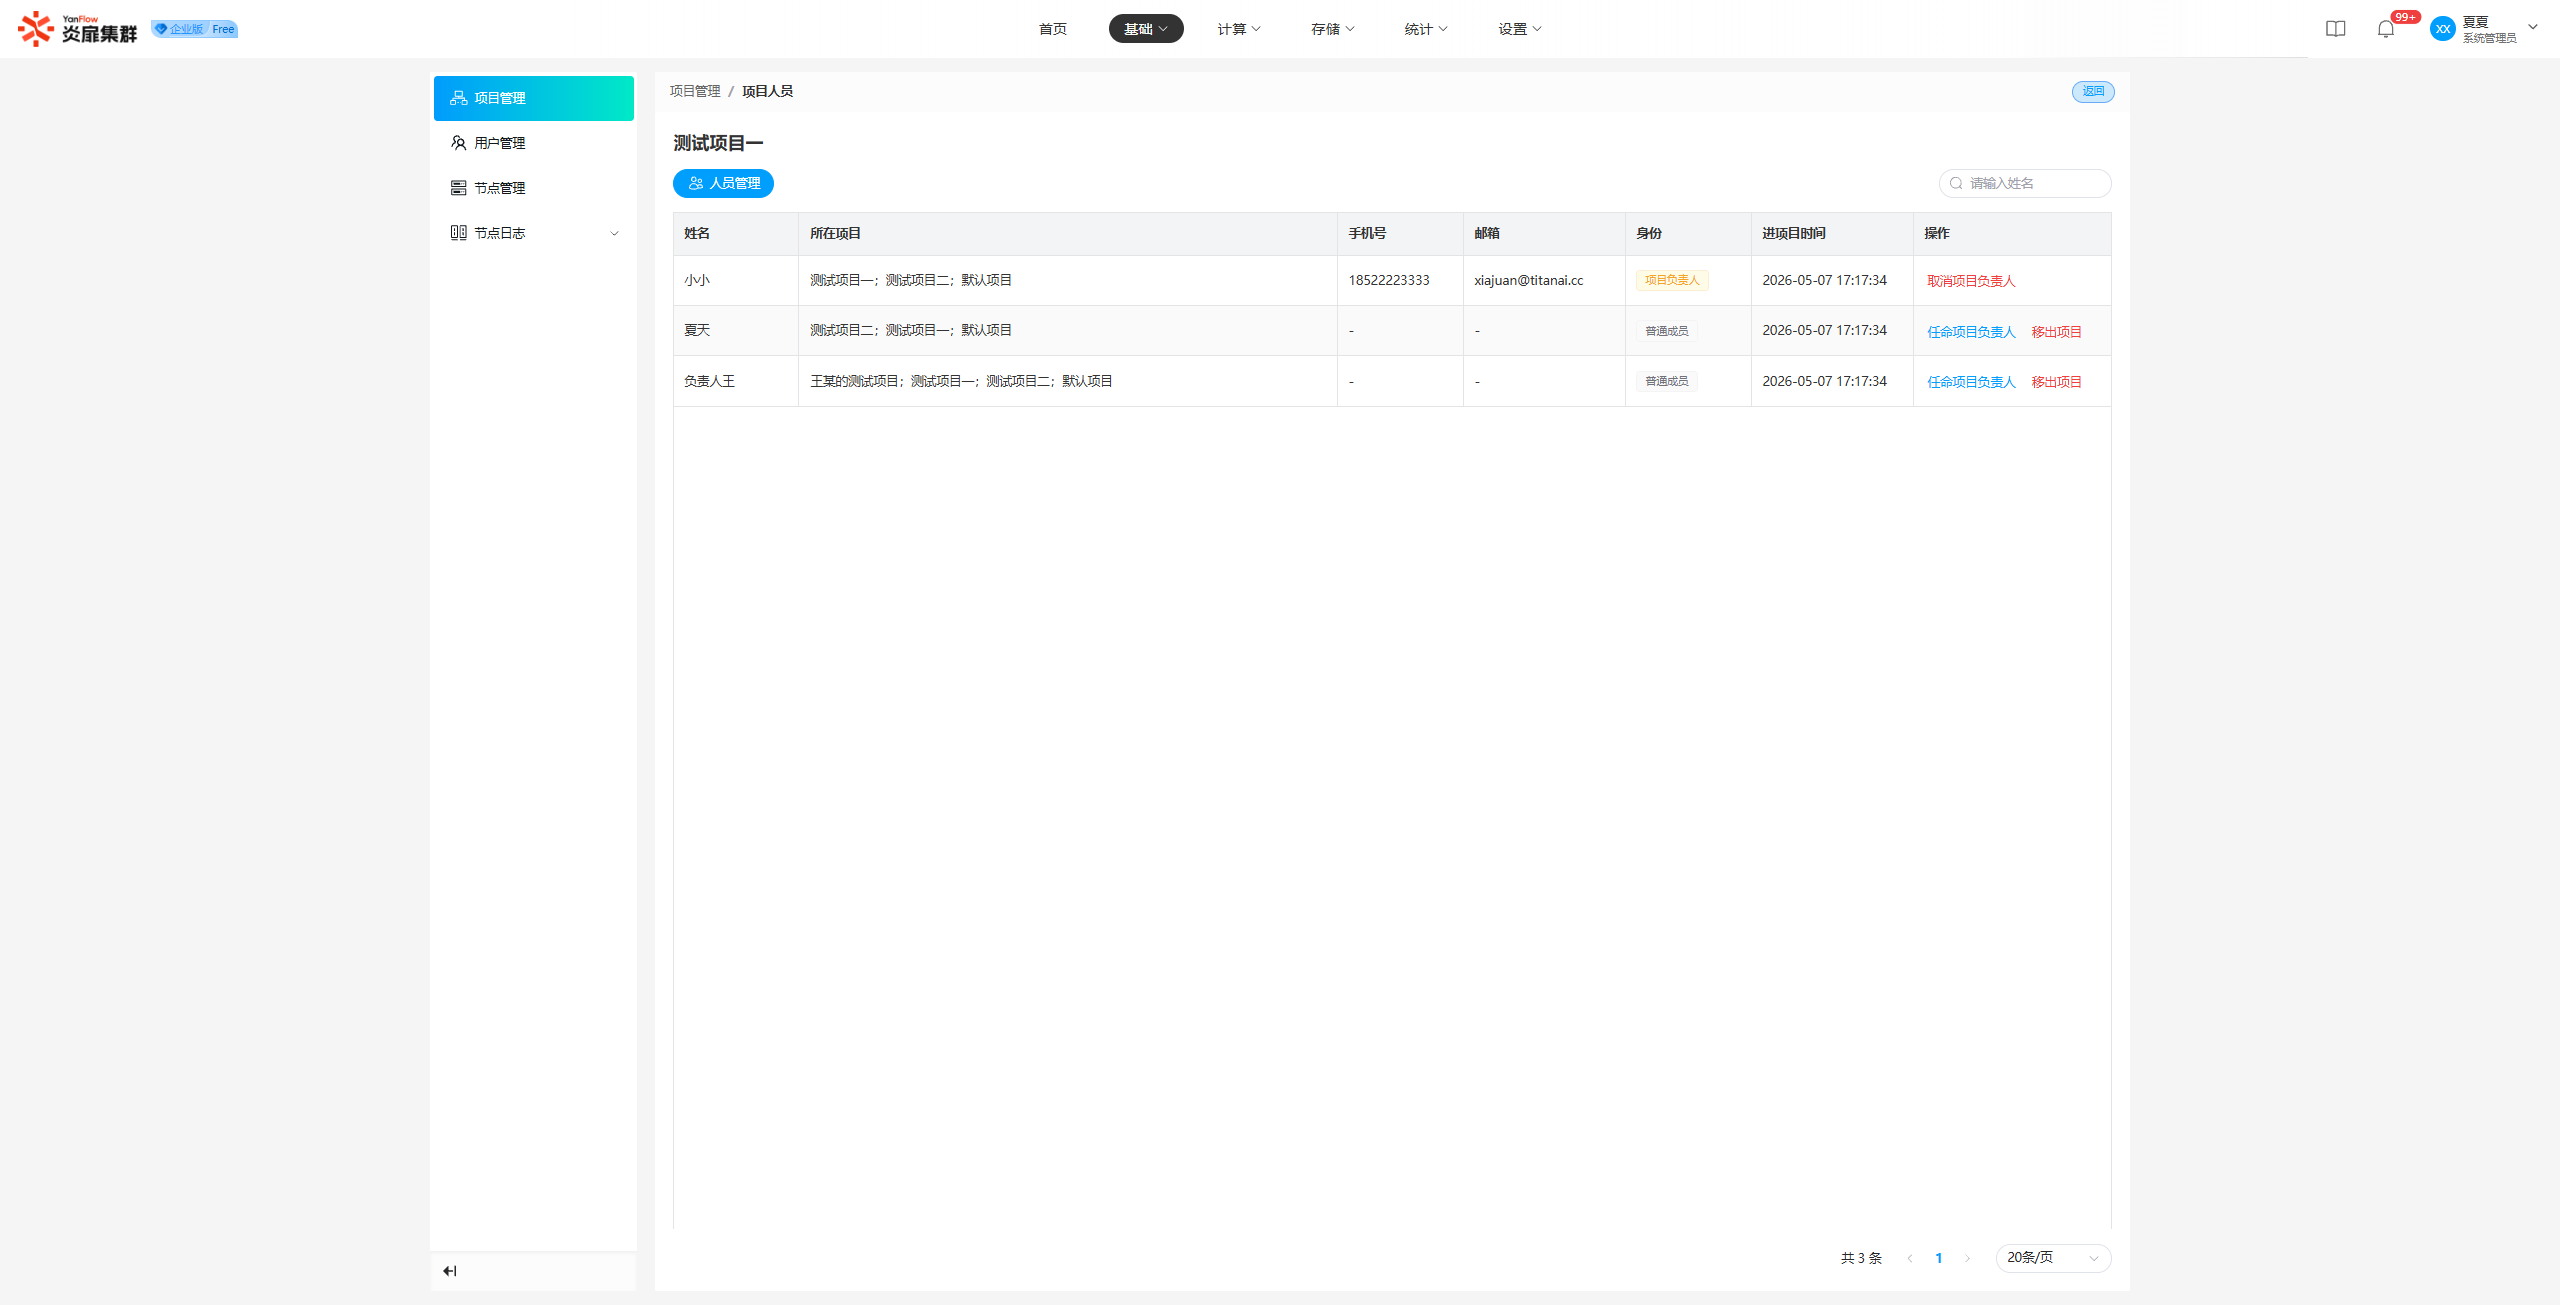
Project Personnel
Click Project Personnel to enter the personnel management page for that specific project, where you can view and manage members within the project.
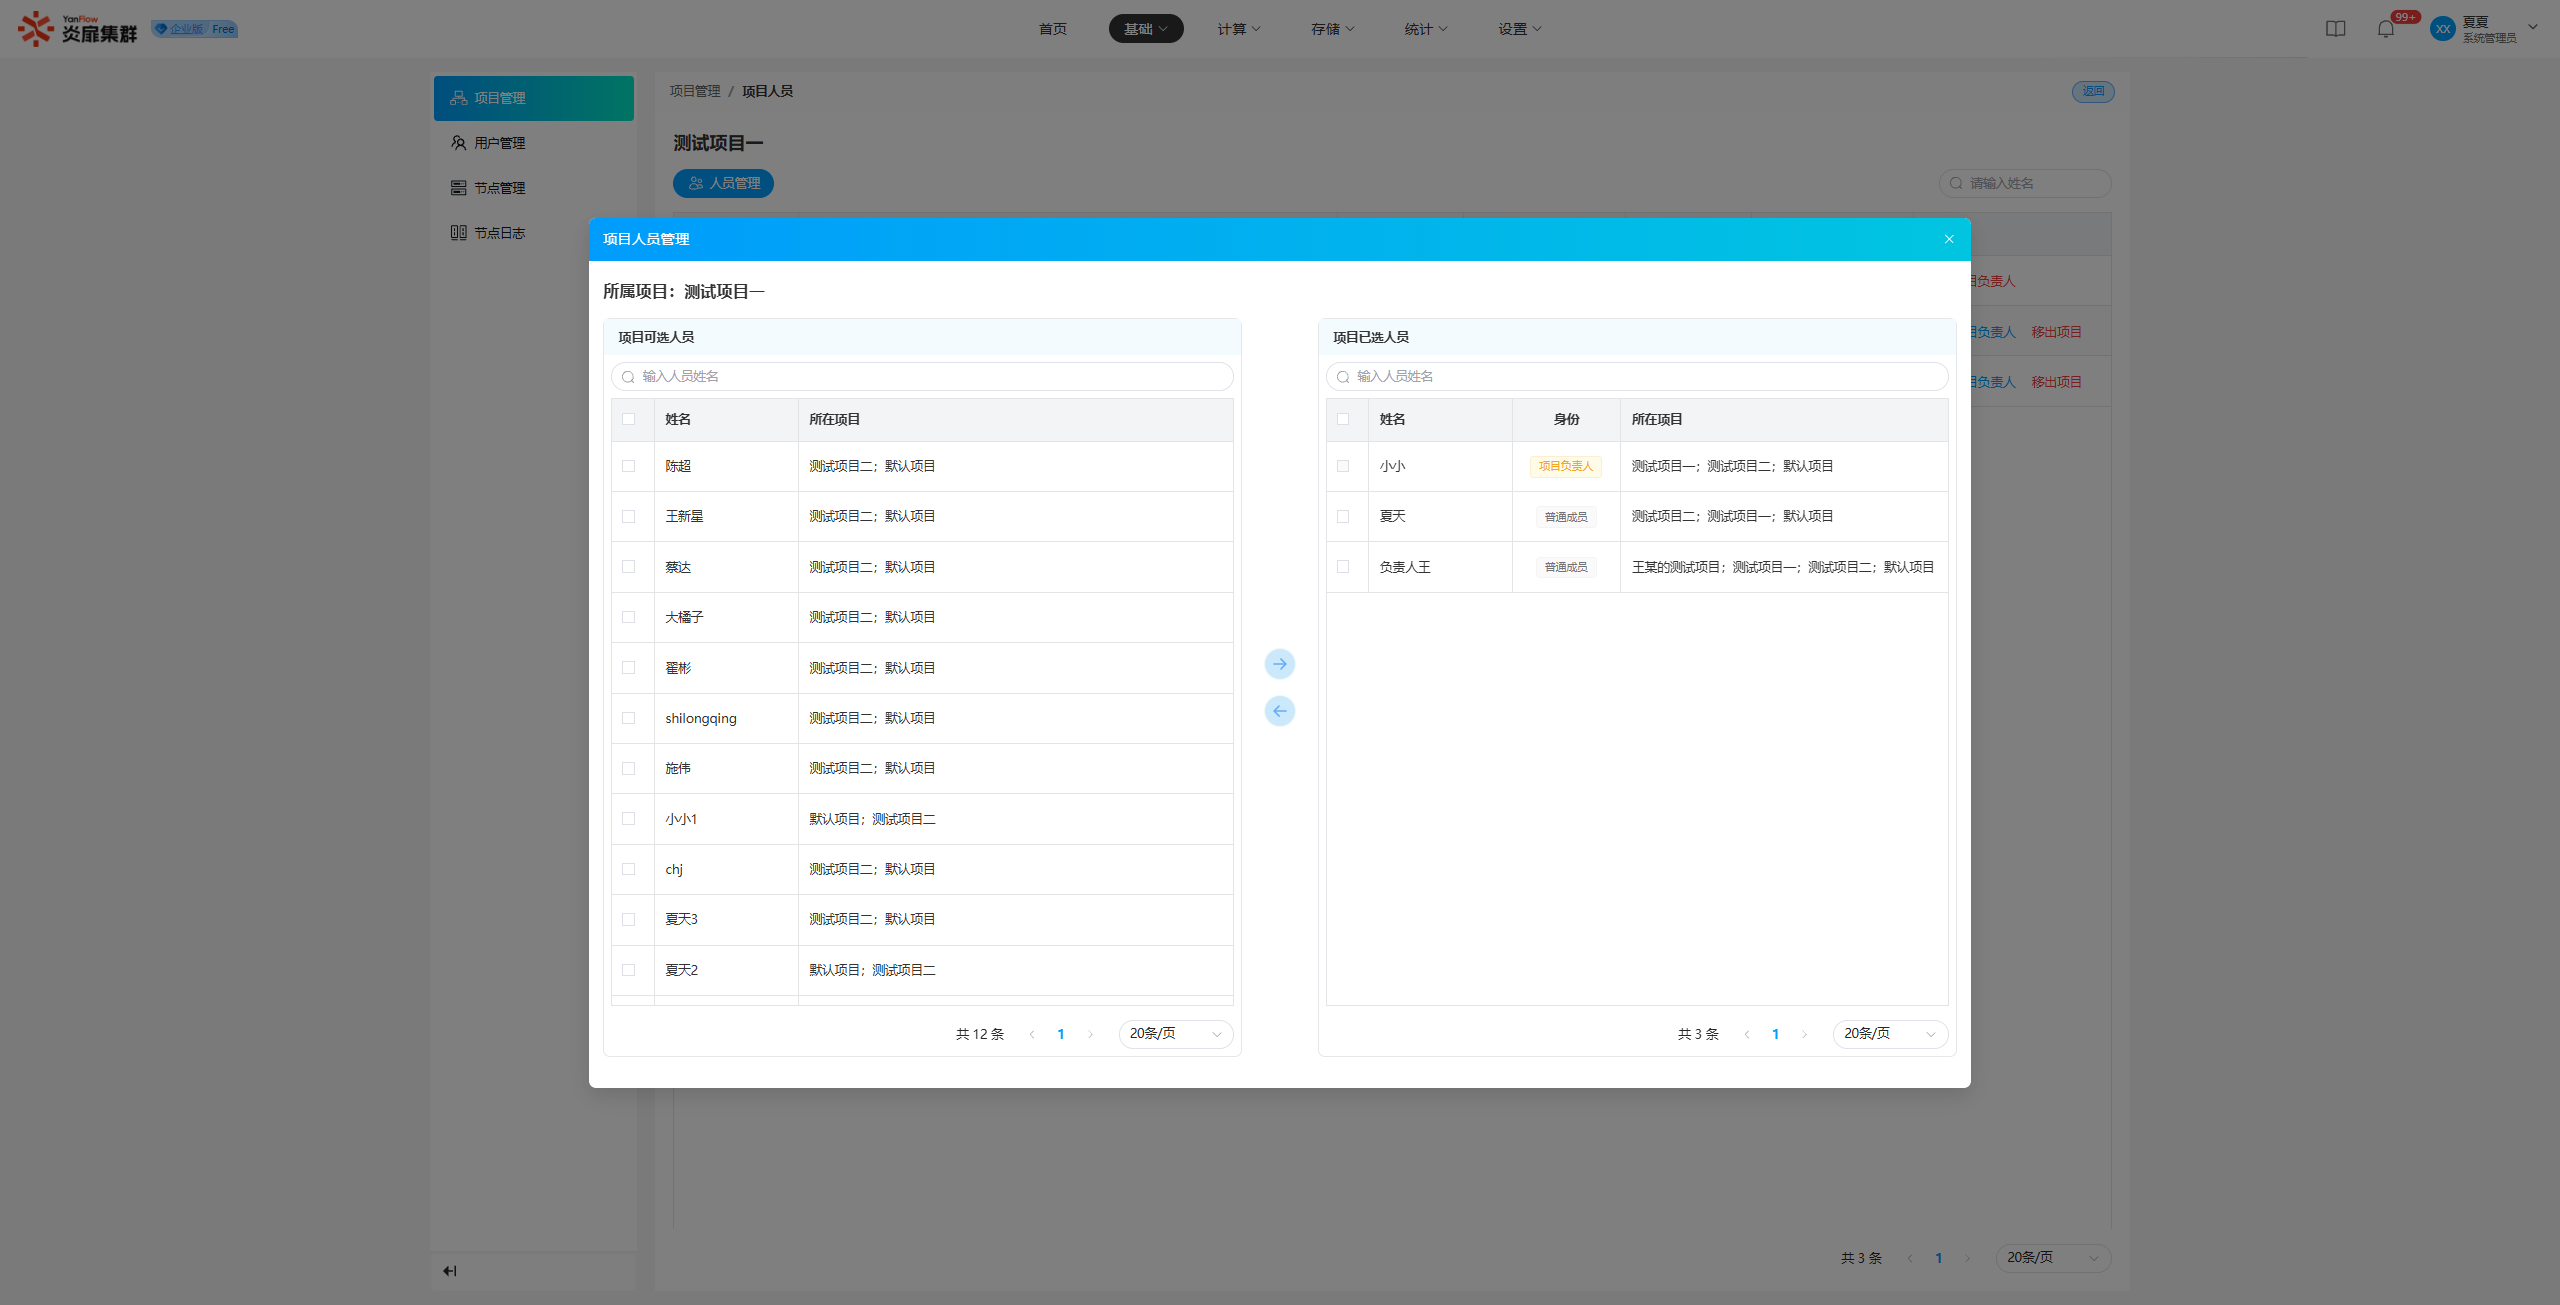
Personnel Management: Click Personnel Management to show the management popup, which supports adding or removing project personnel.
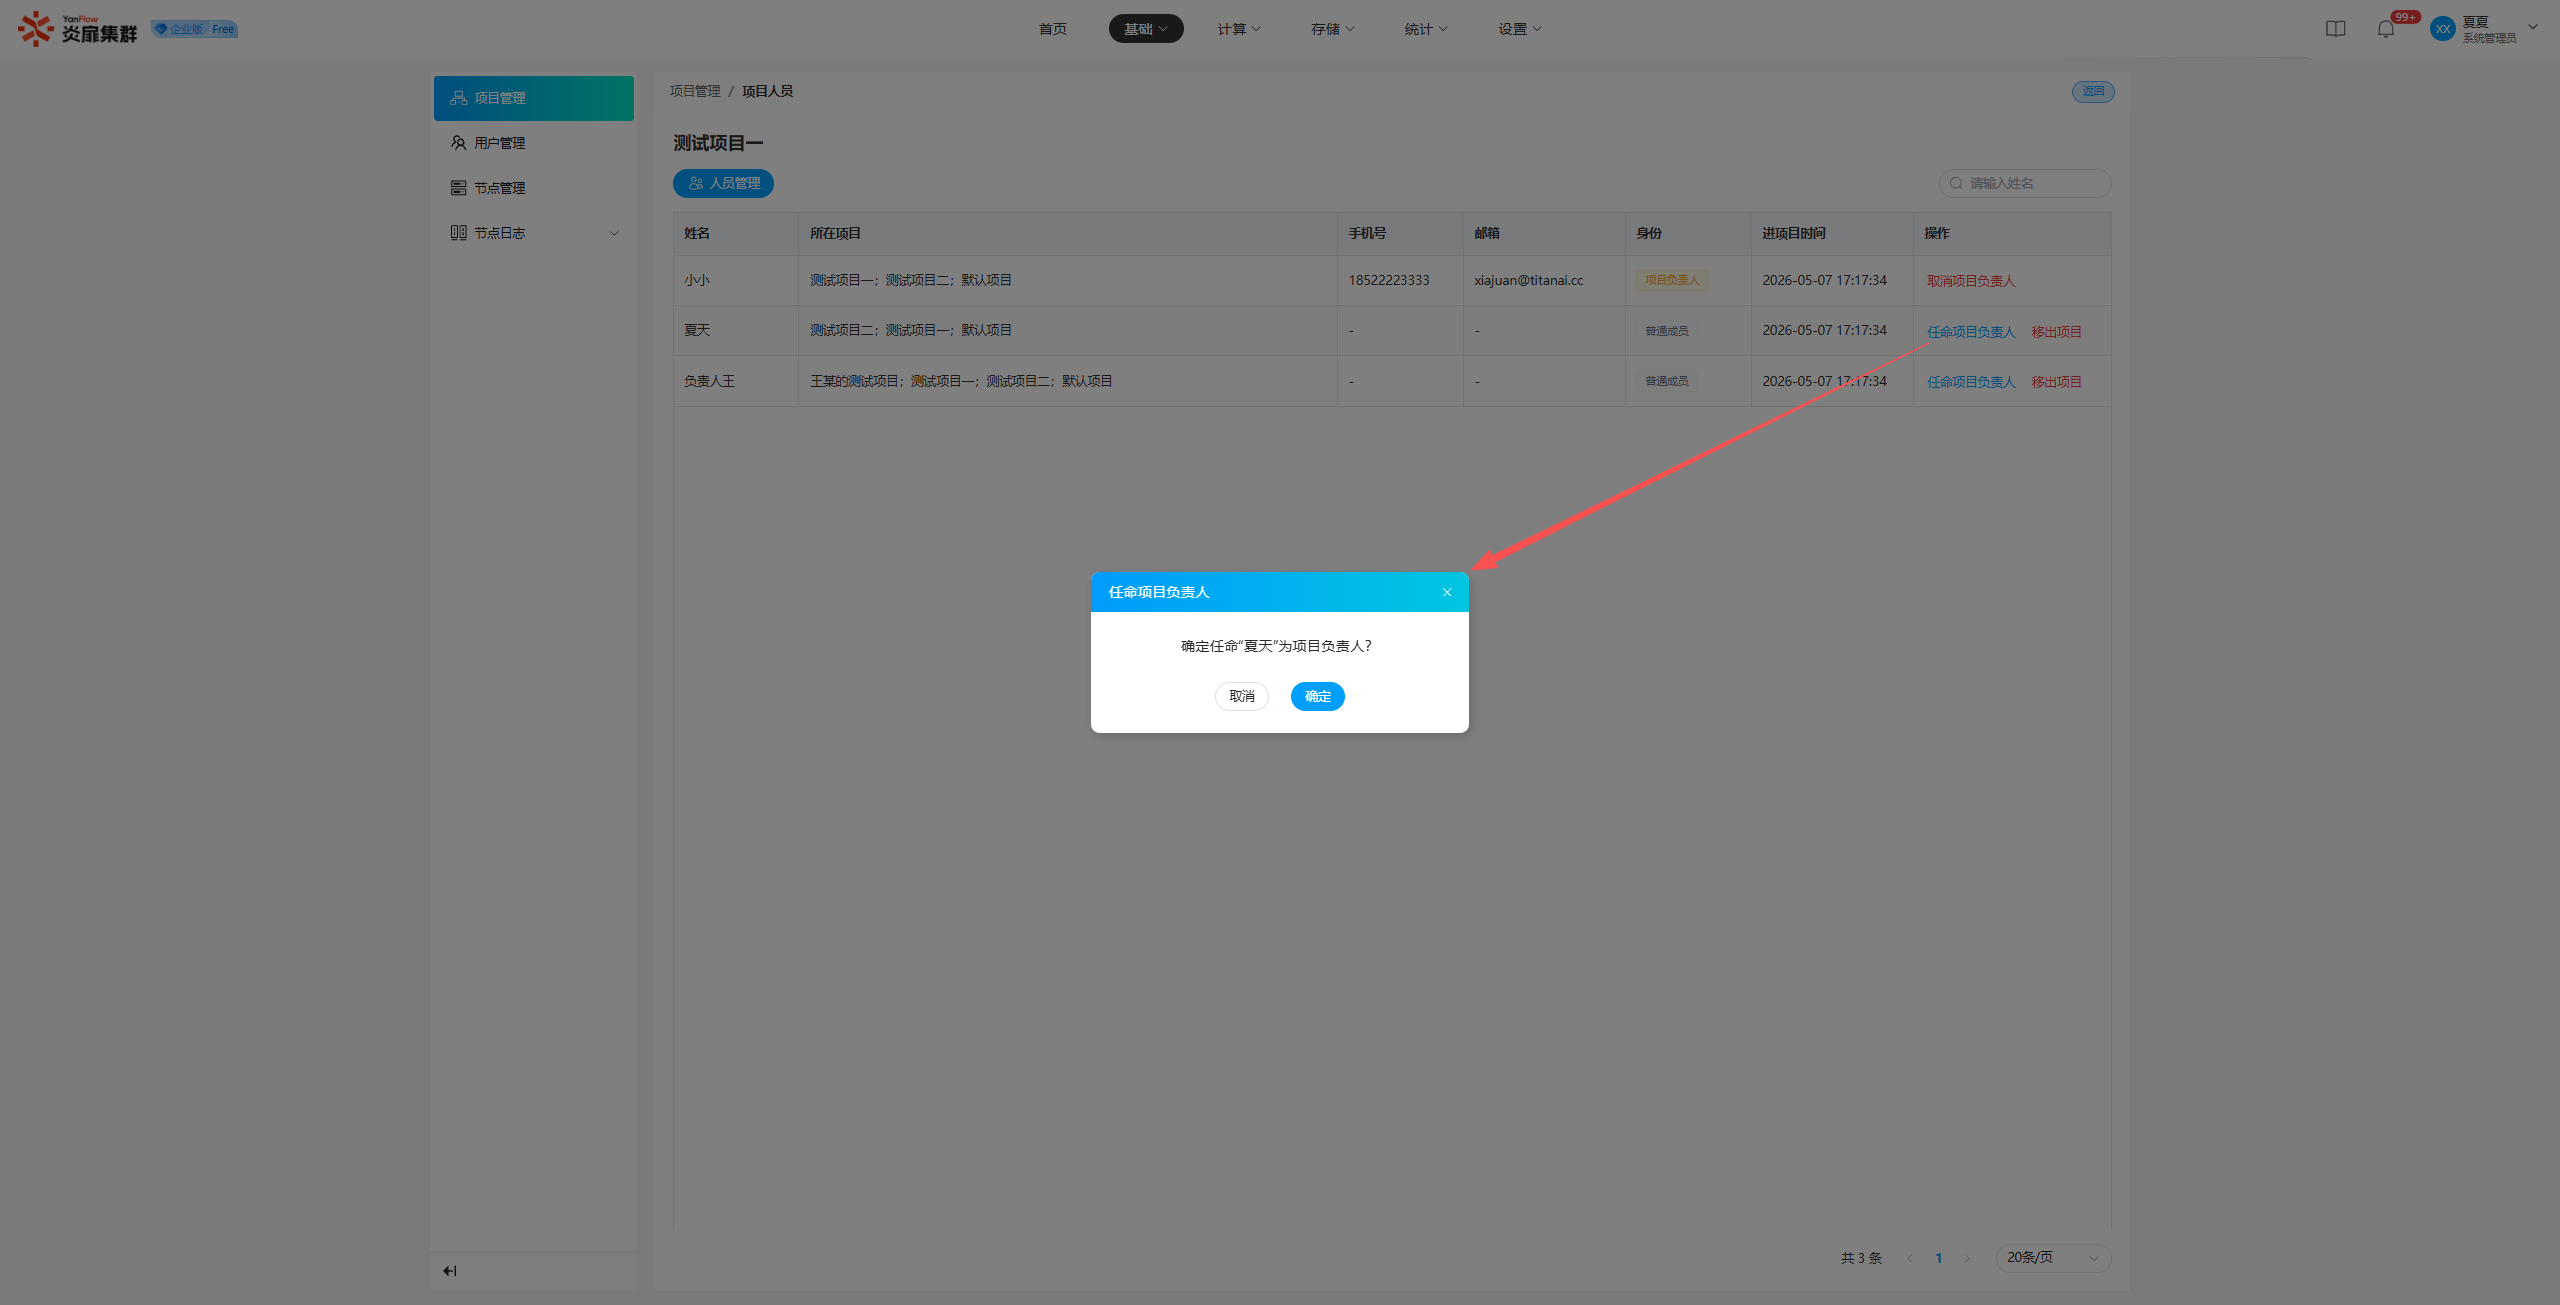
Appoint Project Leader: Click Appoint Project Leader to show a prompt. Click Confirm to complete the appointment.
Revoke Project Leader: Click Revoke Project Leader to show a prompt. Click Confirm to cancel the appointment.
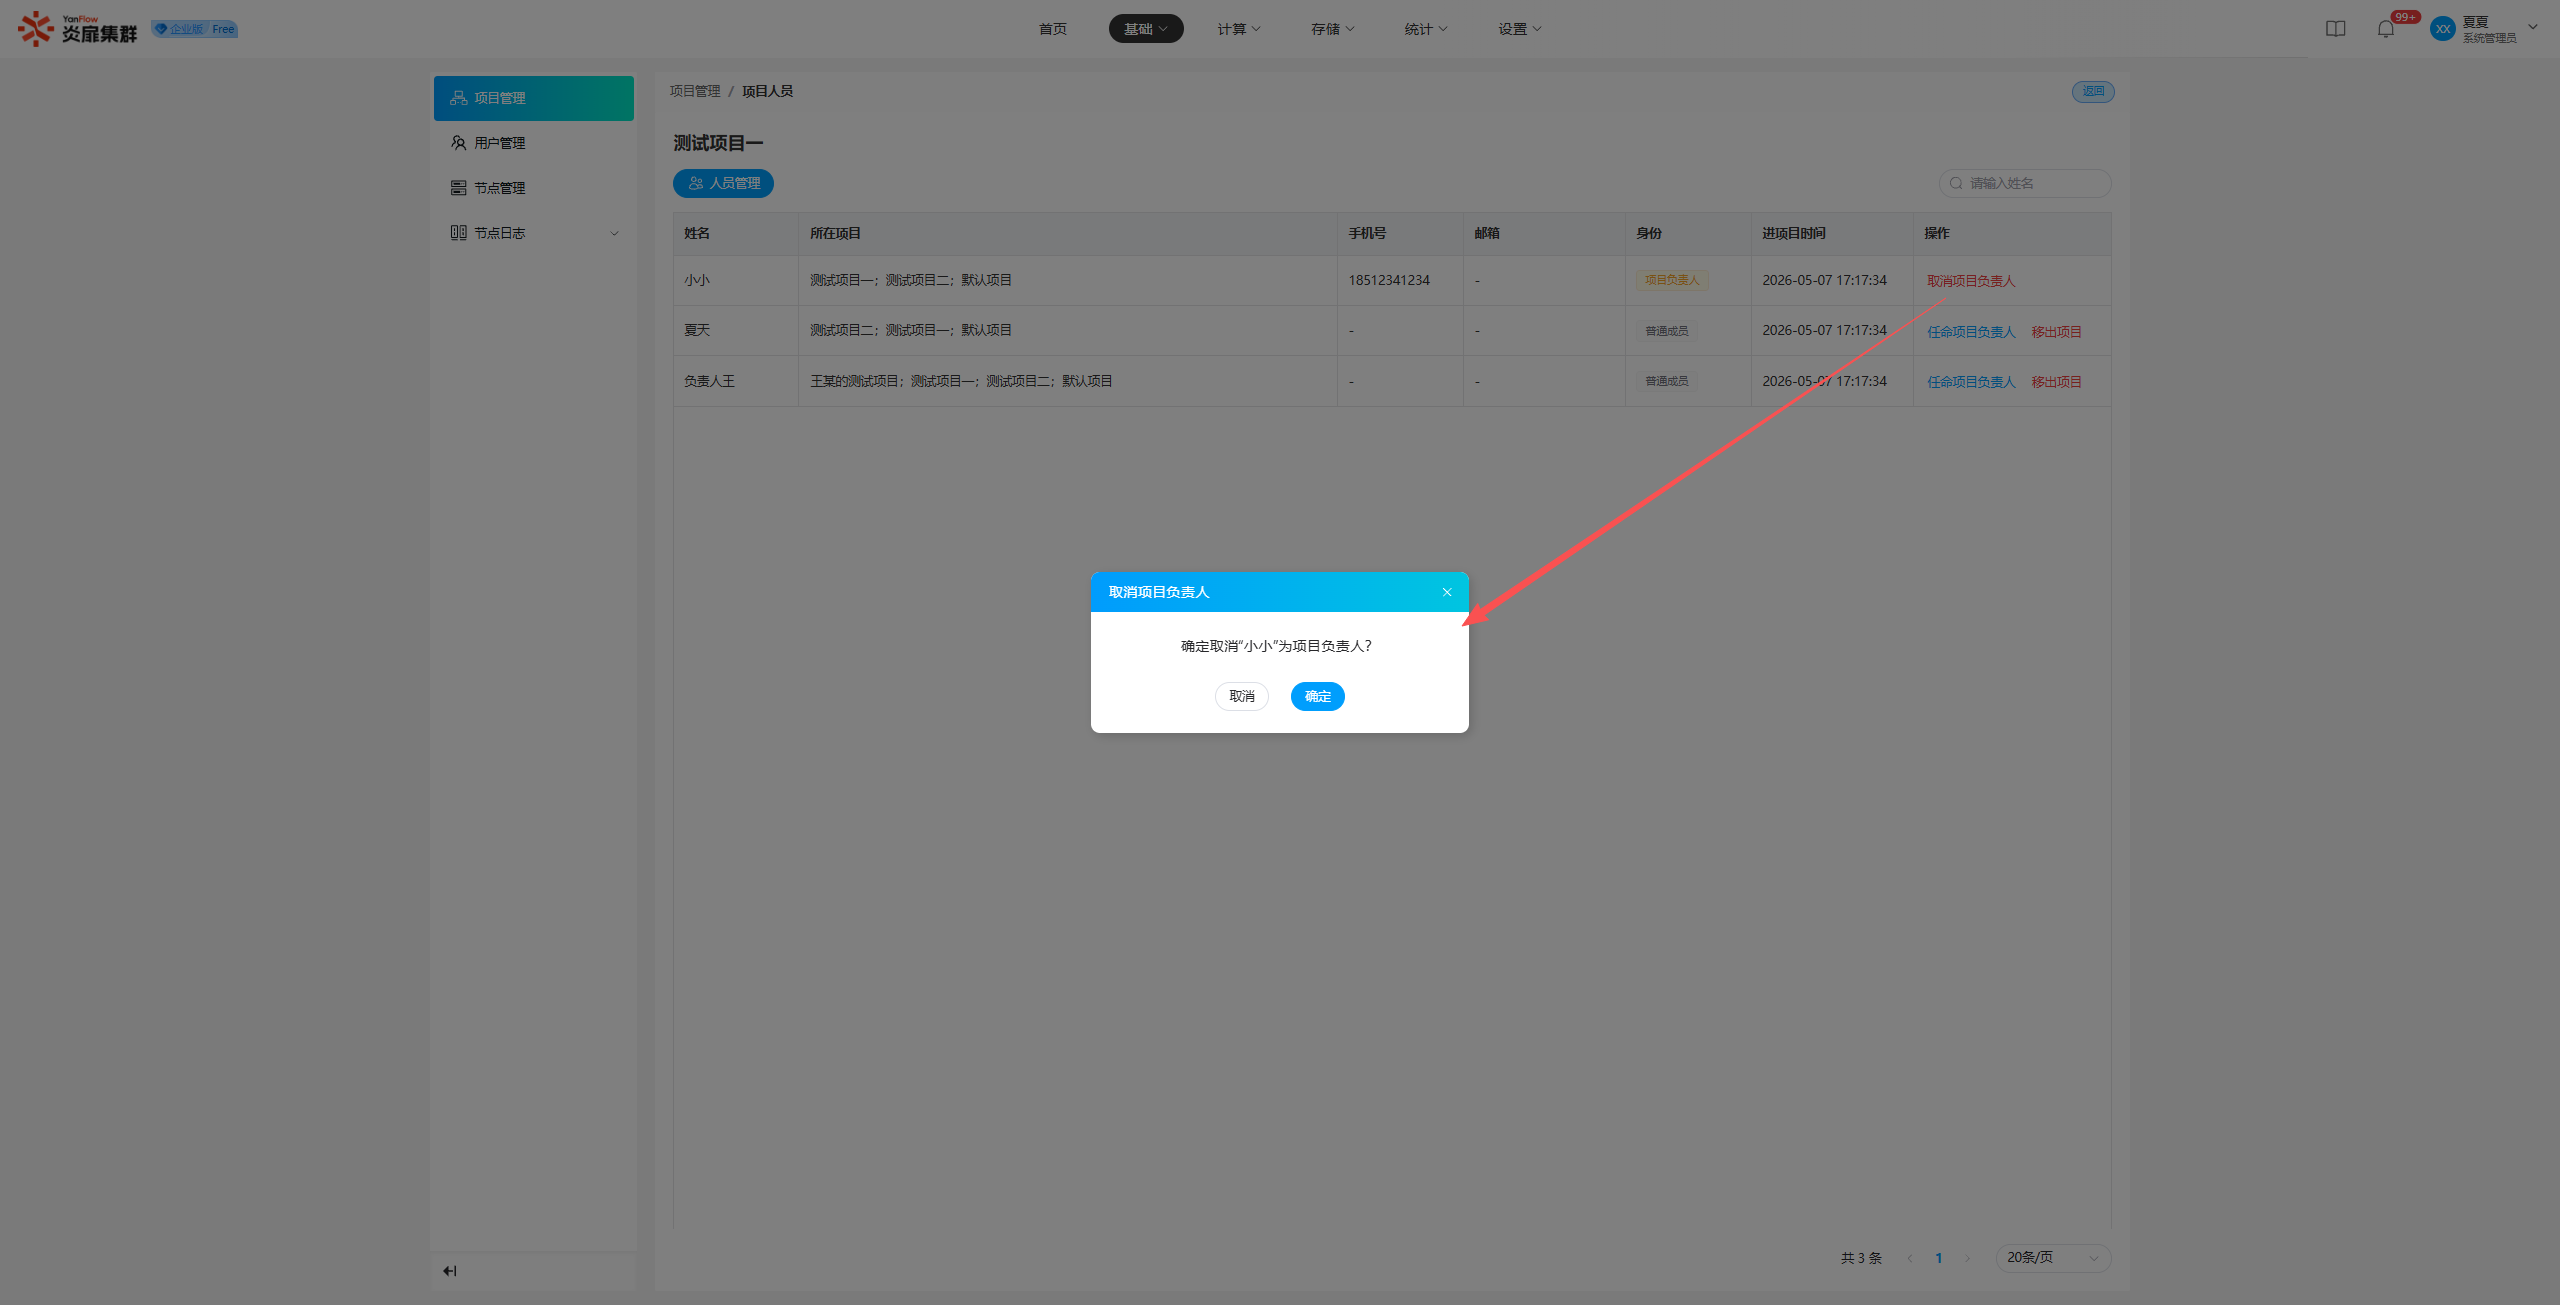
Remove from Project: Click Remove from Project to show a prompt. Click Confirm to remove the personnel from the project.
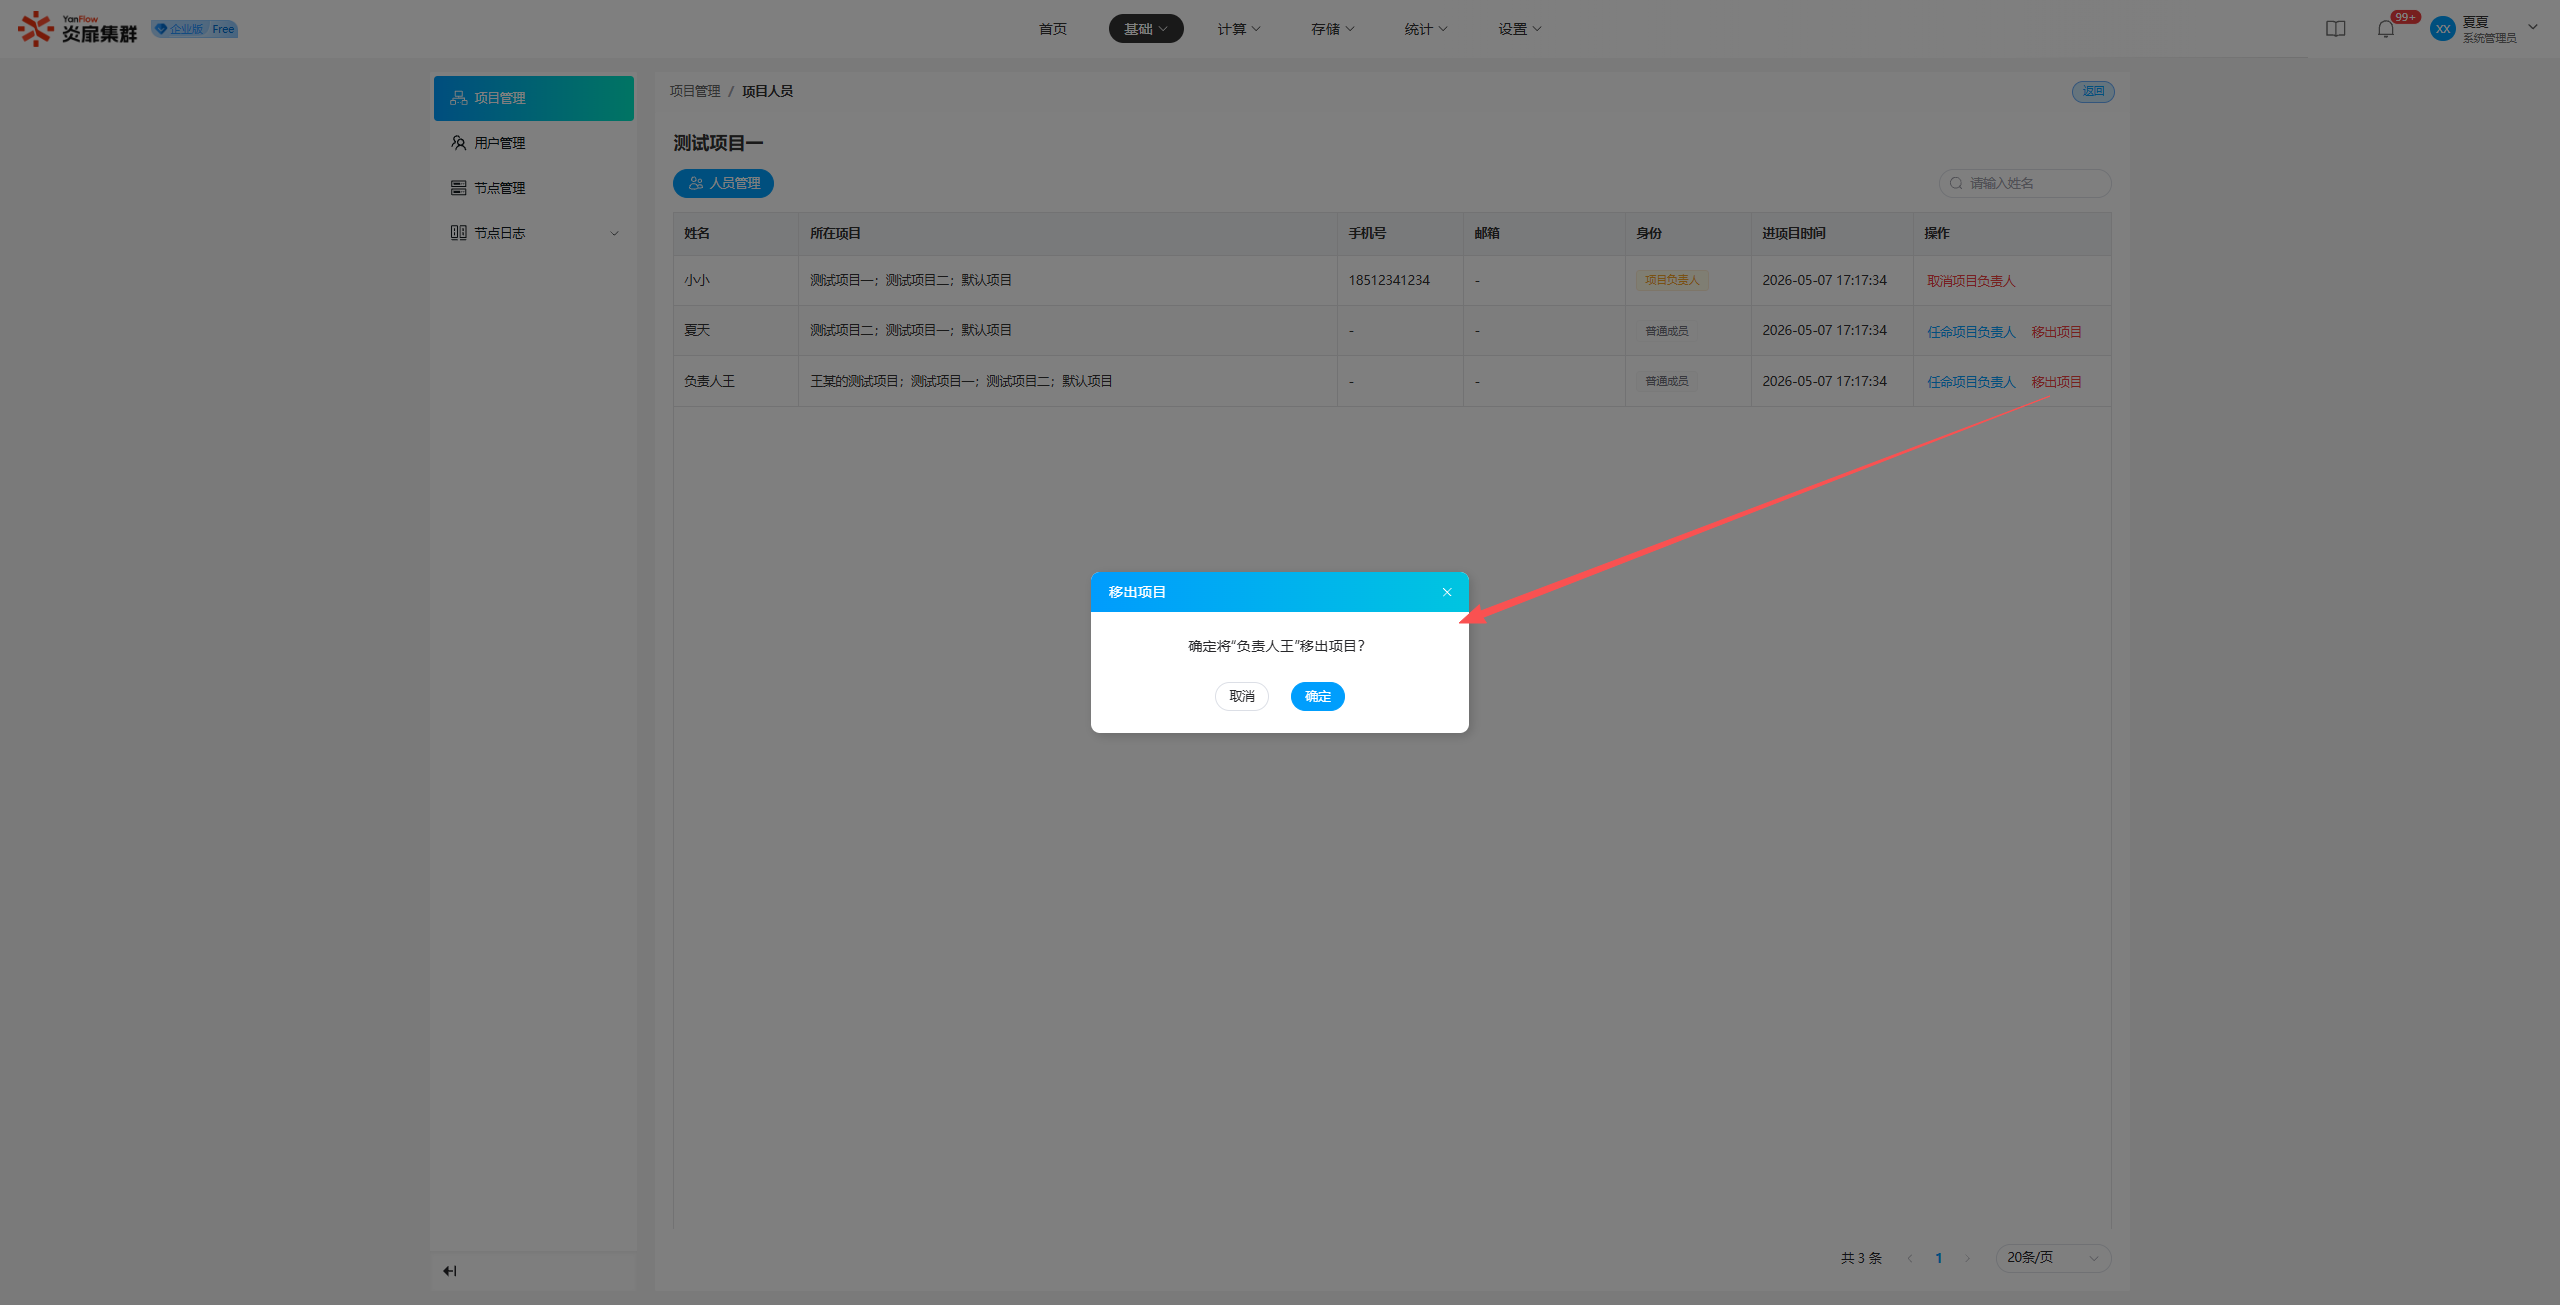
Note:
- It is not supported to remove a Project Leader from the project without appointing a replacement.
- Once a person is removed from a project, all their active resources within that project will be terminated.
User Management
User List
System Administrators can create and manage all Regular Users and Temporary Users in the system. Supports keyword search by name or username, and supports filtering by project, user role, user status, and creation date.
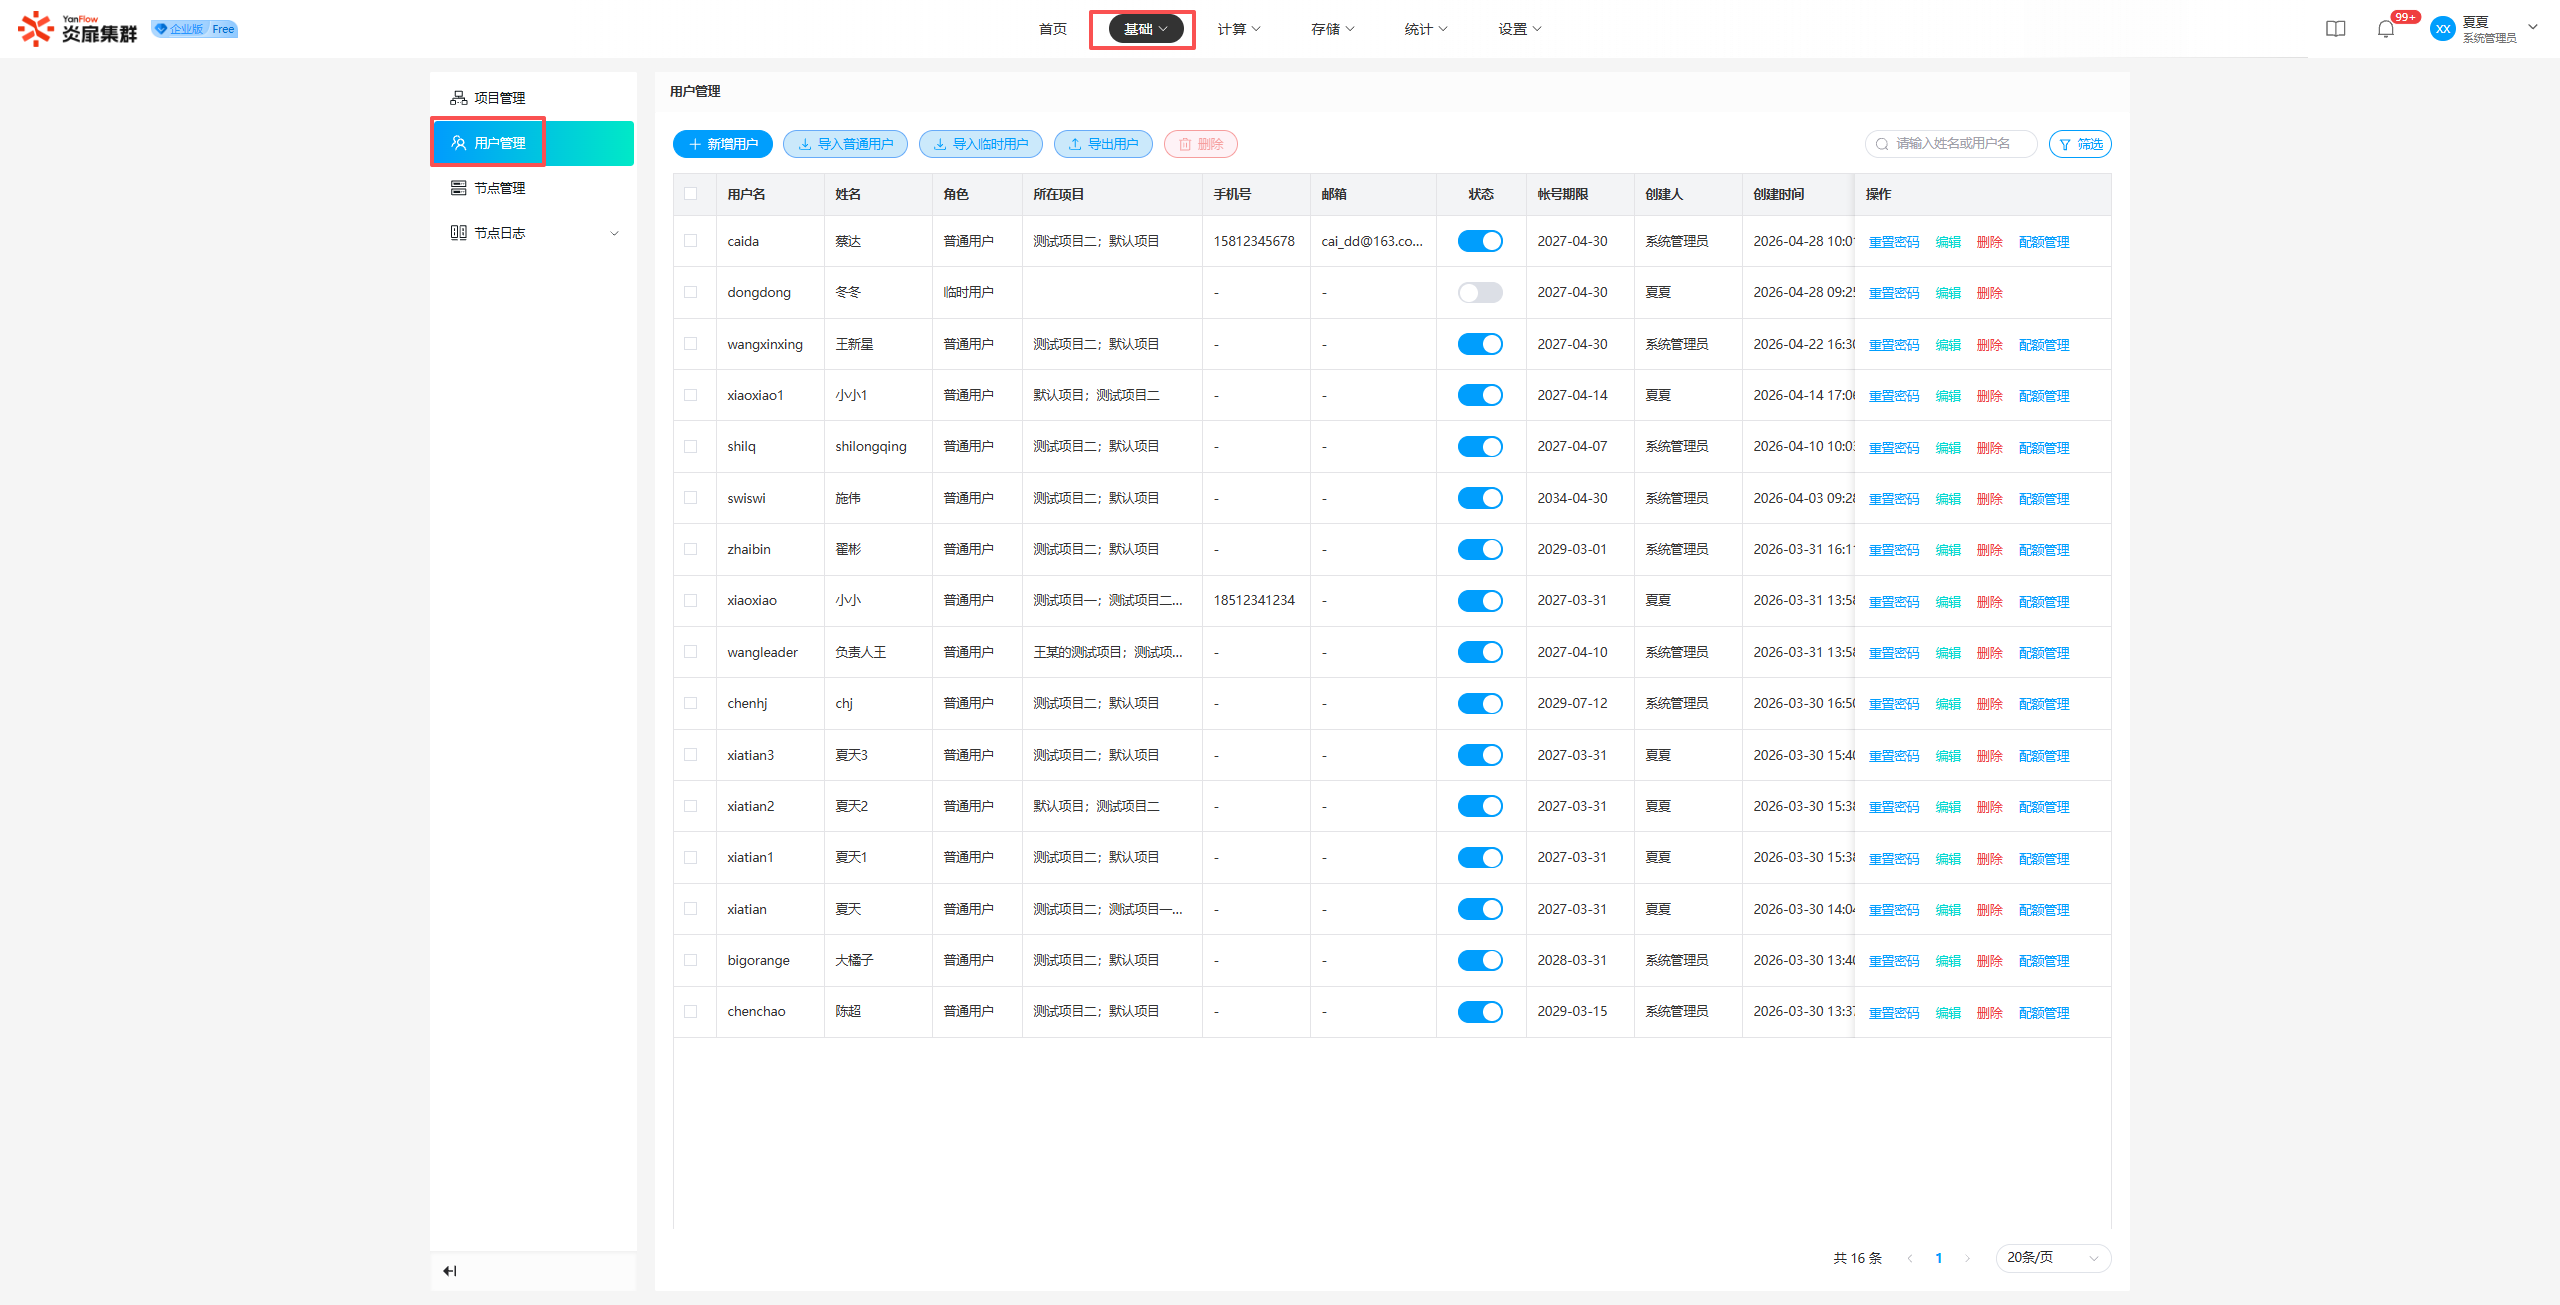
Add User
Click Add to open the creation popup. Set the relevant information and click Confirm. Once validated, a new user will be created.
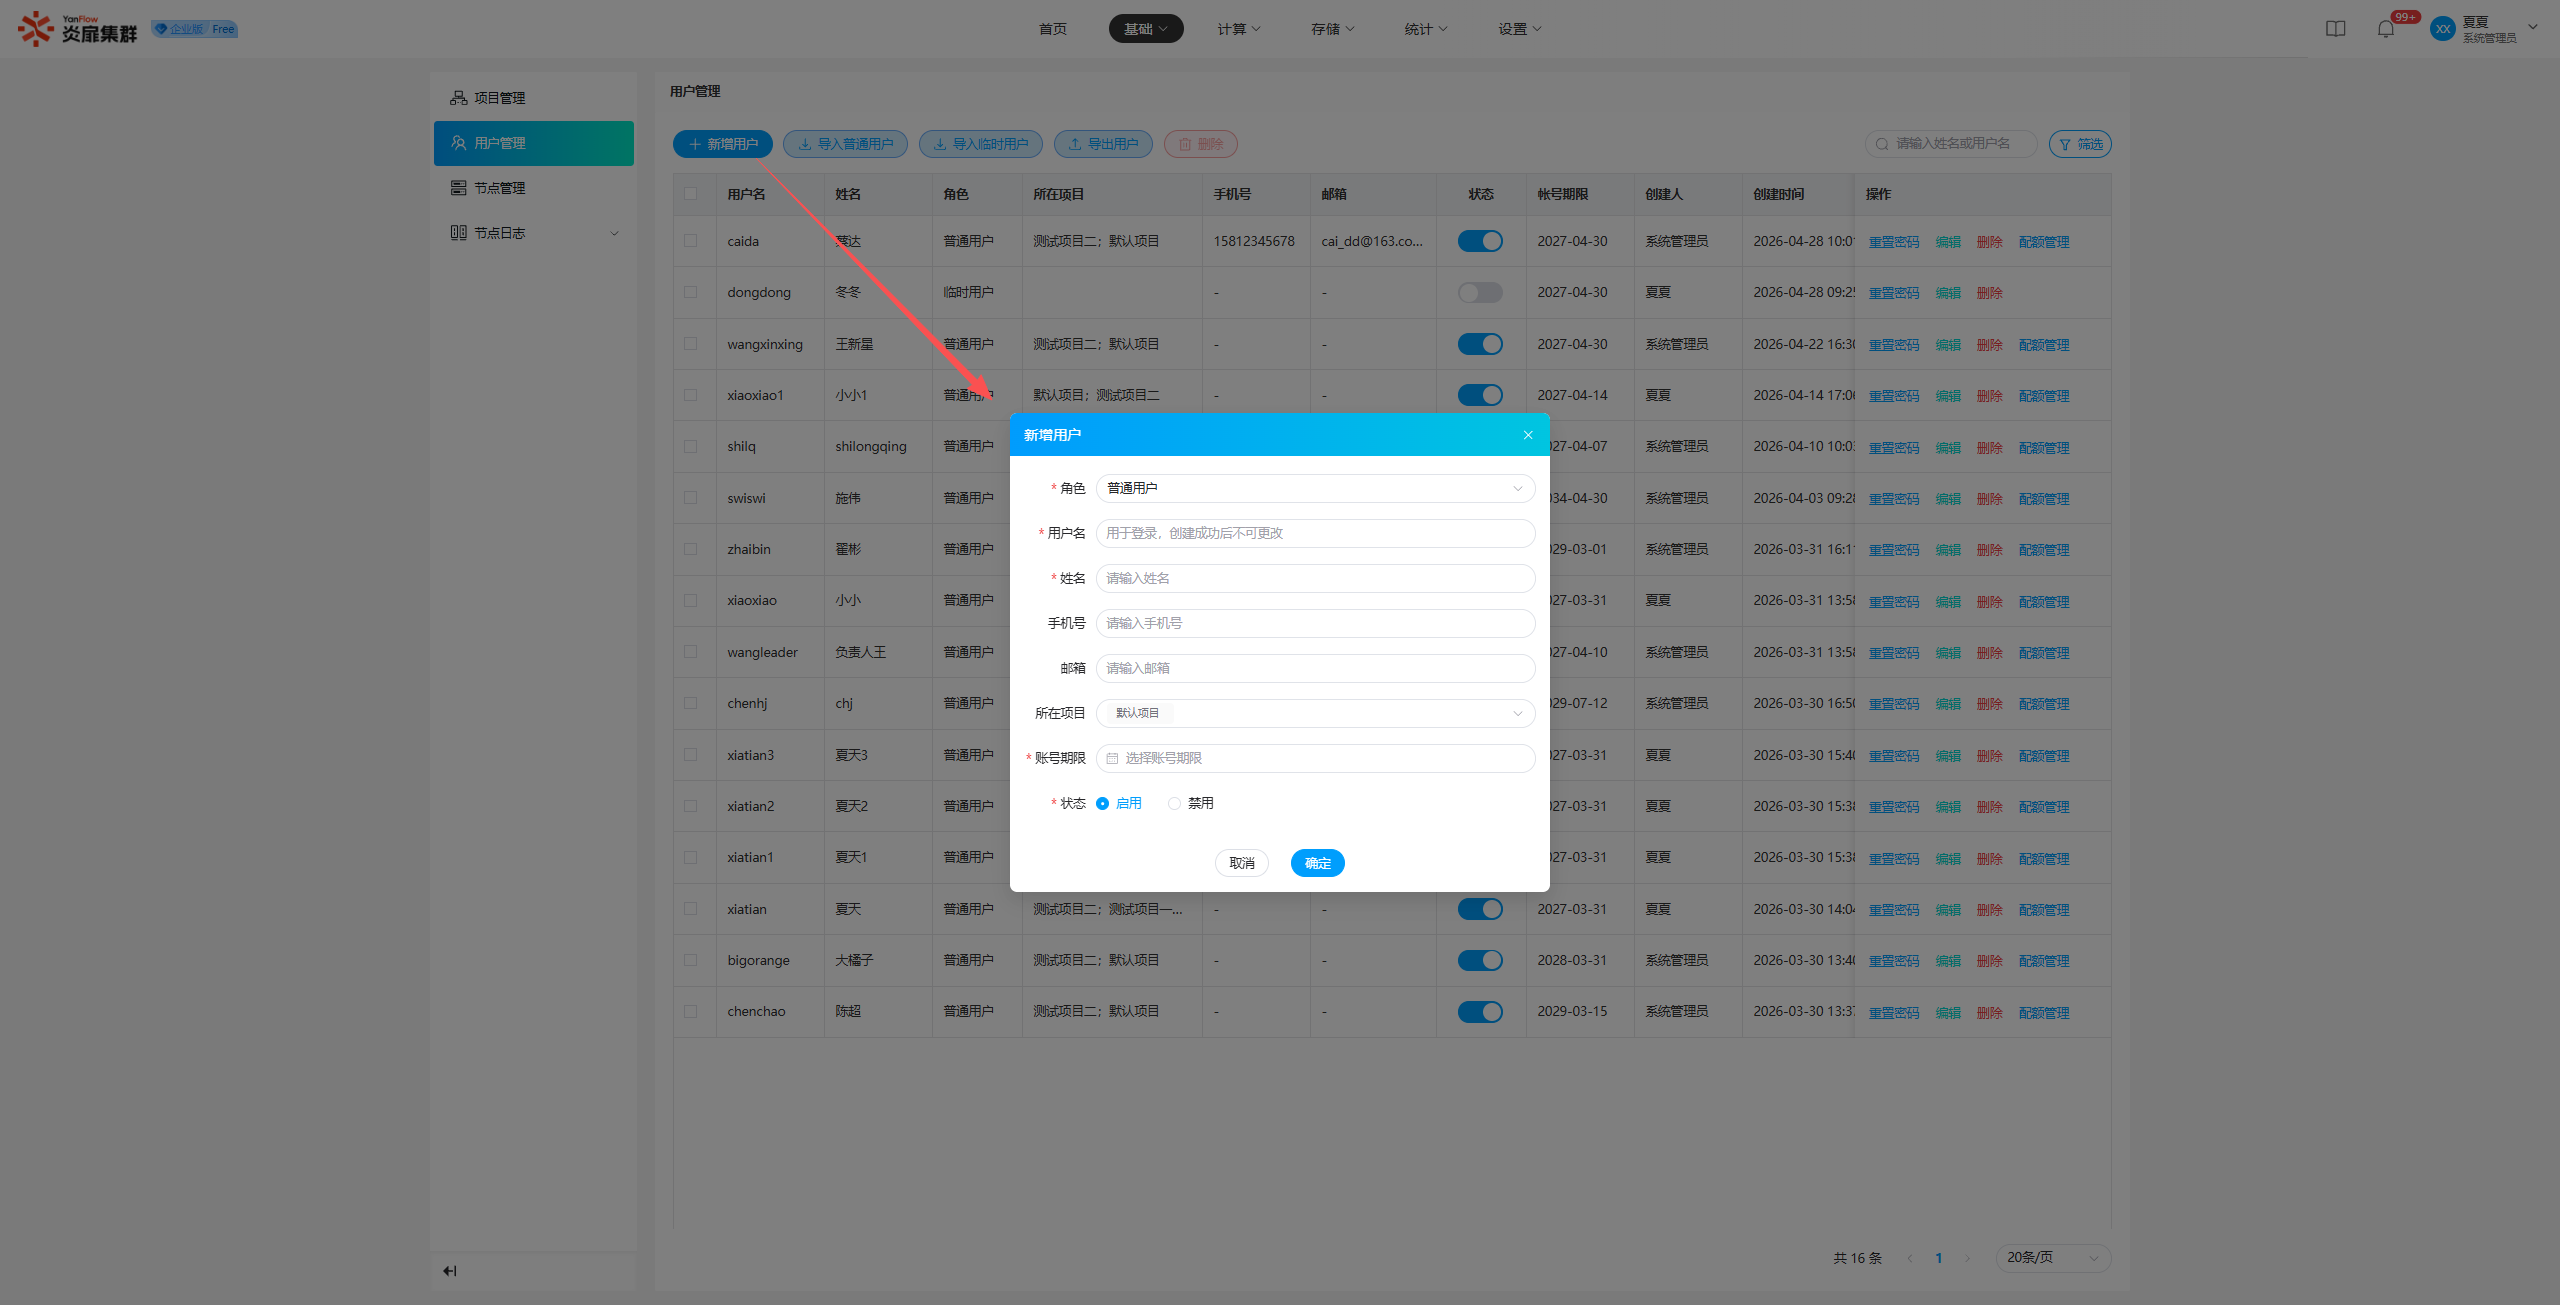
Note:
- Once successfully added, the Role and Username cannot be changed.
- The initial login password for a new user is the reverse of their creation date (YYYYMMDD). Example: If a user is created on January 01, 2026, the initial password is 10106202.
Edit User
Click Edit to open the editing popup. Modify the information that needs changing and click Confirm to update the user information.
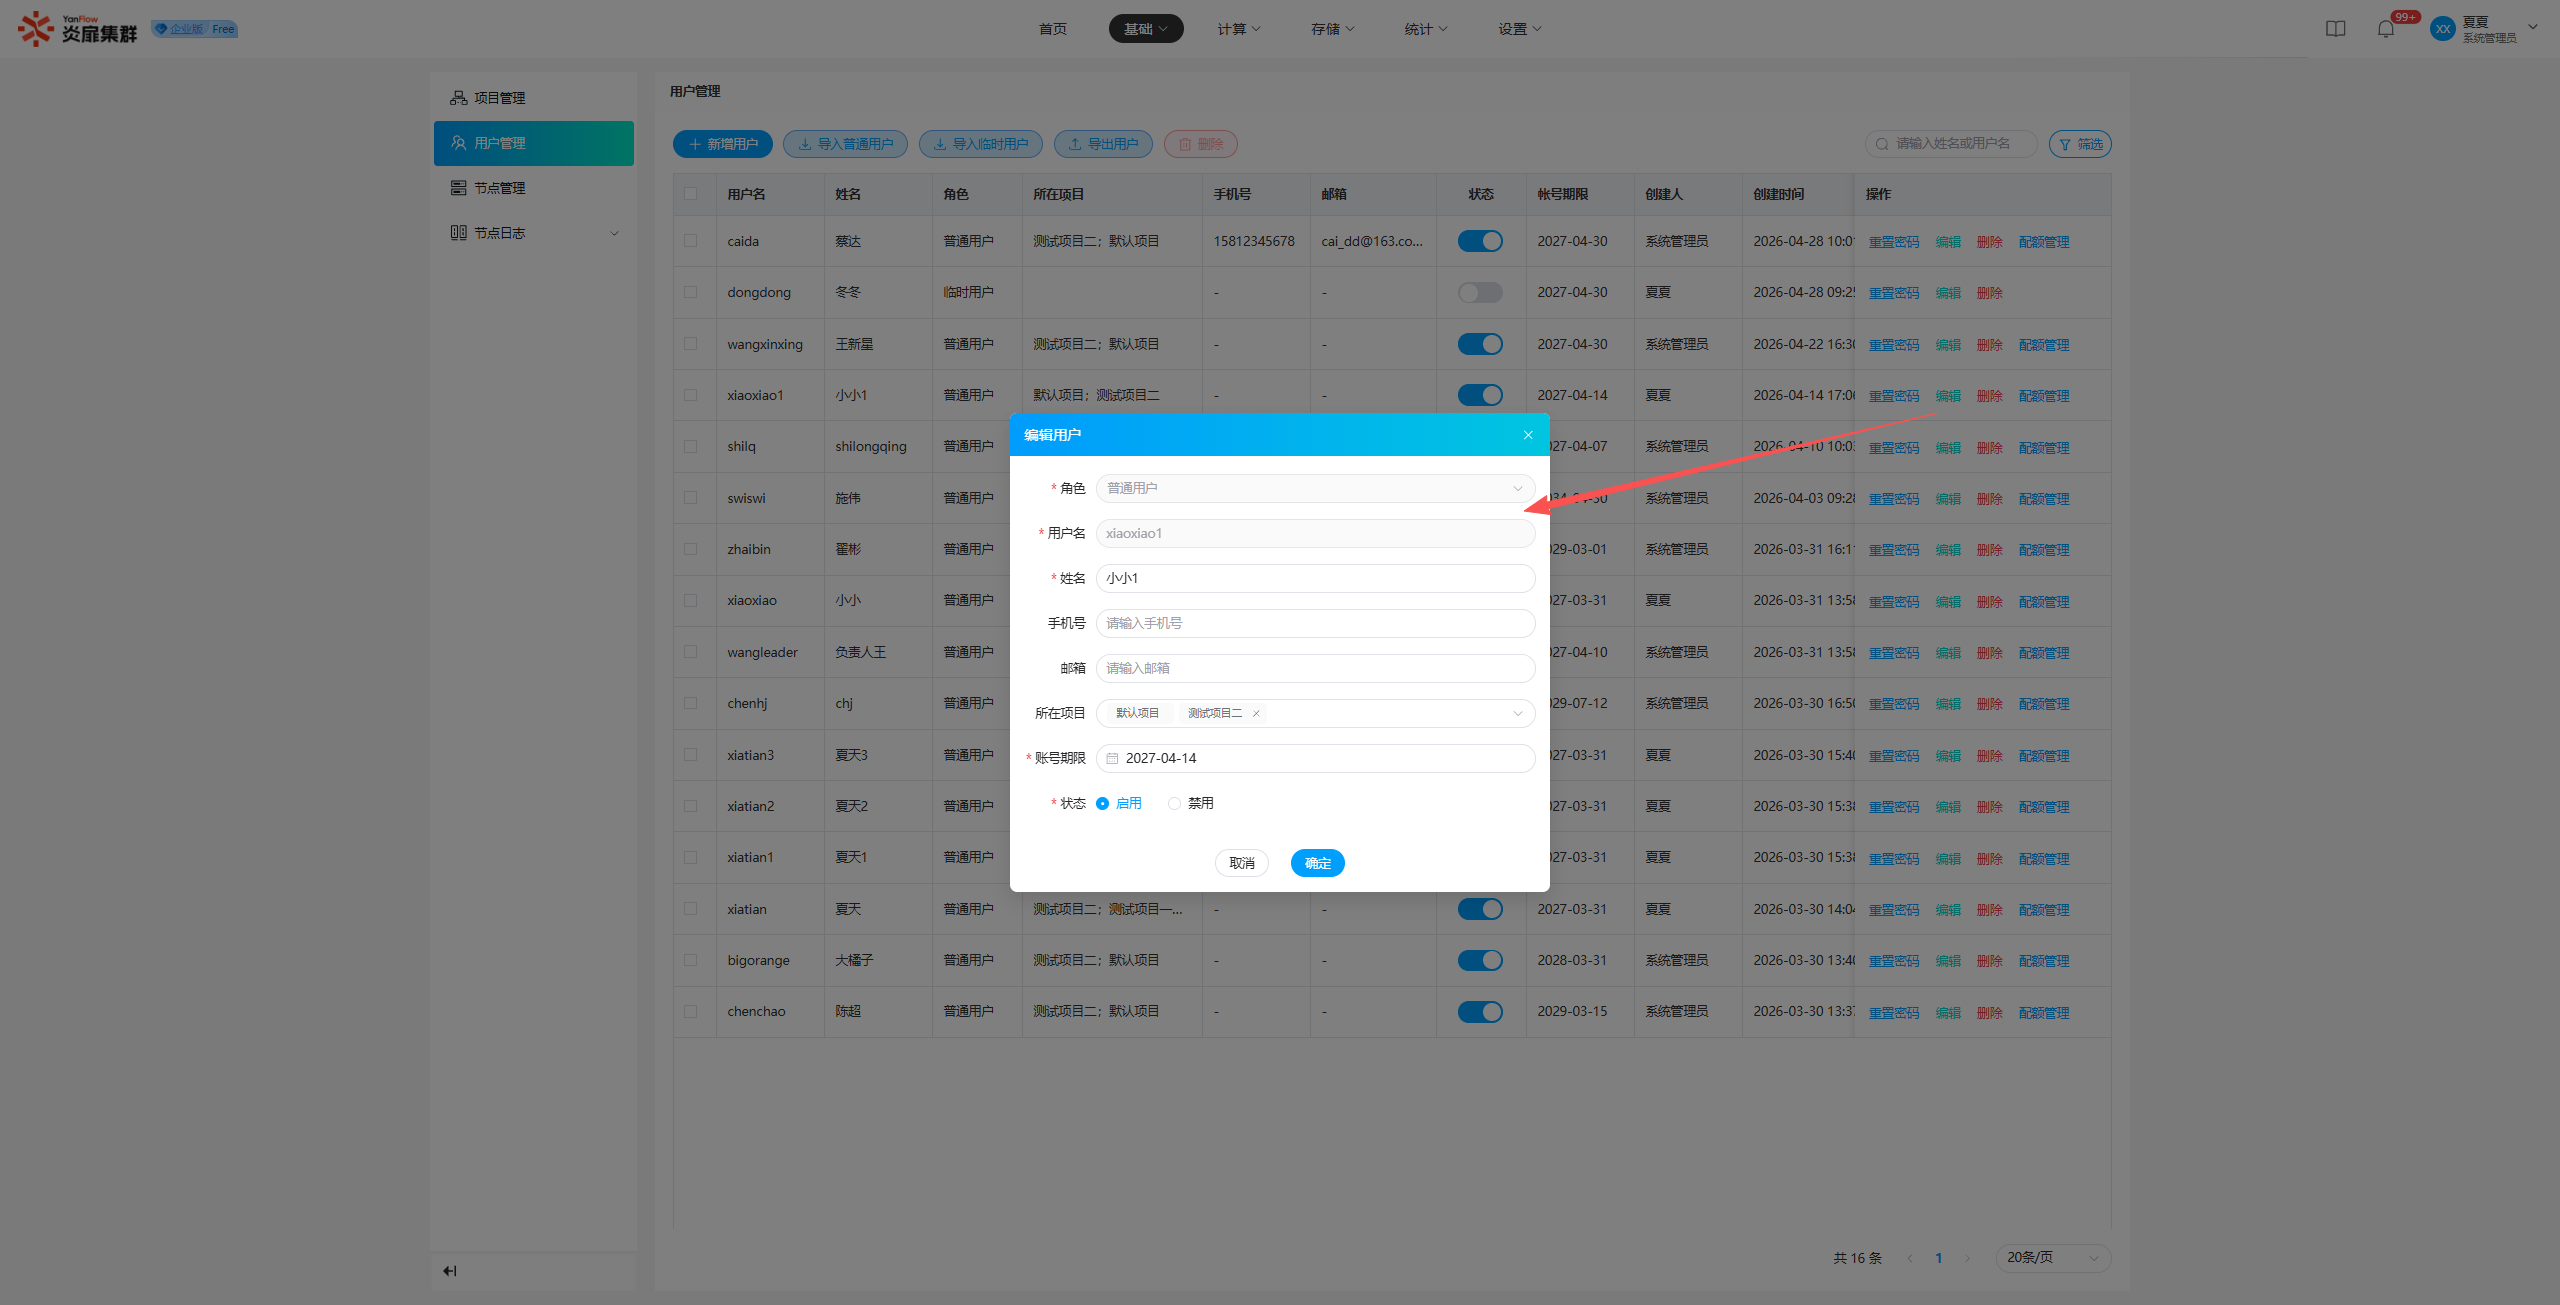
Note: Role and Username cannot be changed.
Delete User
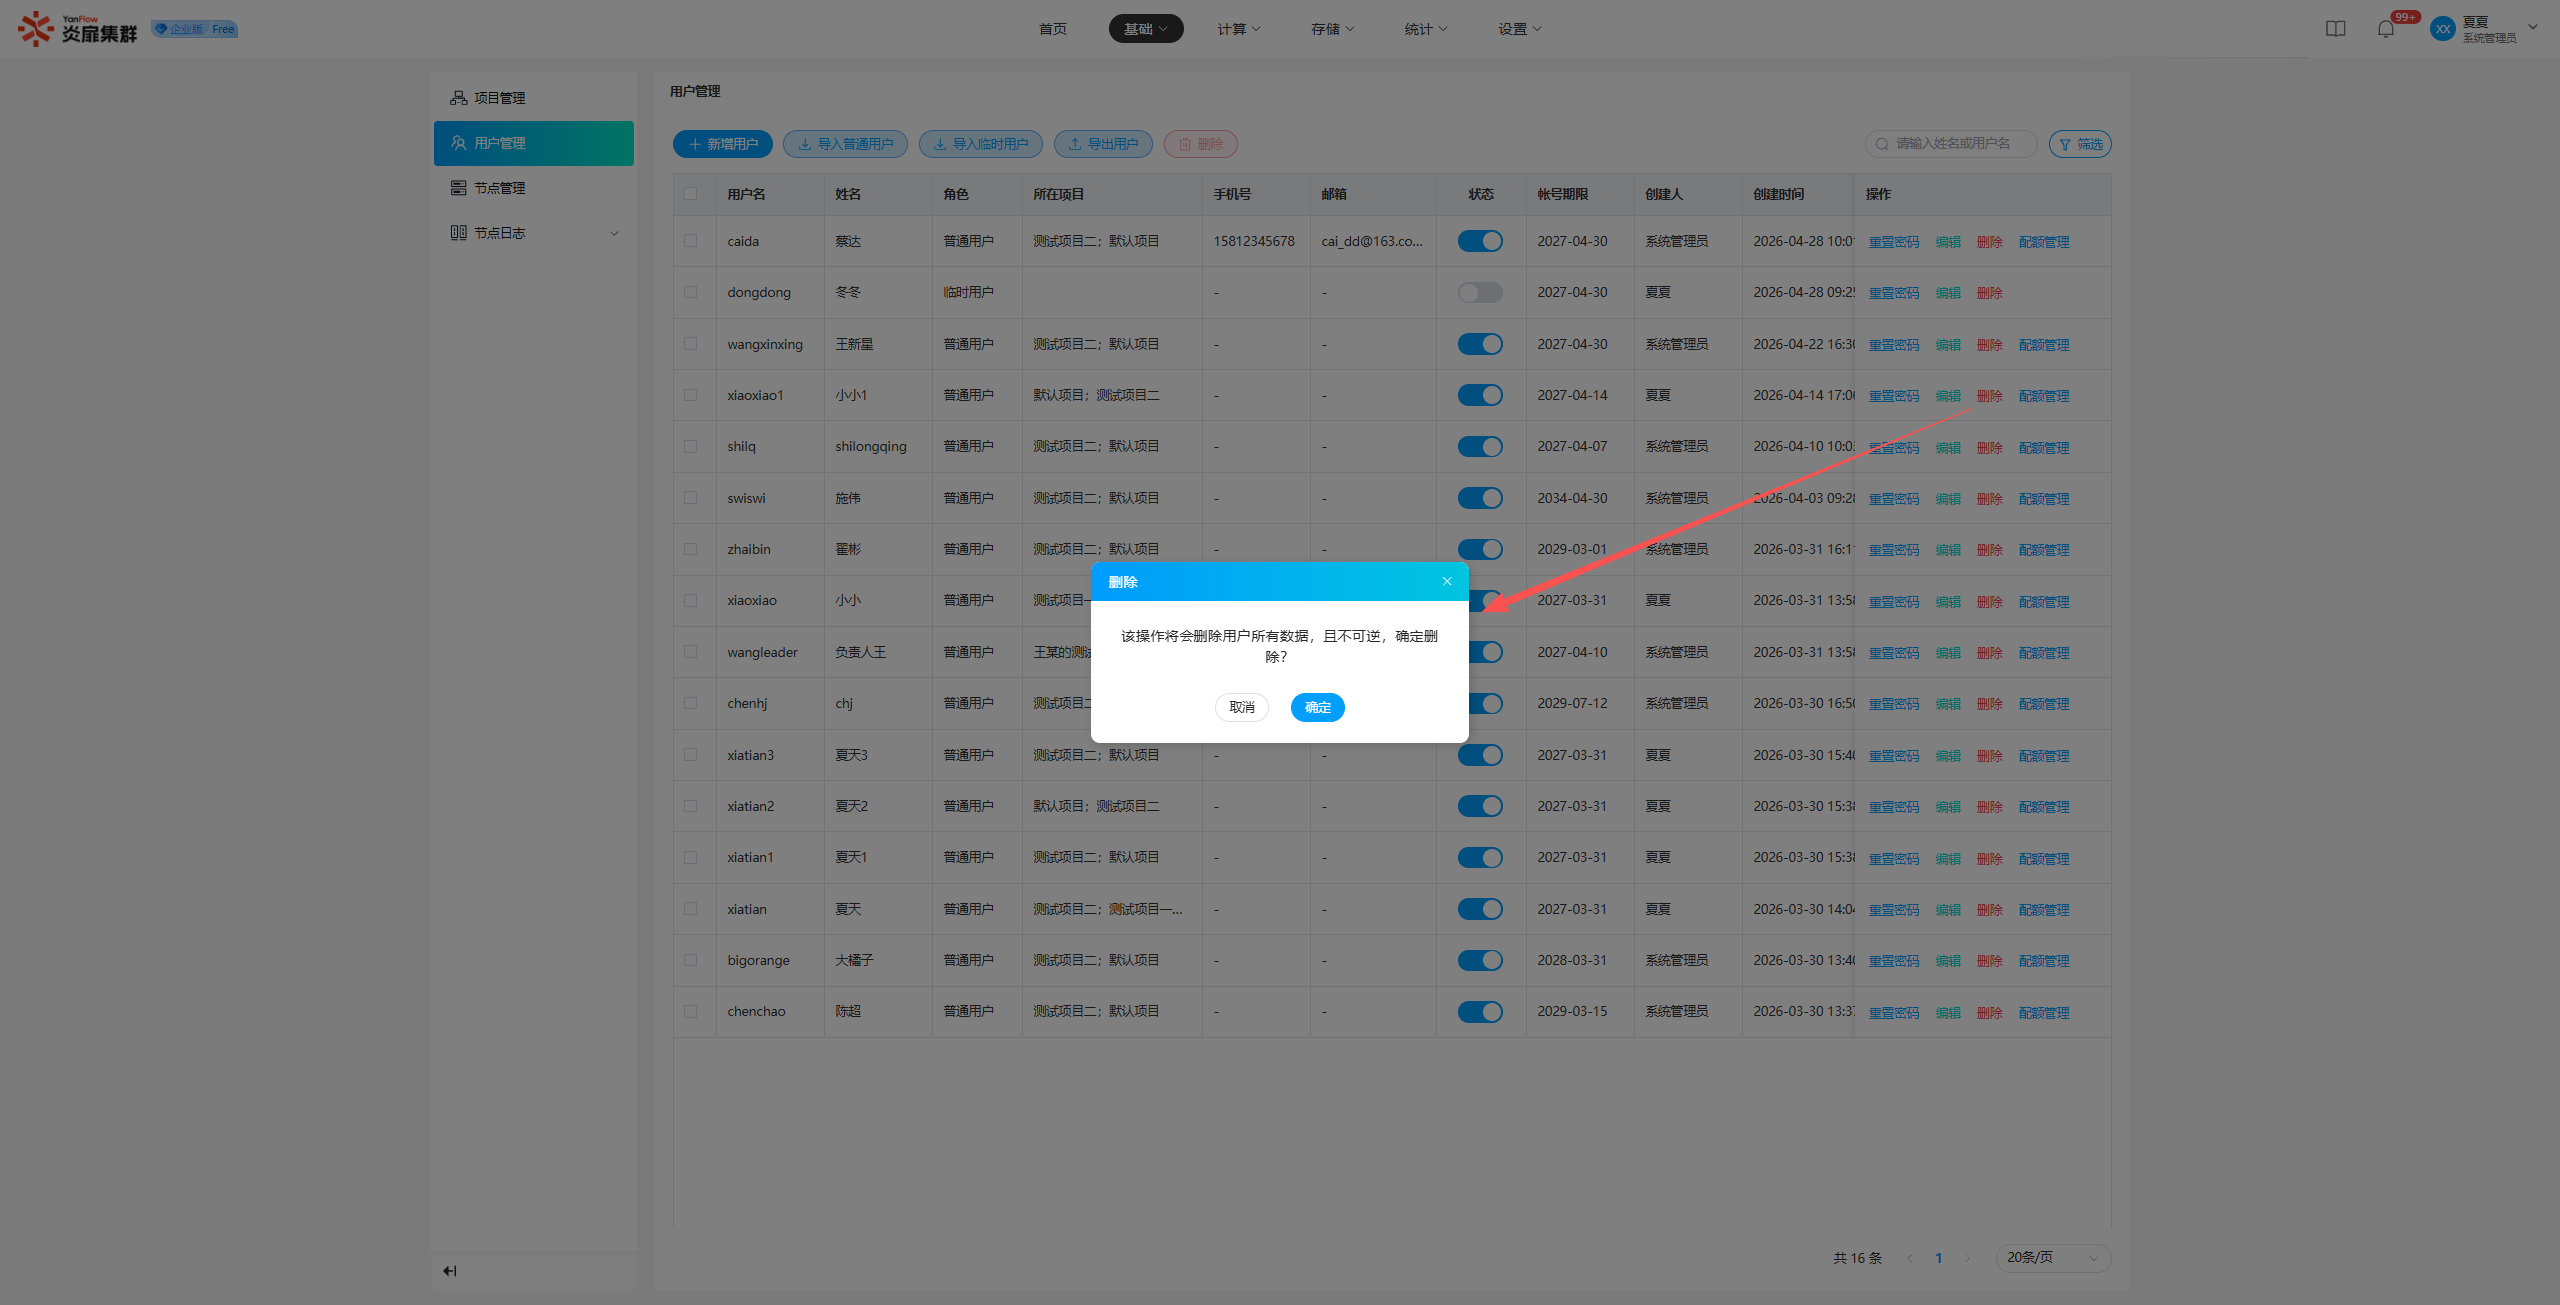
Delete: Click Delete for a specific user, show the prompt, and click Confirm to delete the user.
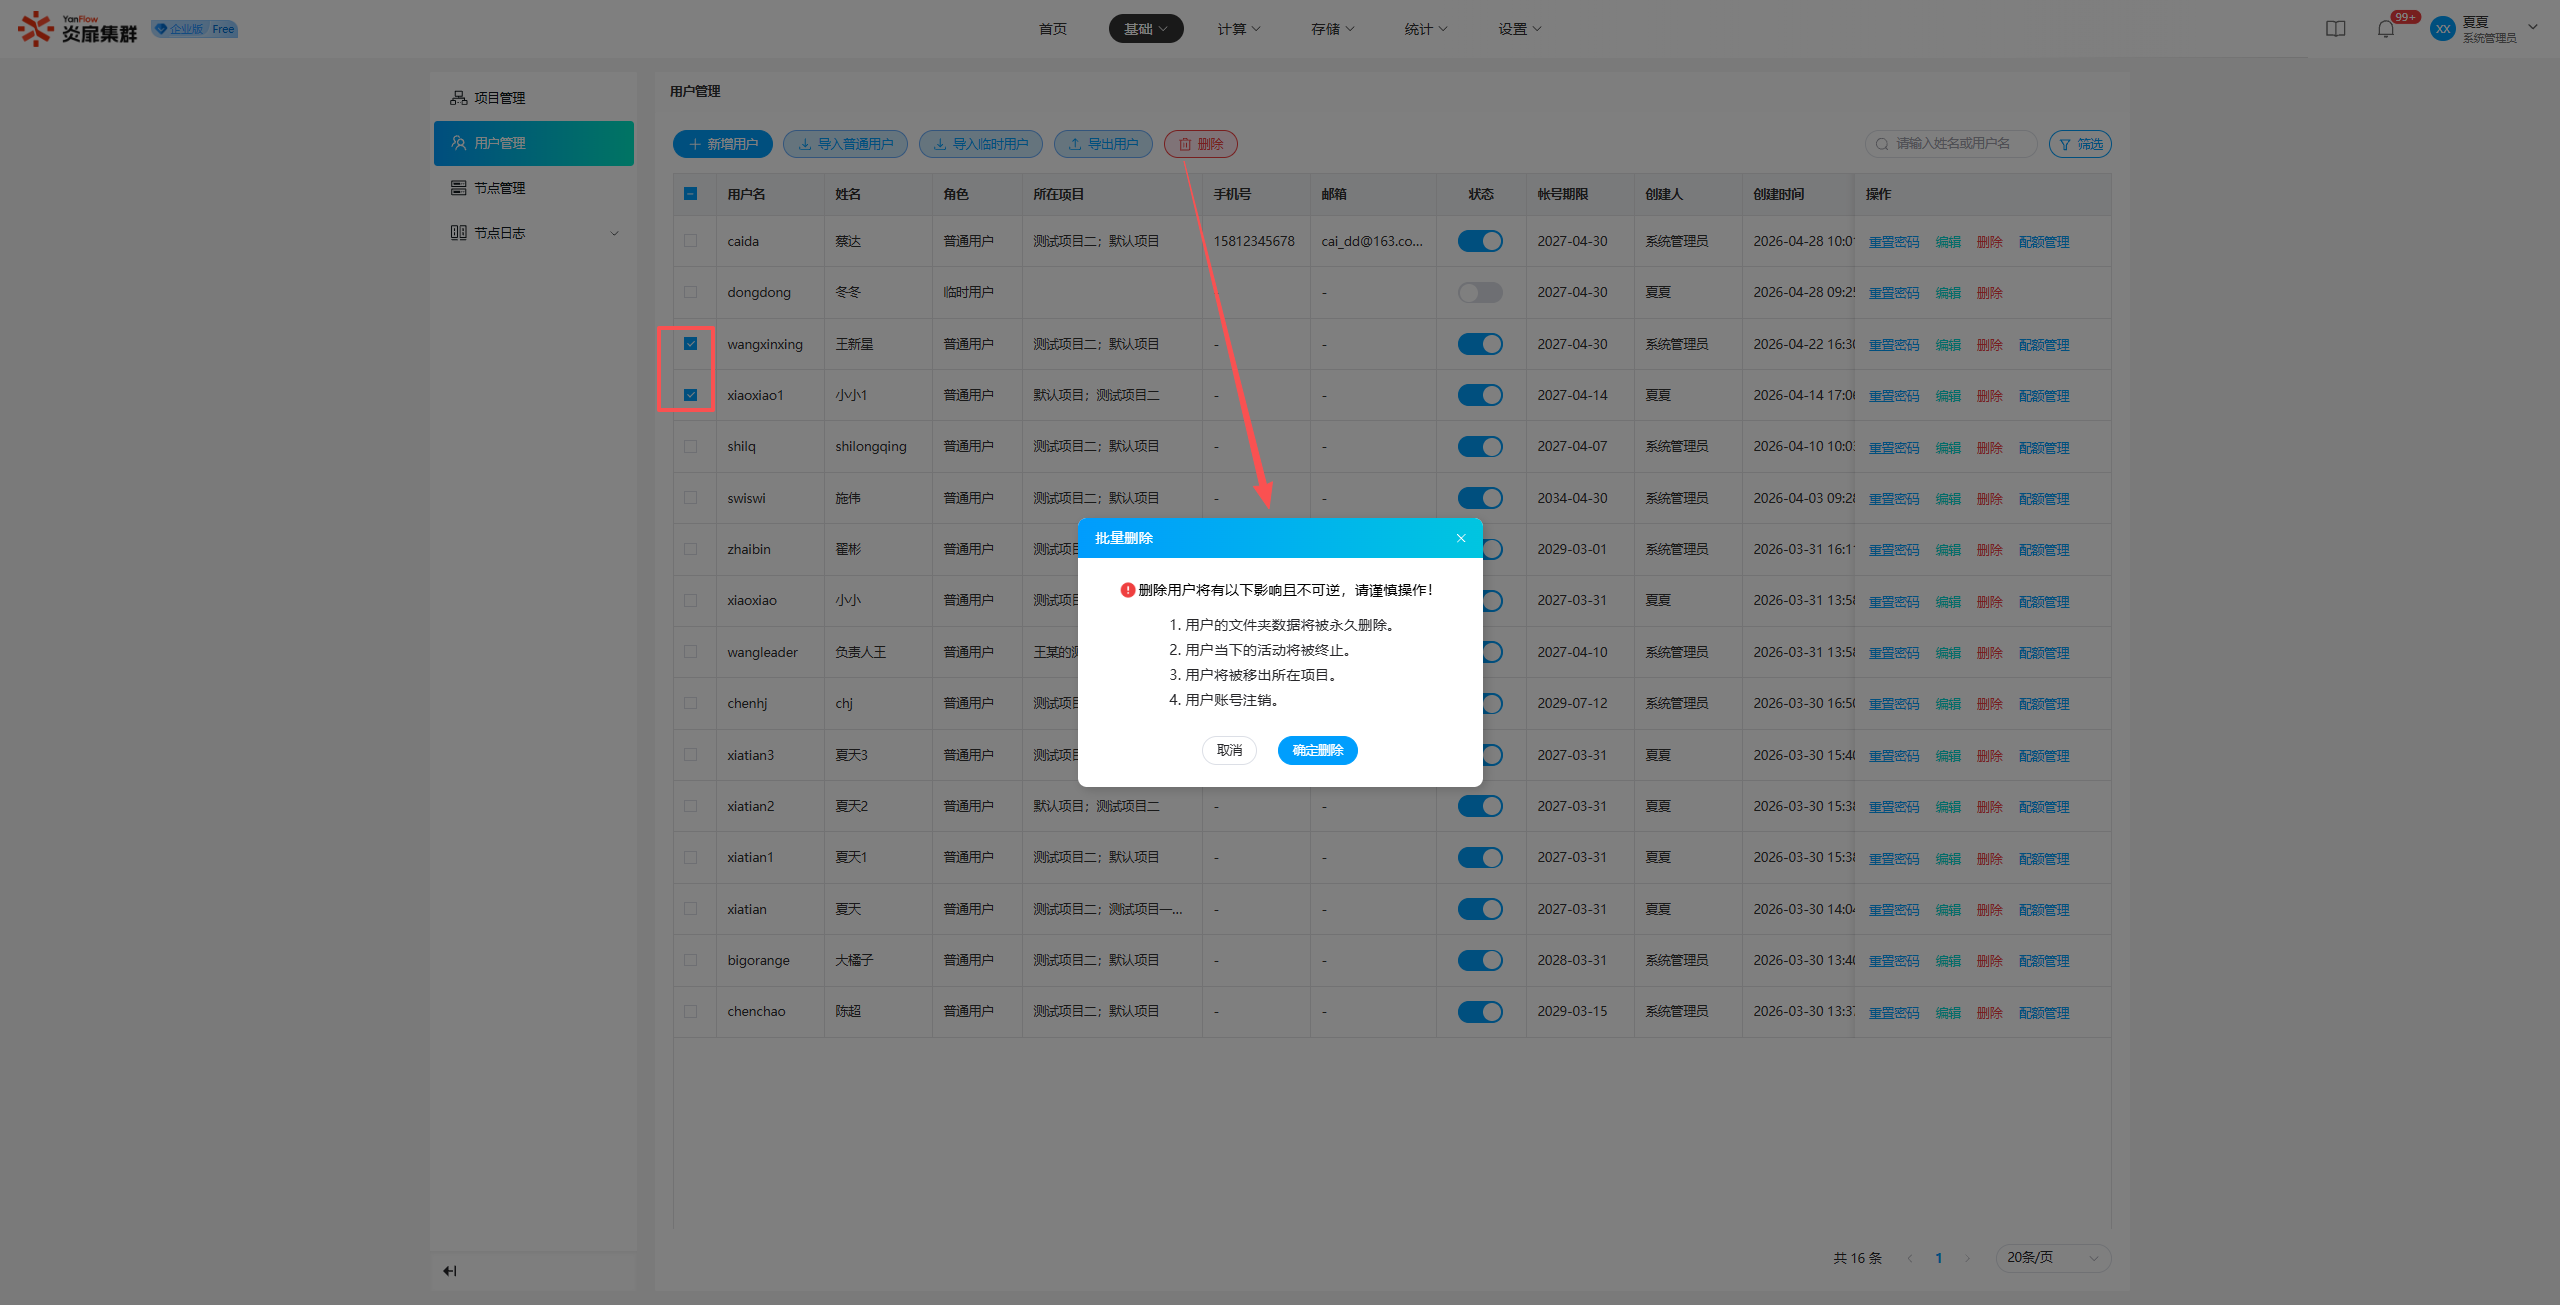
Batch Delete: Check one or more users and click Delete at the top. Click Confirm in the prompt to delete the selected users.
Enable/Disable
Click Enable or Disable to show a prompt. Click Confirm to enable or disable the user.
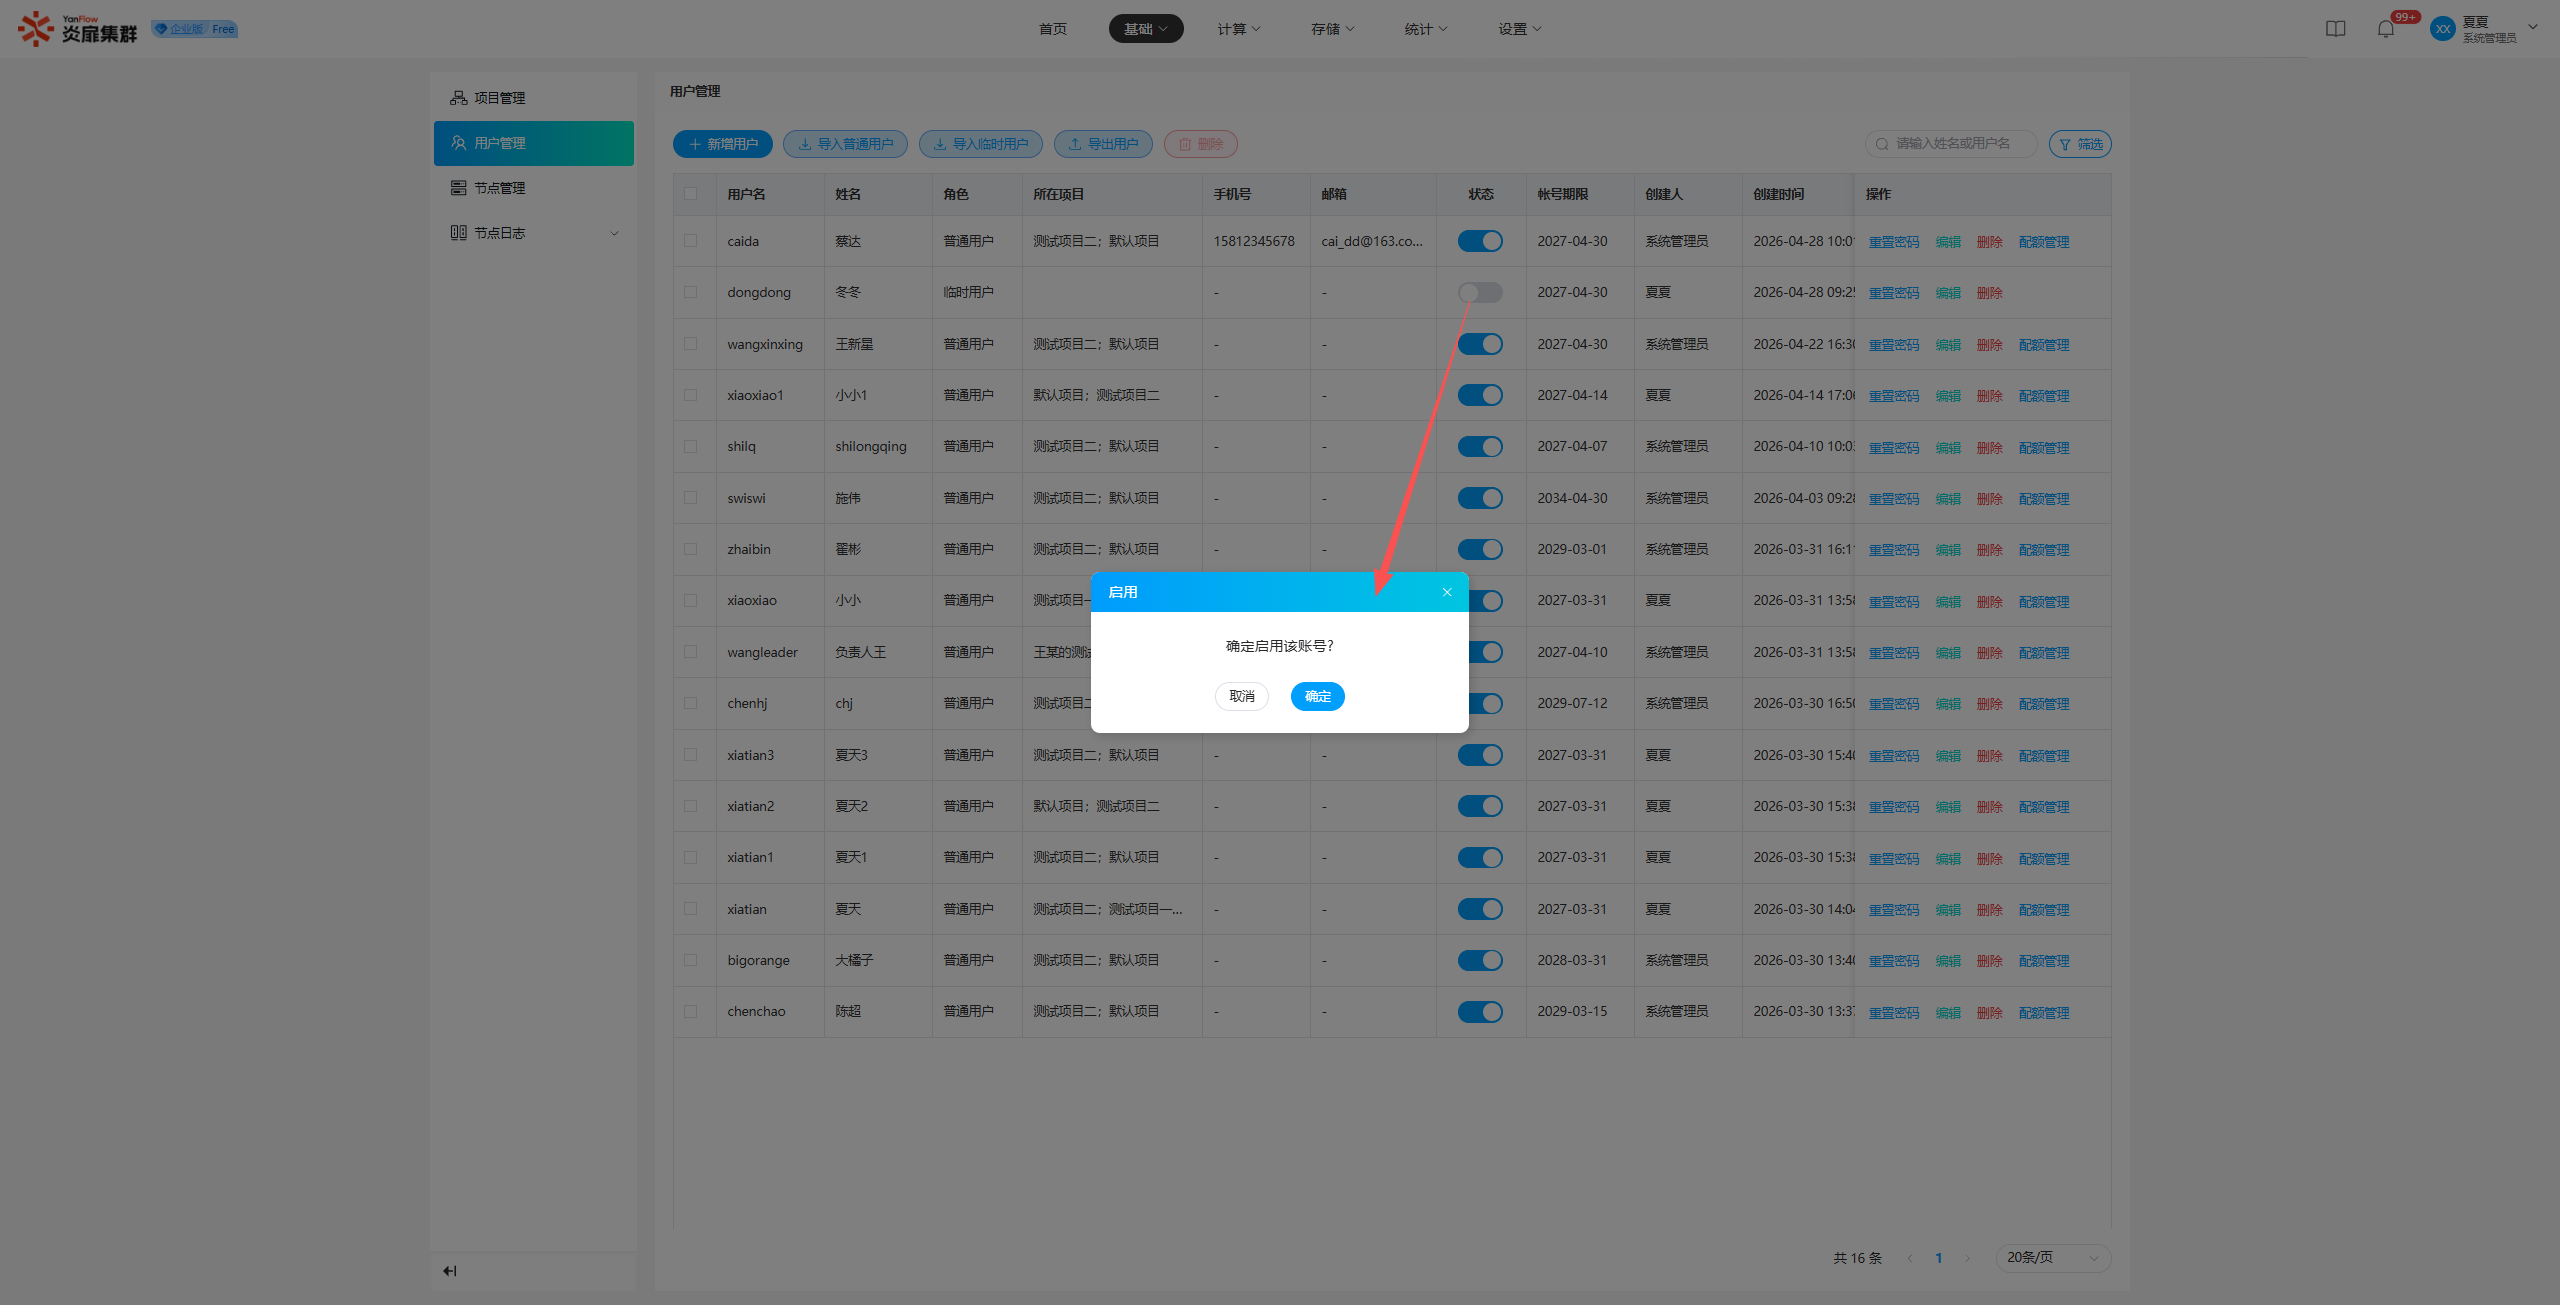
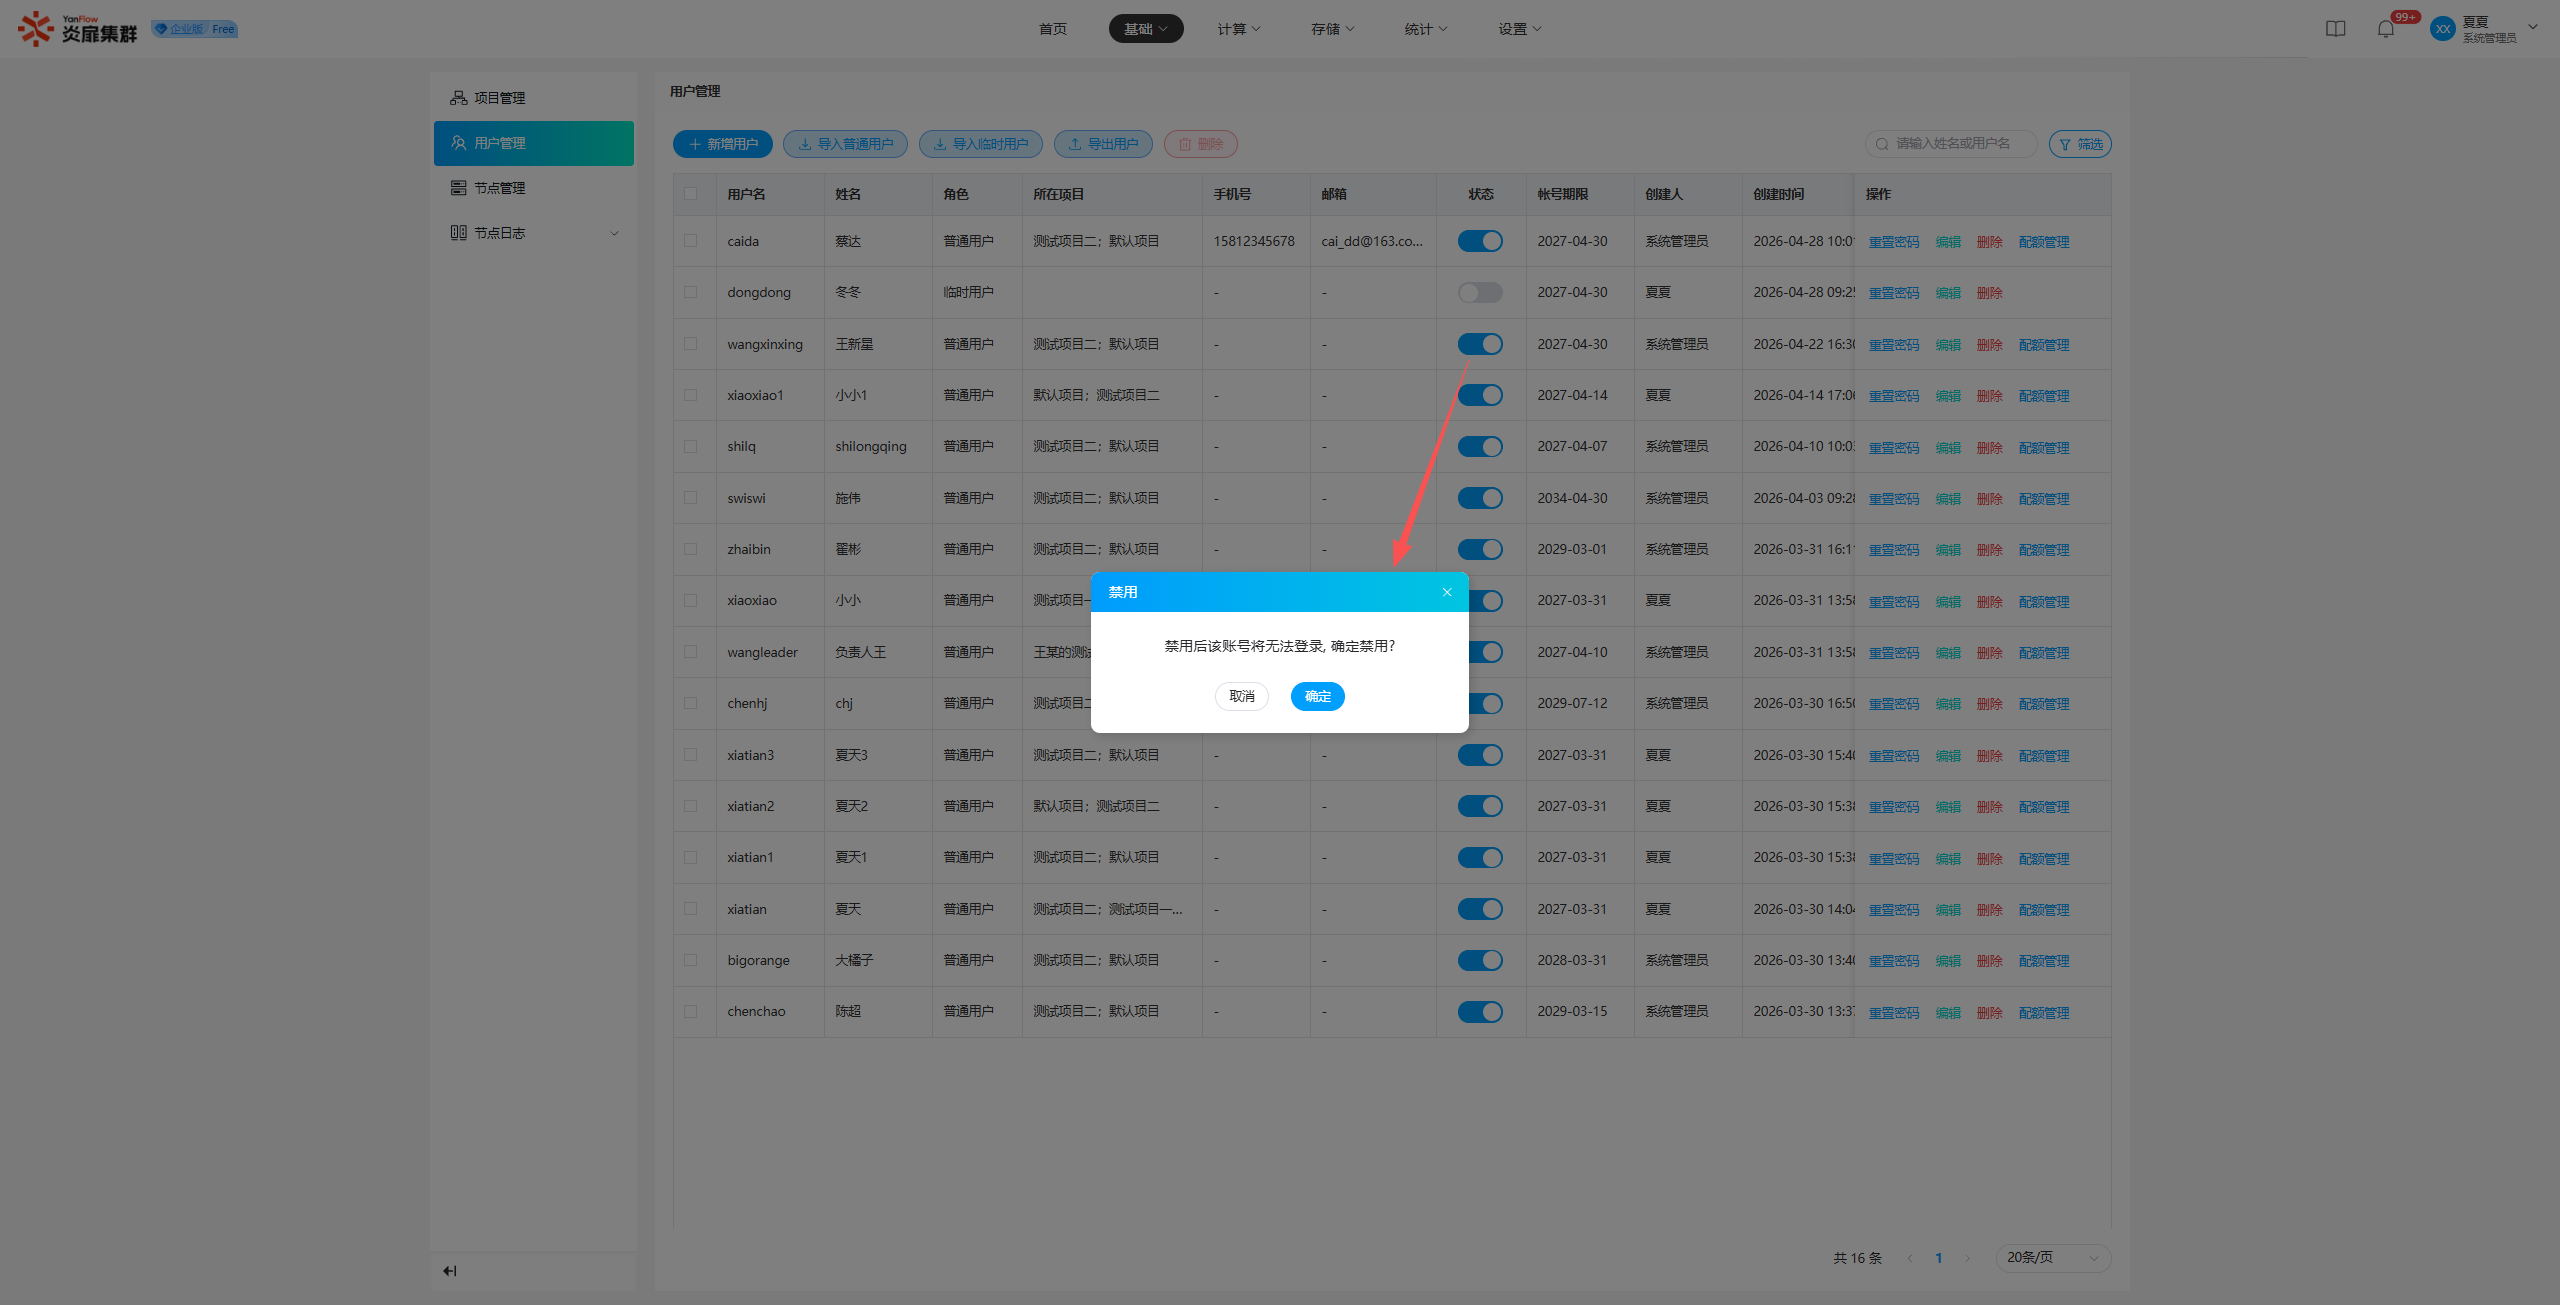
Note: Once disabled, the user account will be unable to log into the system.
Reset Password
Click Reset Password to show a prompt. Click Confirm to complete the password reset.
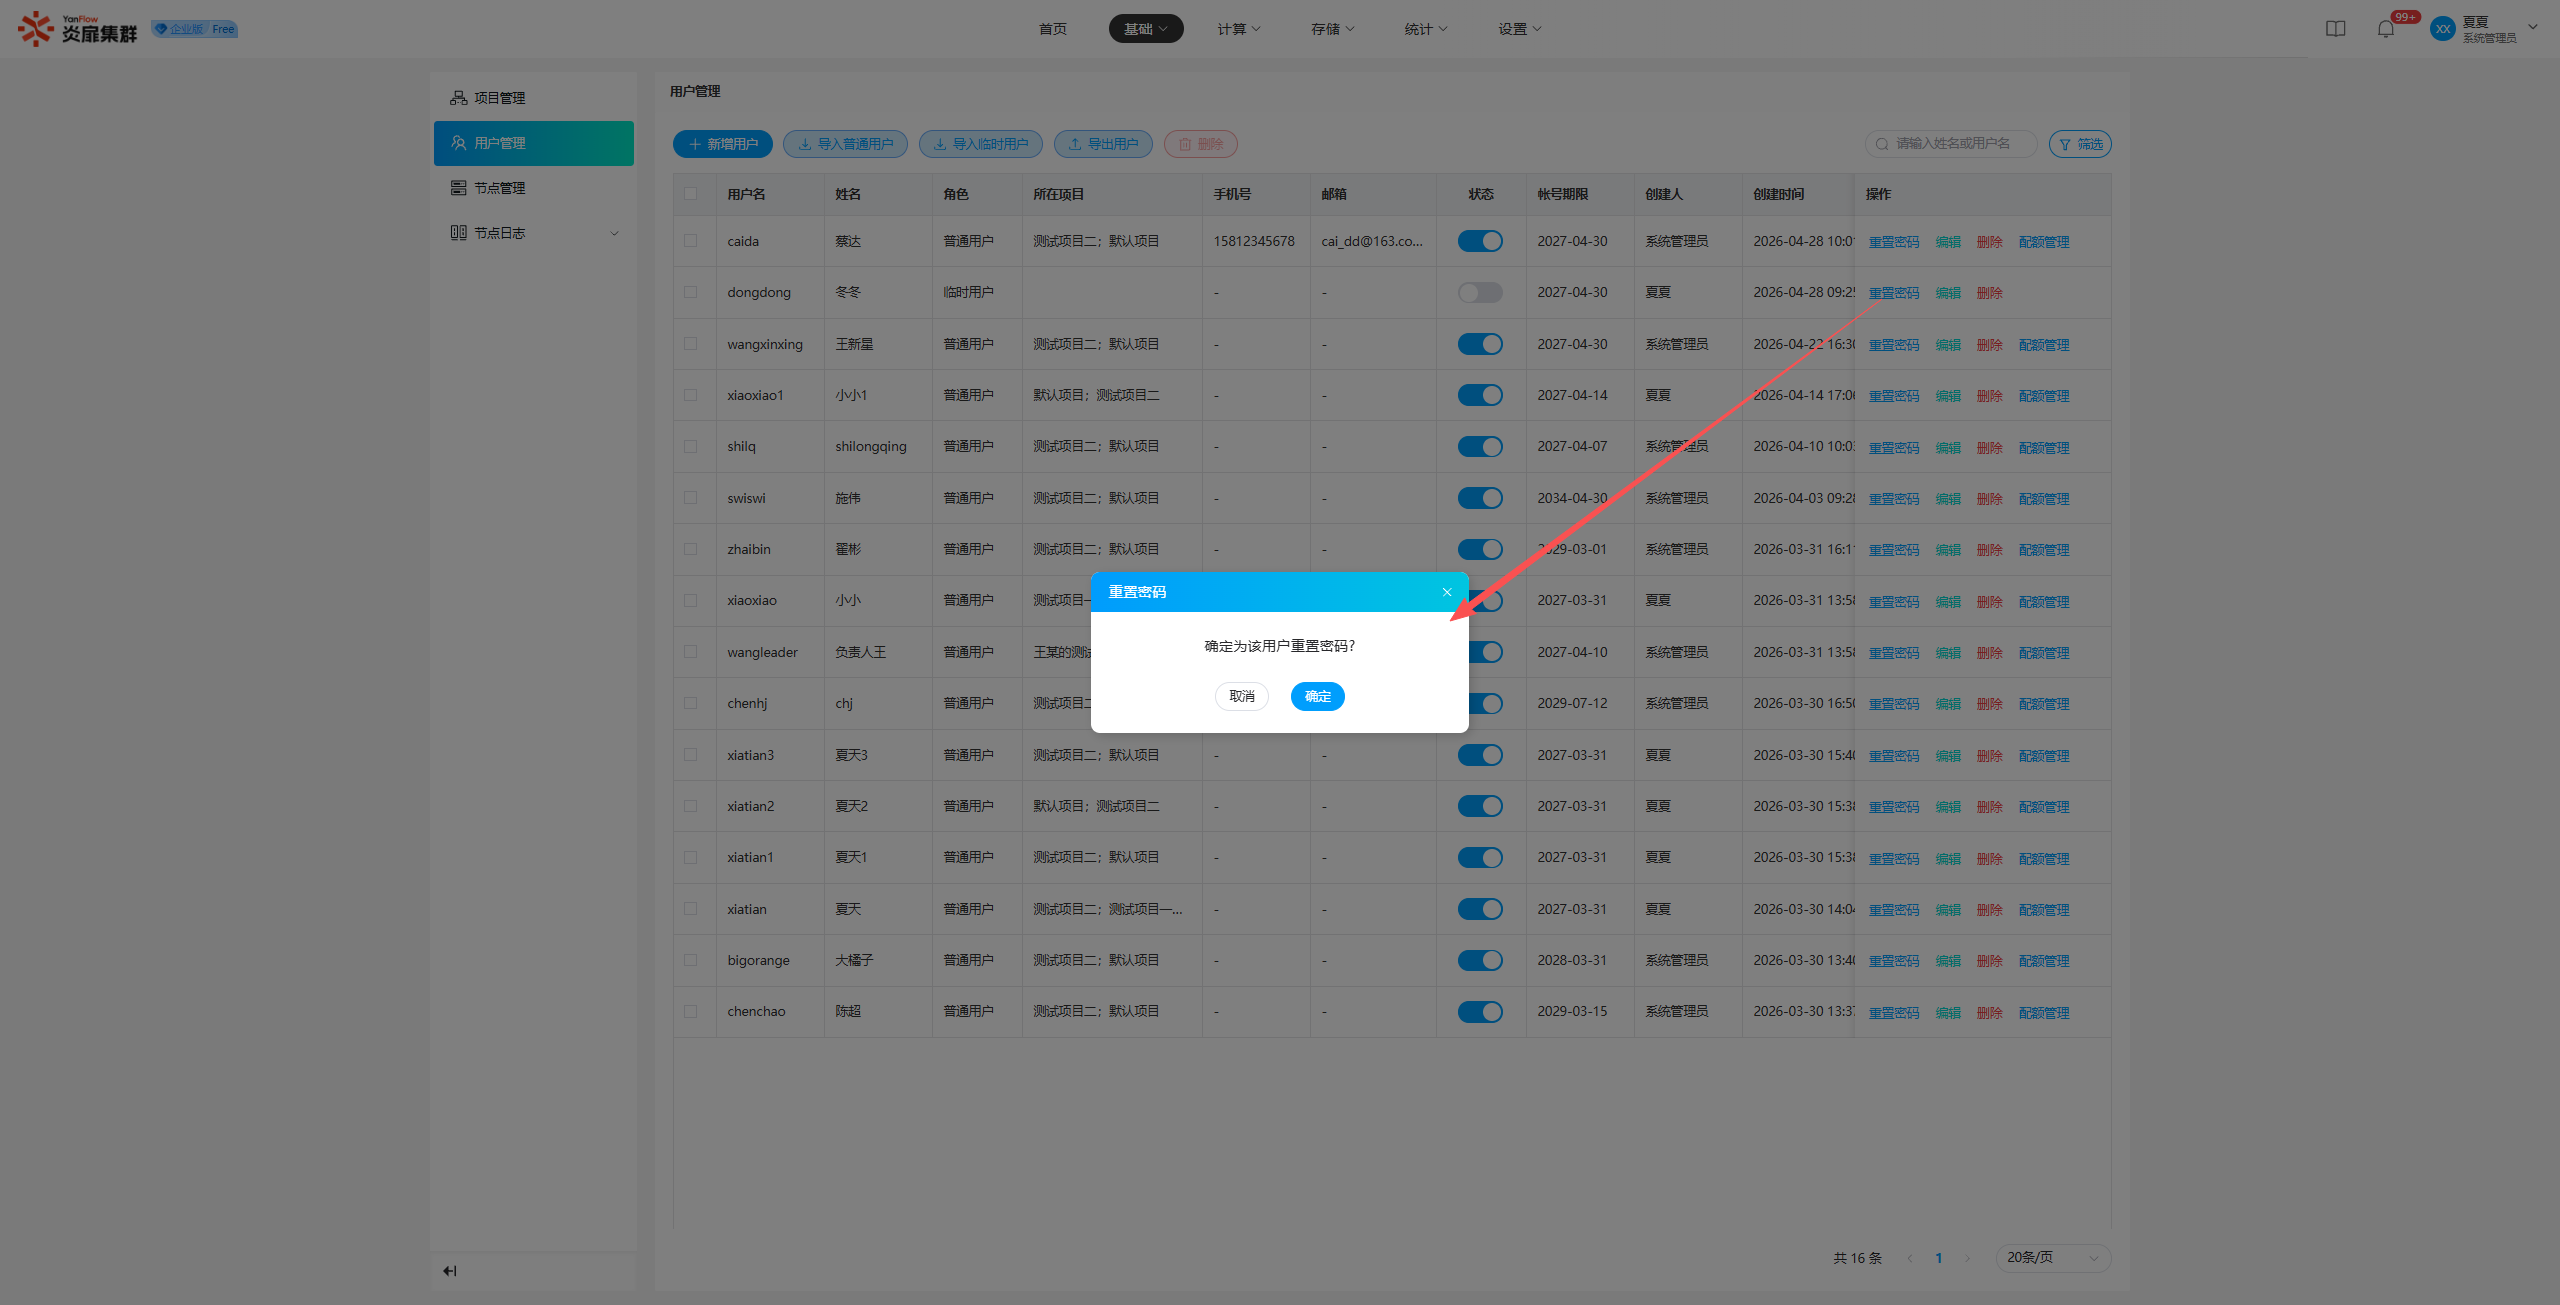
Note:
- The new password after reset is the reverse of the reset operation date (YYYYMMDD). Example: If the "Reset Password" operation is performed on January 01, 2026, the new password will be 10106202.
Quota Management
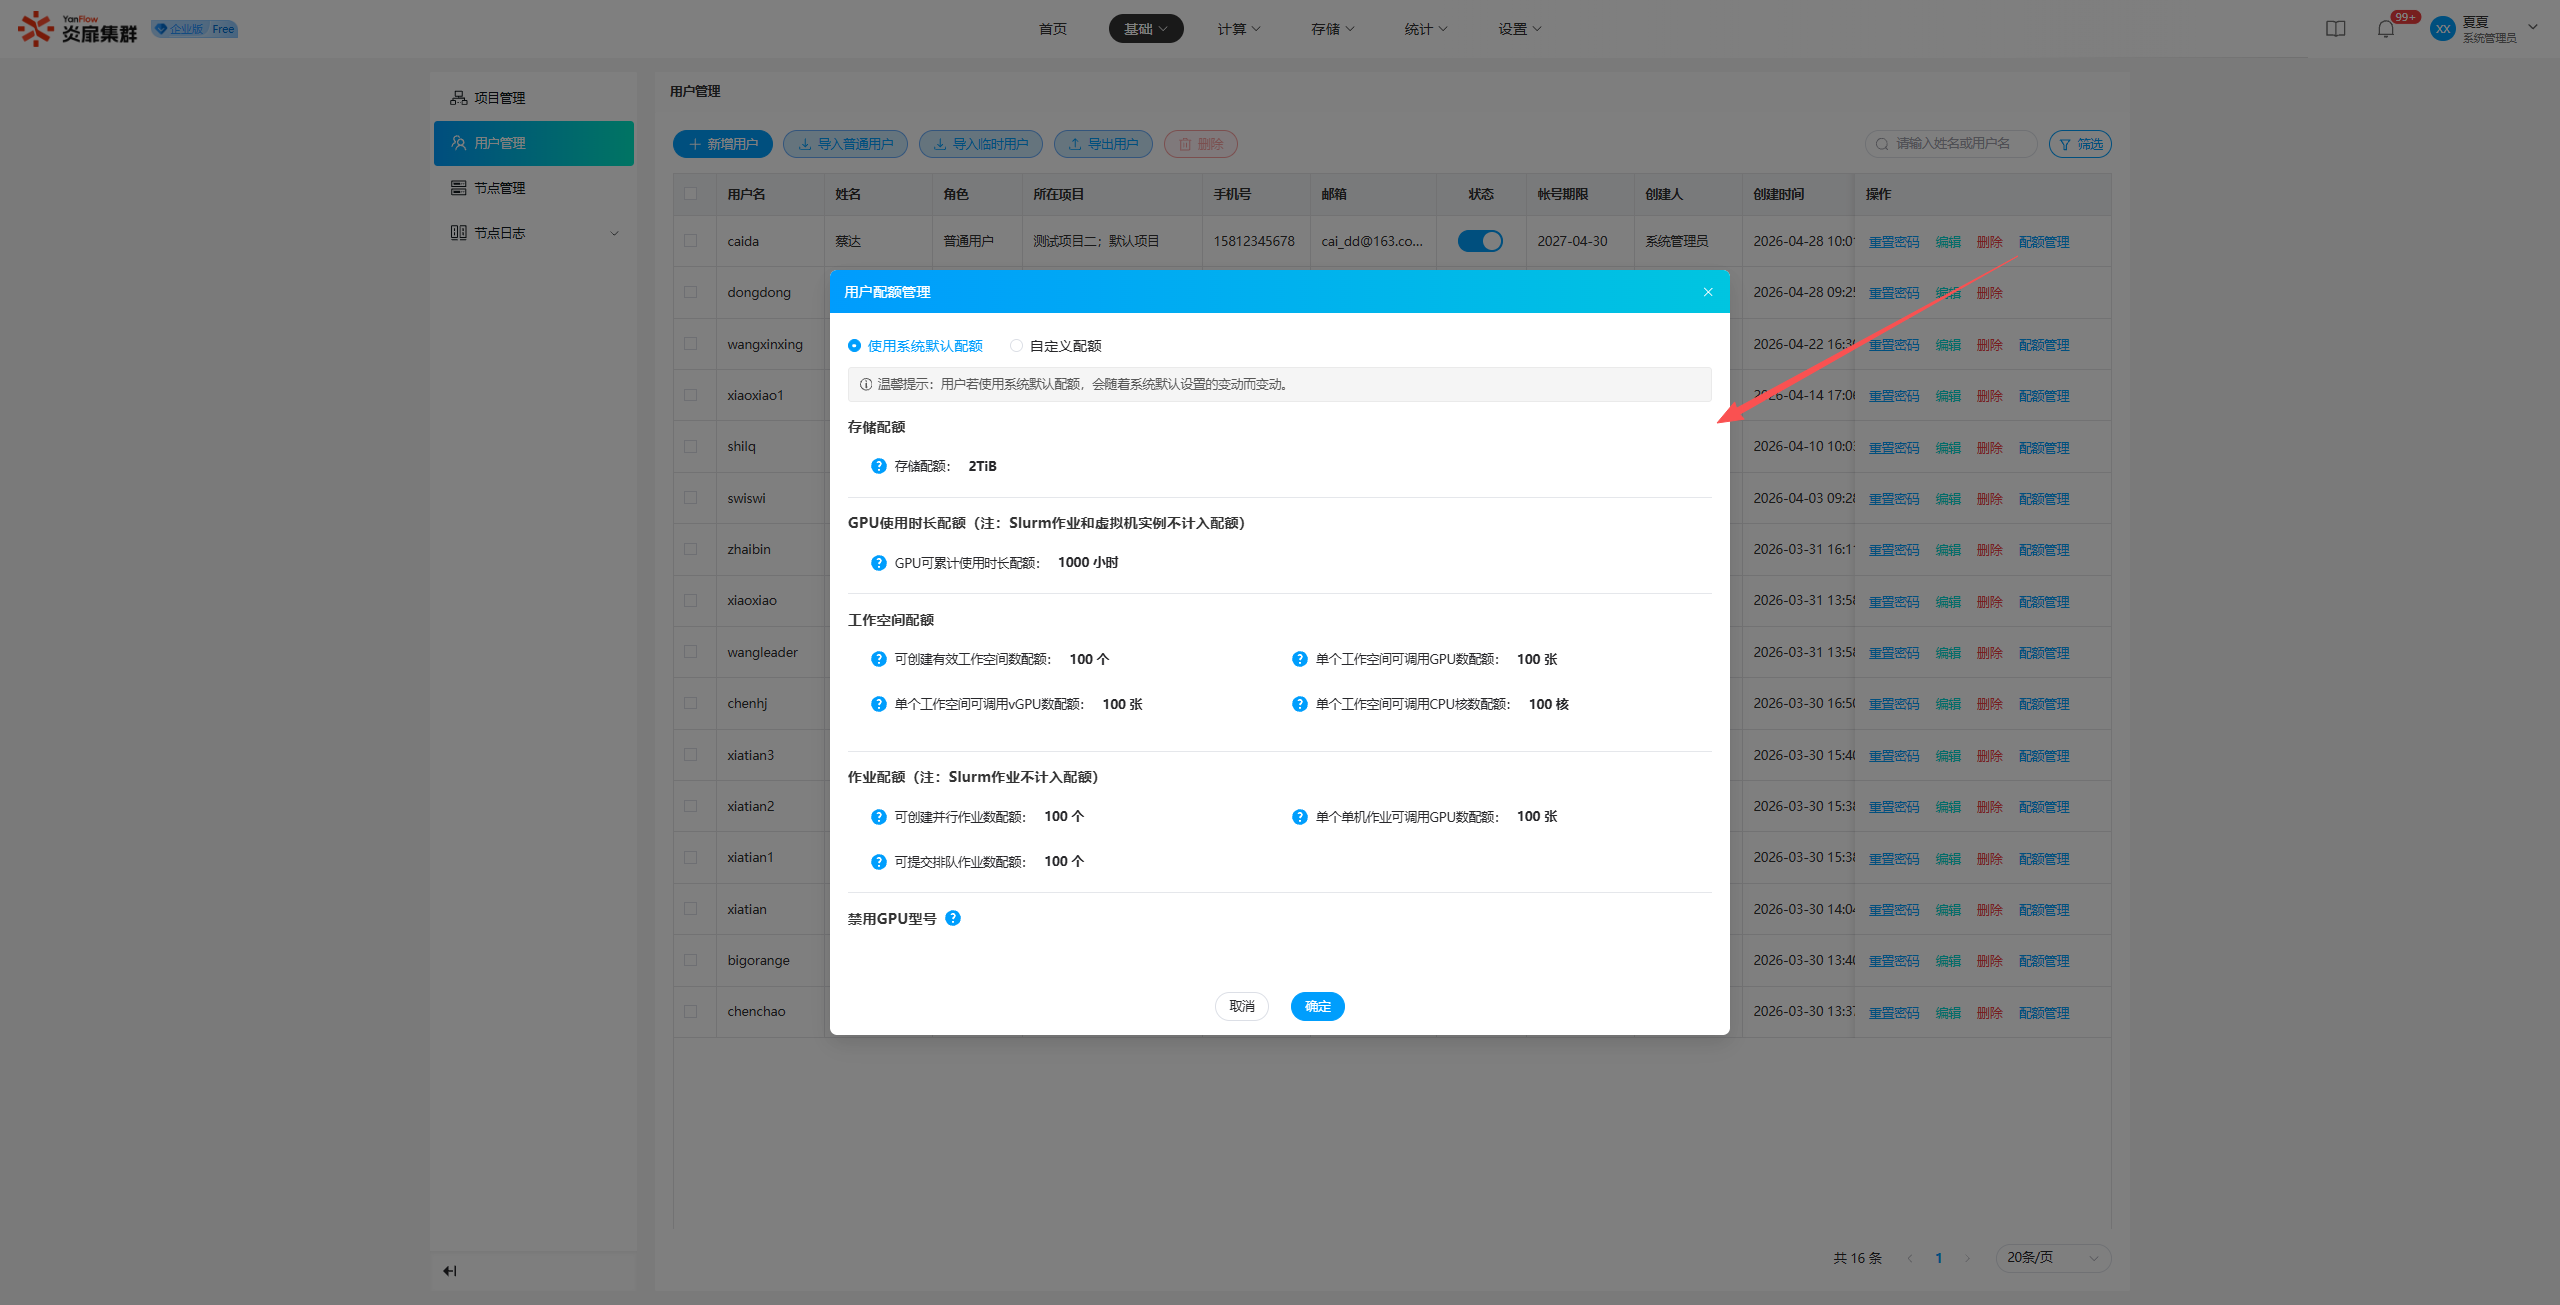
Click Quota Management to open the settings popup, where you can view or set user-related quotas. Supports two methods: Use System Default Quota or Custom Quota. Settings take effect immediately.
Note:
- Only Regular Users have quota management.
- Newly created Regular Users use the system default quota by default. The default quota is set by the System Administrator in Default Quota.
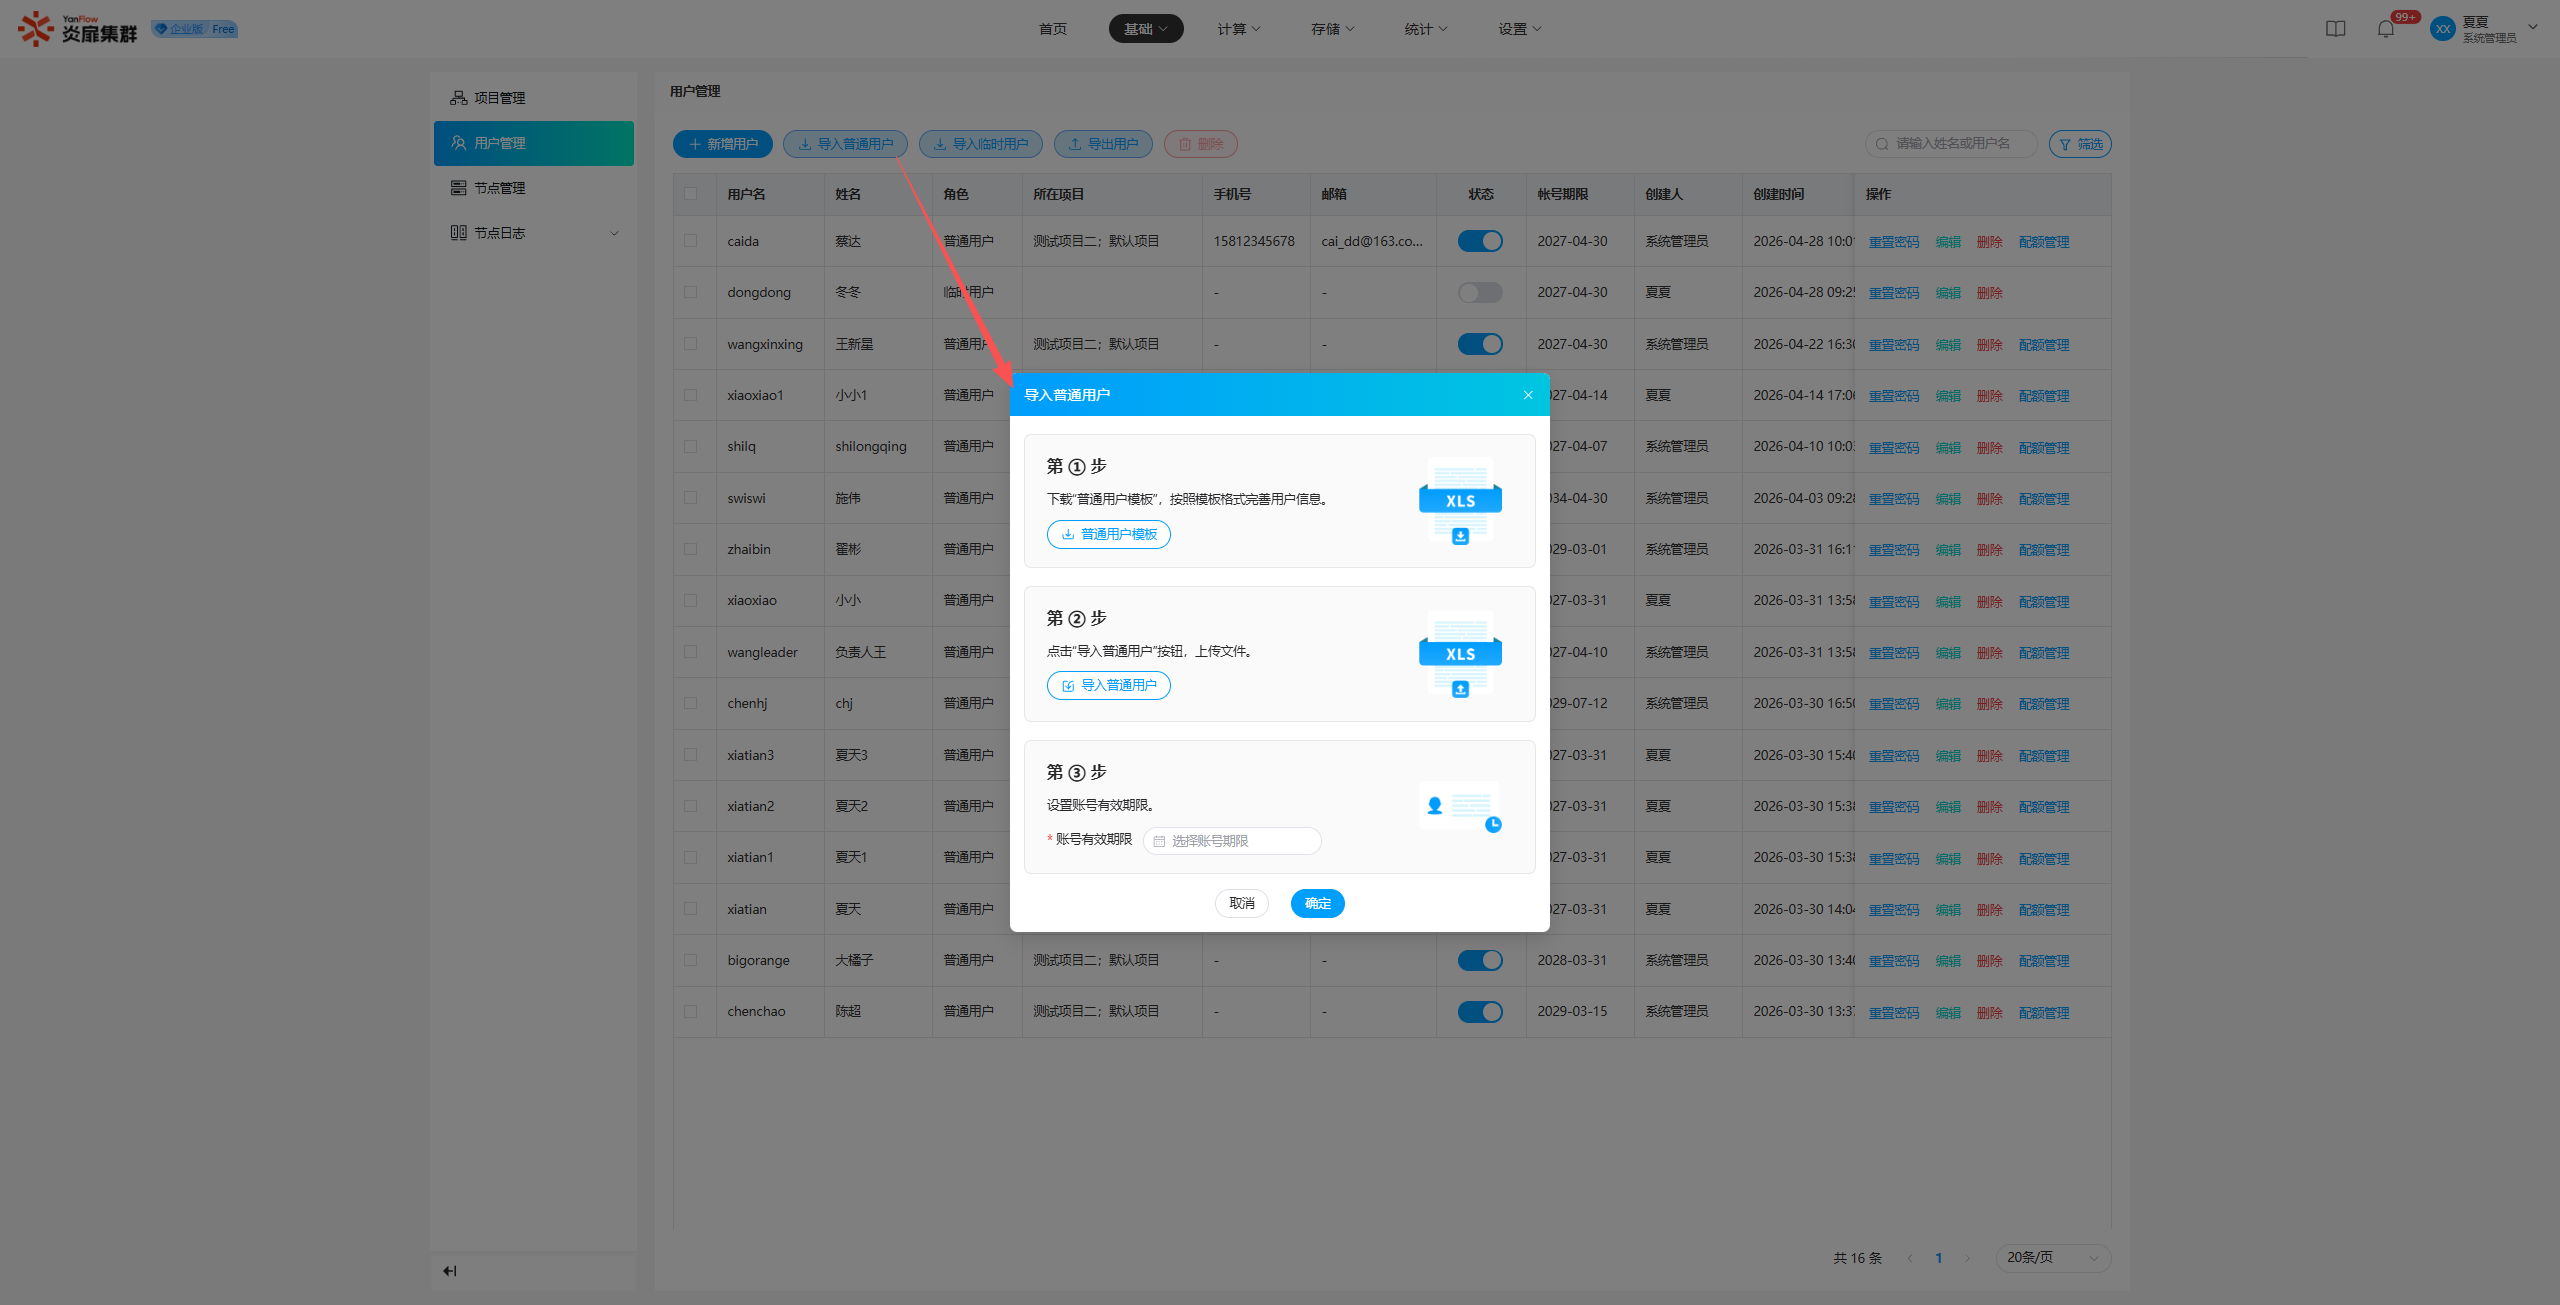
Import Regular Users
Click Import Regular Users to open the import popup. Follow the steps: Download Regular User Template -> Complete User Information -> Import Regular Users -> Set Account Expiration, then click Confirm to complete the import.
Import Temporary Users
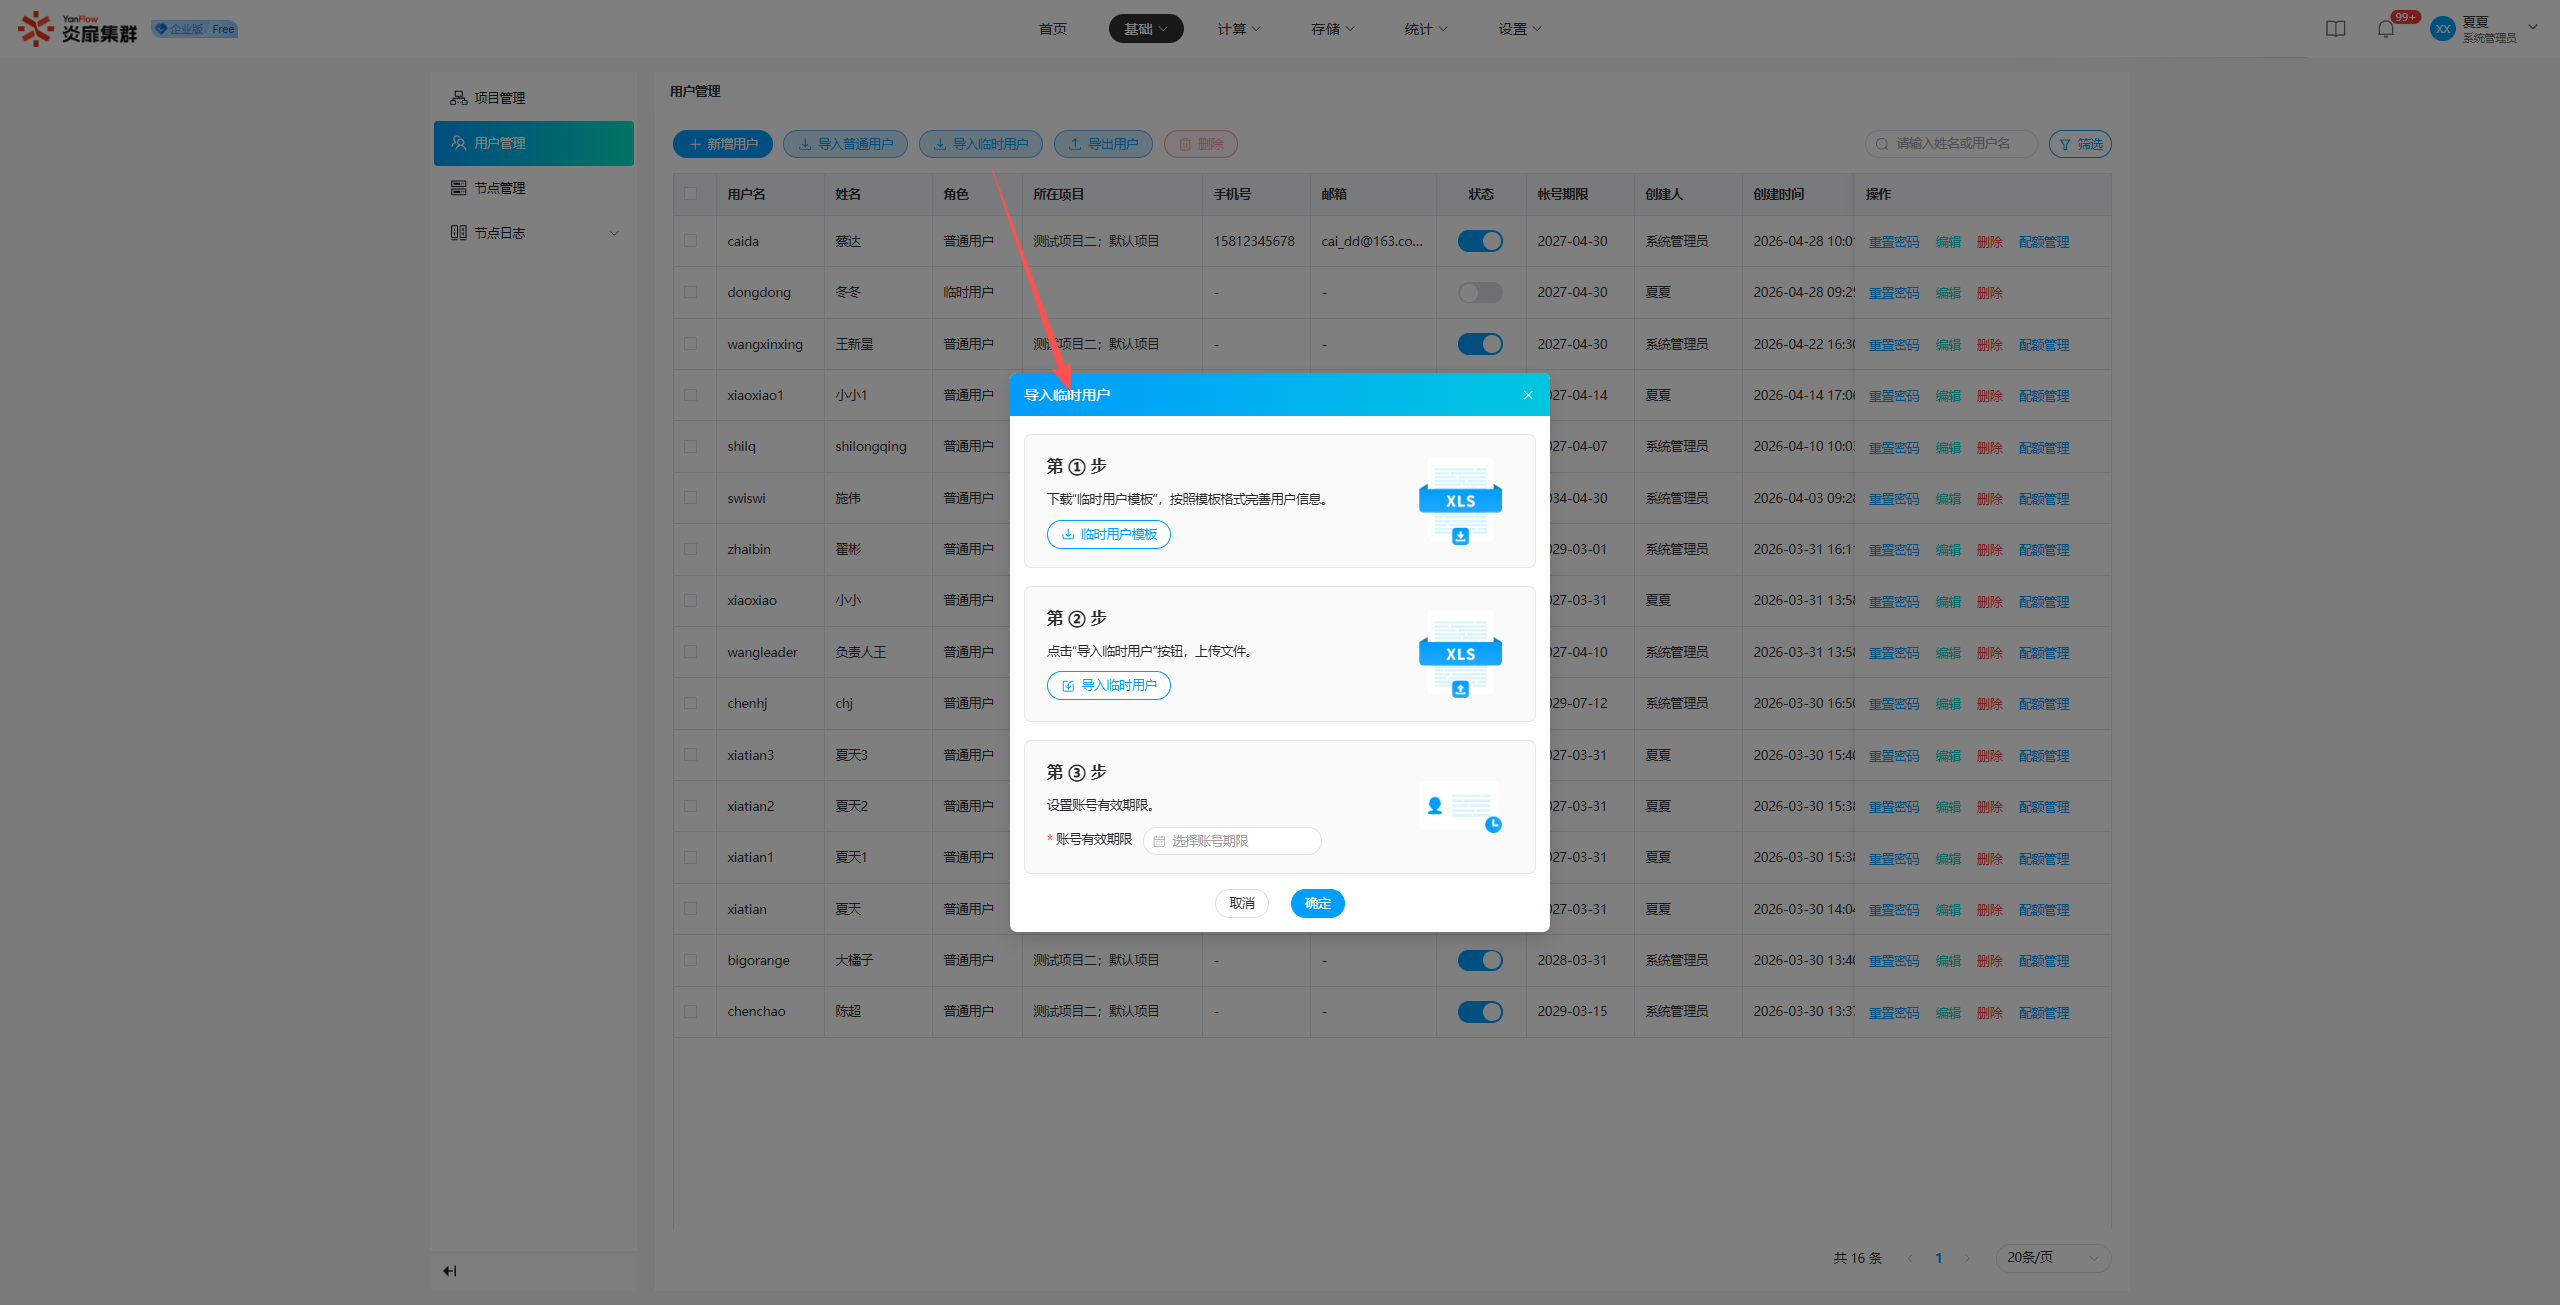
Click Import Temporary Users to open the import popup. Follow the steps: Download Temporary User Template -> Complete User Information -> Import Temporary Users -> Set Account Expiration, then click Confirm to complete the import.
Export Users
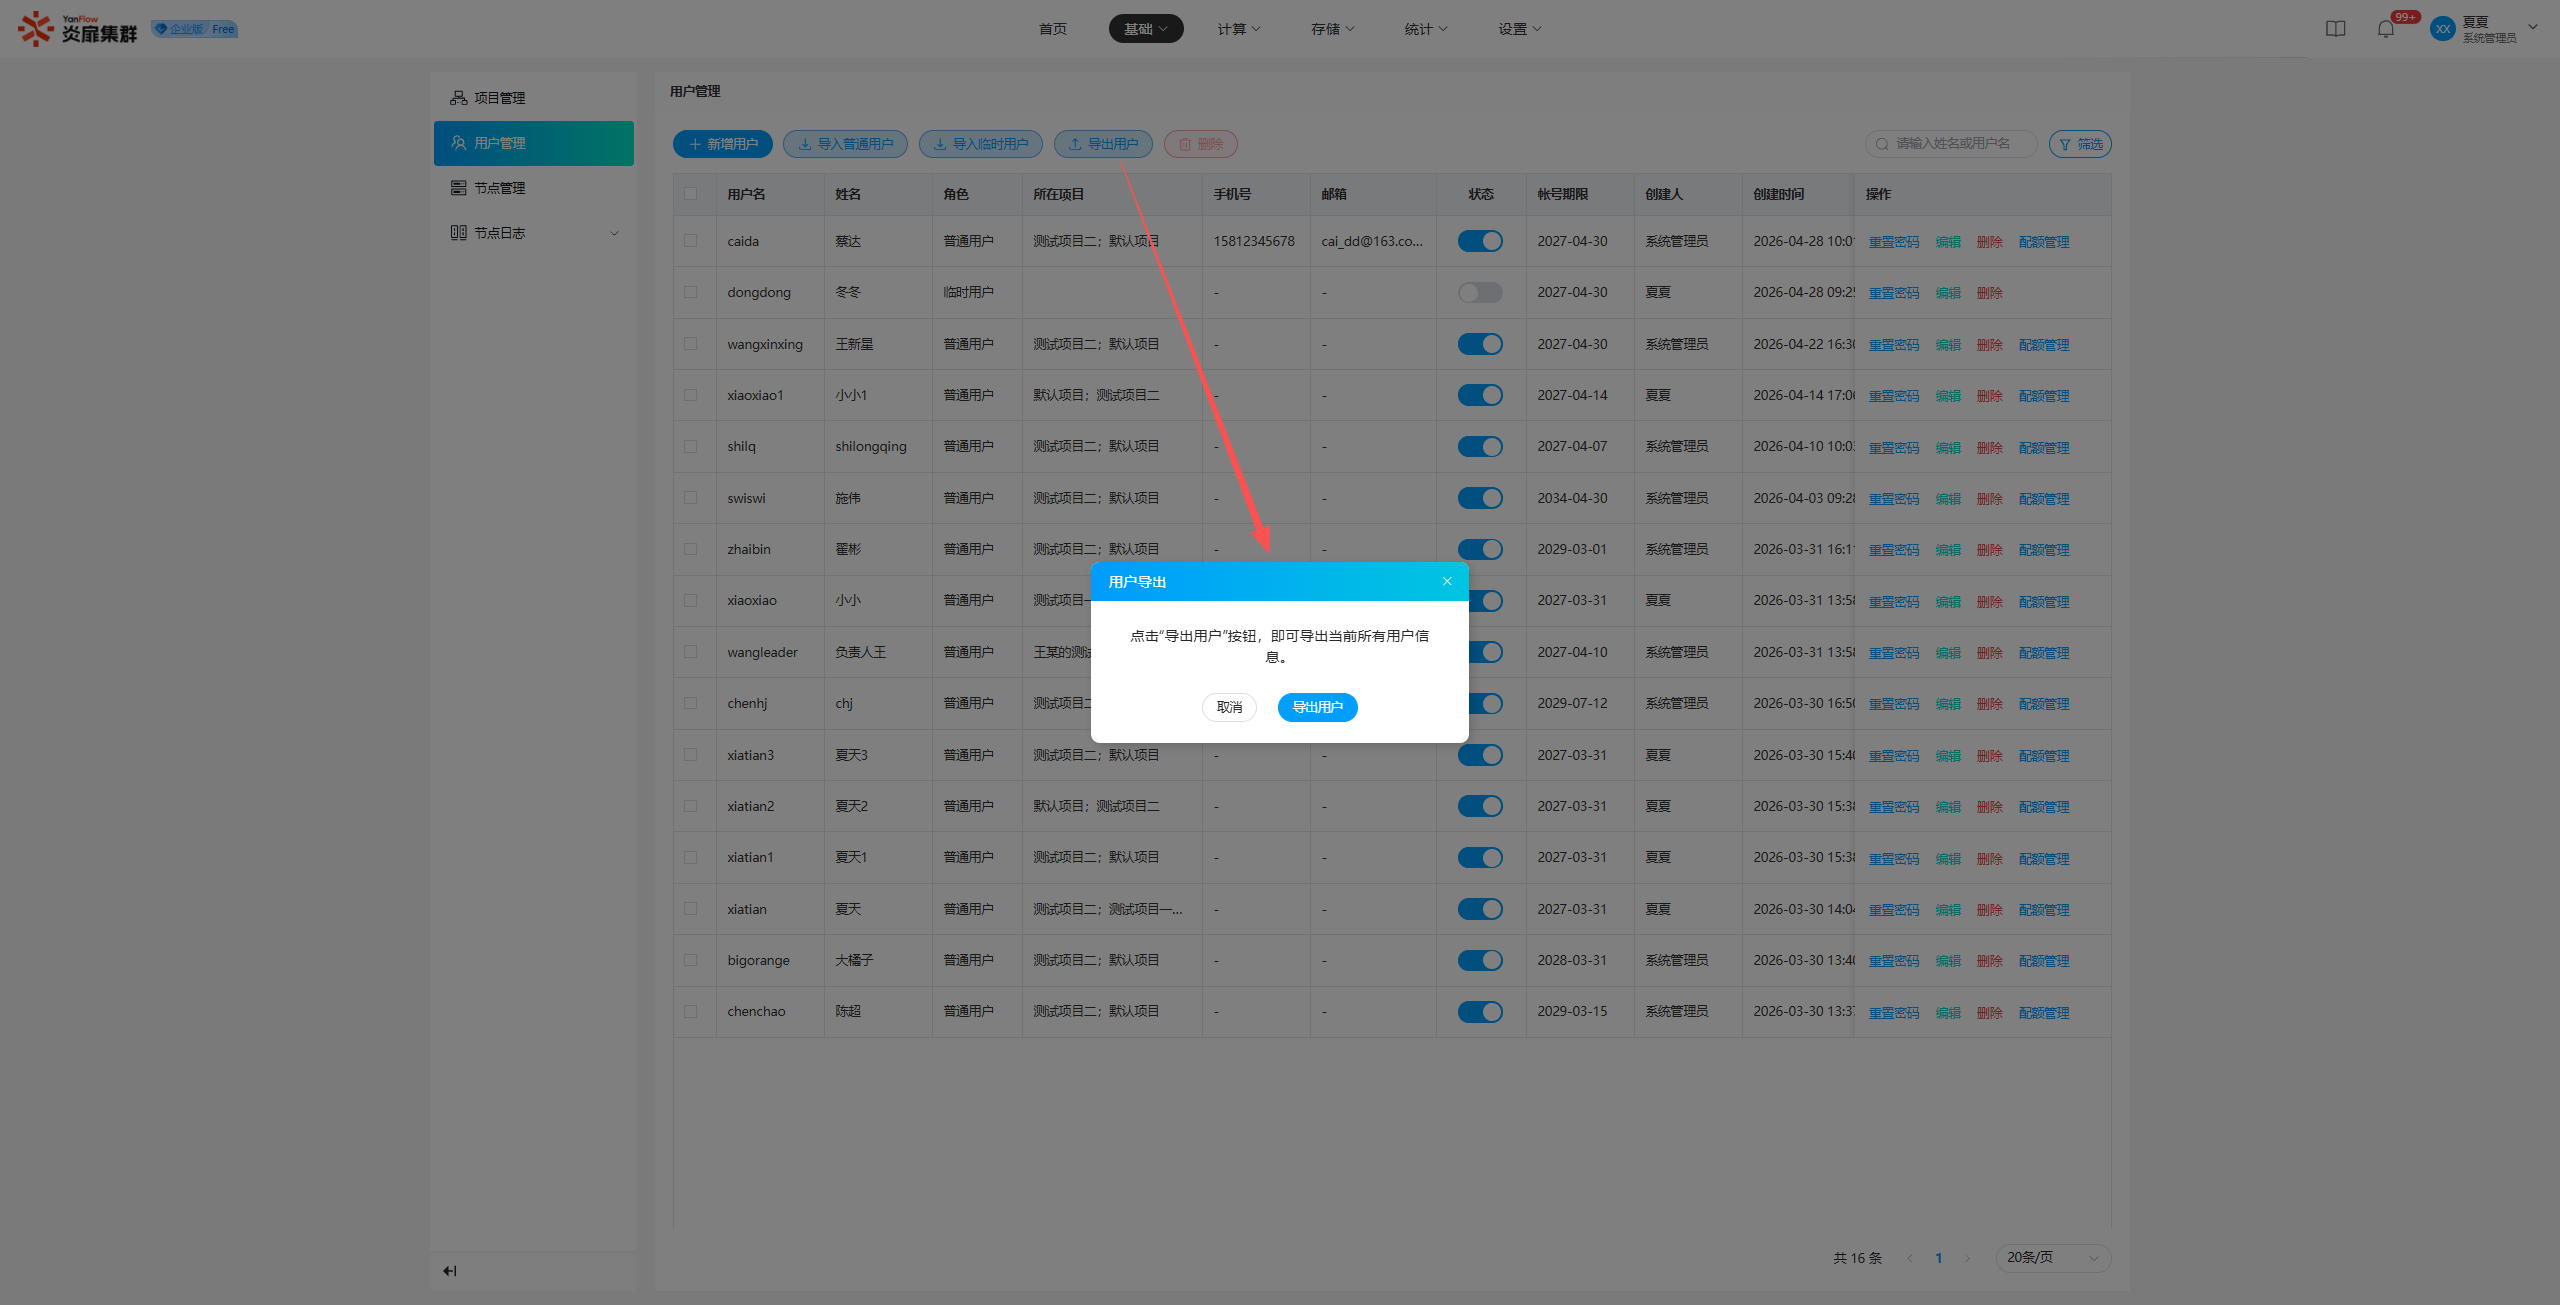
Click Export Users to show a prompt. Click Confirm to export the information of all regular and temporary users in the current system.
Node Management
Node List
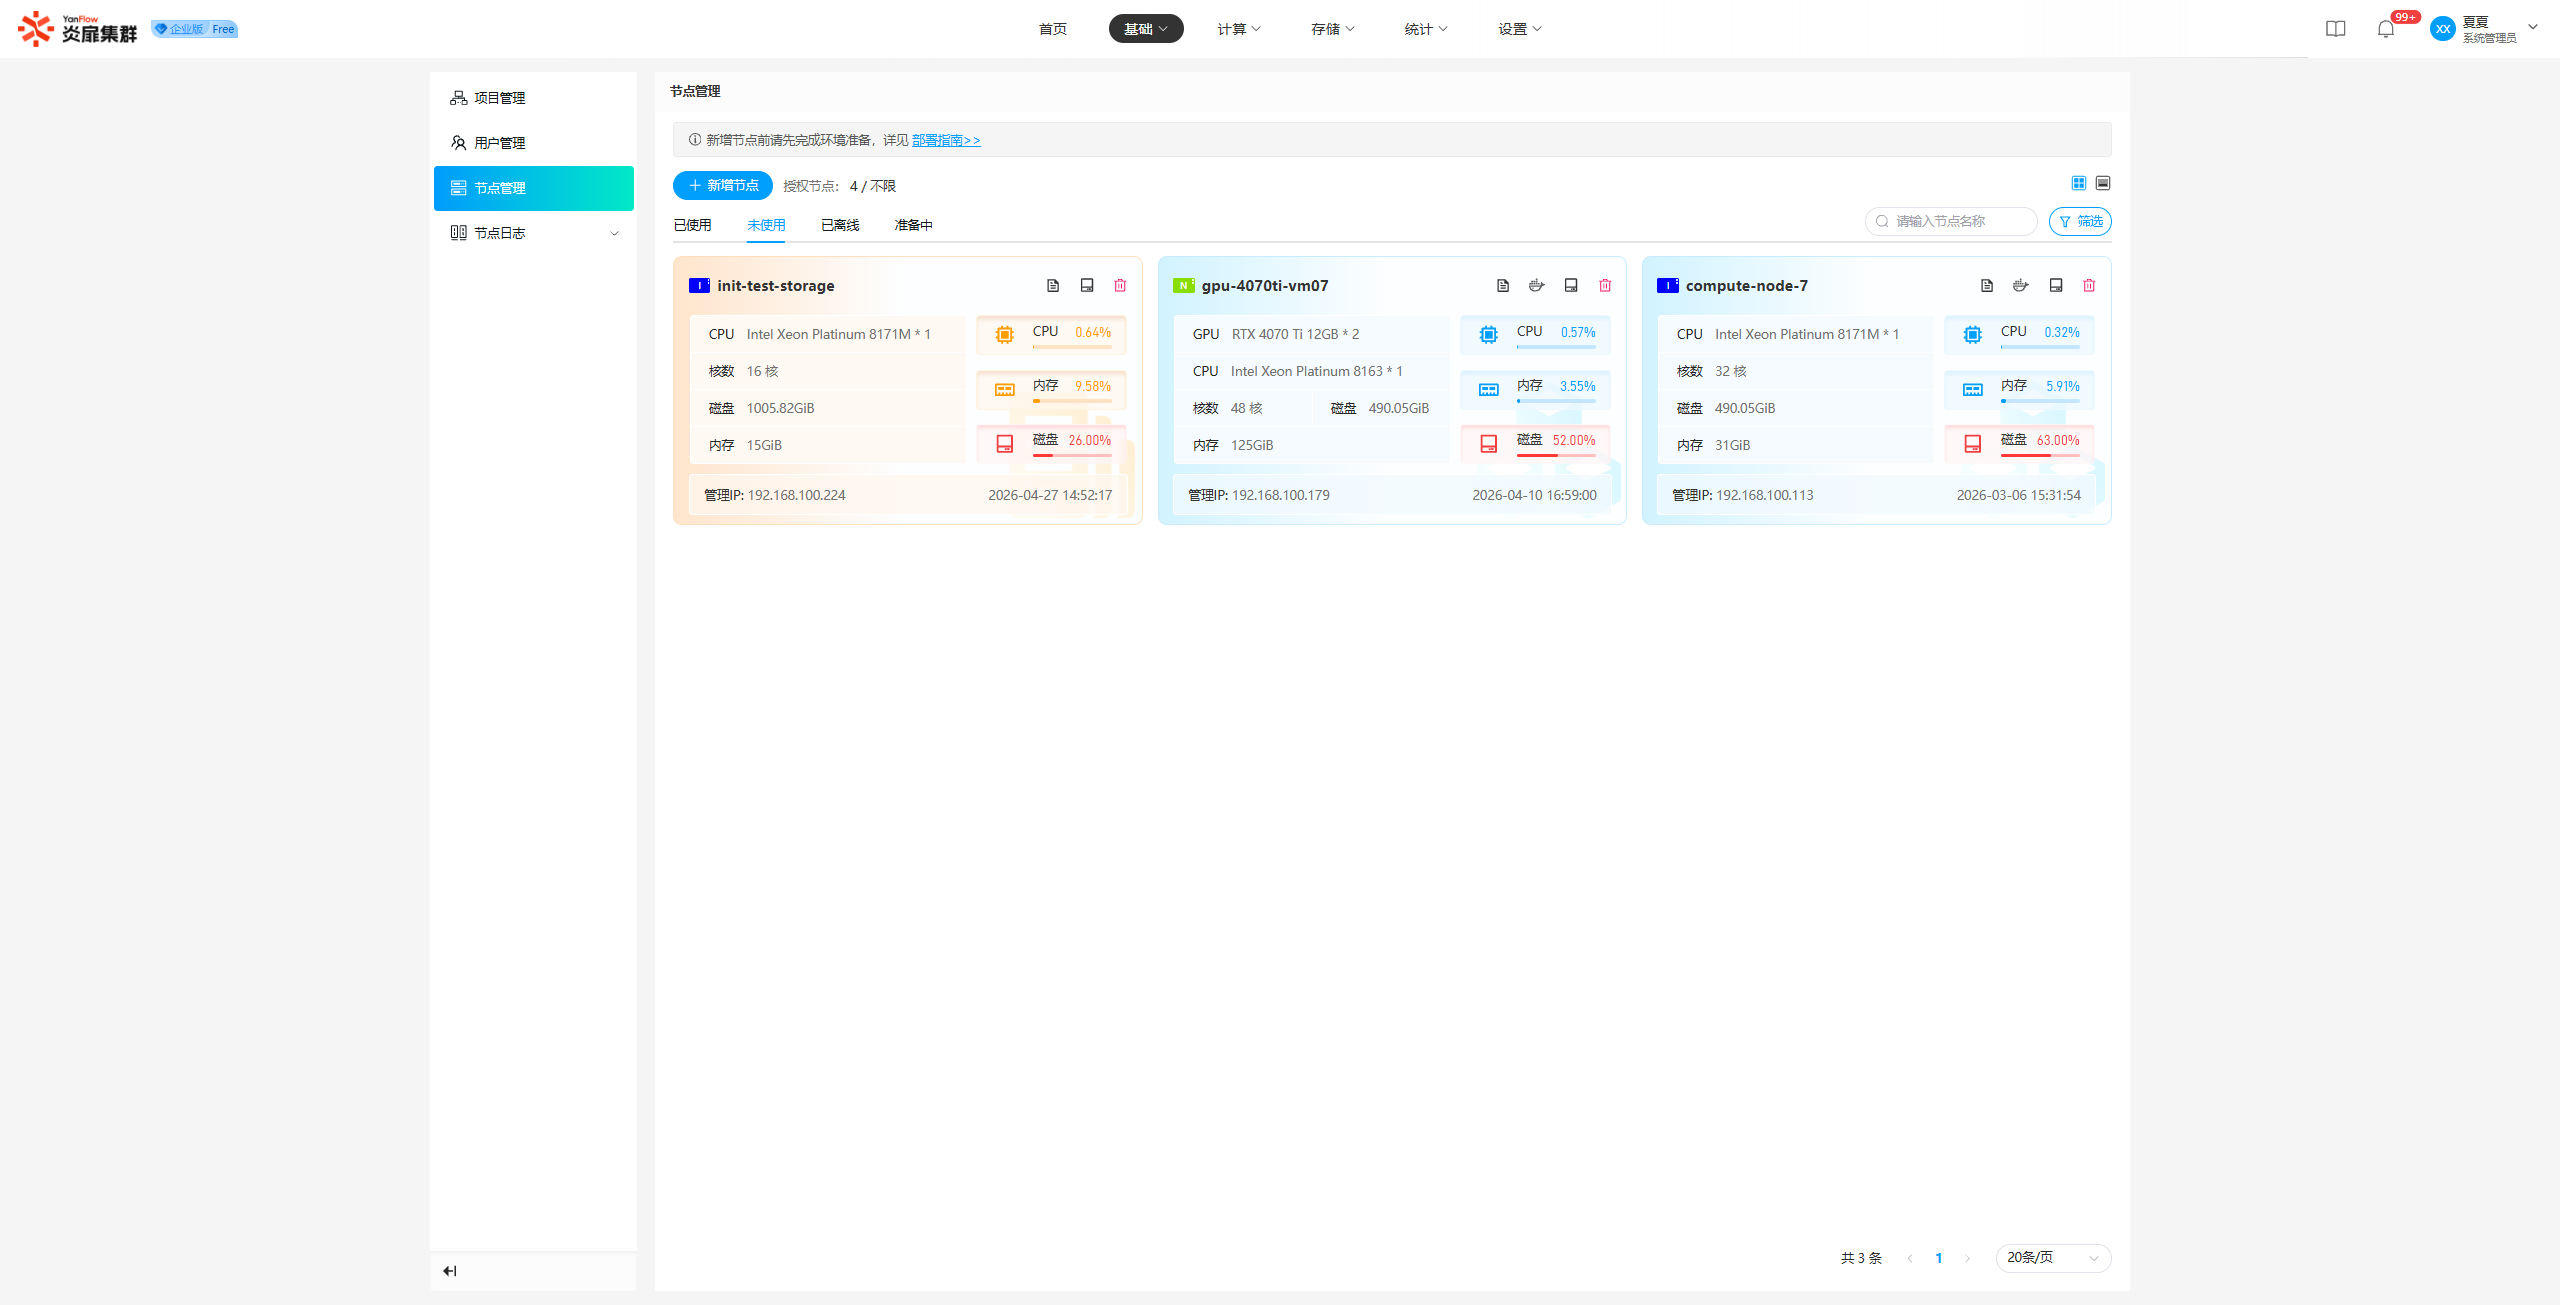
Provides two views: Card and Table. All nodes in the system are displayed according to their status, including Container Nodes and Virtual Machine (VM) Nodes. Supports keyword search by node name and filtering by node mode, GPU model, or CPU model.
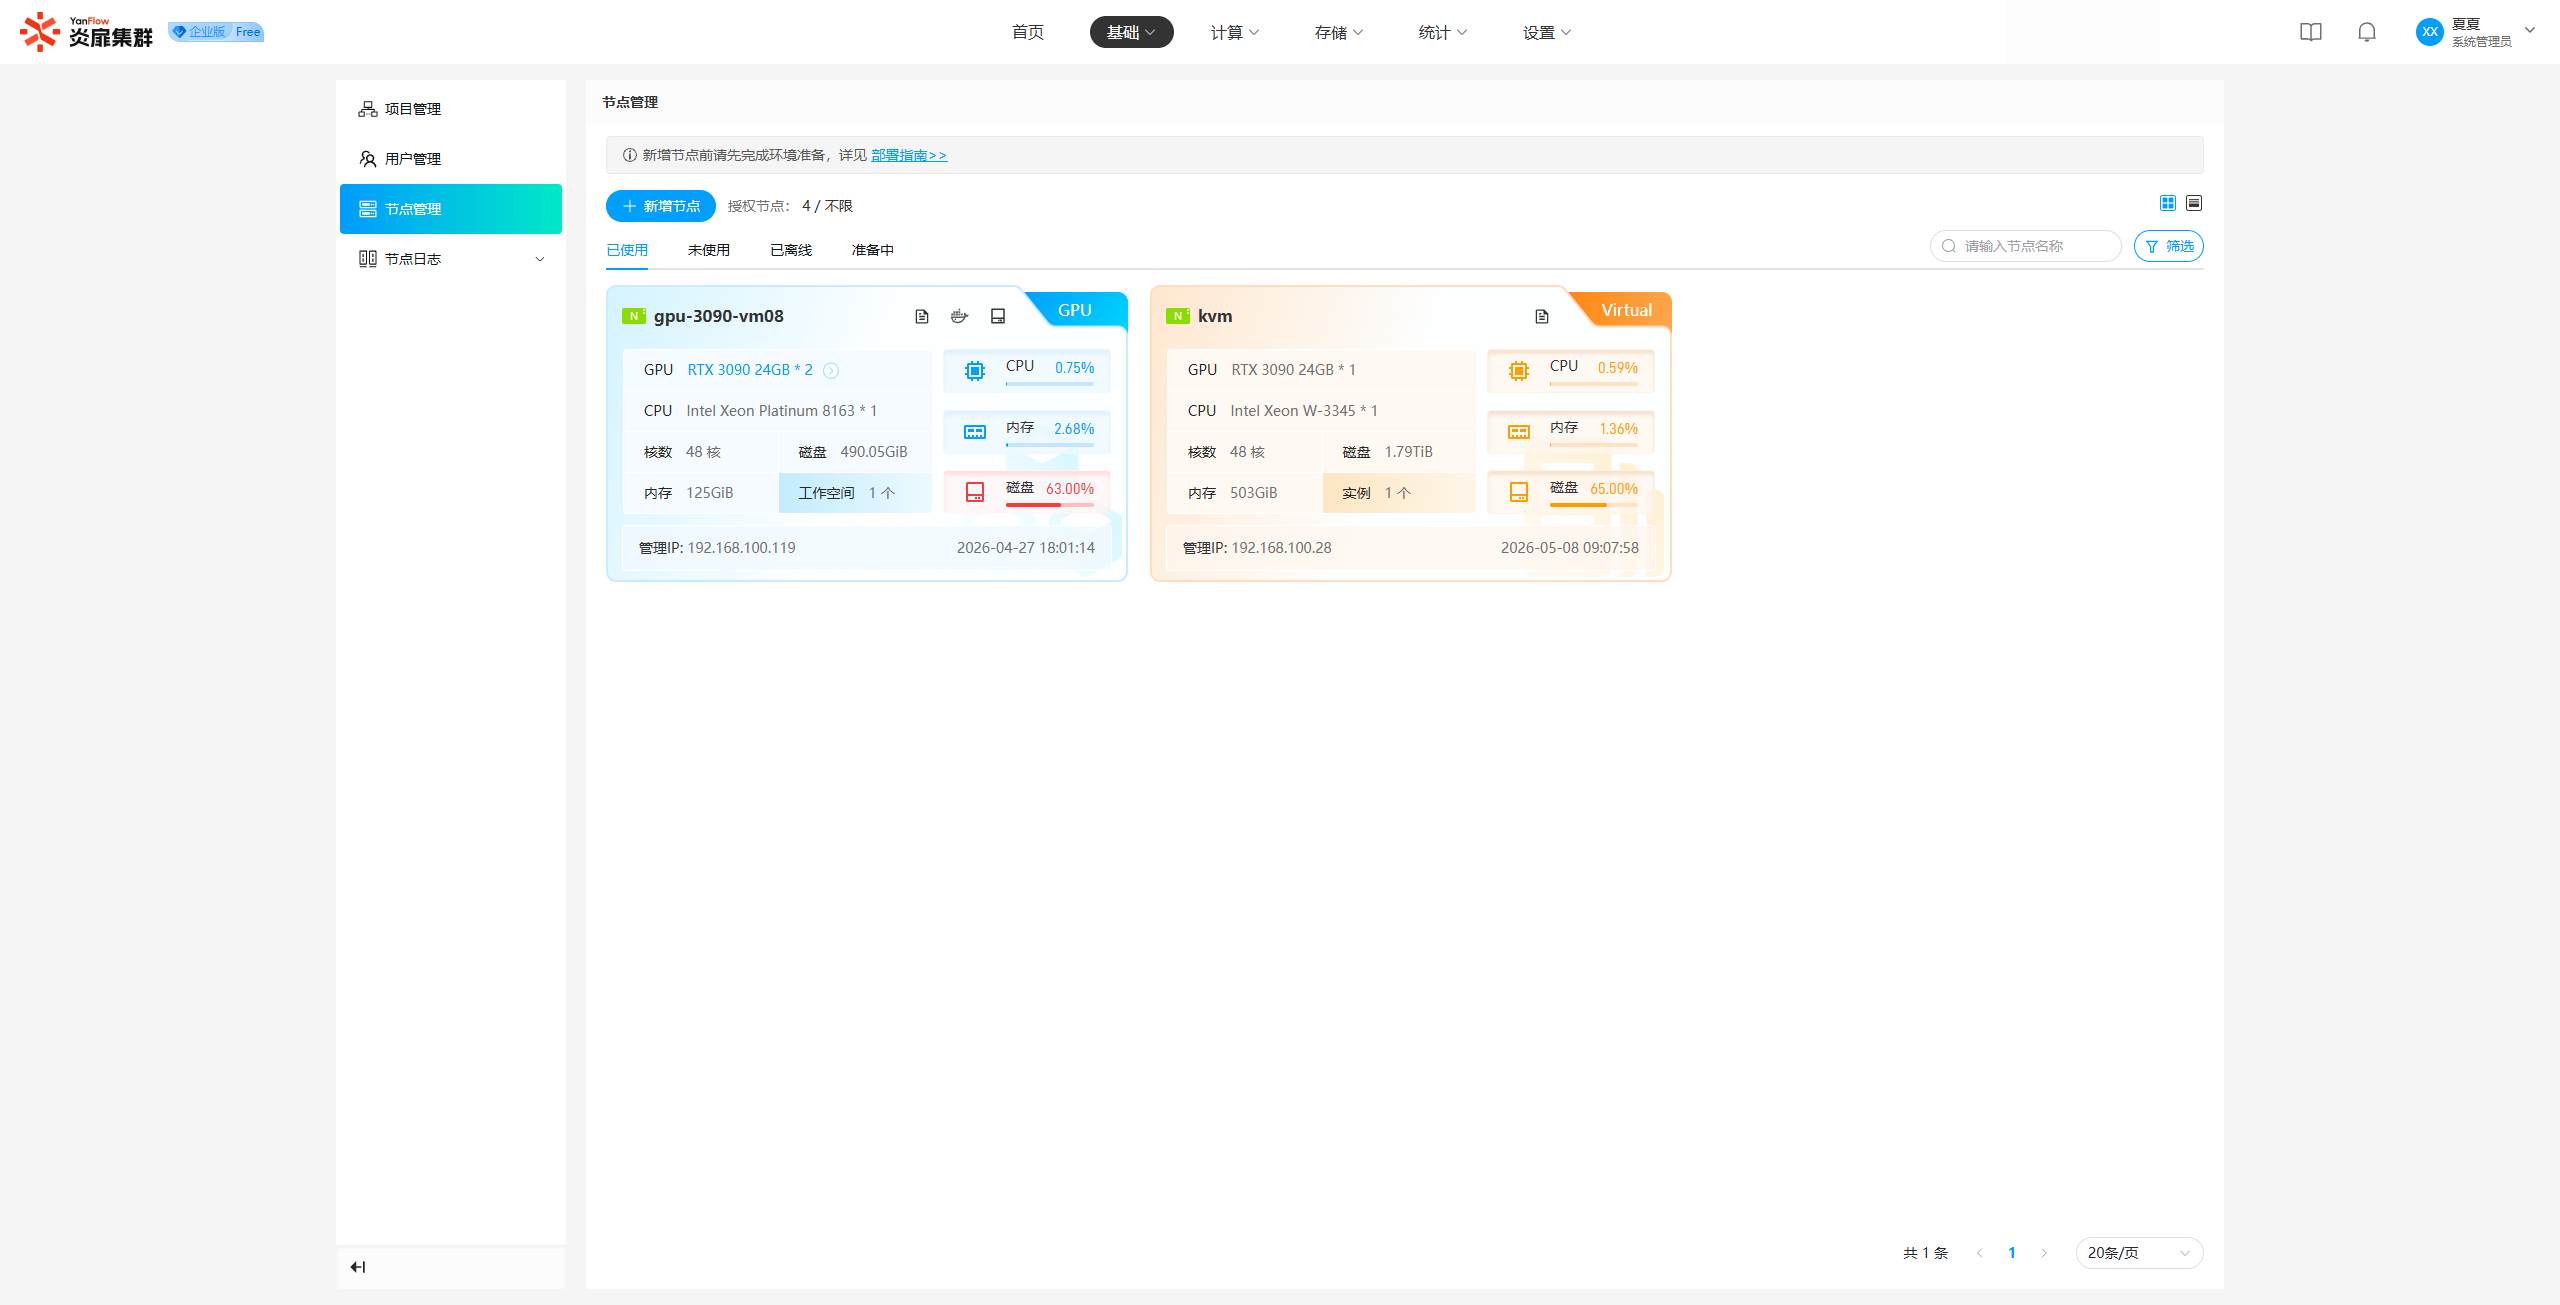
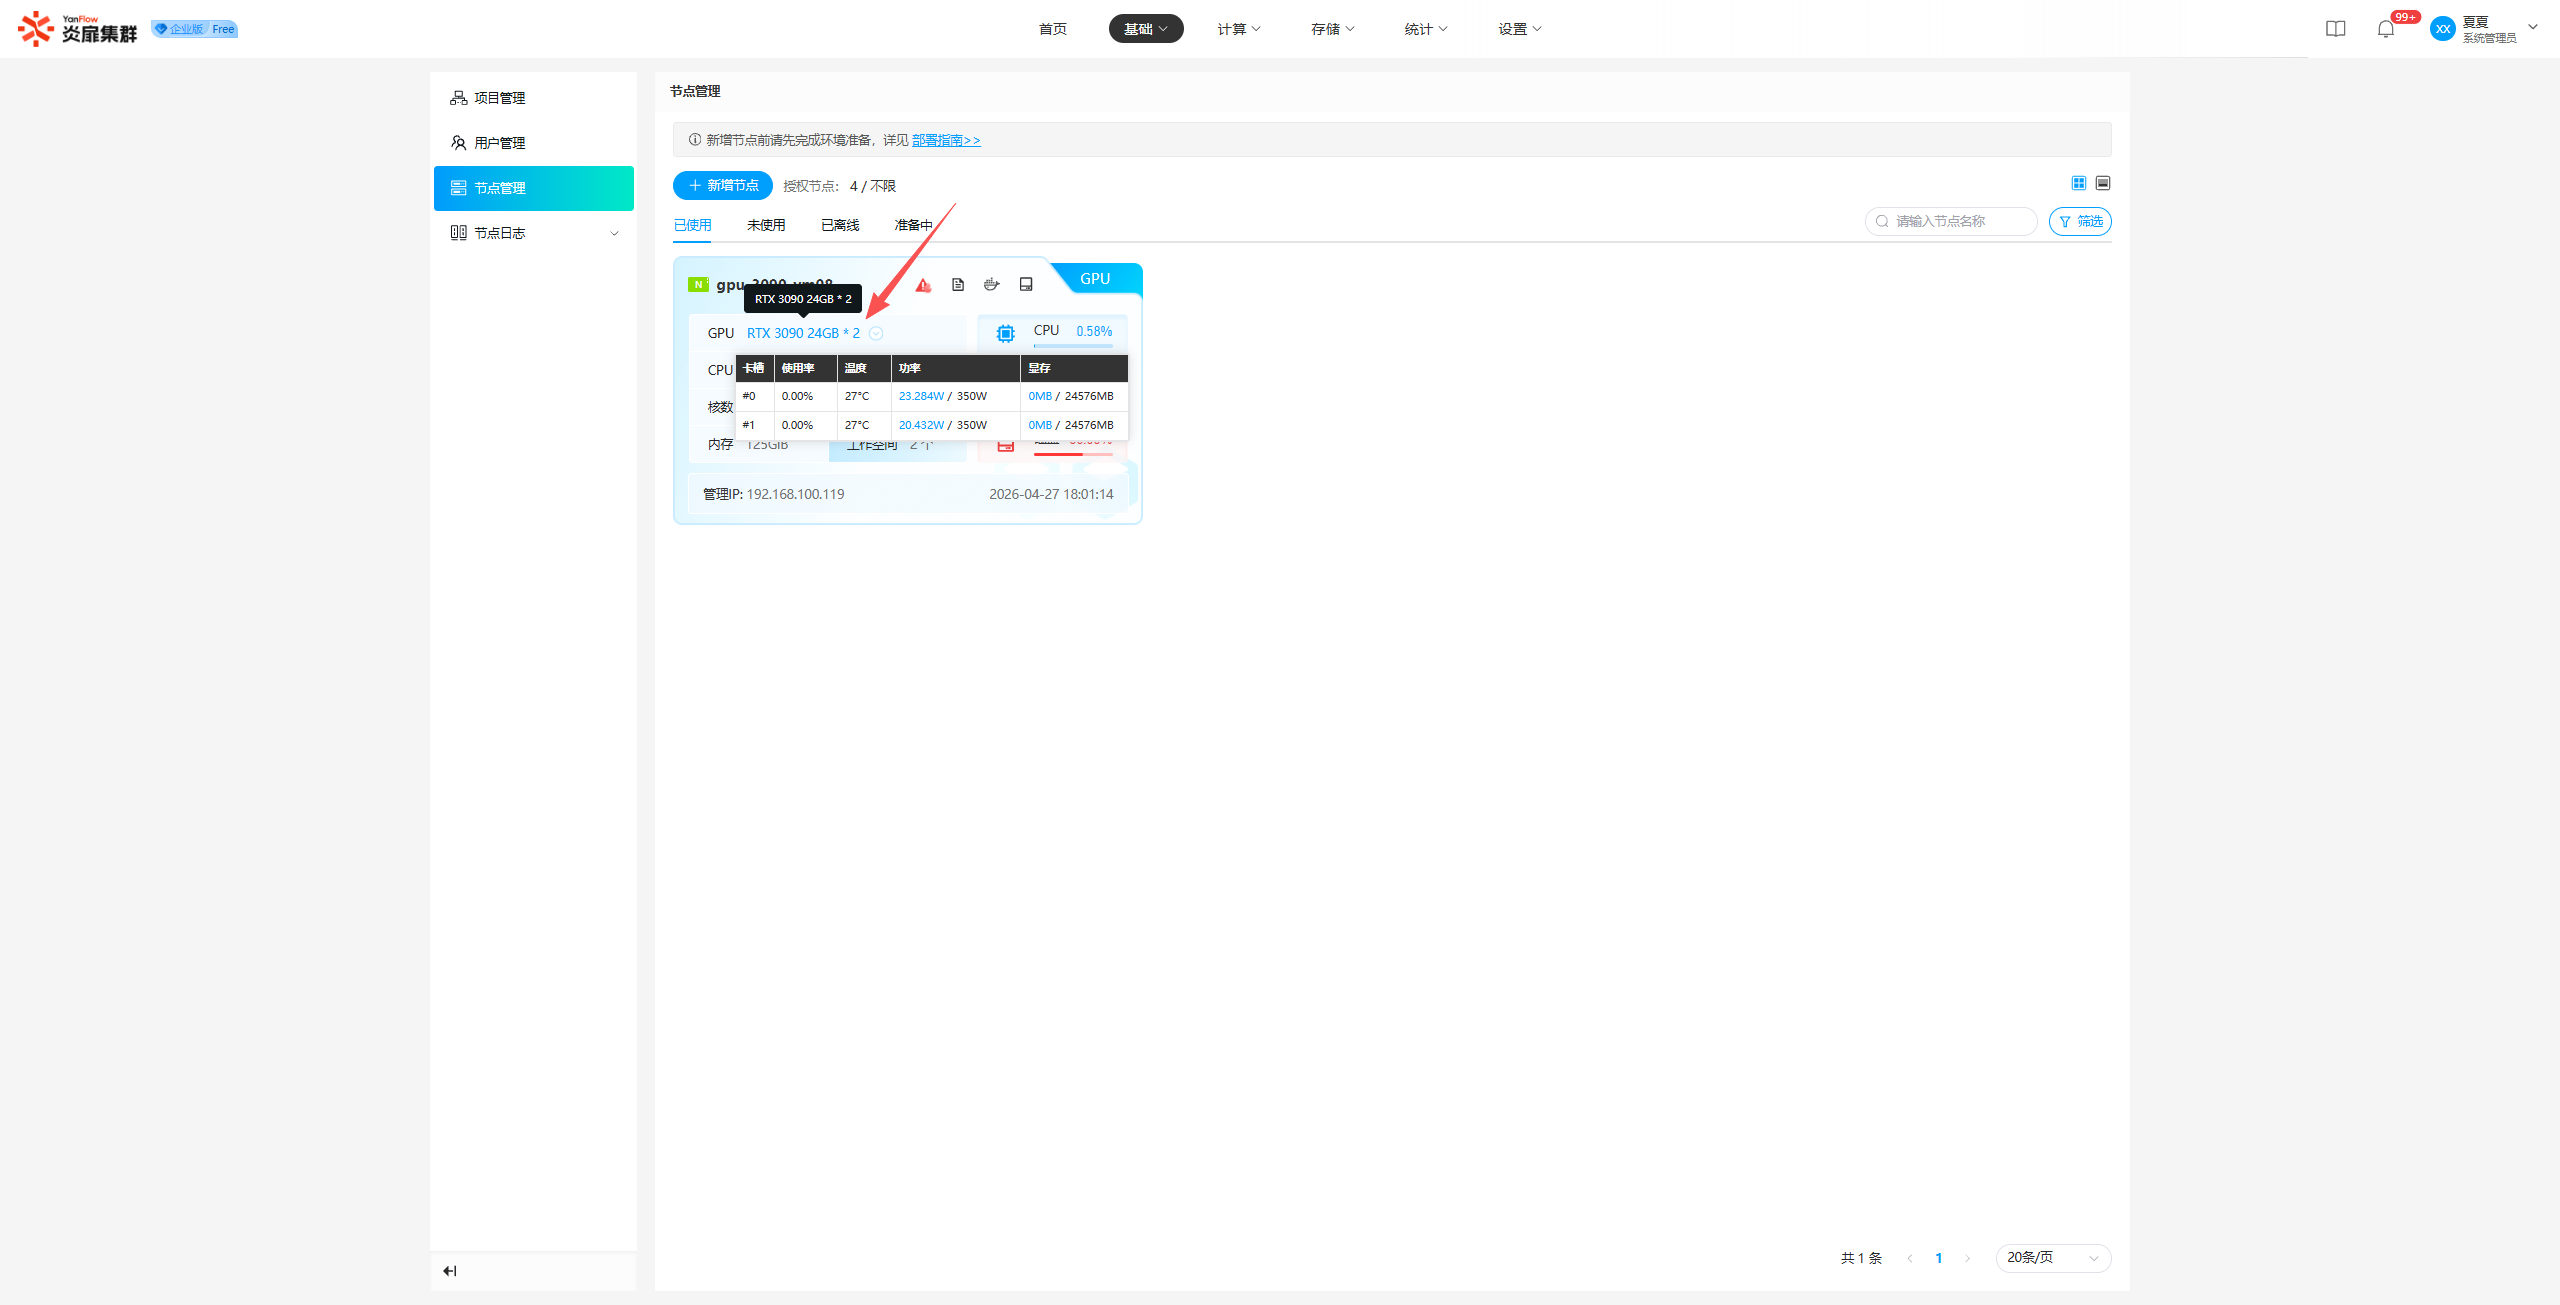
GPU Details: In Card view, for Container Nodes in an In Use state, click on the GPU Model to view GPU usage data. (This feature is only supported for Container Nodes).
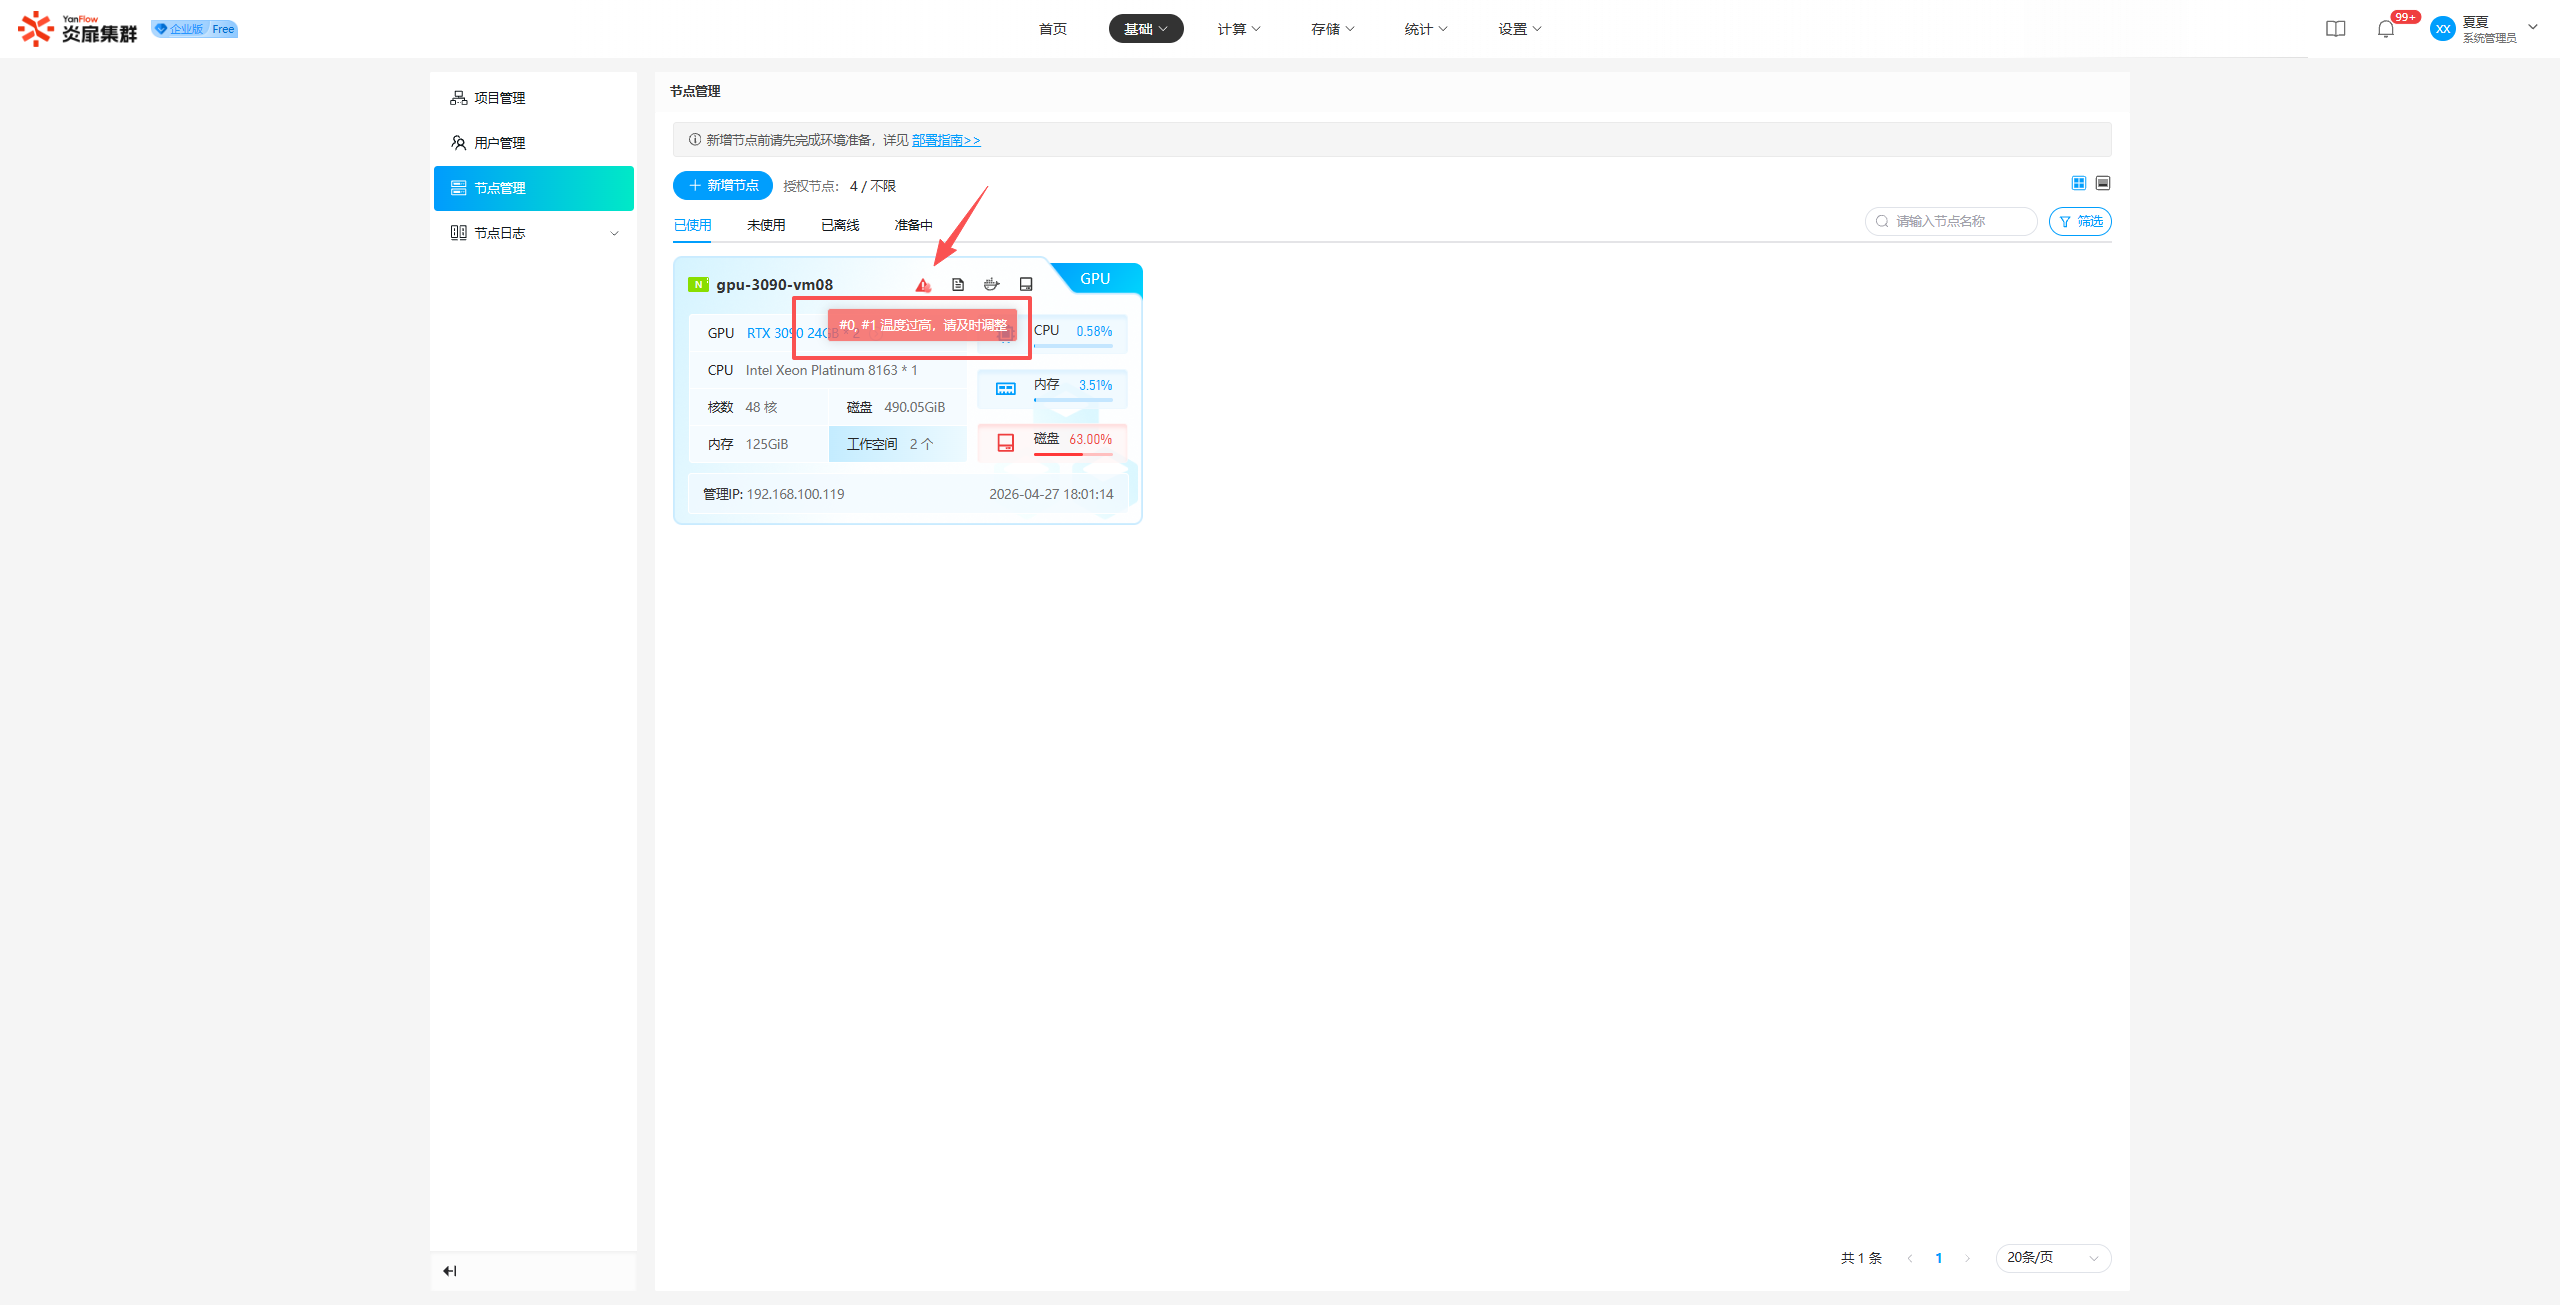
GPU Temperature Warning: If the GPU temperature exceeds the threshold, an alert icon will be displayed on the node in Card view. Hovering over the icon allows you to view the information of the overheating GPU slot.
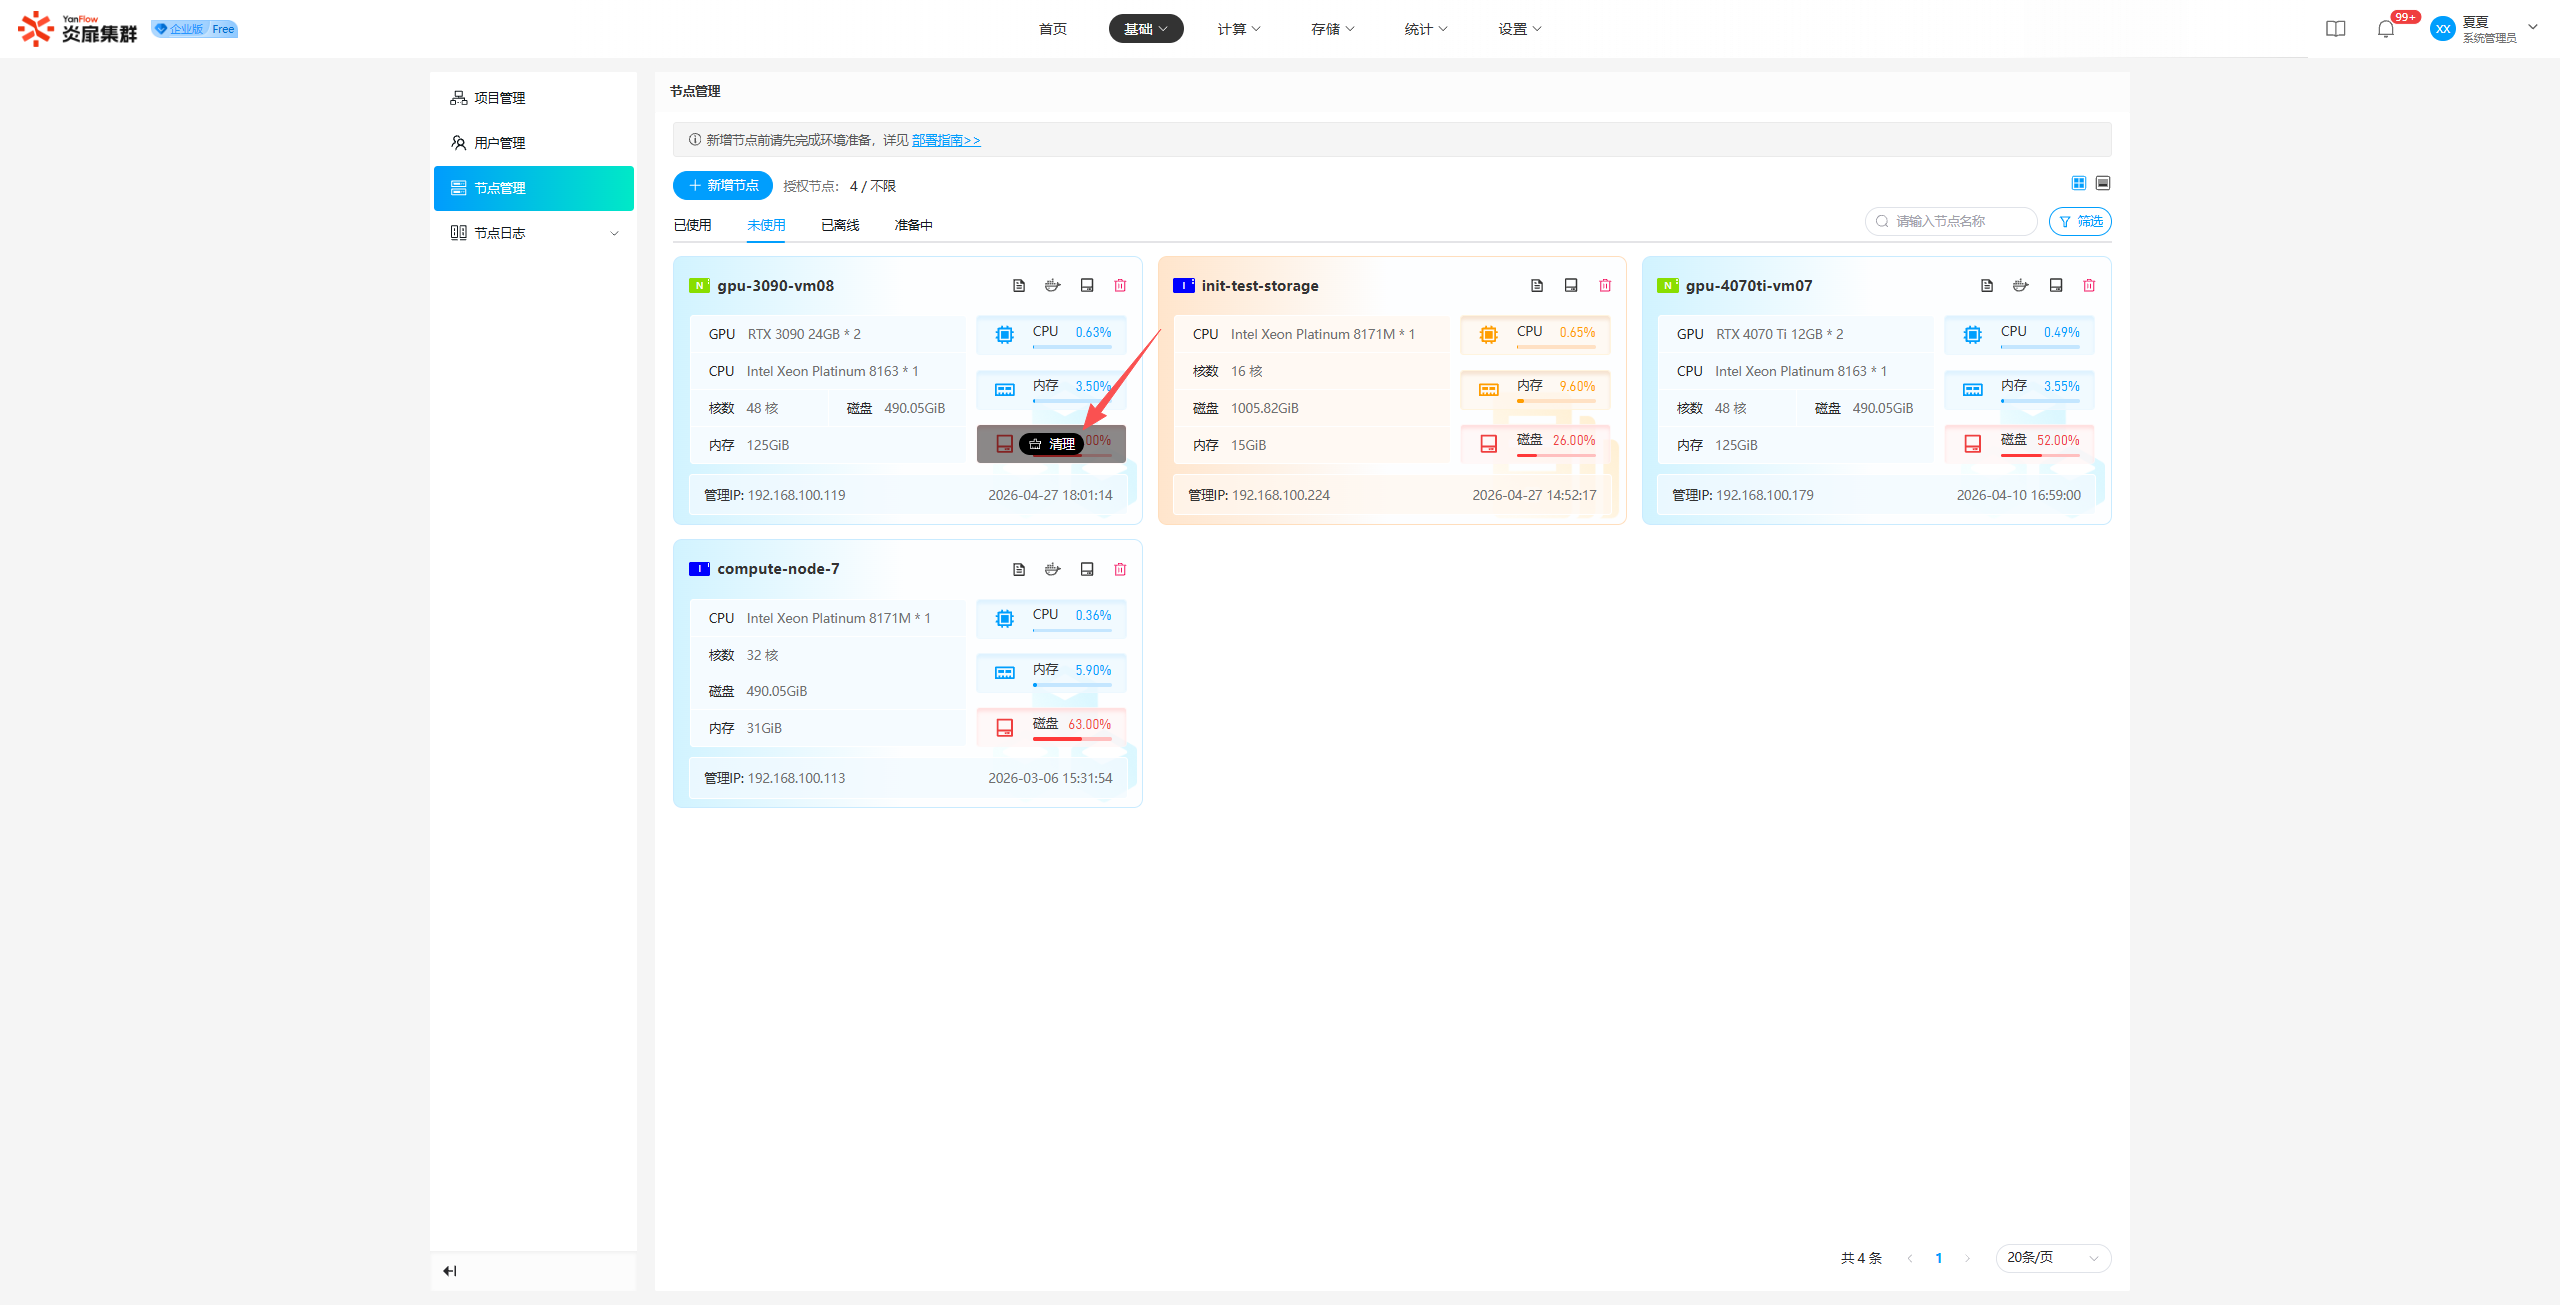
Disk Space Warning: If the node's disk space usage exceeds the threshold, the disk usage value will be highlighted in red in Card view. Hovering over it will show a Clean operation; clicking it will immediately clean the disk.
Note:
- When a node is in use, the system automatically configures its mode, such as
GPU,vGPU,CPU,Job,LLM, orVirtual.- The alert thresholds for GPU temperature and disk space are set by the System Administrator inThreshold Settings .
Add Node
Click Add Node to open the creation popup. Enter basic information: Node Type, Resource Type, Node Management IP, Node Storage IP, Port, root password, etc. Click the Node Verification button; once verification is successful, the node name will be displayed.
Click the Get Machine Configuration button to display the machine's configuration and the system's recommended configuration. Click Confirm Add to execute the addition. Once successful, the node information will refresh.
Note: If your machine configuration is lower than the recommended requirements, the system still supports adding the node, but this may lead to insufficient performance or abnormal operation. To ensure the best experience, it is recommended to upgrade your machine to the recommended configuration or higher.
Disk Management
Unused Nodes: Click Disk Management to open the disk management popup.
- If no storage disk has been set: You can follow the steps to set up a storage disk.
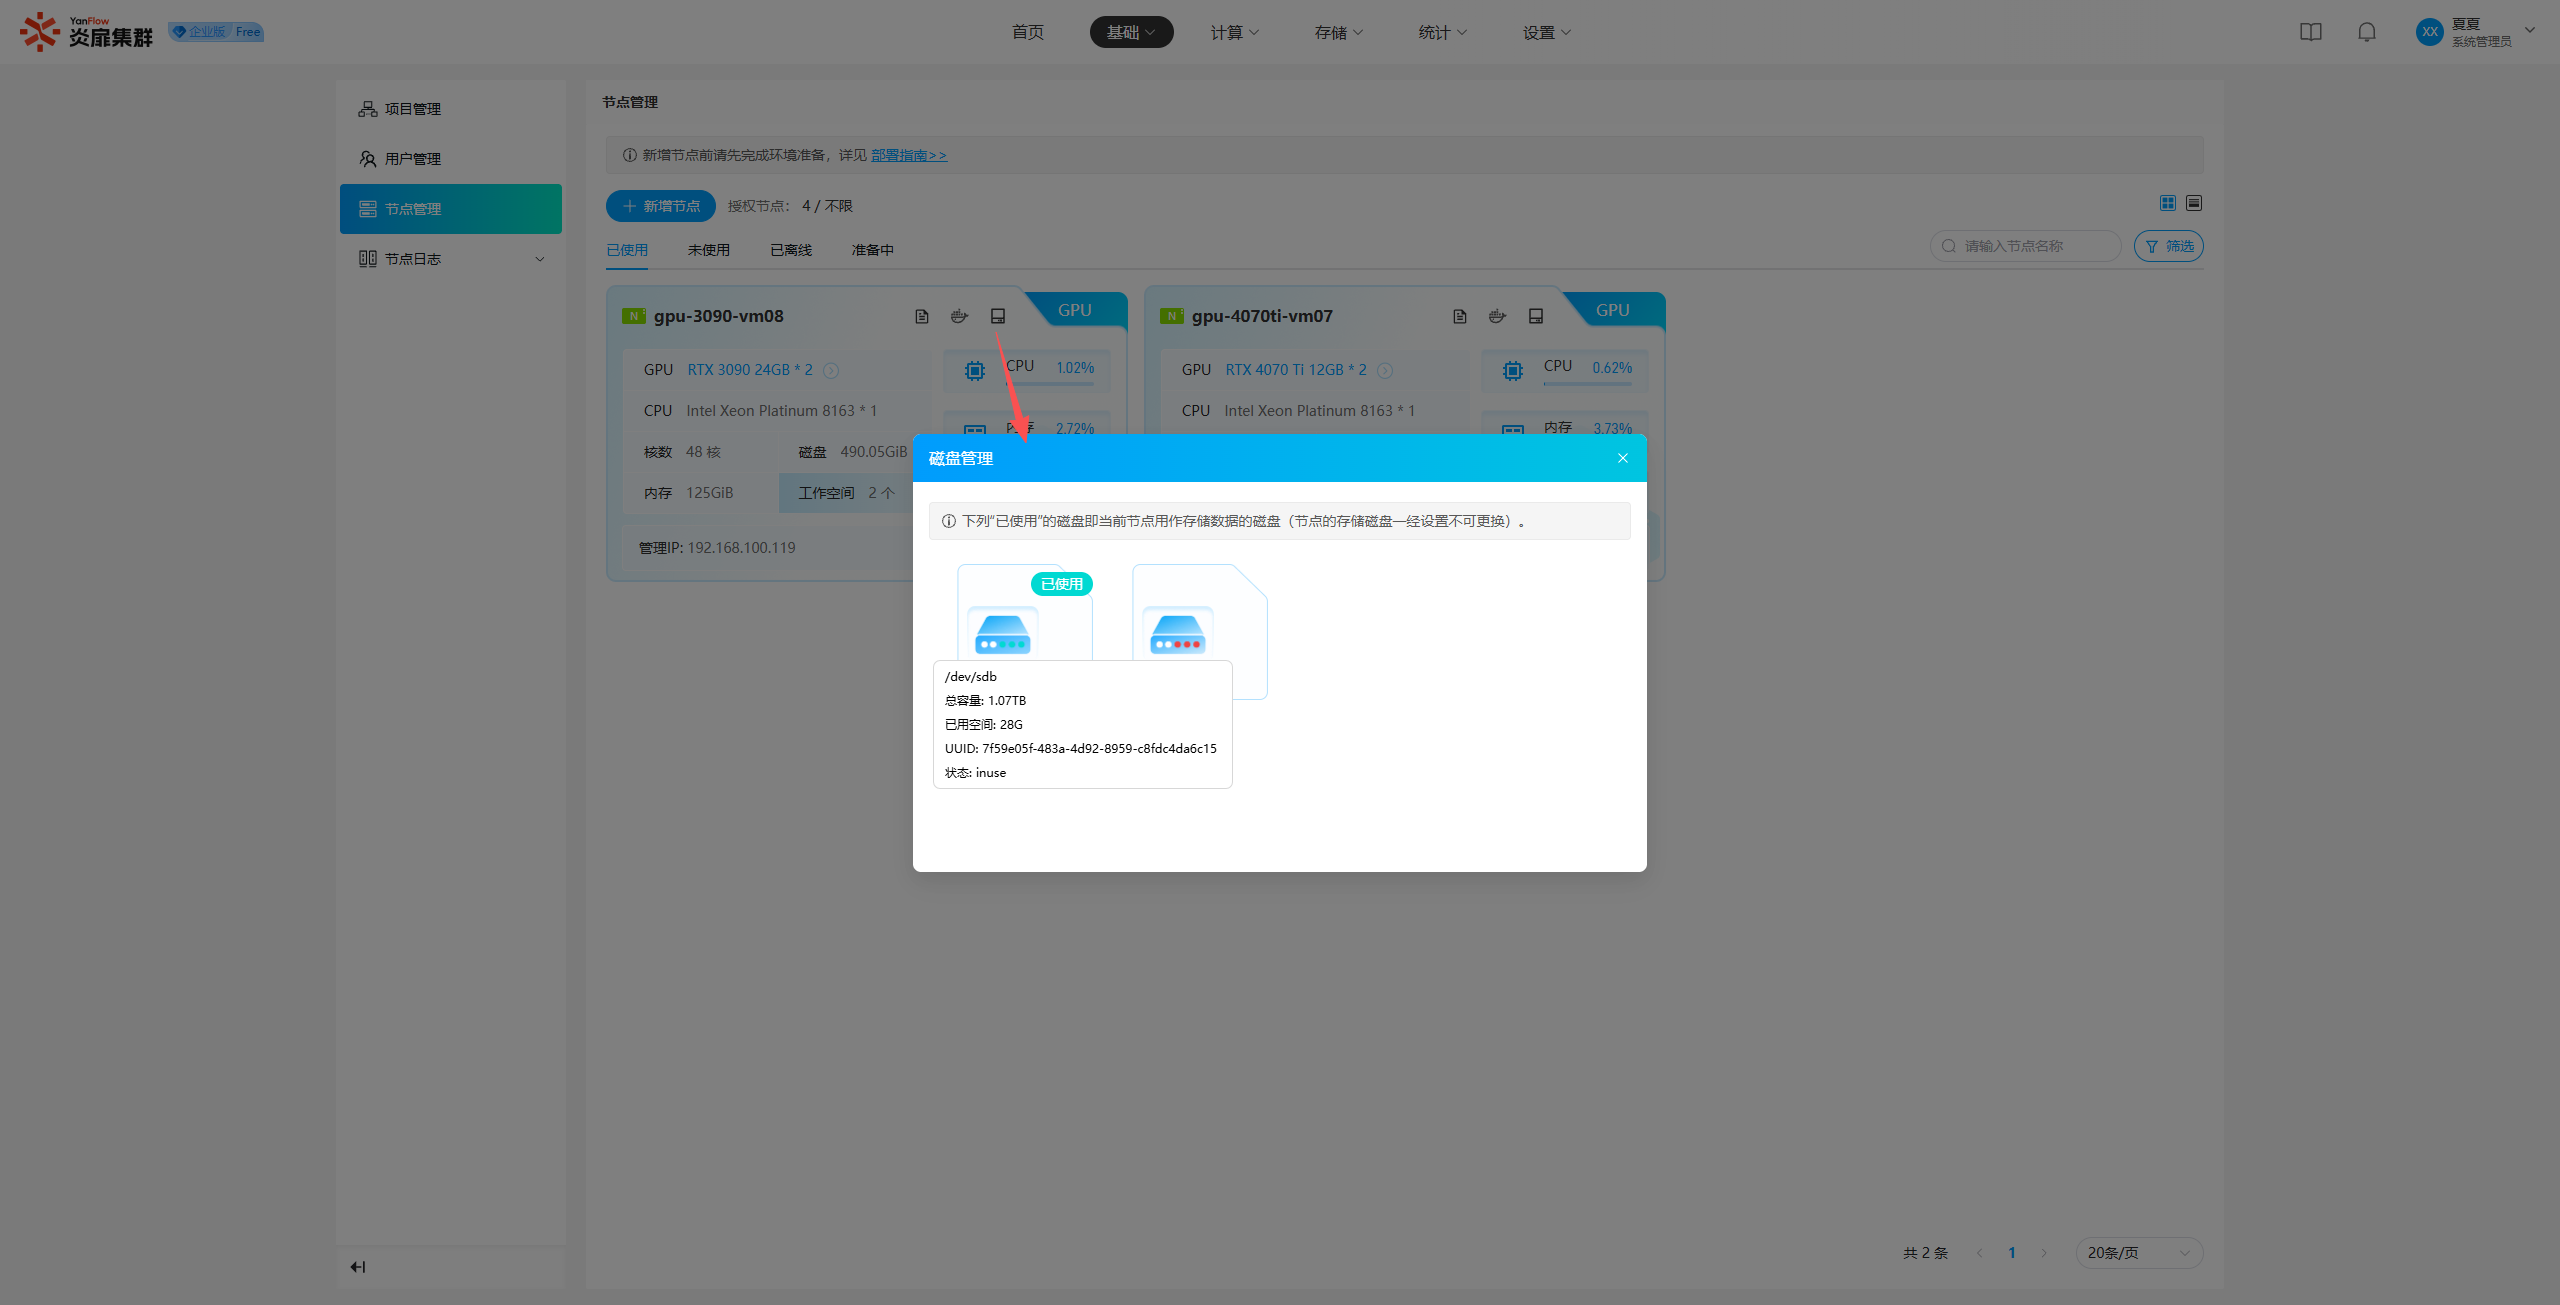
- If a storage disk has already been set: All disks under that node are displayed. Disks marked as In Use have been set as storage disks. Hovering over them allows you to view detailed disk information.
In-Use Nodes: Click Disk Management to show a popup displaying the information of the disks used for storage on that node. Hovering over them shows detailed information.
Note:
- To manage node disks, please ensure the system architecture is Converged Architecture; this feature is not provided under Professional Architecture.
- Once the node's storage disk is set, it cannot be changed.
Node Details
Click Details to view detailed information about the node, including basic info, CPU/Memory/Disk usage, workspace information, GPU information, etc.
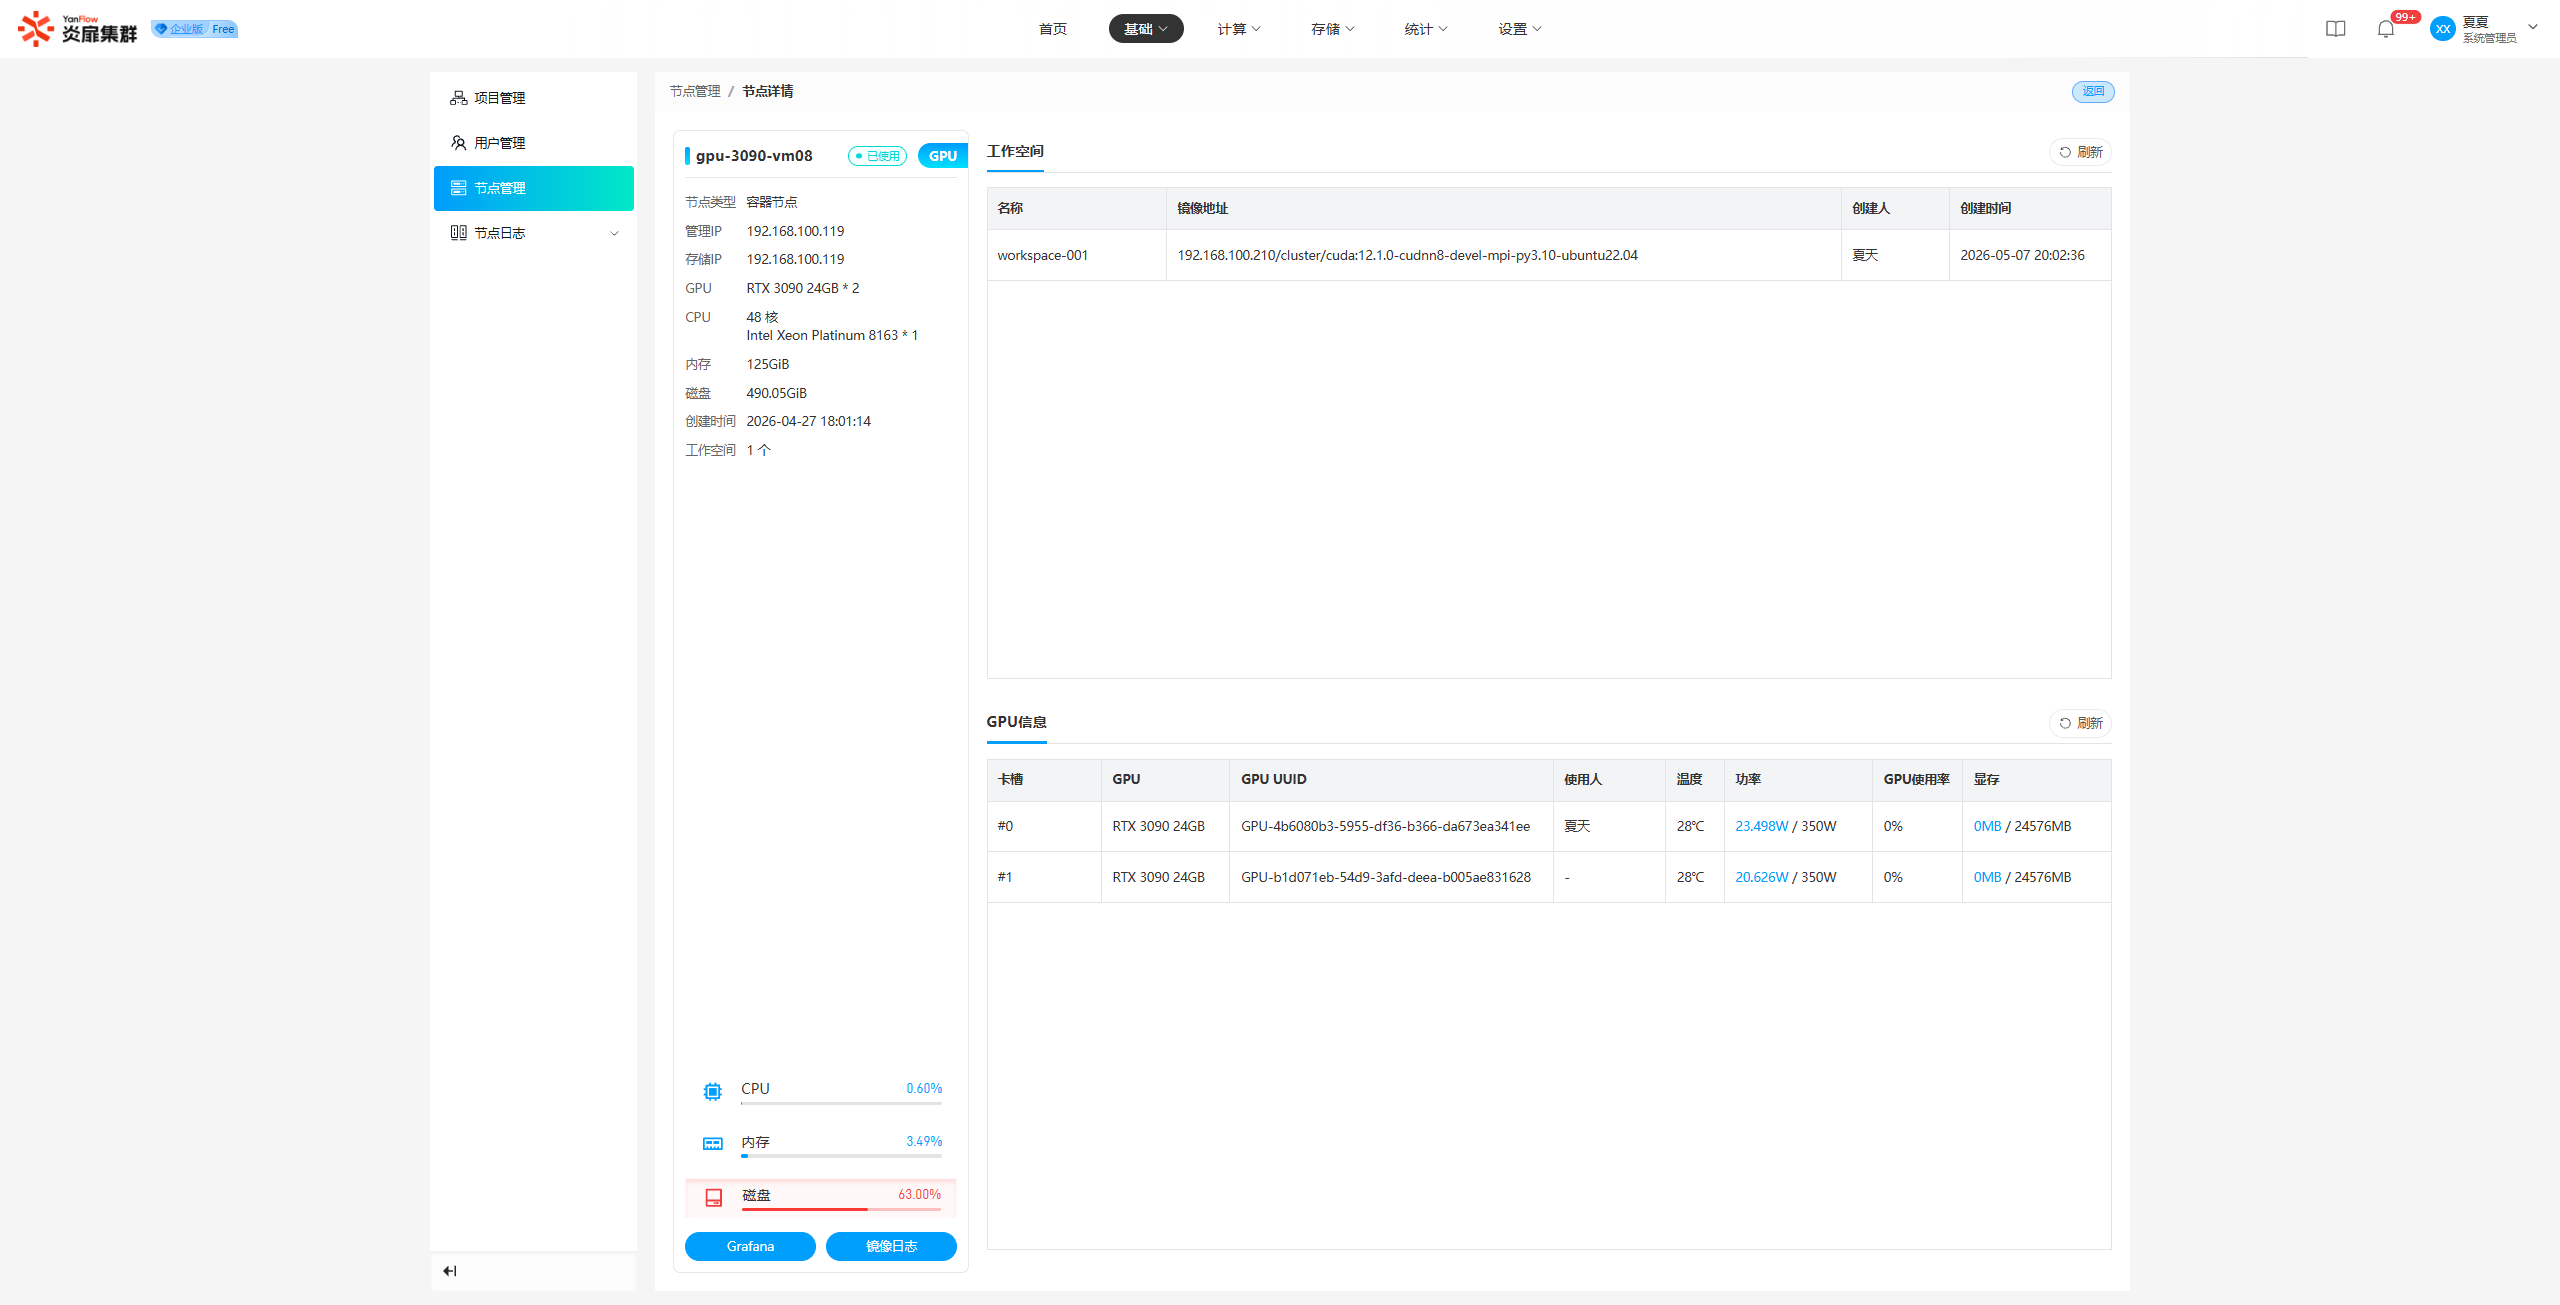
On the details page, click Grafana to display the Grafana monitoring dashboard. Click Image Logs to open the image log page for that node.
Node Images
Click Images to view all image information on that node. Supports keyword search by image address or Image ID.
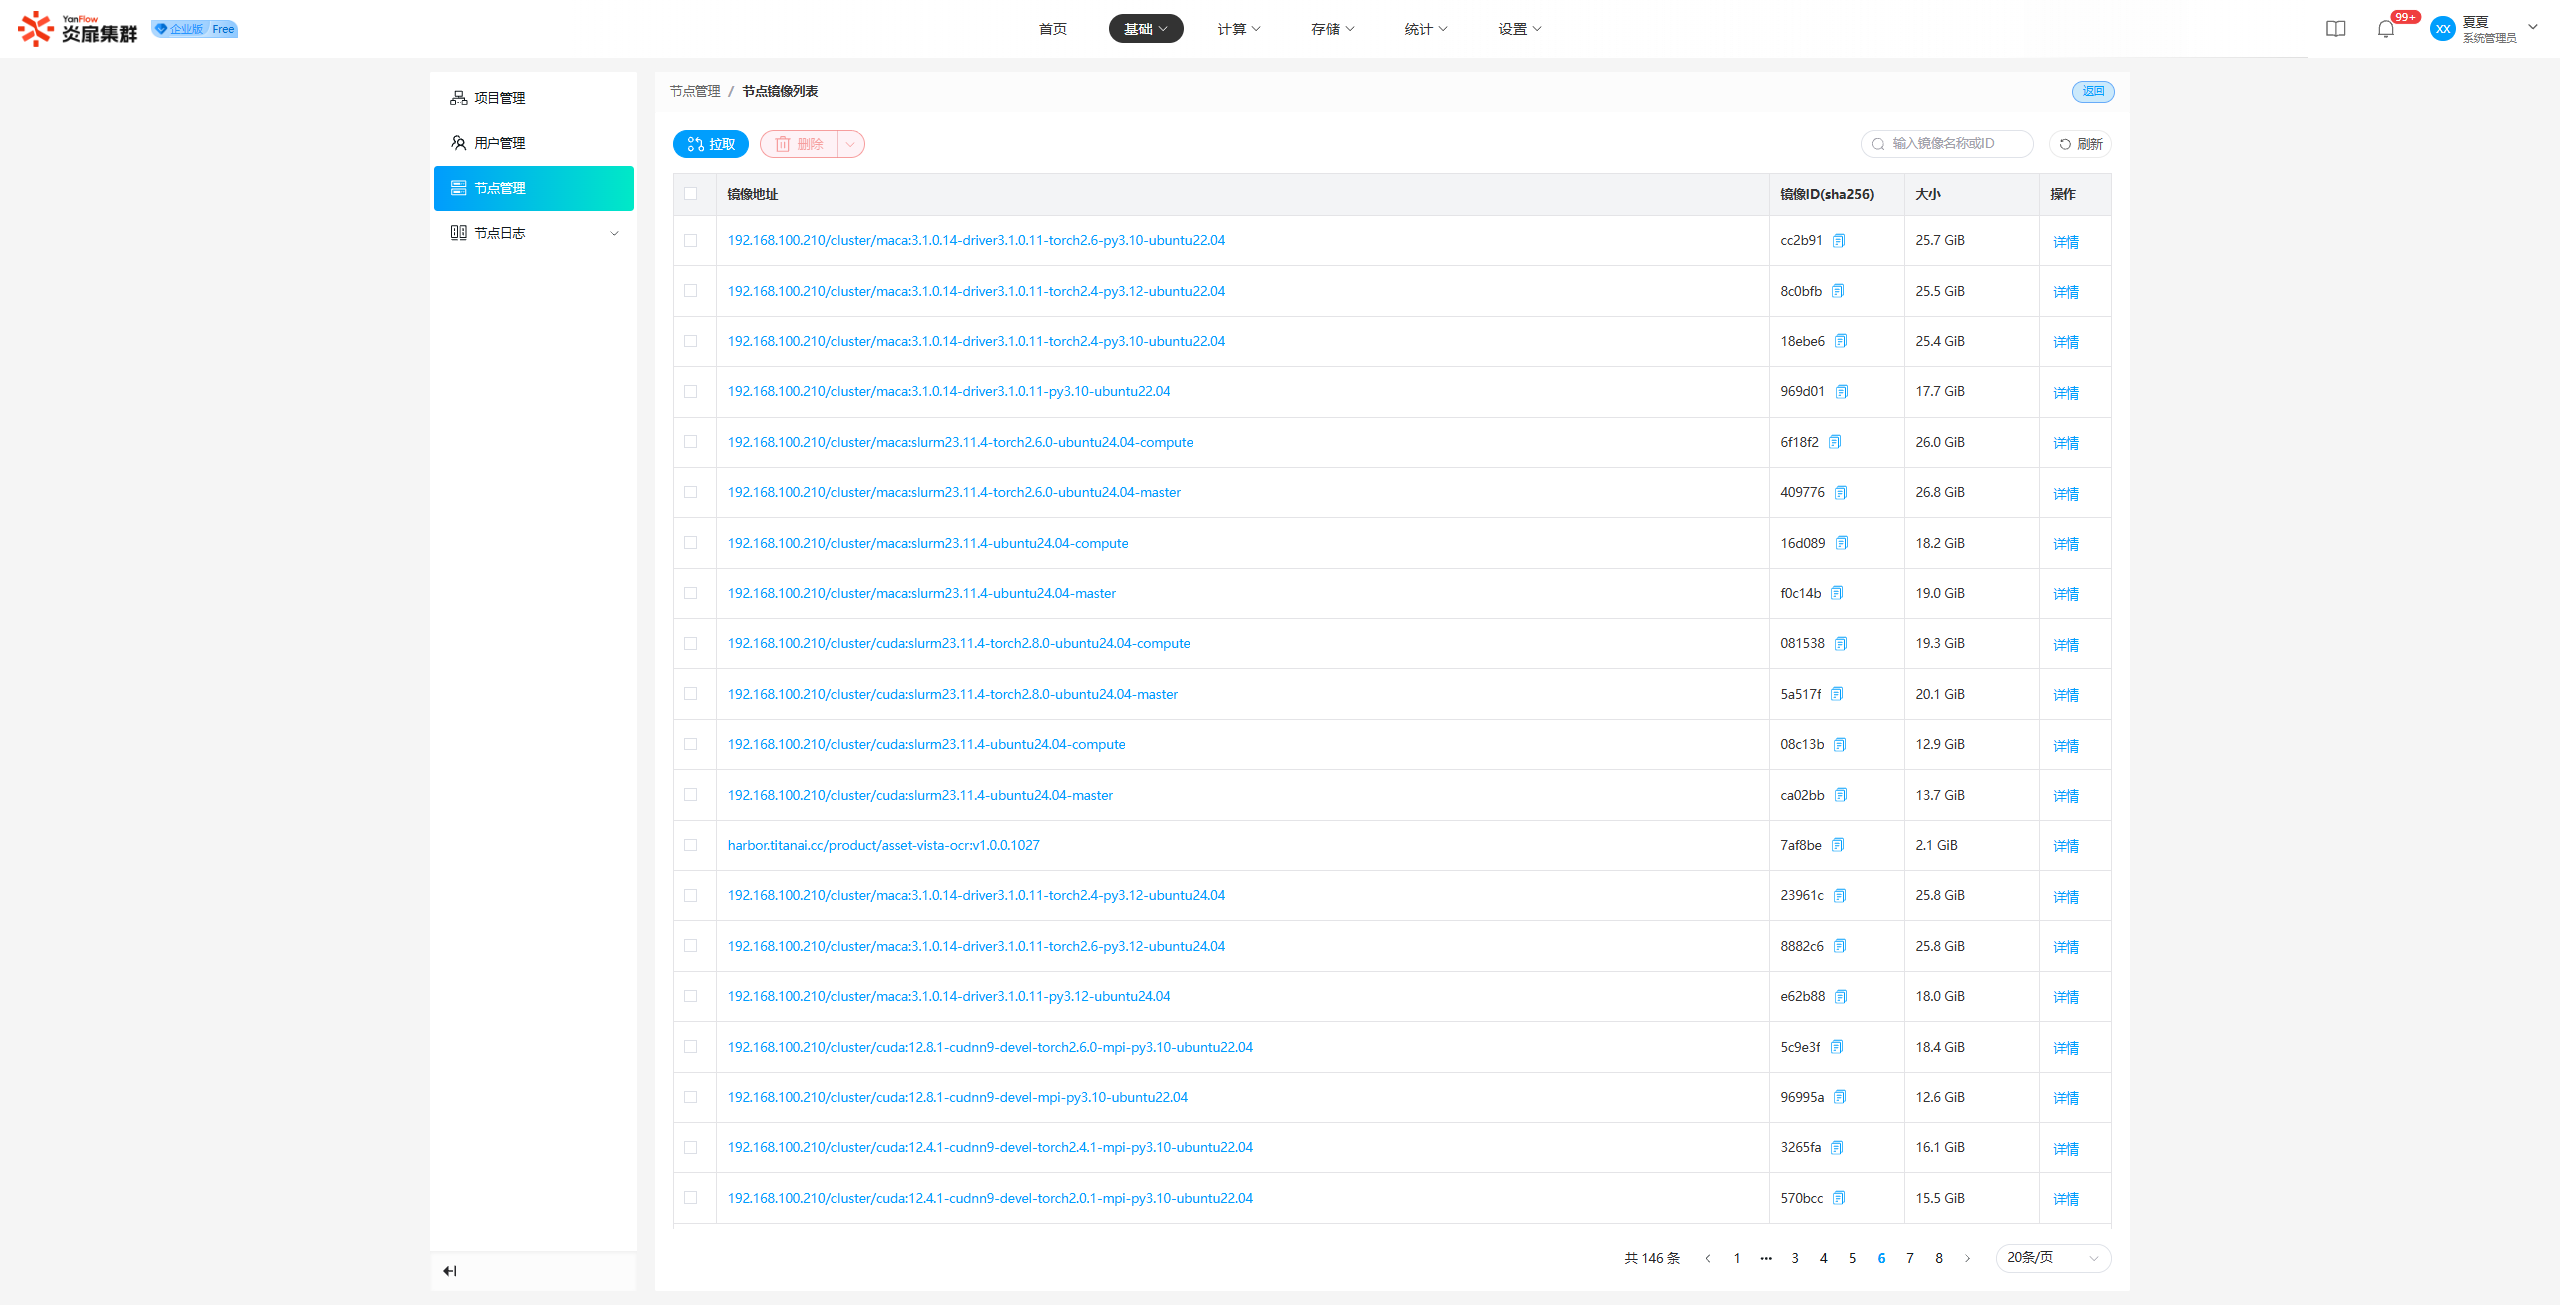
Copy Image ID: Click the Copy button next to the Image ID to copy the full ID.
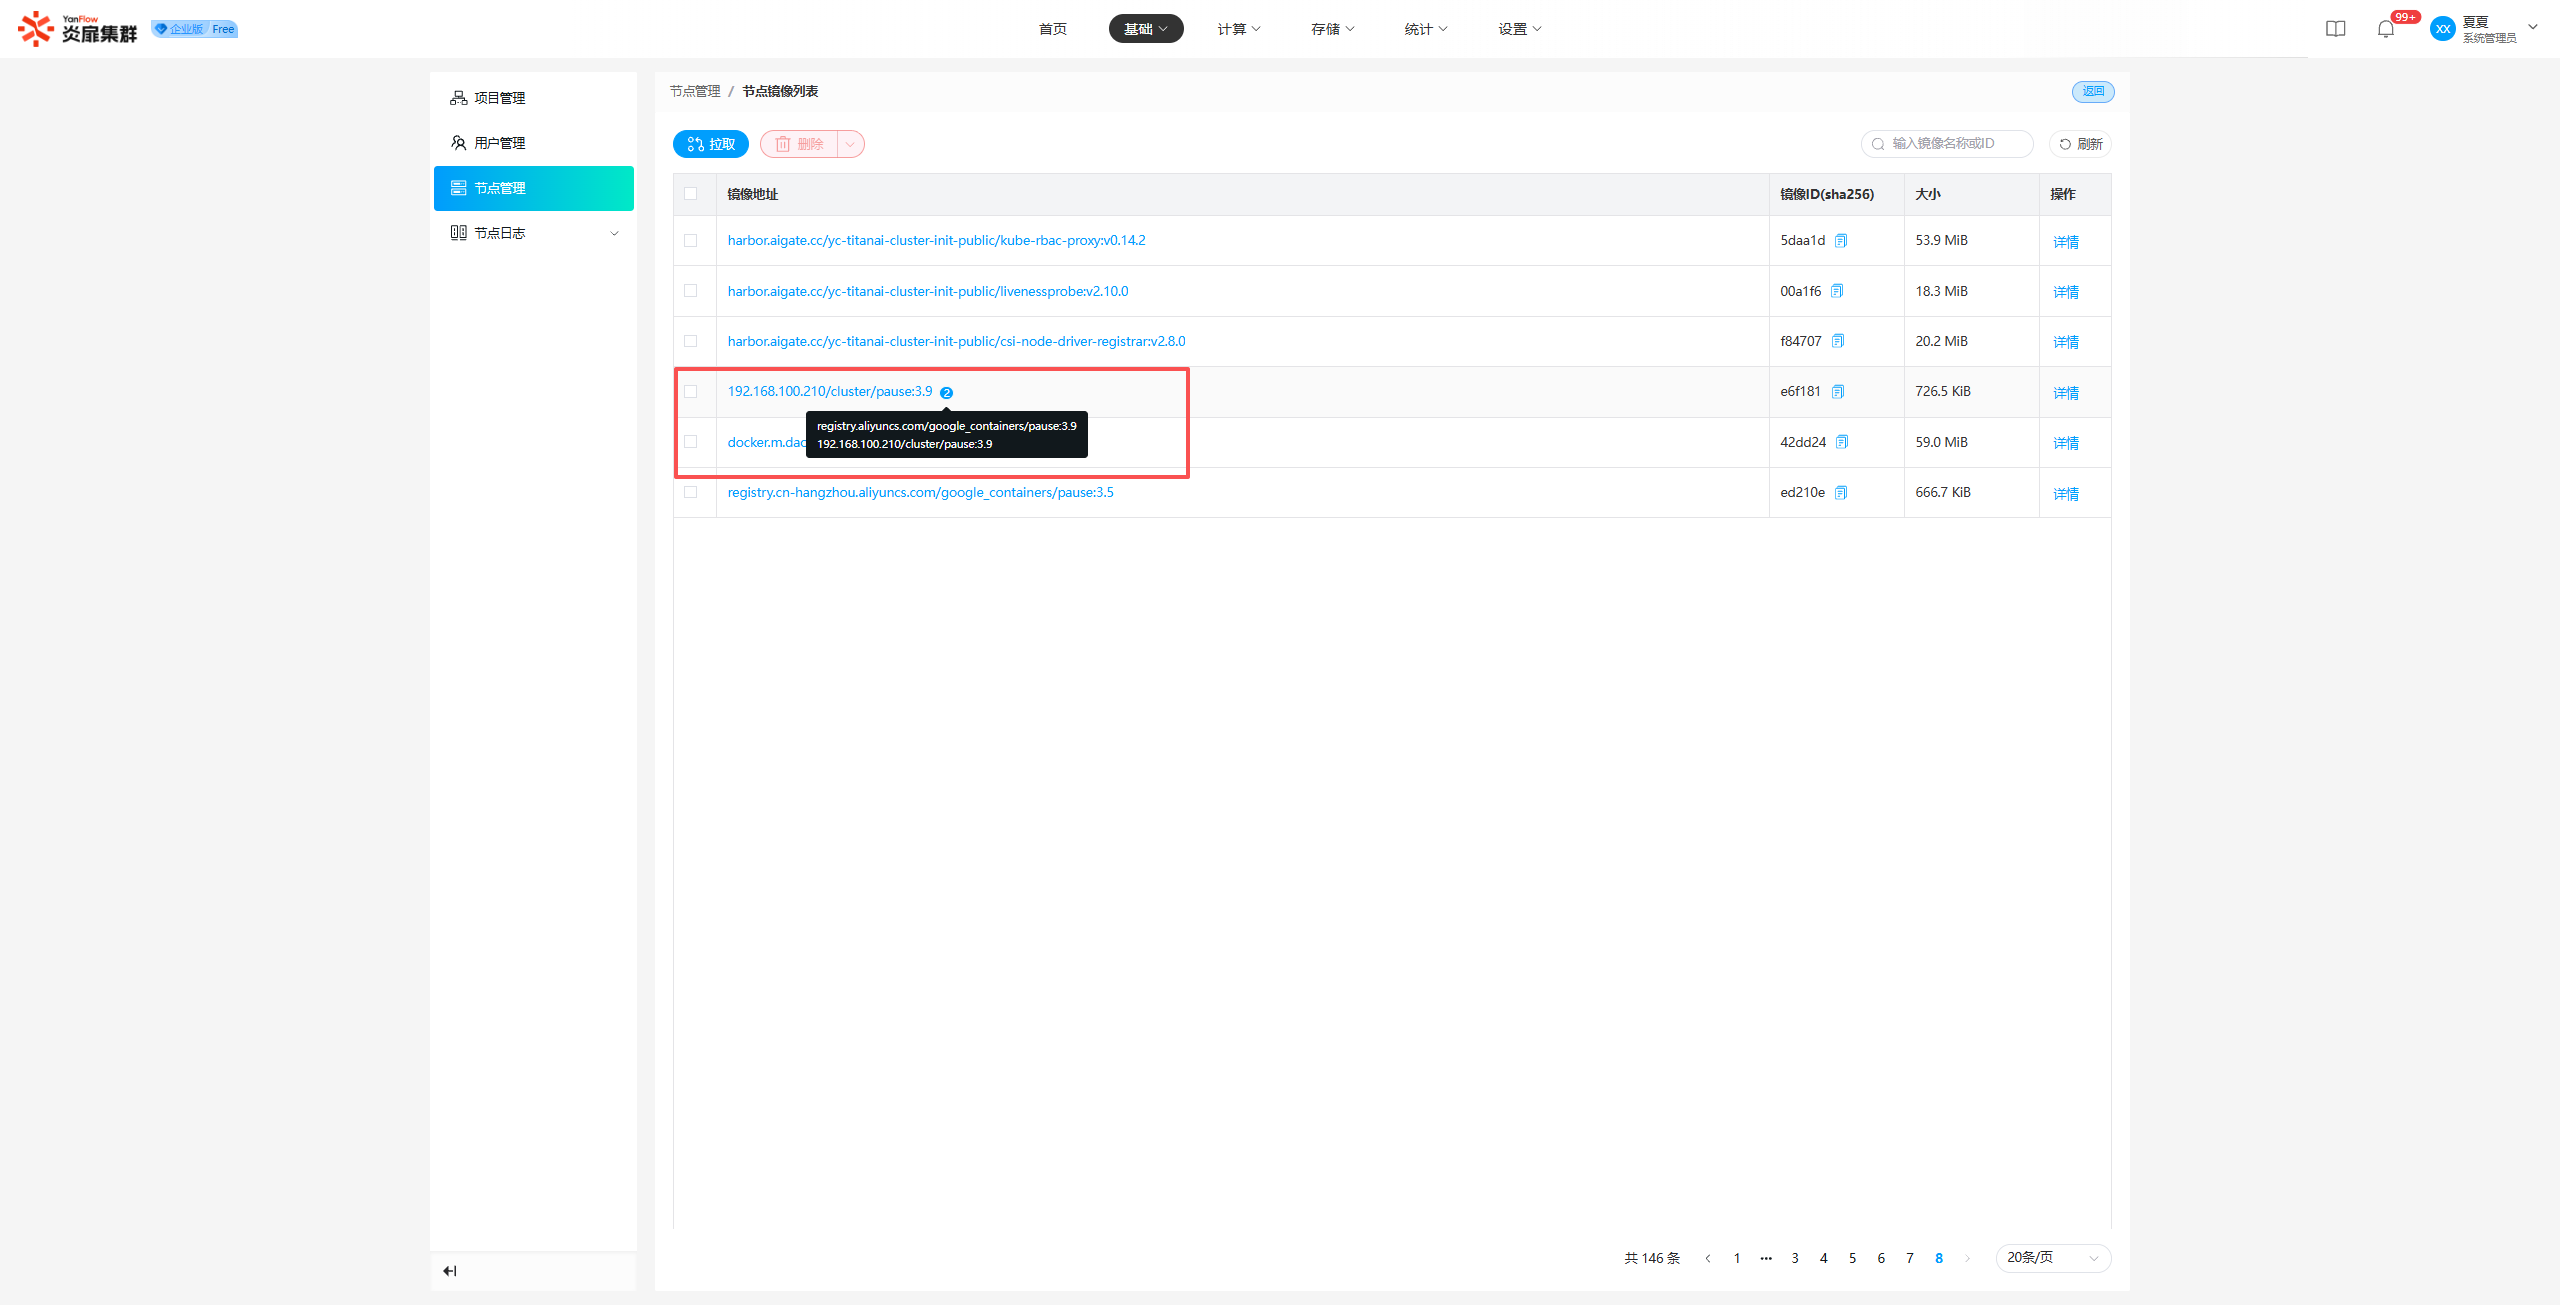
View Image Address: When more than one image address is associated, a numerical badge will be displayed. Hover over it to view all associated image addresses.
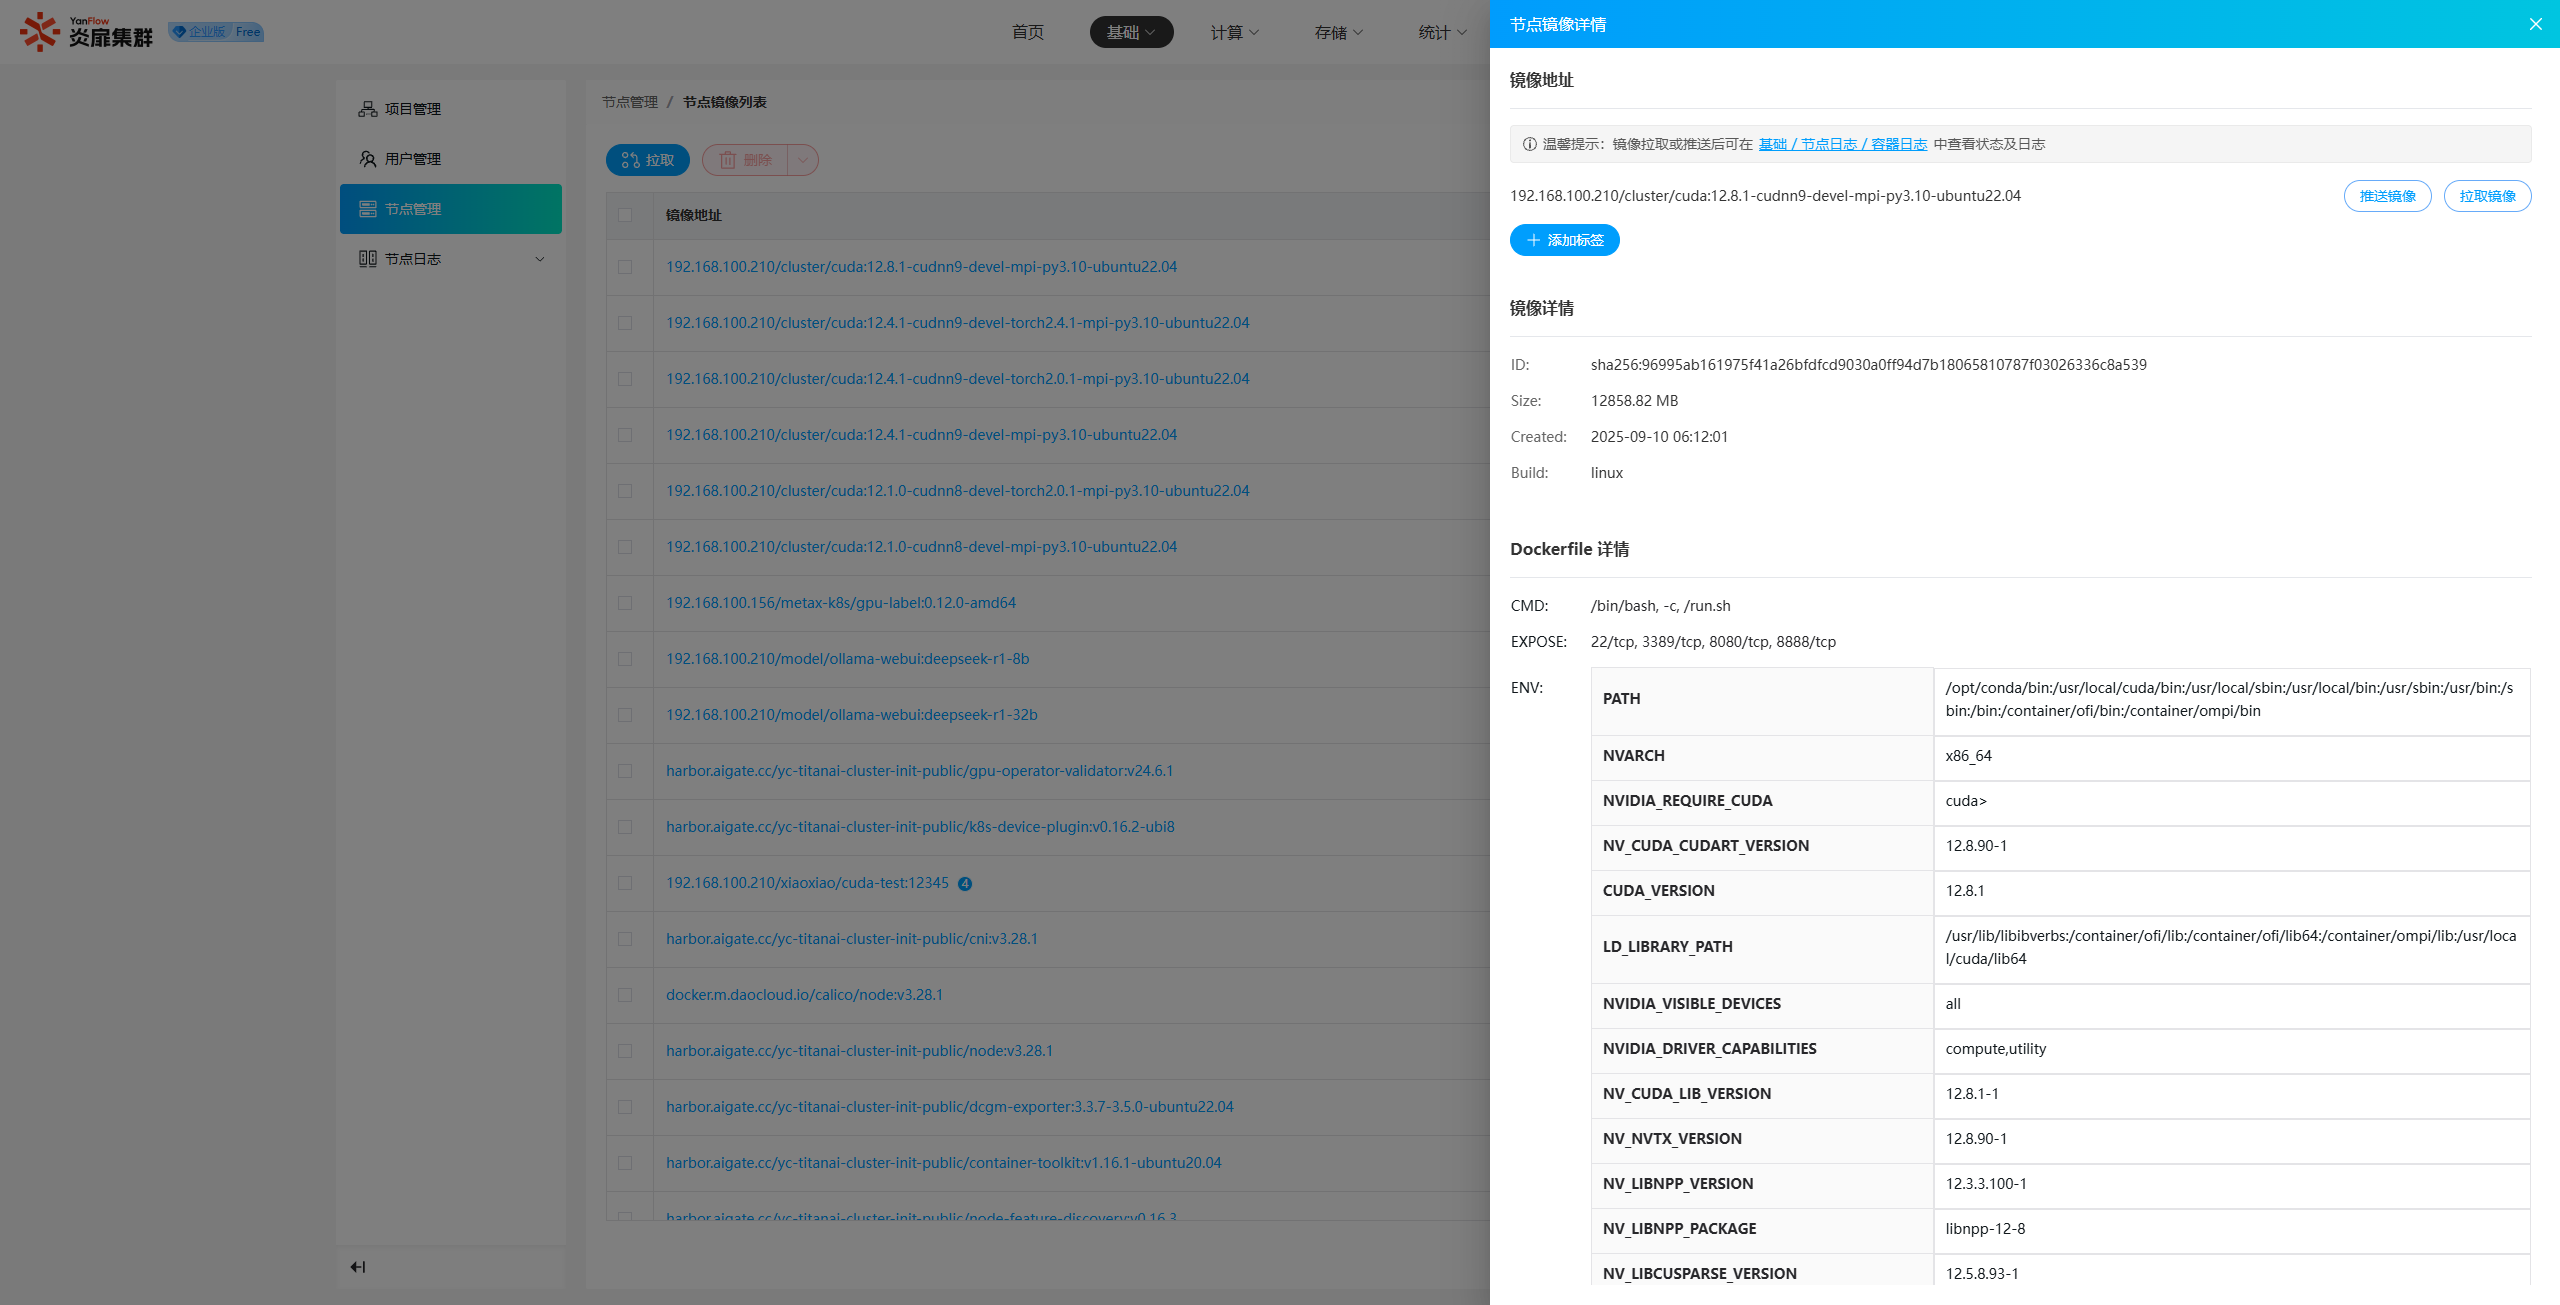
View Image Details: Click an Image Address to view its details, including the address, image details, and Dockerfile details.
Delete Node
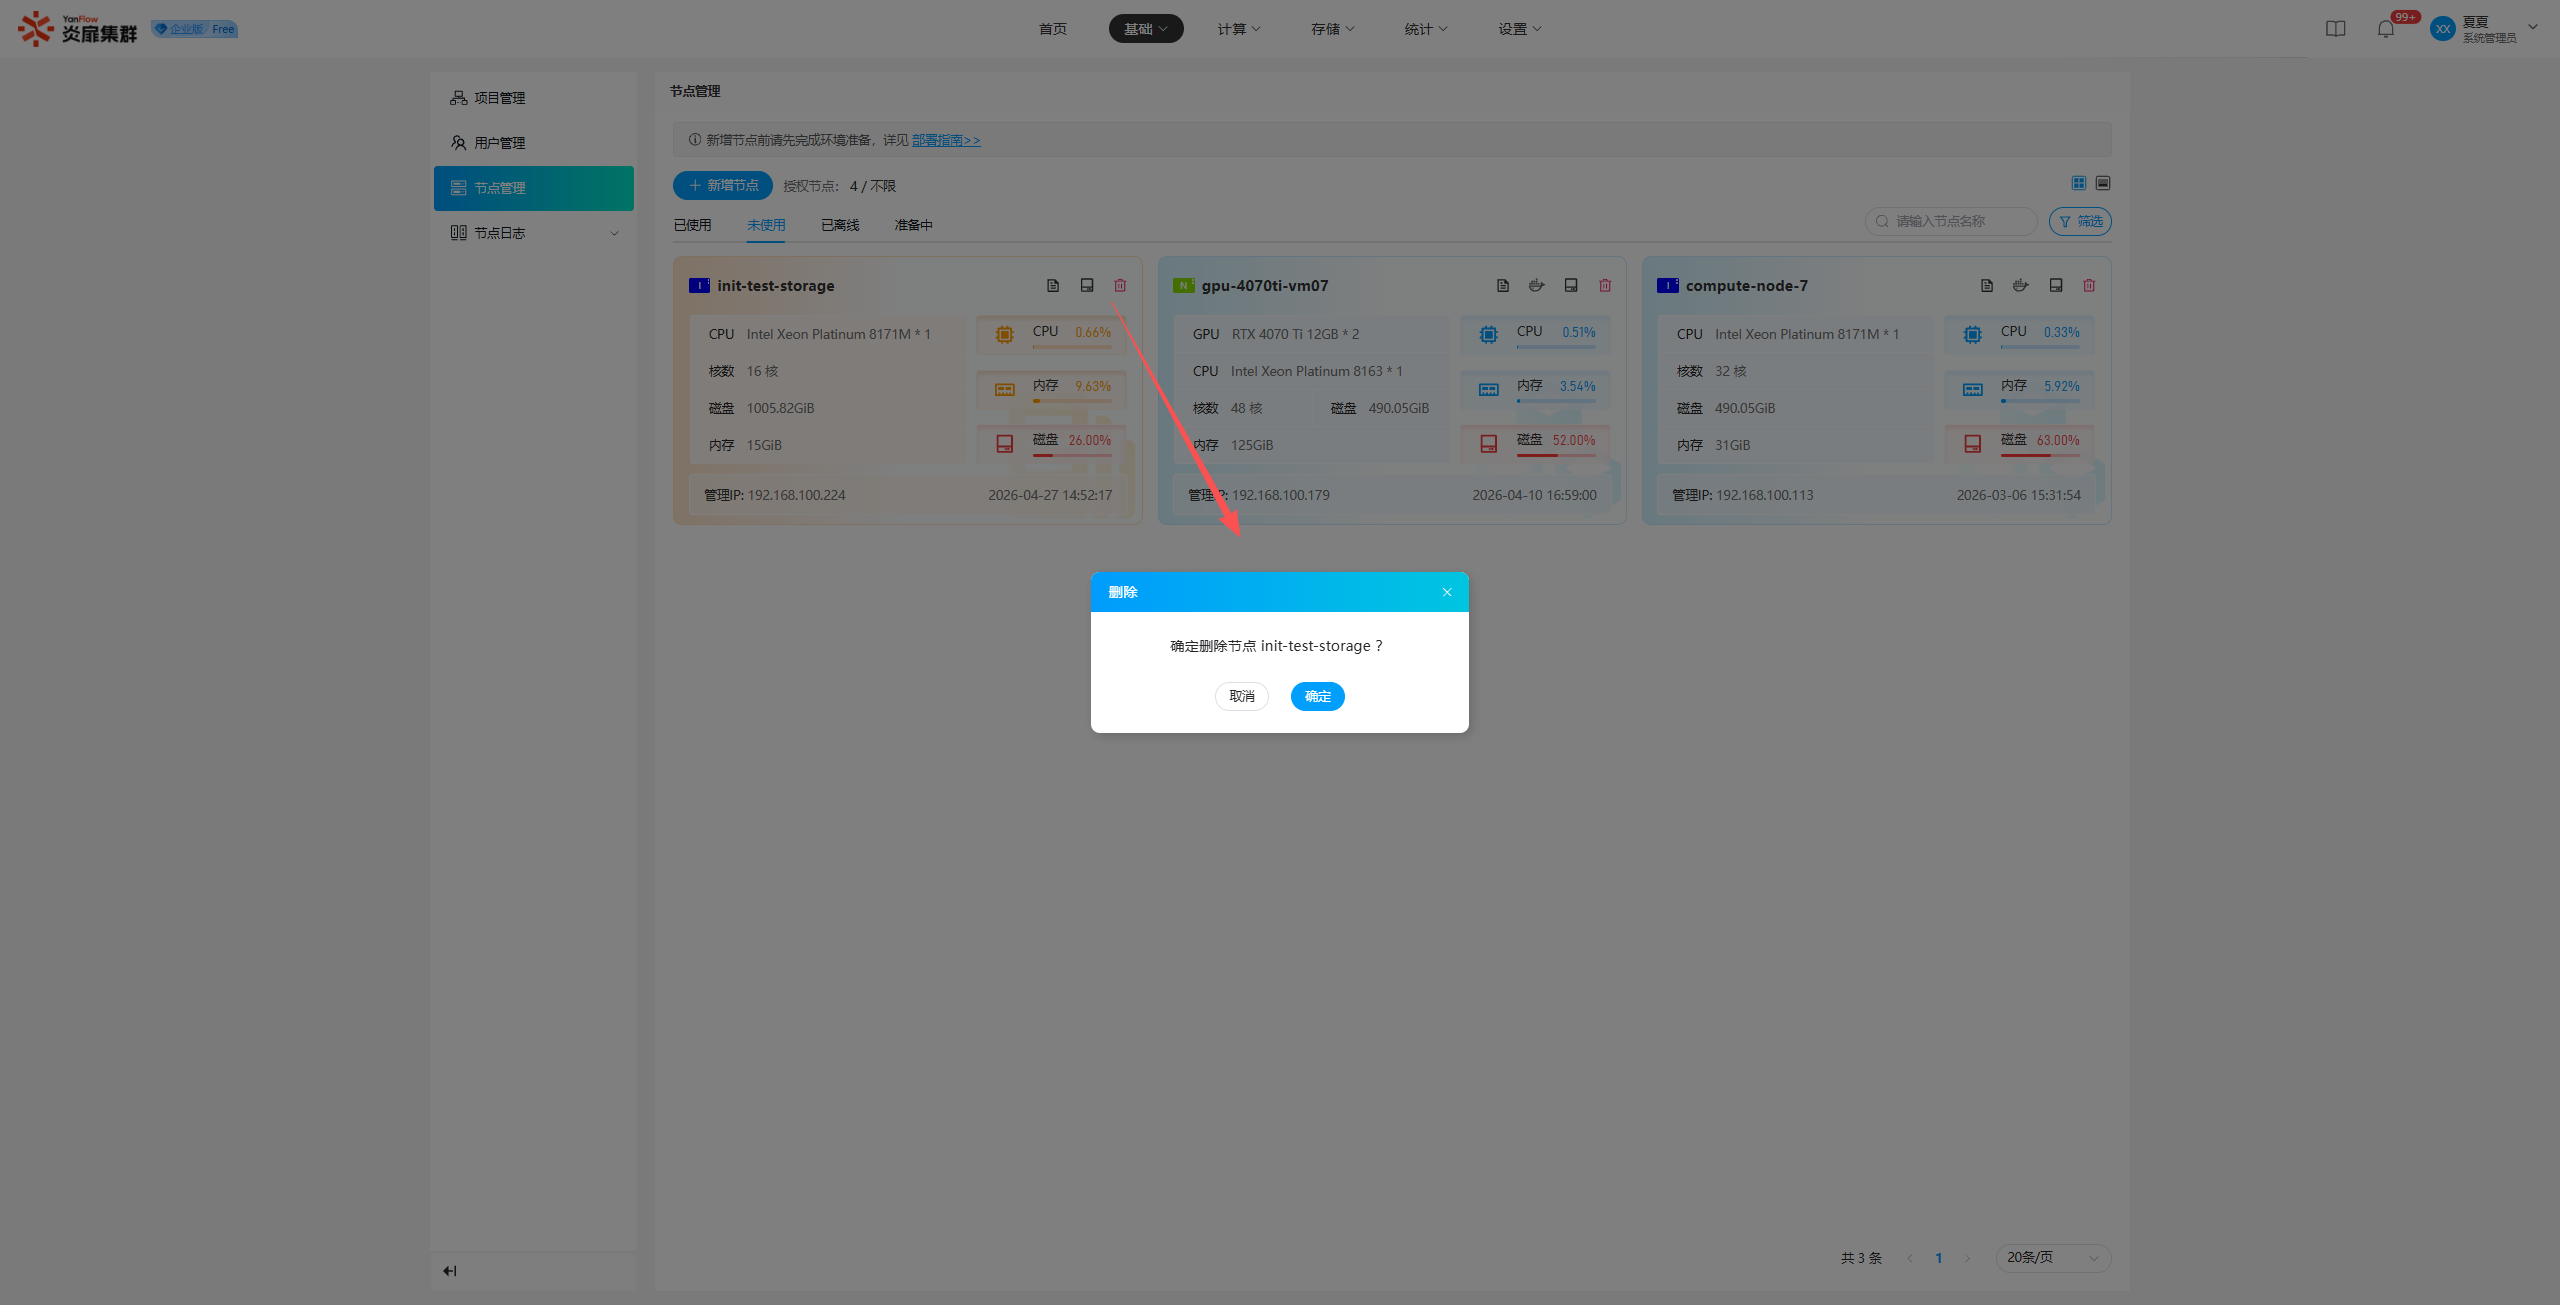
In the Unused node list, select a node and click Delete. A prompt will appear; click Confirm to delete it.
Node Logs
Container Logs
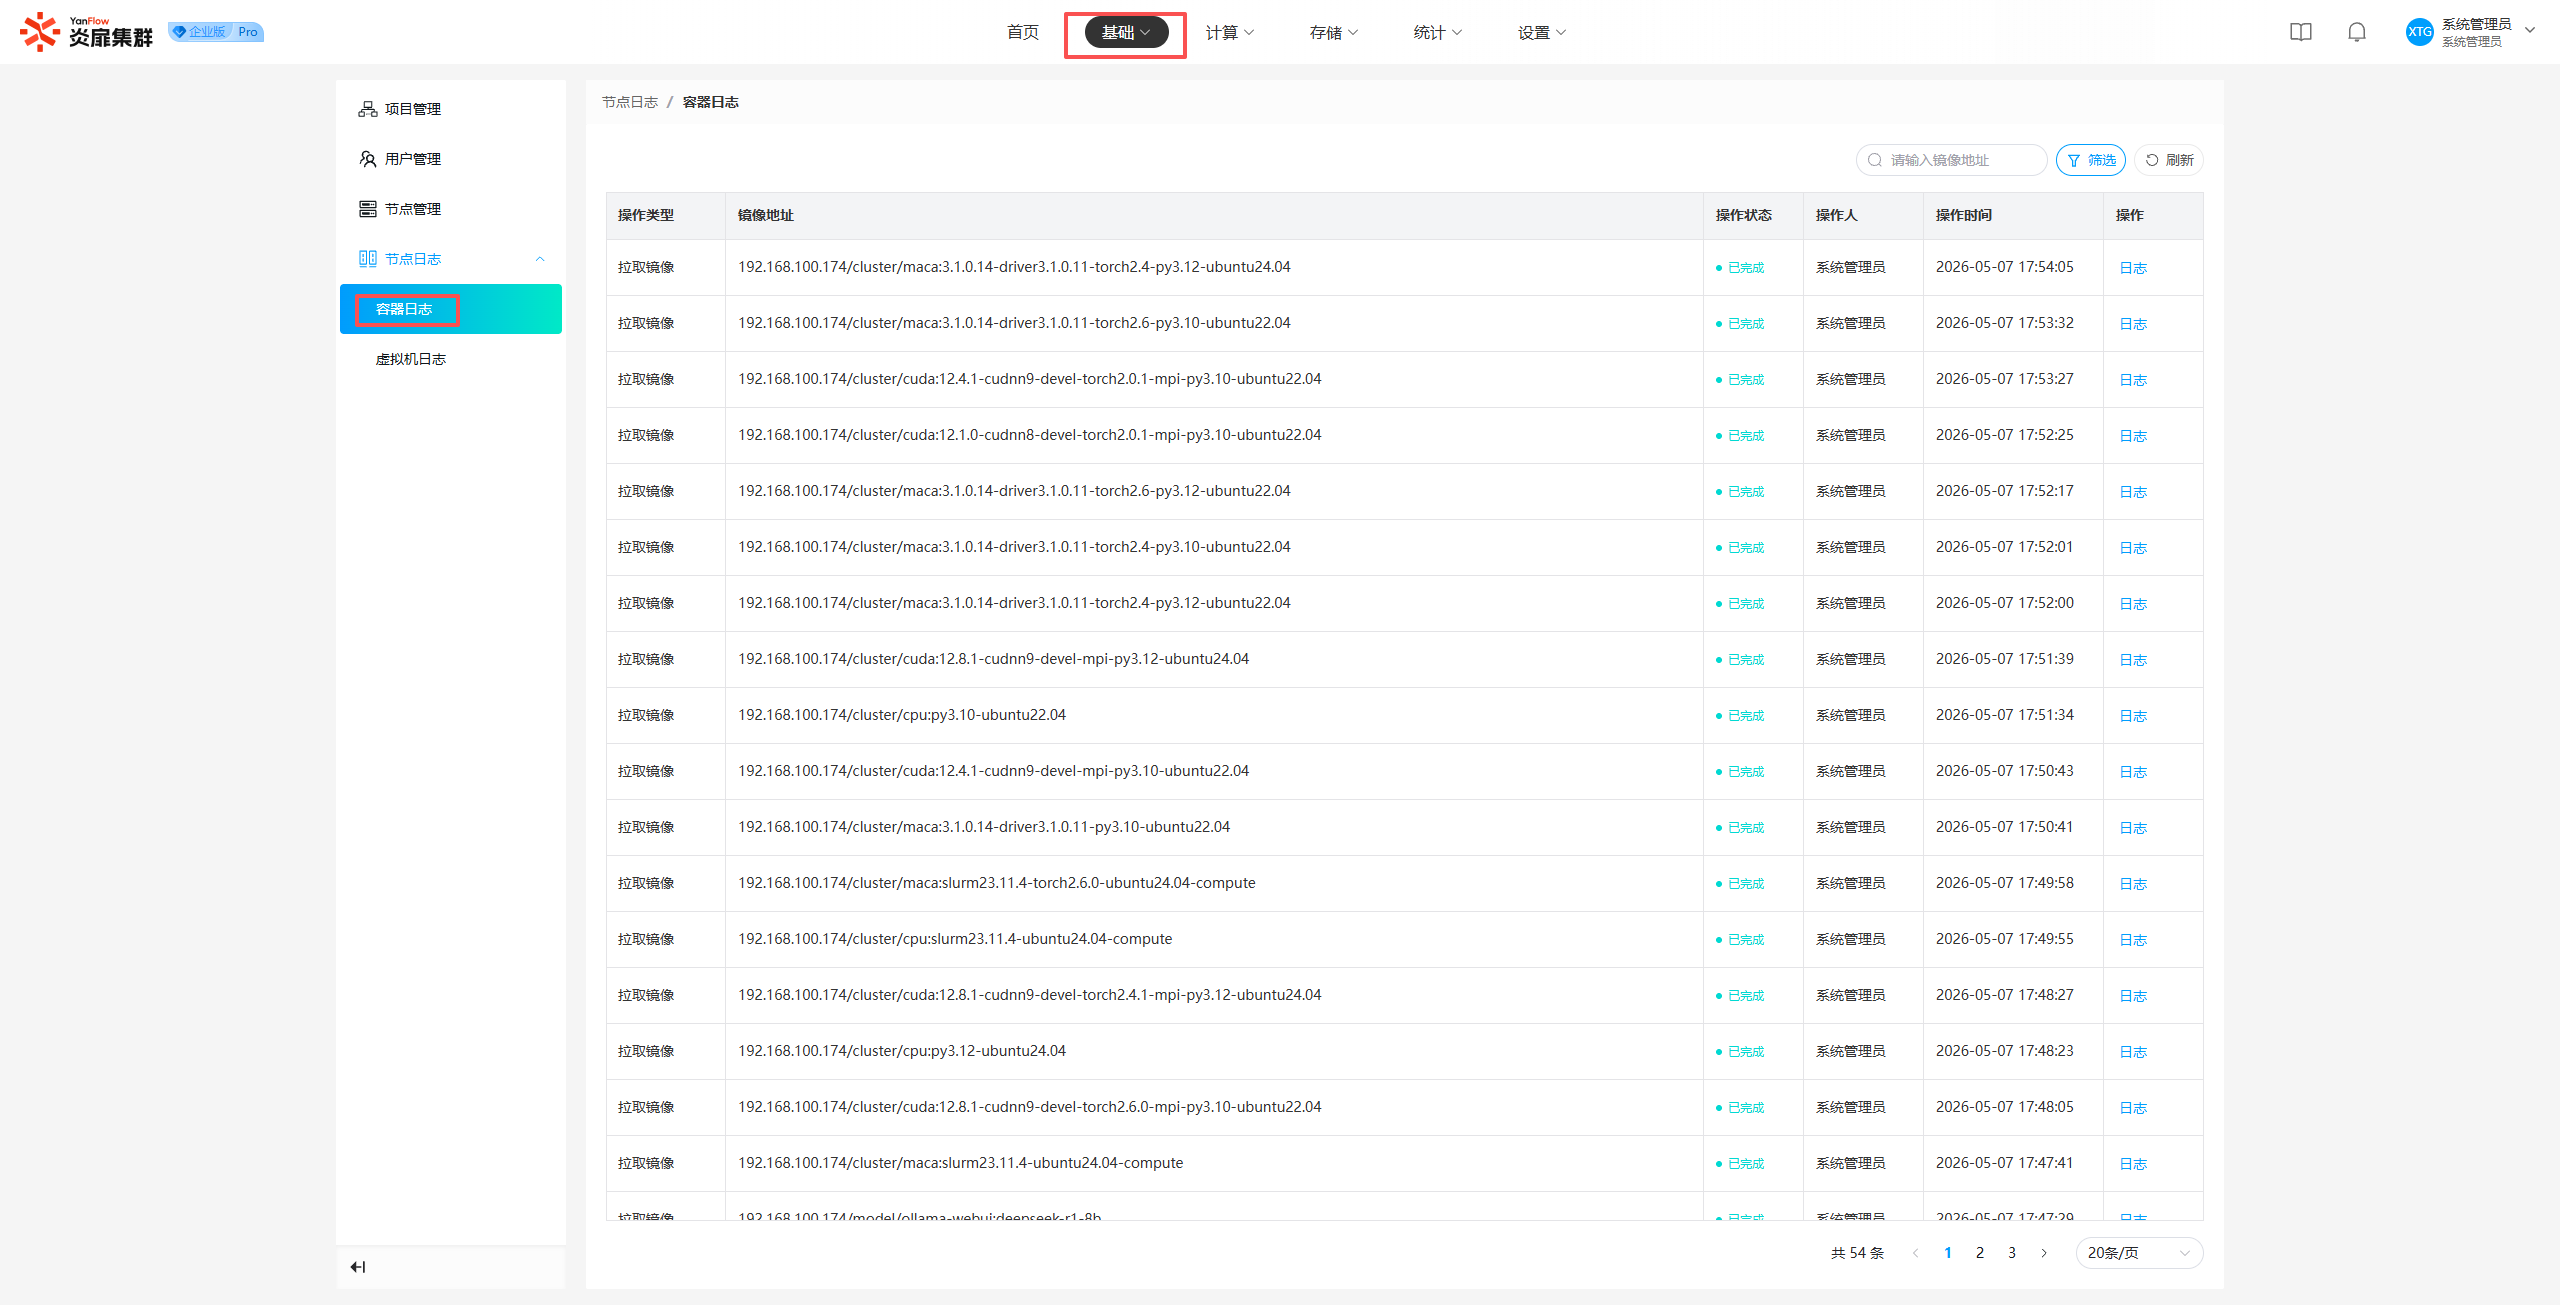
Displays the image operation logs for all Container Nodes. Supports keyword search by image address and filtering by operation type, status, time, etc. Click Logs to view detailed log content.
VM Logs
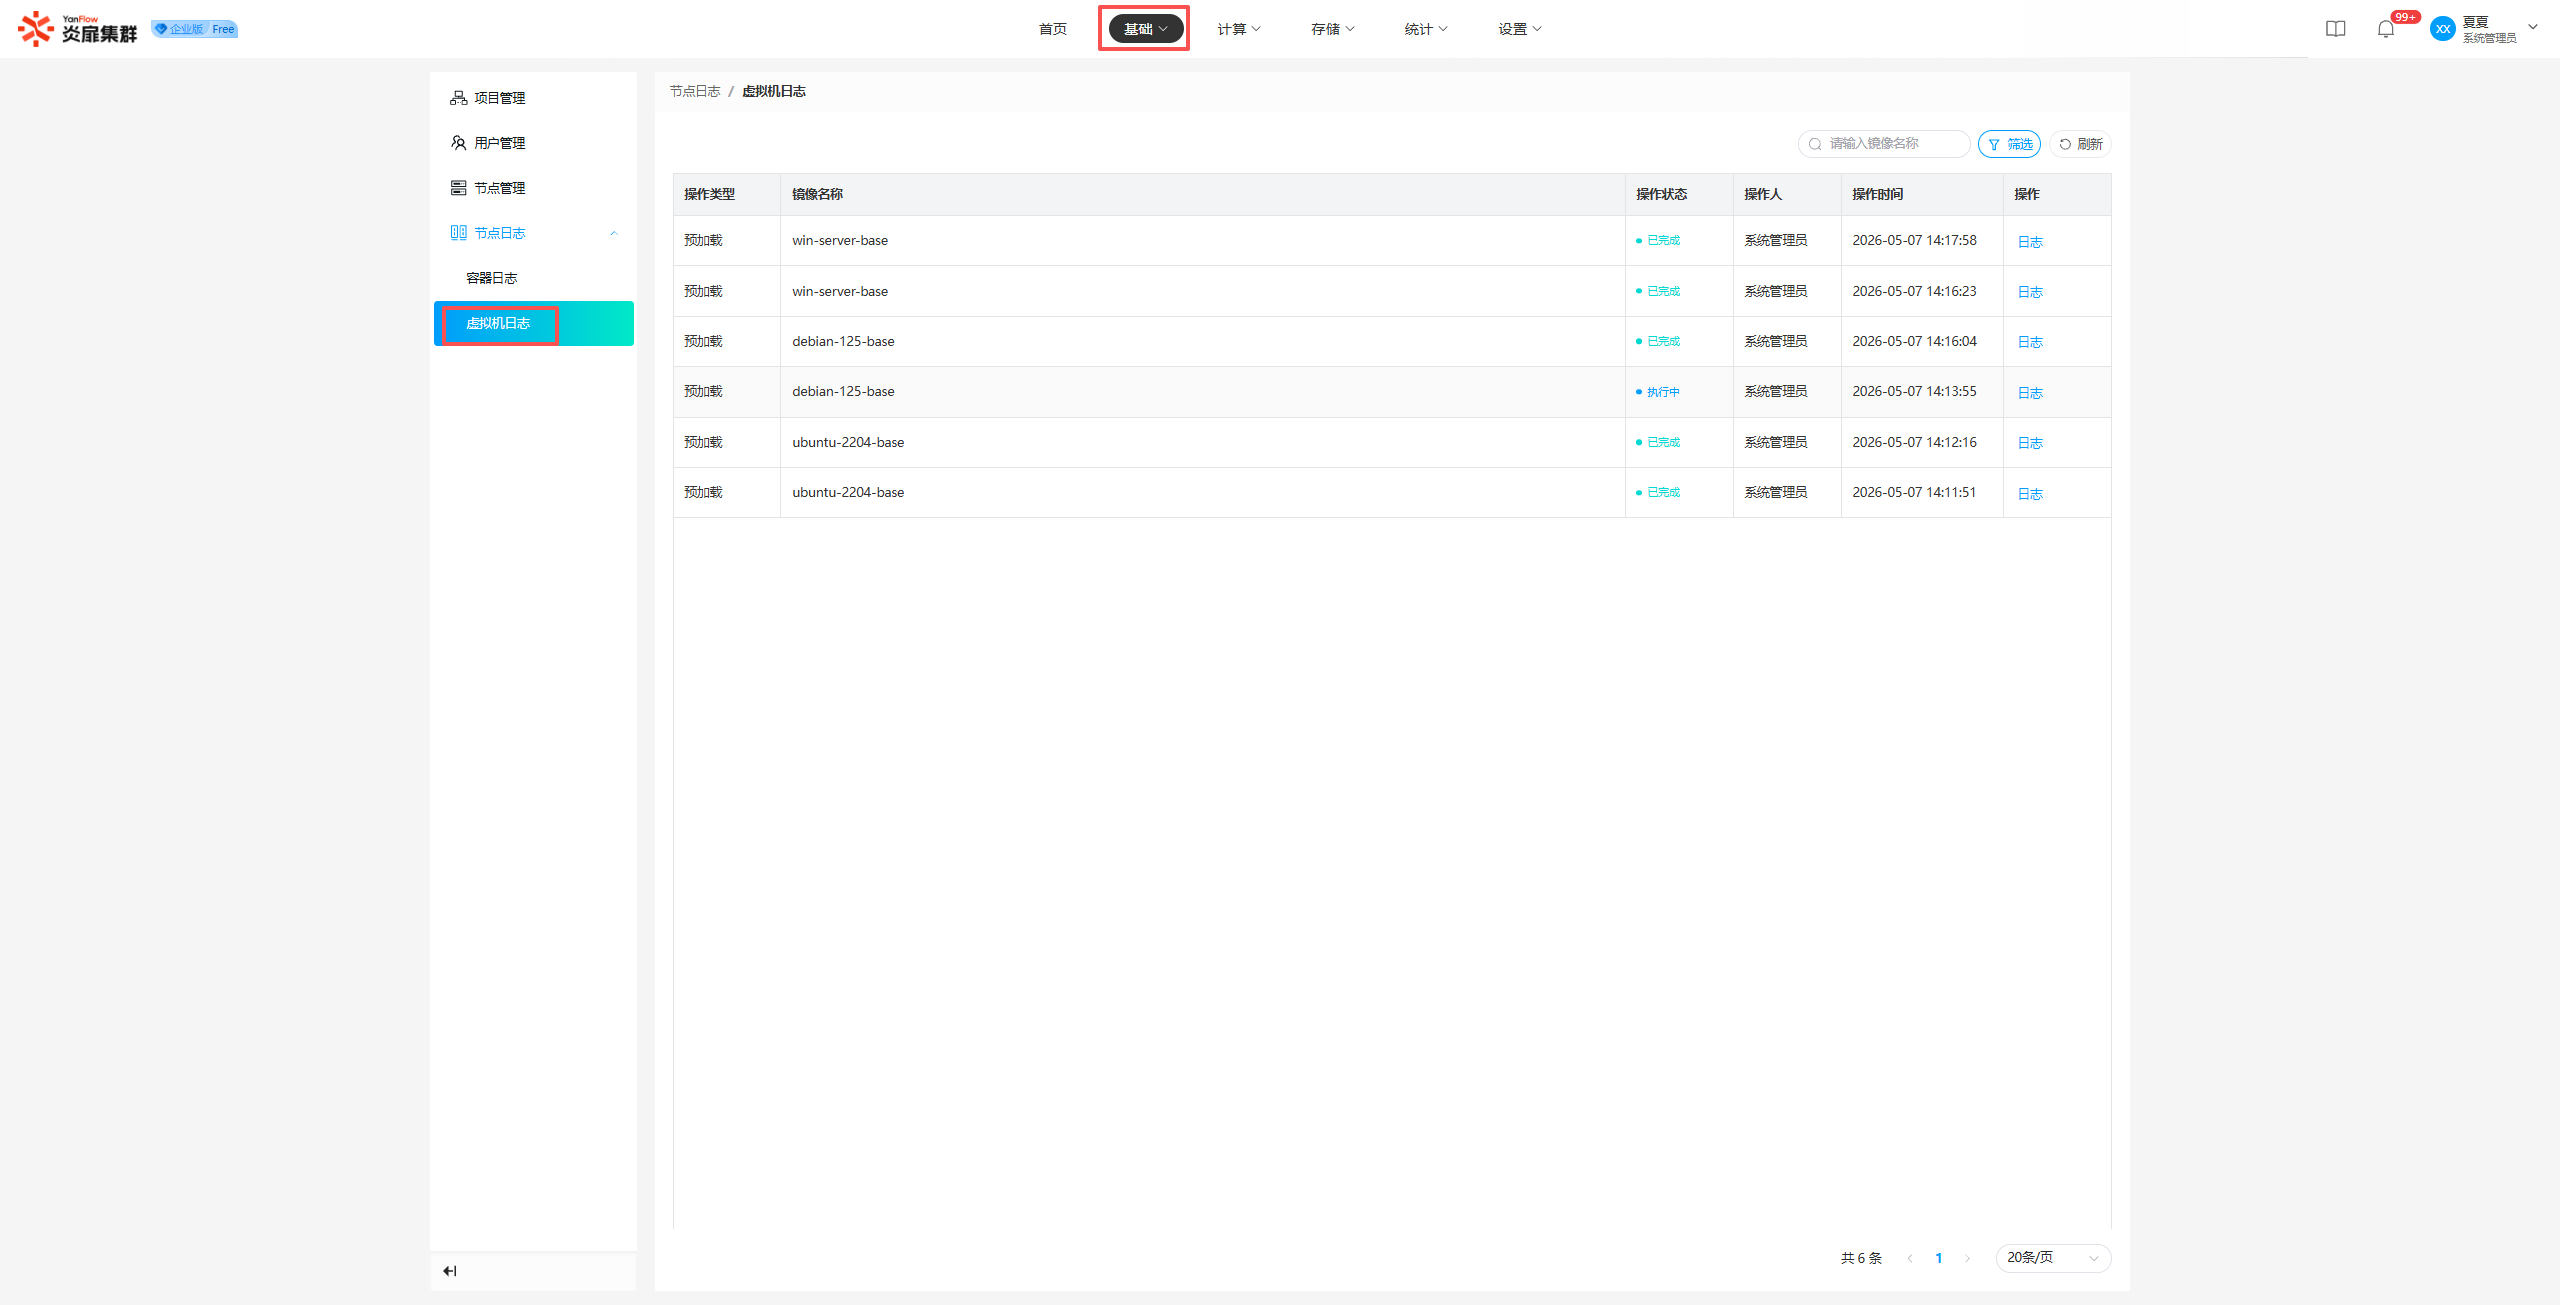
Displays the image operation logs for all Virtual Machine Nodes. Supports keyword search by image name and filtering by operation status, time, etc. Click Logs to view detailed log content.
Computing
Workspace
Workspace List
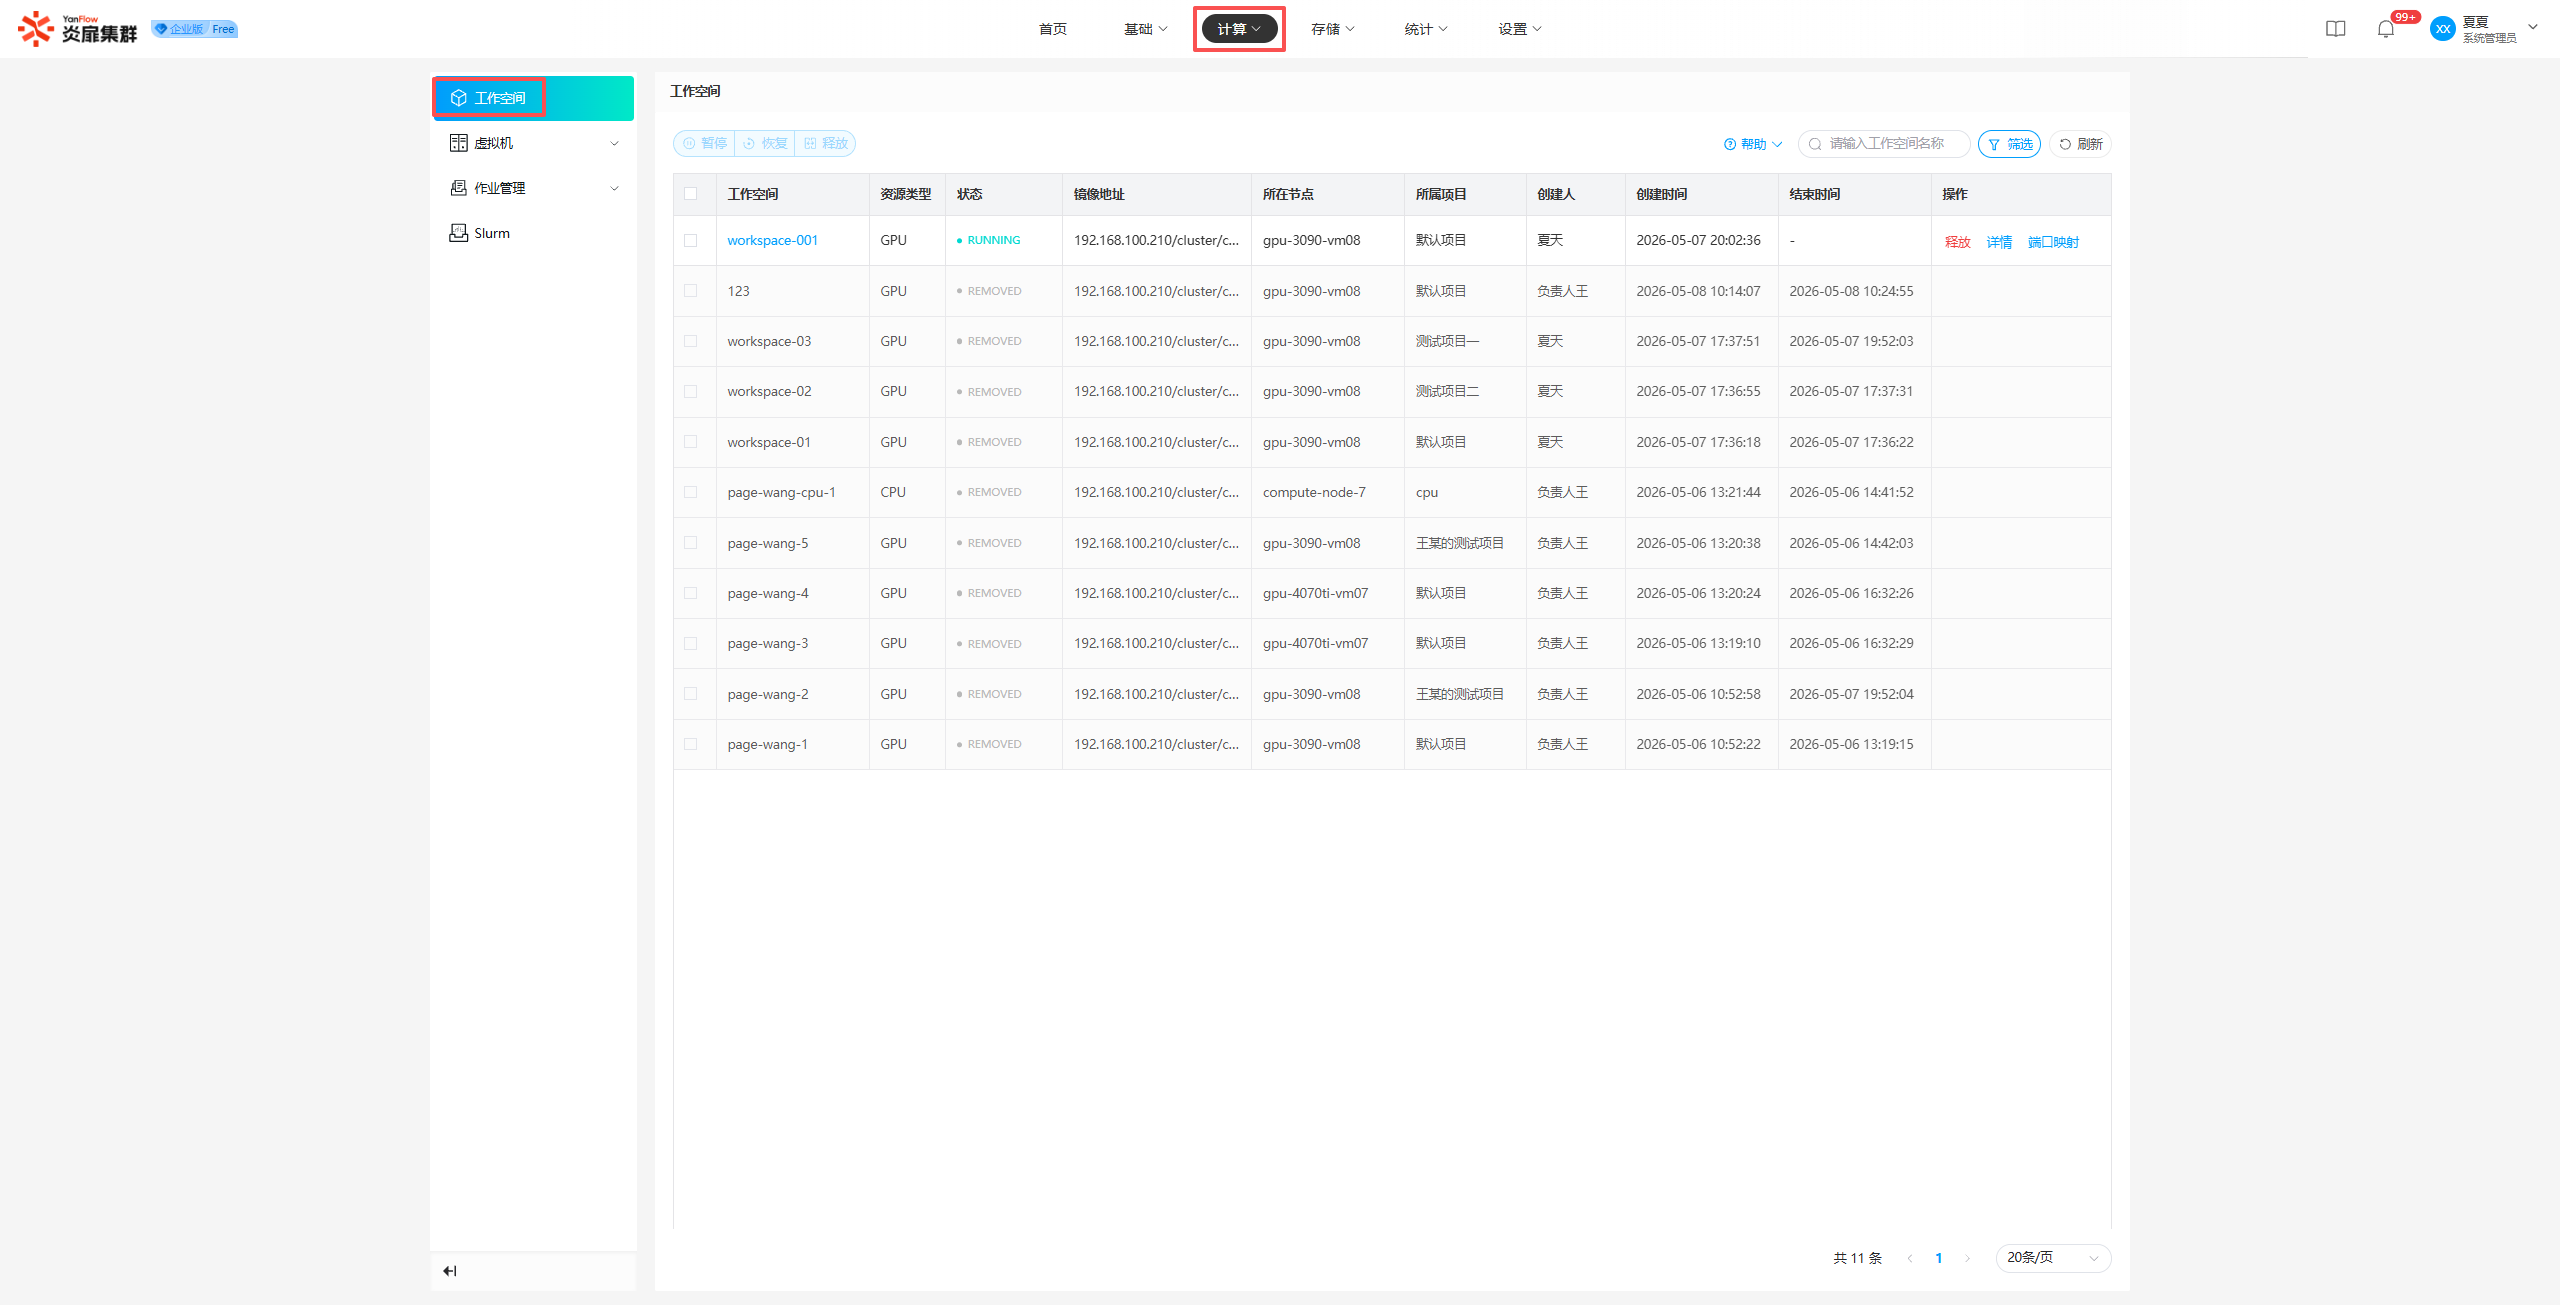
System Administrators can view all workspaces in the system. Supports keyword search by workspace name and filtering by resource type, status, project, node, creation date, or creator.
Workspace Details
Click the Workspace Name to enter the details page, where you can view basic information, port mapping, resource information, mount information, and environment variables. It also supports viewing Logs, Inspect, and Console connections.
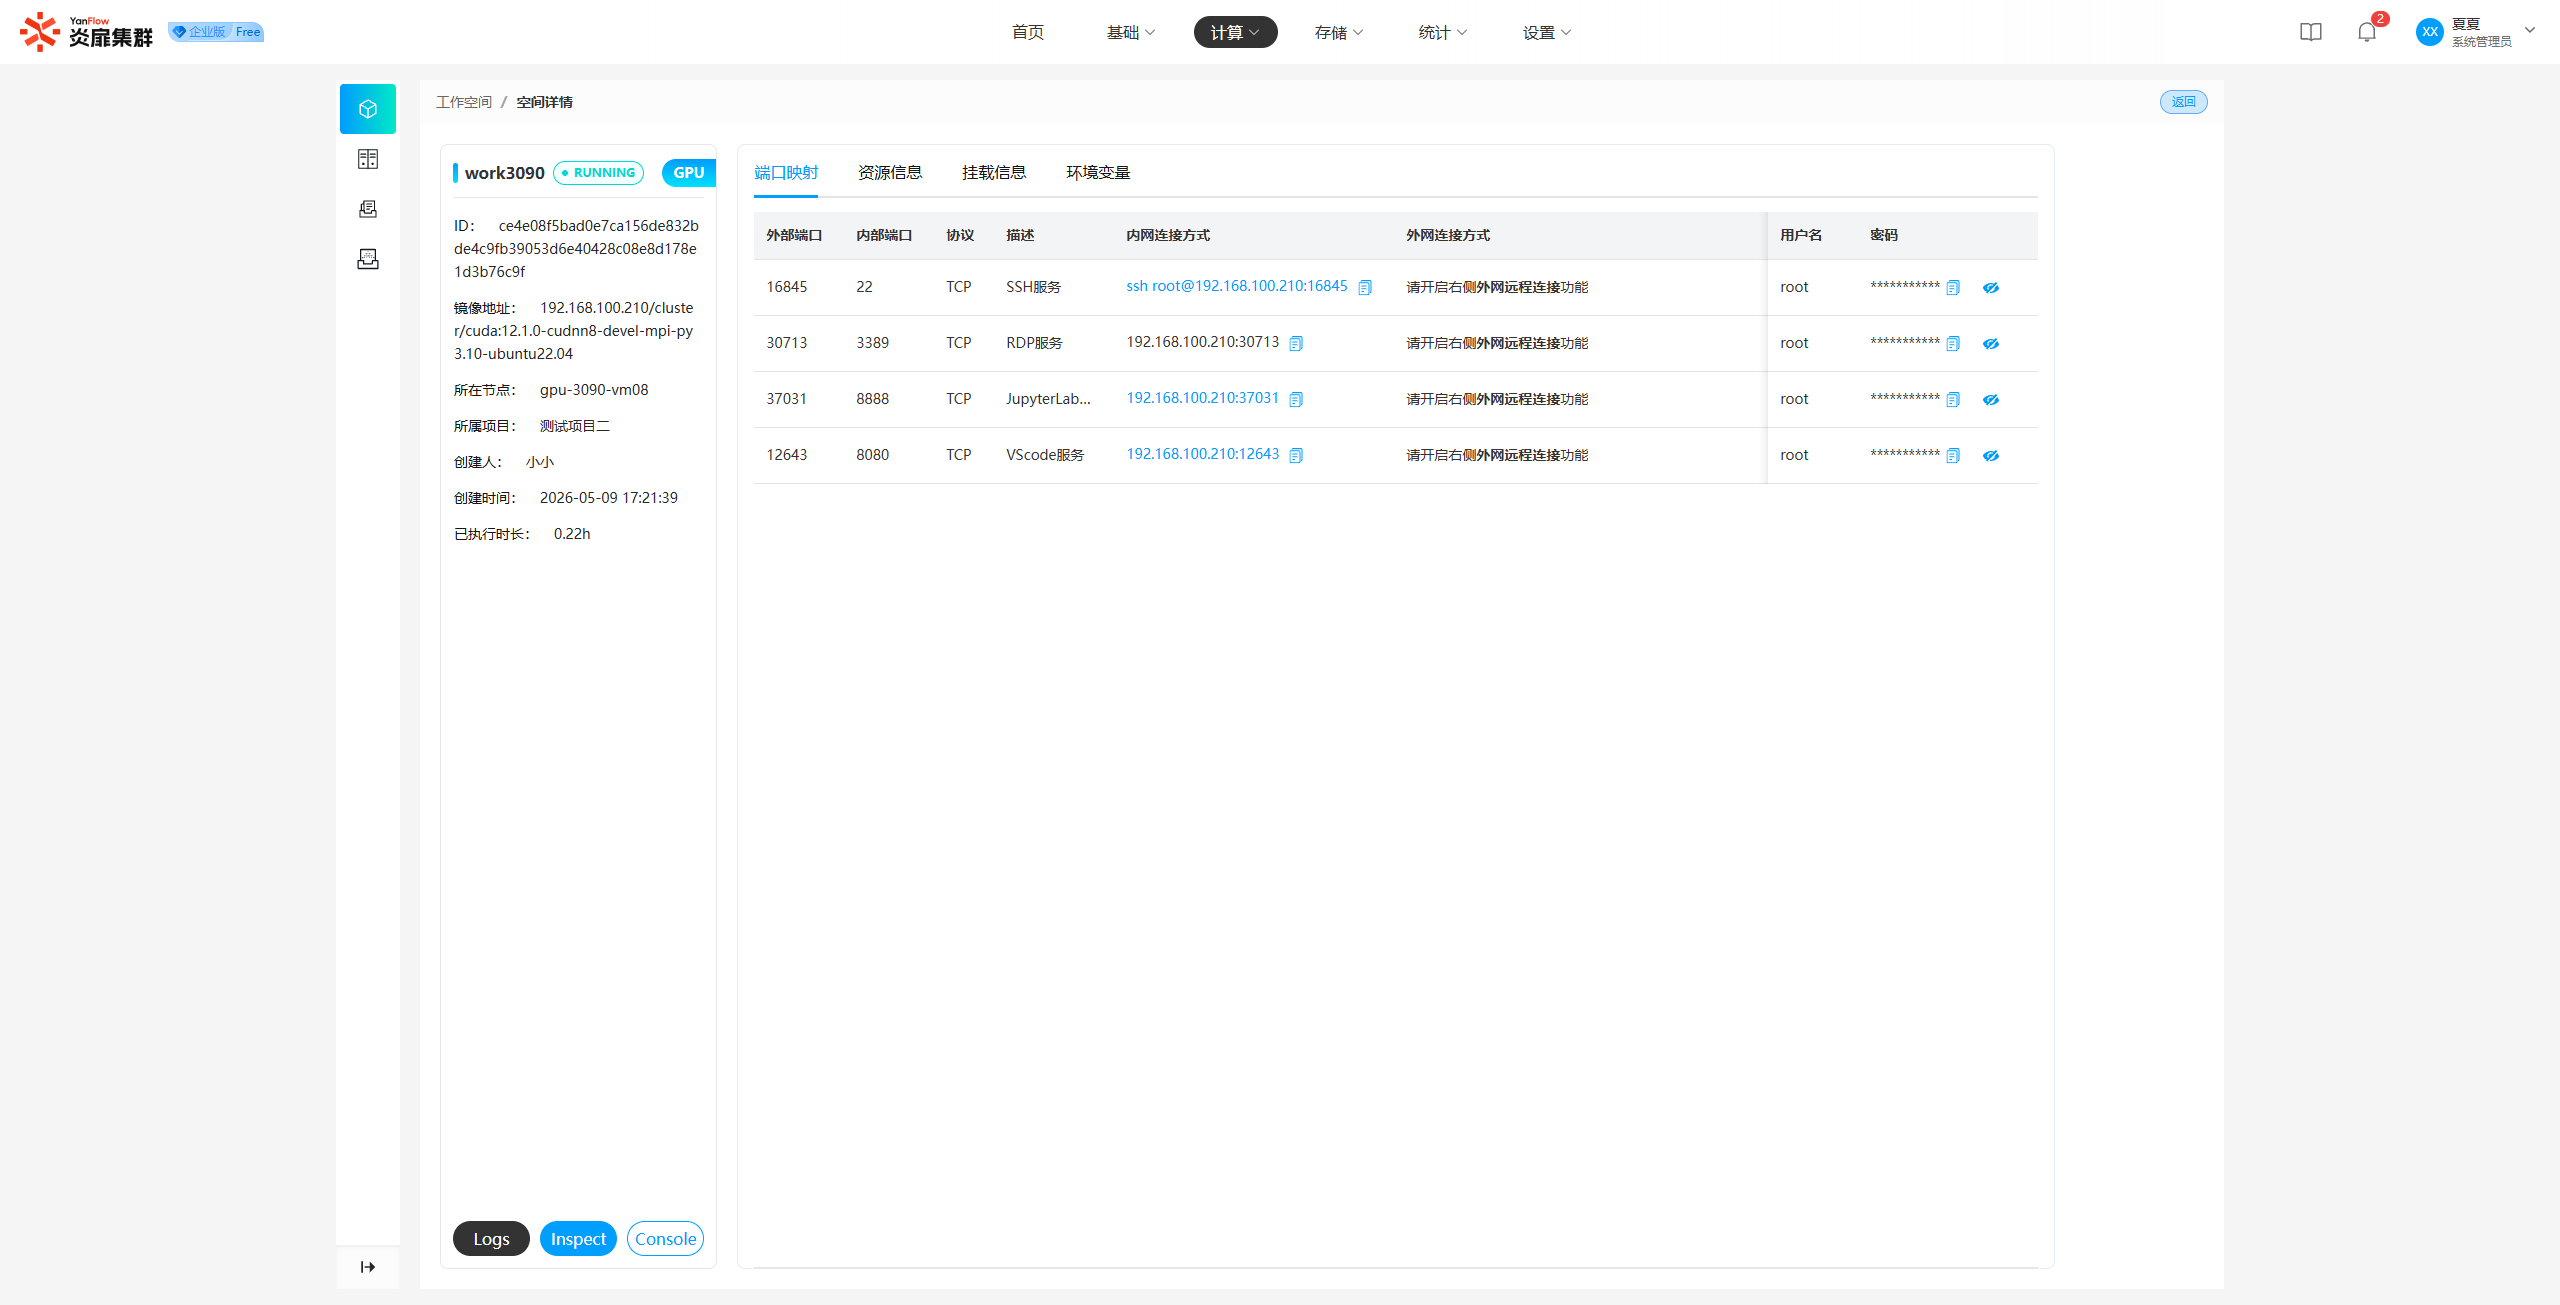
Note:
- Details can only be viewed when the status is RUNNING or PAUSED.
- System Administrators do not have permission to toggle the
External Remote Connectionfor ports.
Pause/Resume/Release
System Administrators can perform Pause / Resume / Release operations on workspaces. Select one or more workspaces, click the corresponding operation, and click Confirm in the prompt to complete the action.
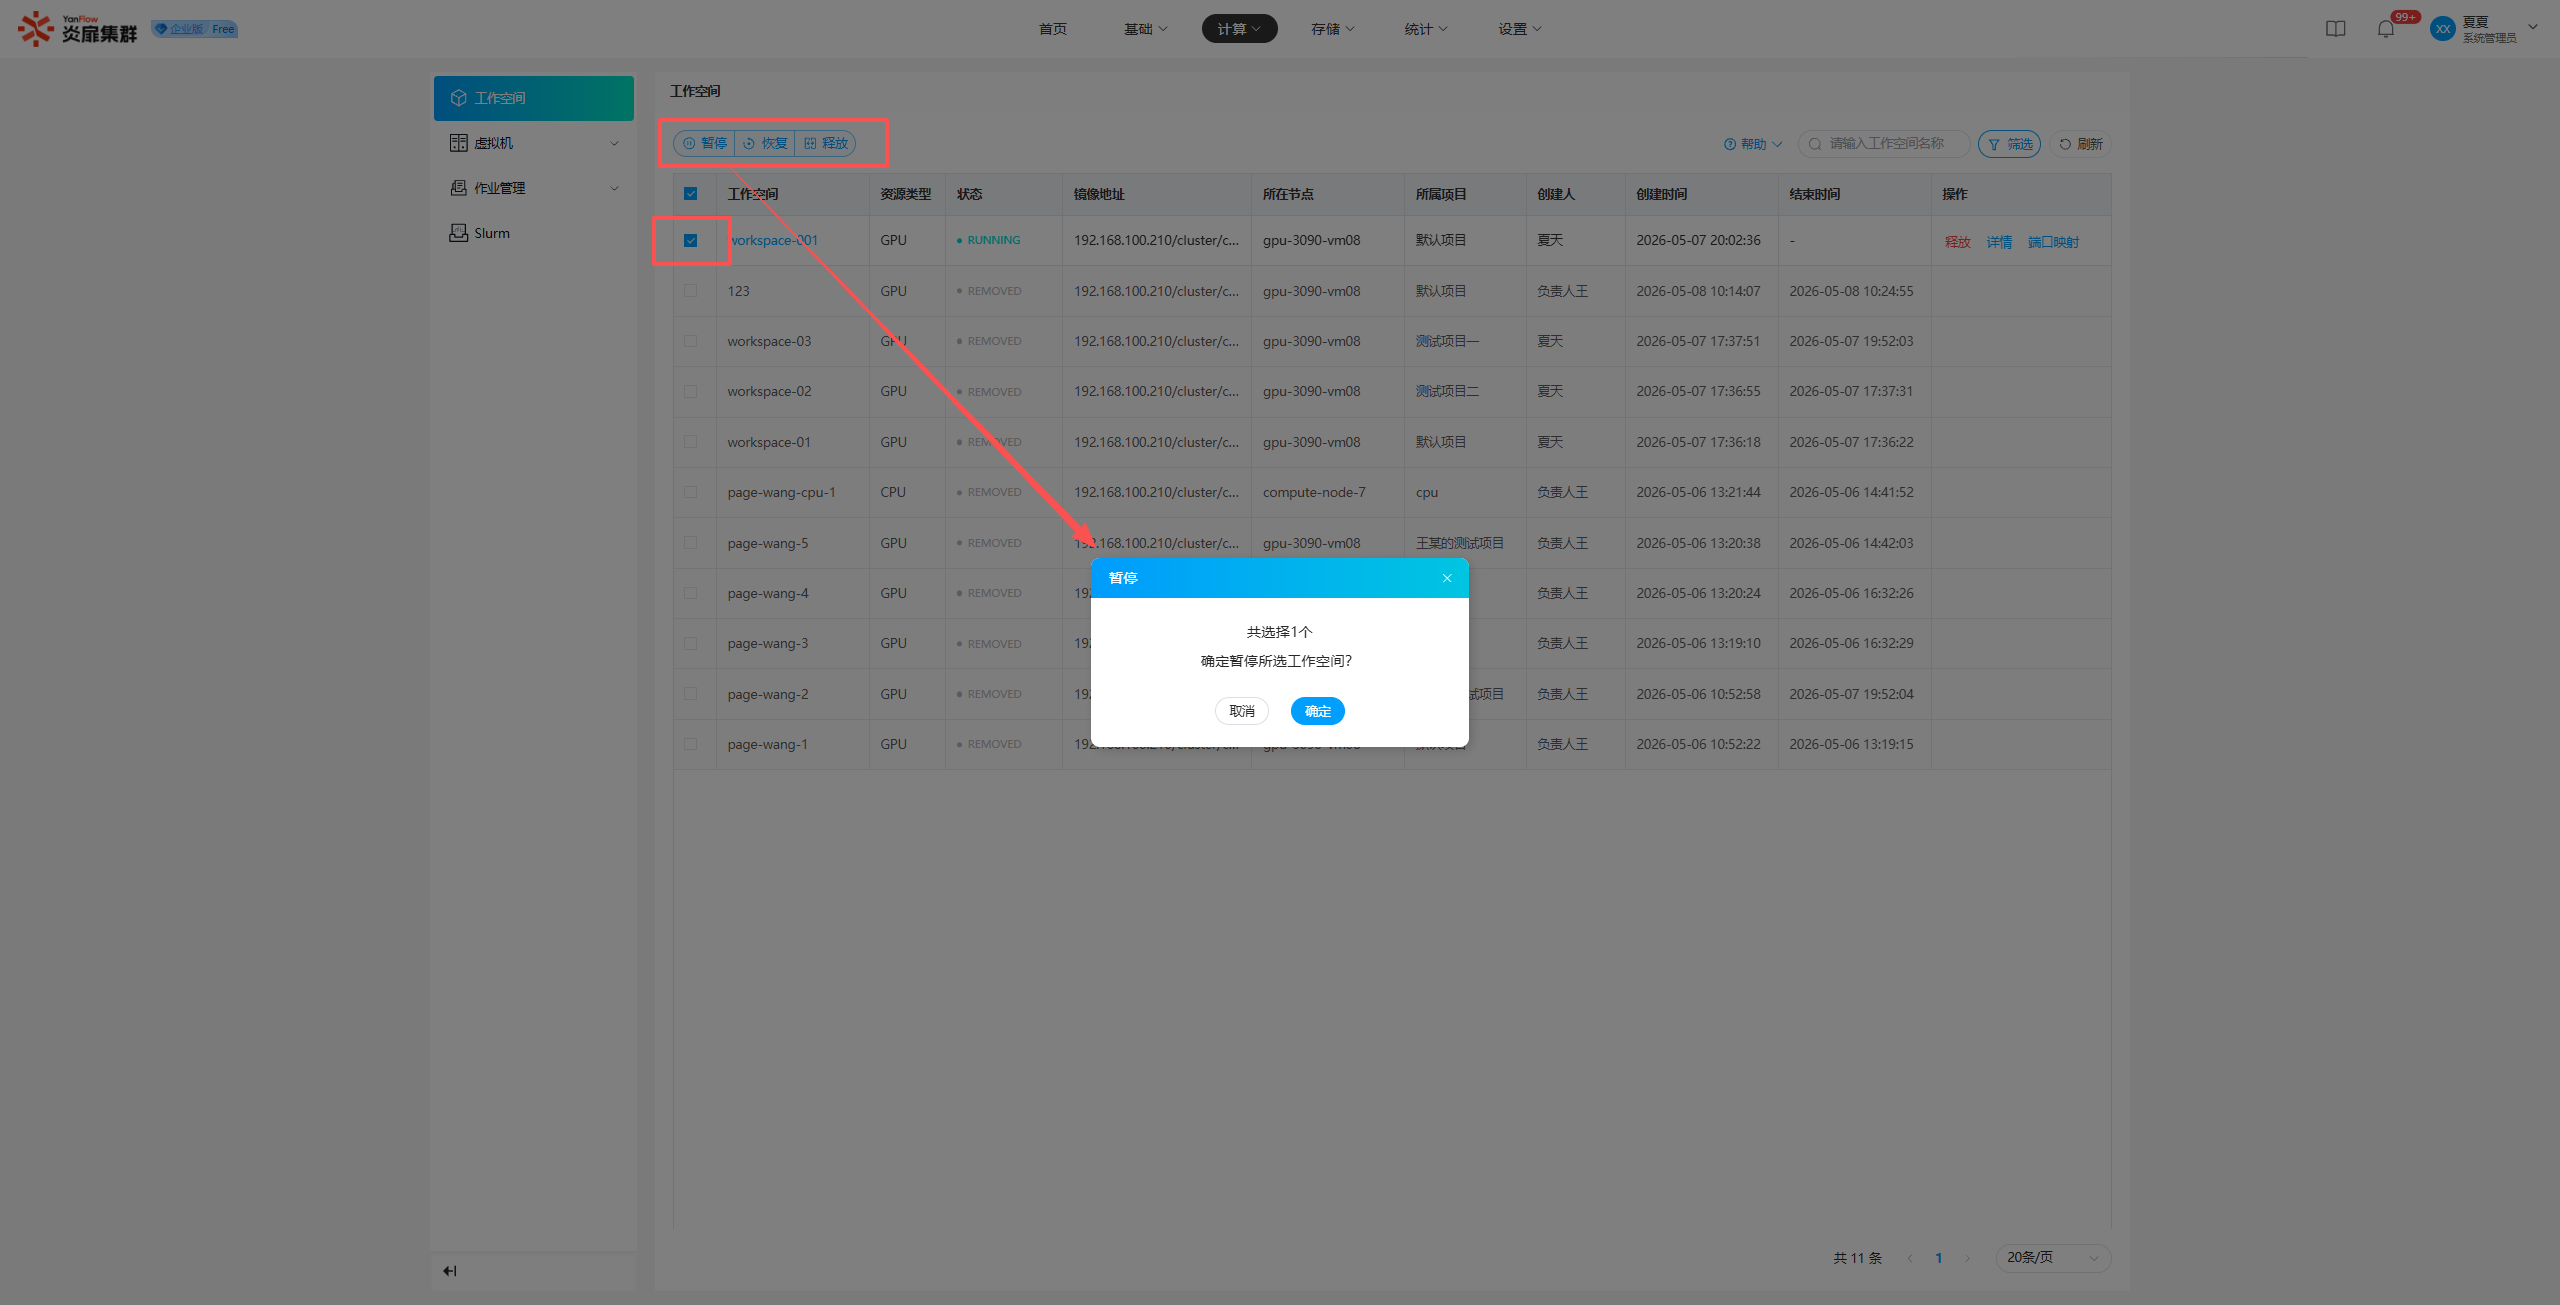
Note:
Pausecan only be executed in the RUNNING state.Resumecan only be executed in the PAUSED state.
Port Mapping
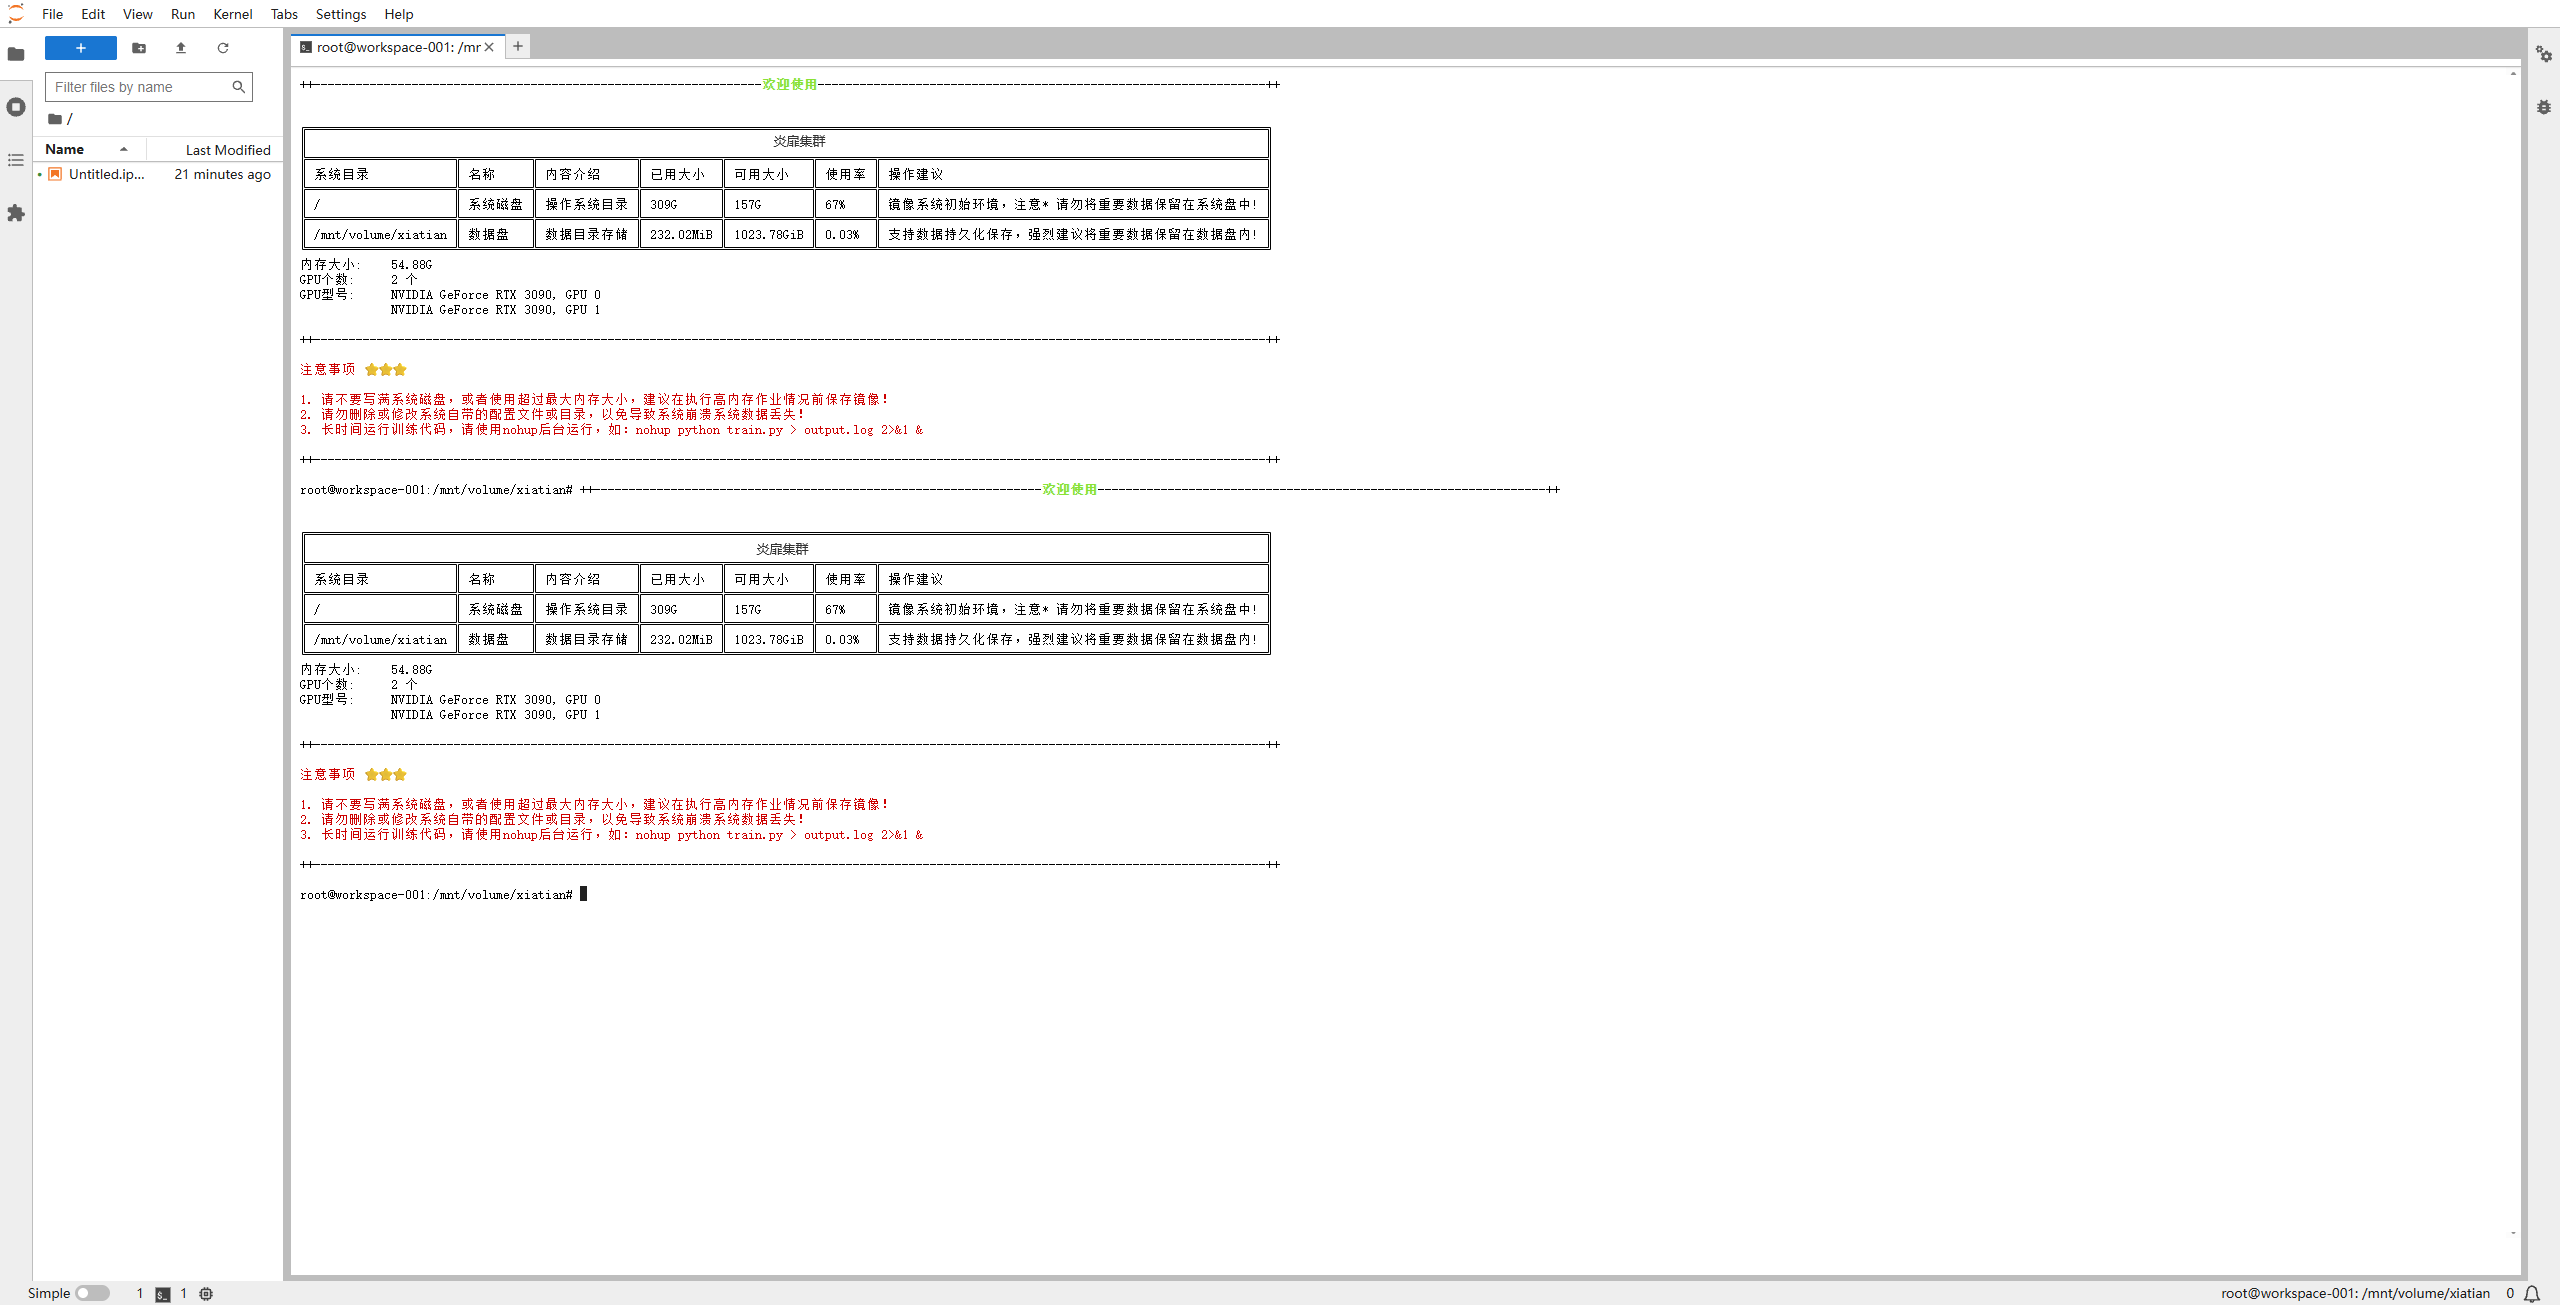
Click Port Mapping to show a popup with the port mapping information for the workspace, supporting various connection methods to access the interior of the container.
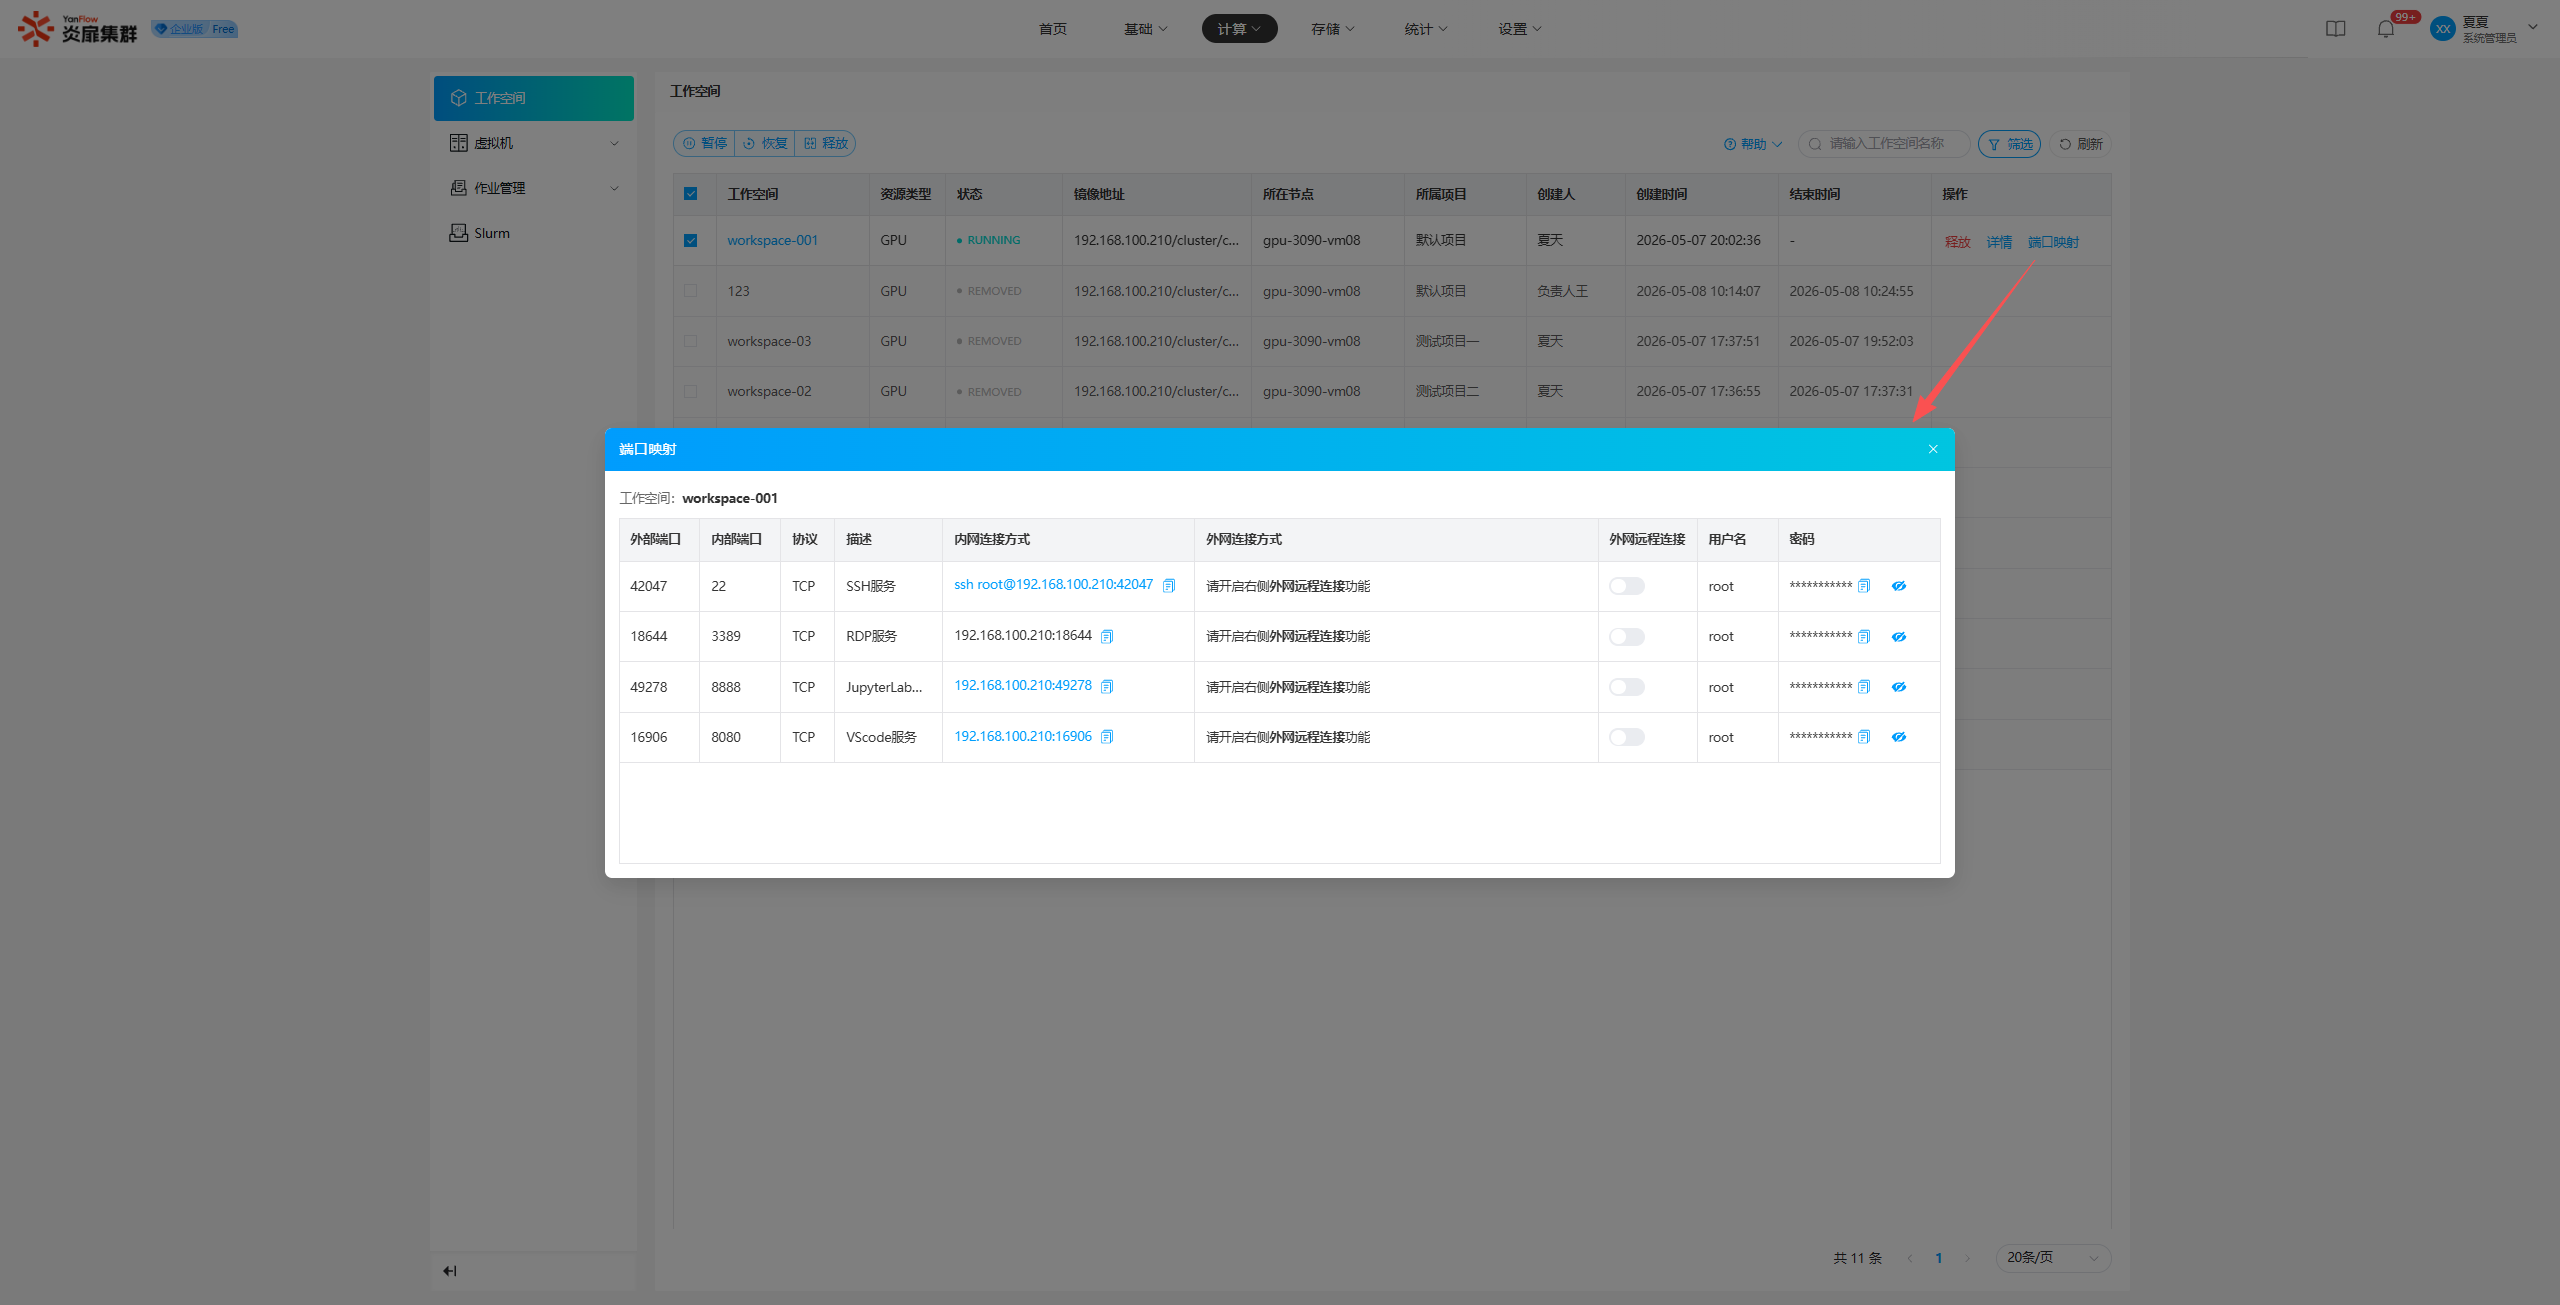
Note:
- Port mapping can only be viewed in RUNNING or PAUSED states.
- System Administrators do not have permission to toggle the
External Remote Connectionfor ports.
Virtual Machine
Instance
Instance List
System Administrators can view all VM instances in the system. Supports keyword search by instance name and filtering by system, status, project, node, creation date, or creator.
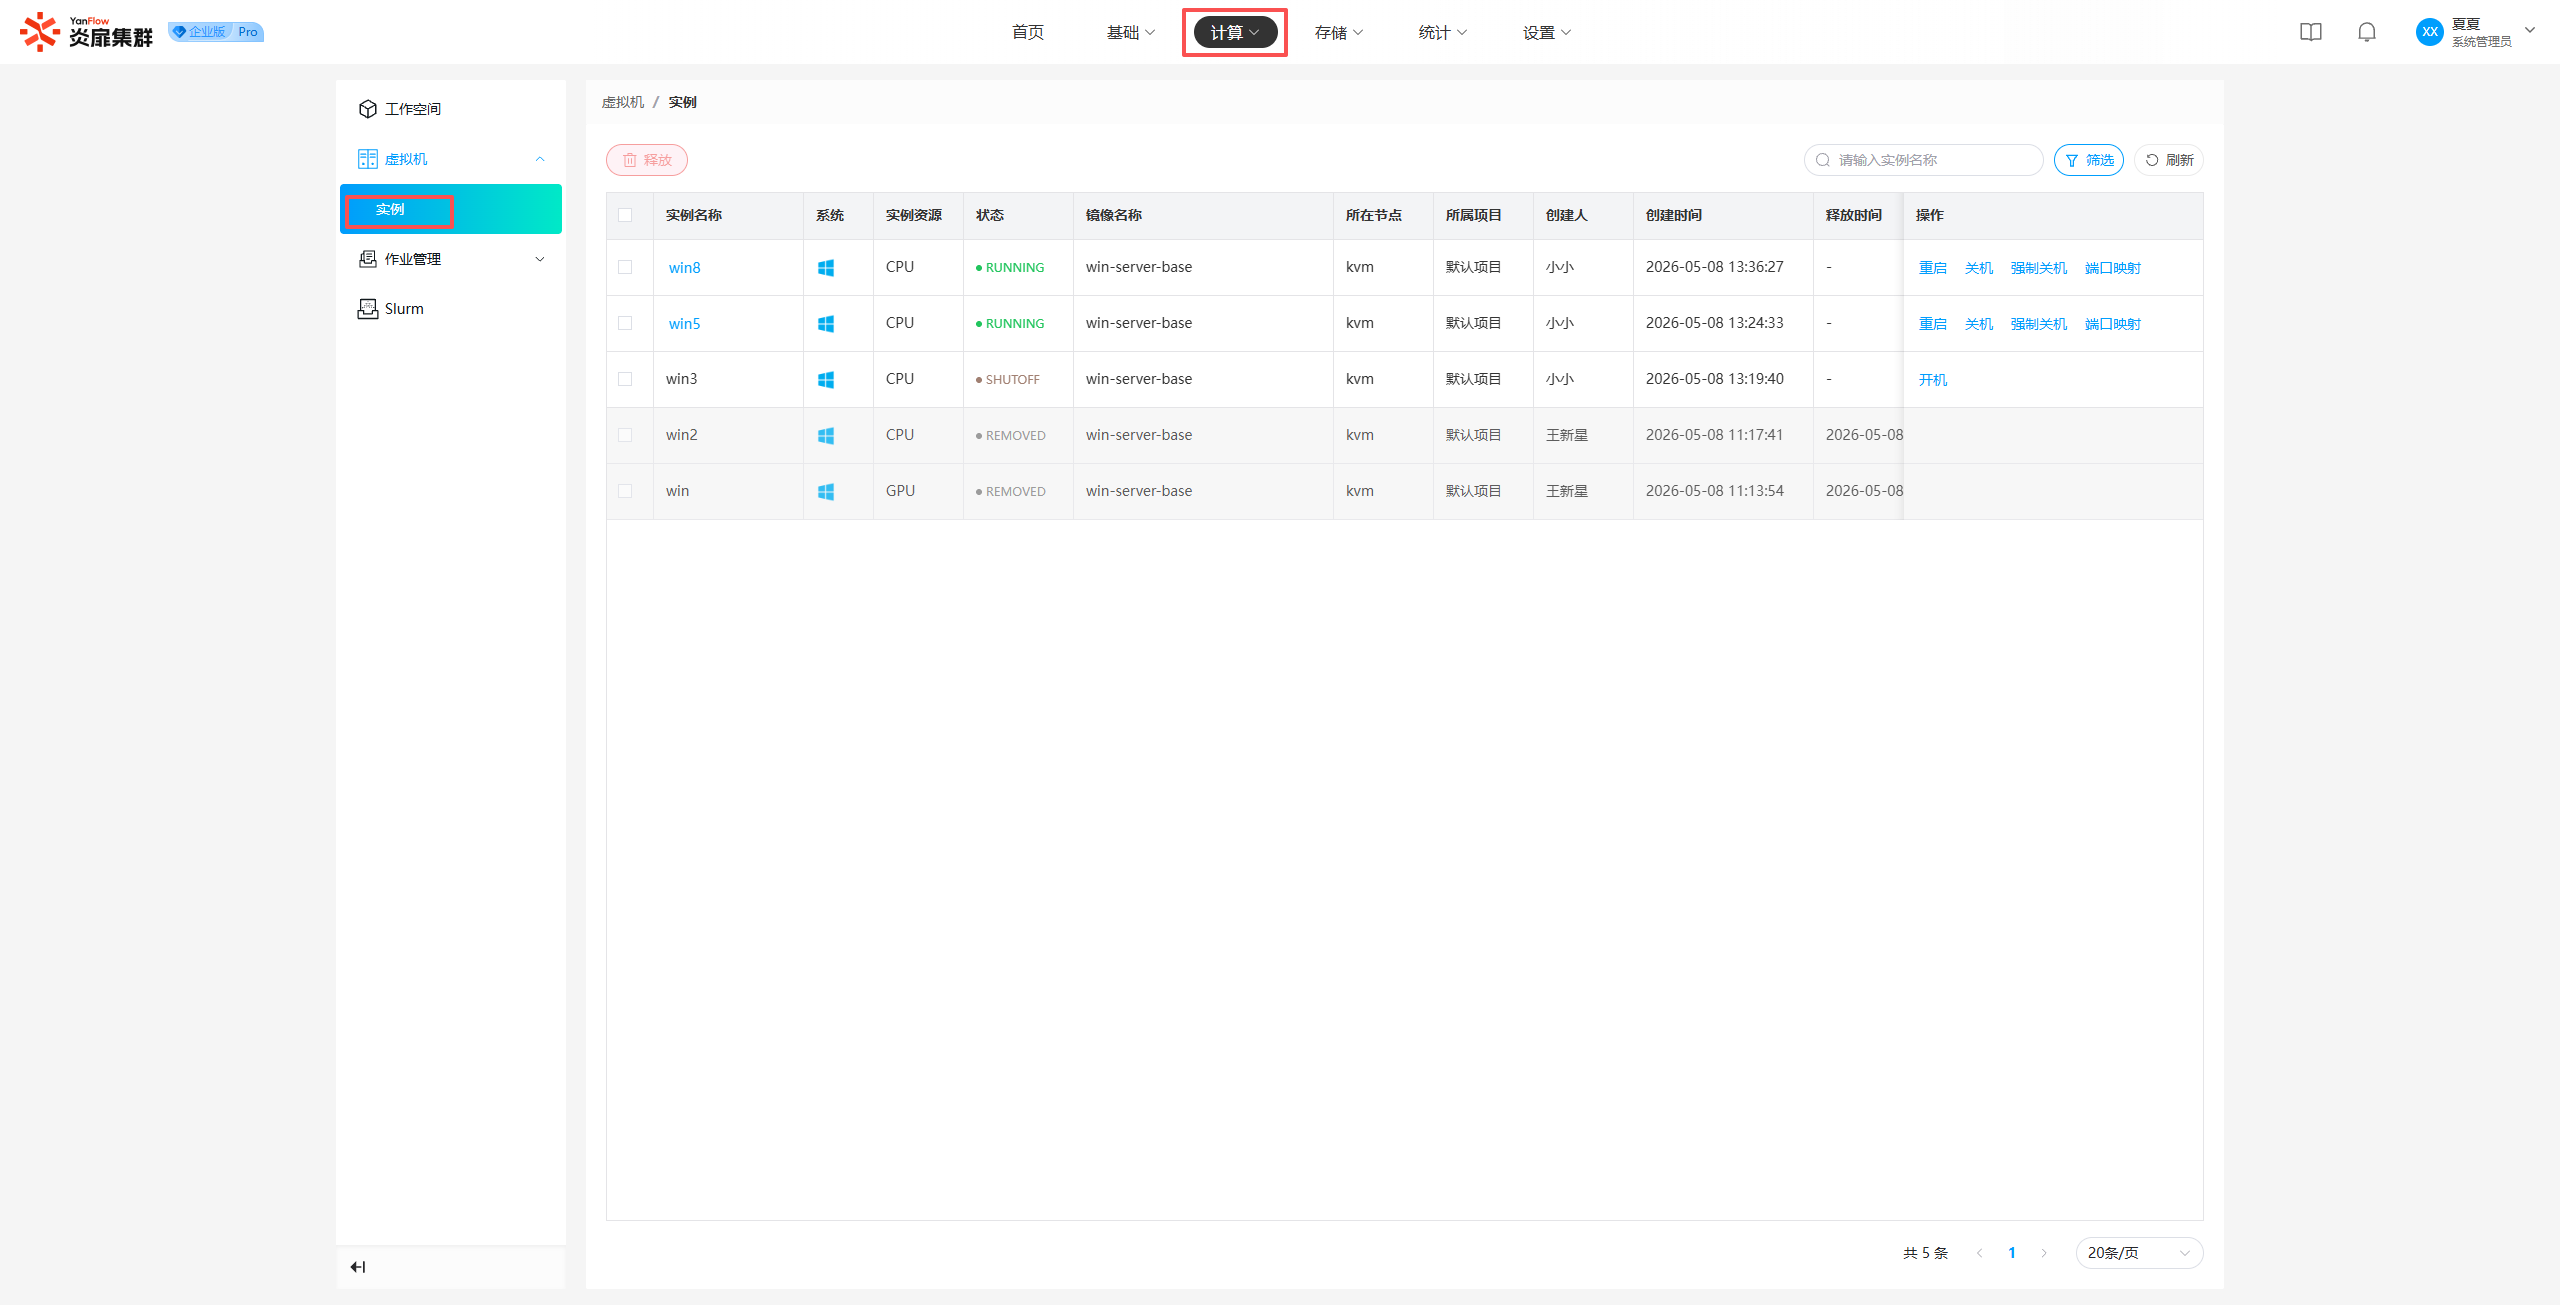
Instance Details
Click the Instance Name to enter the details page, where you can view basic information, port mapping, resource information, and data disks.
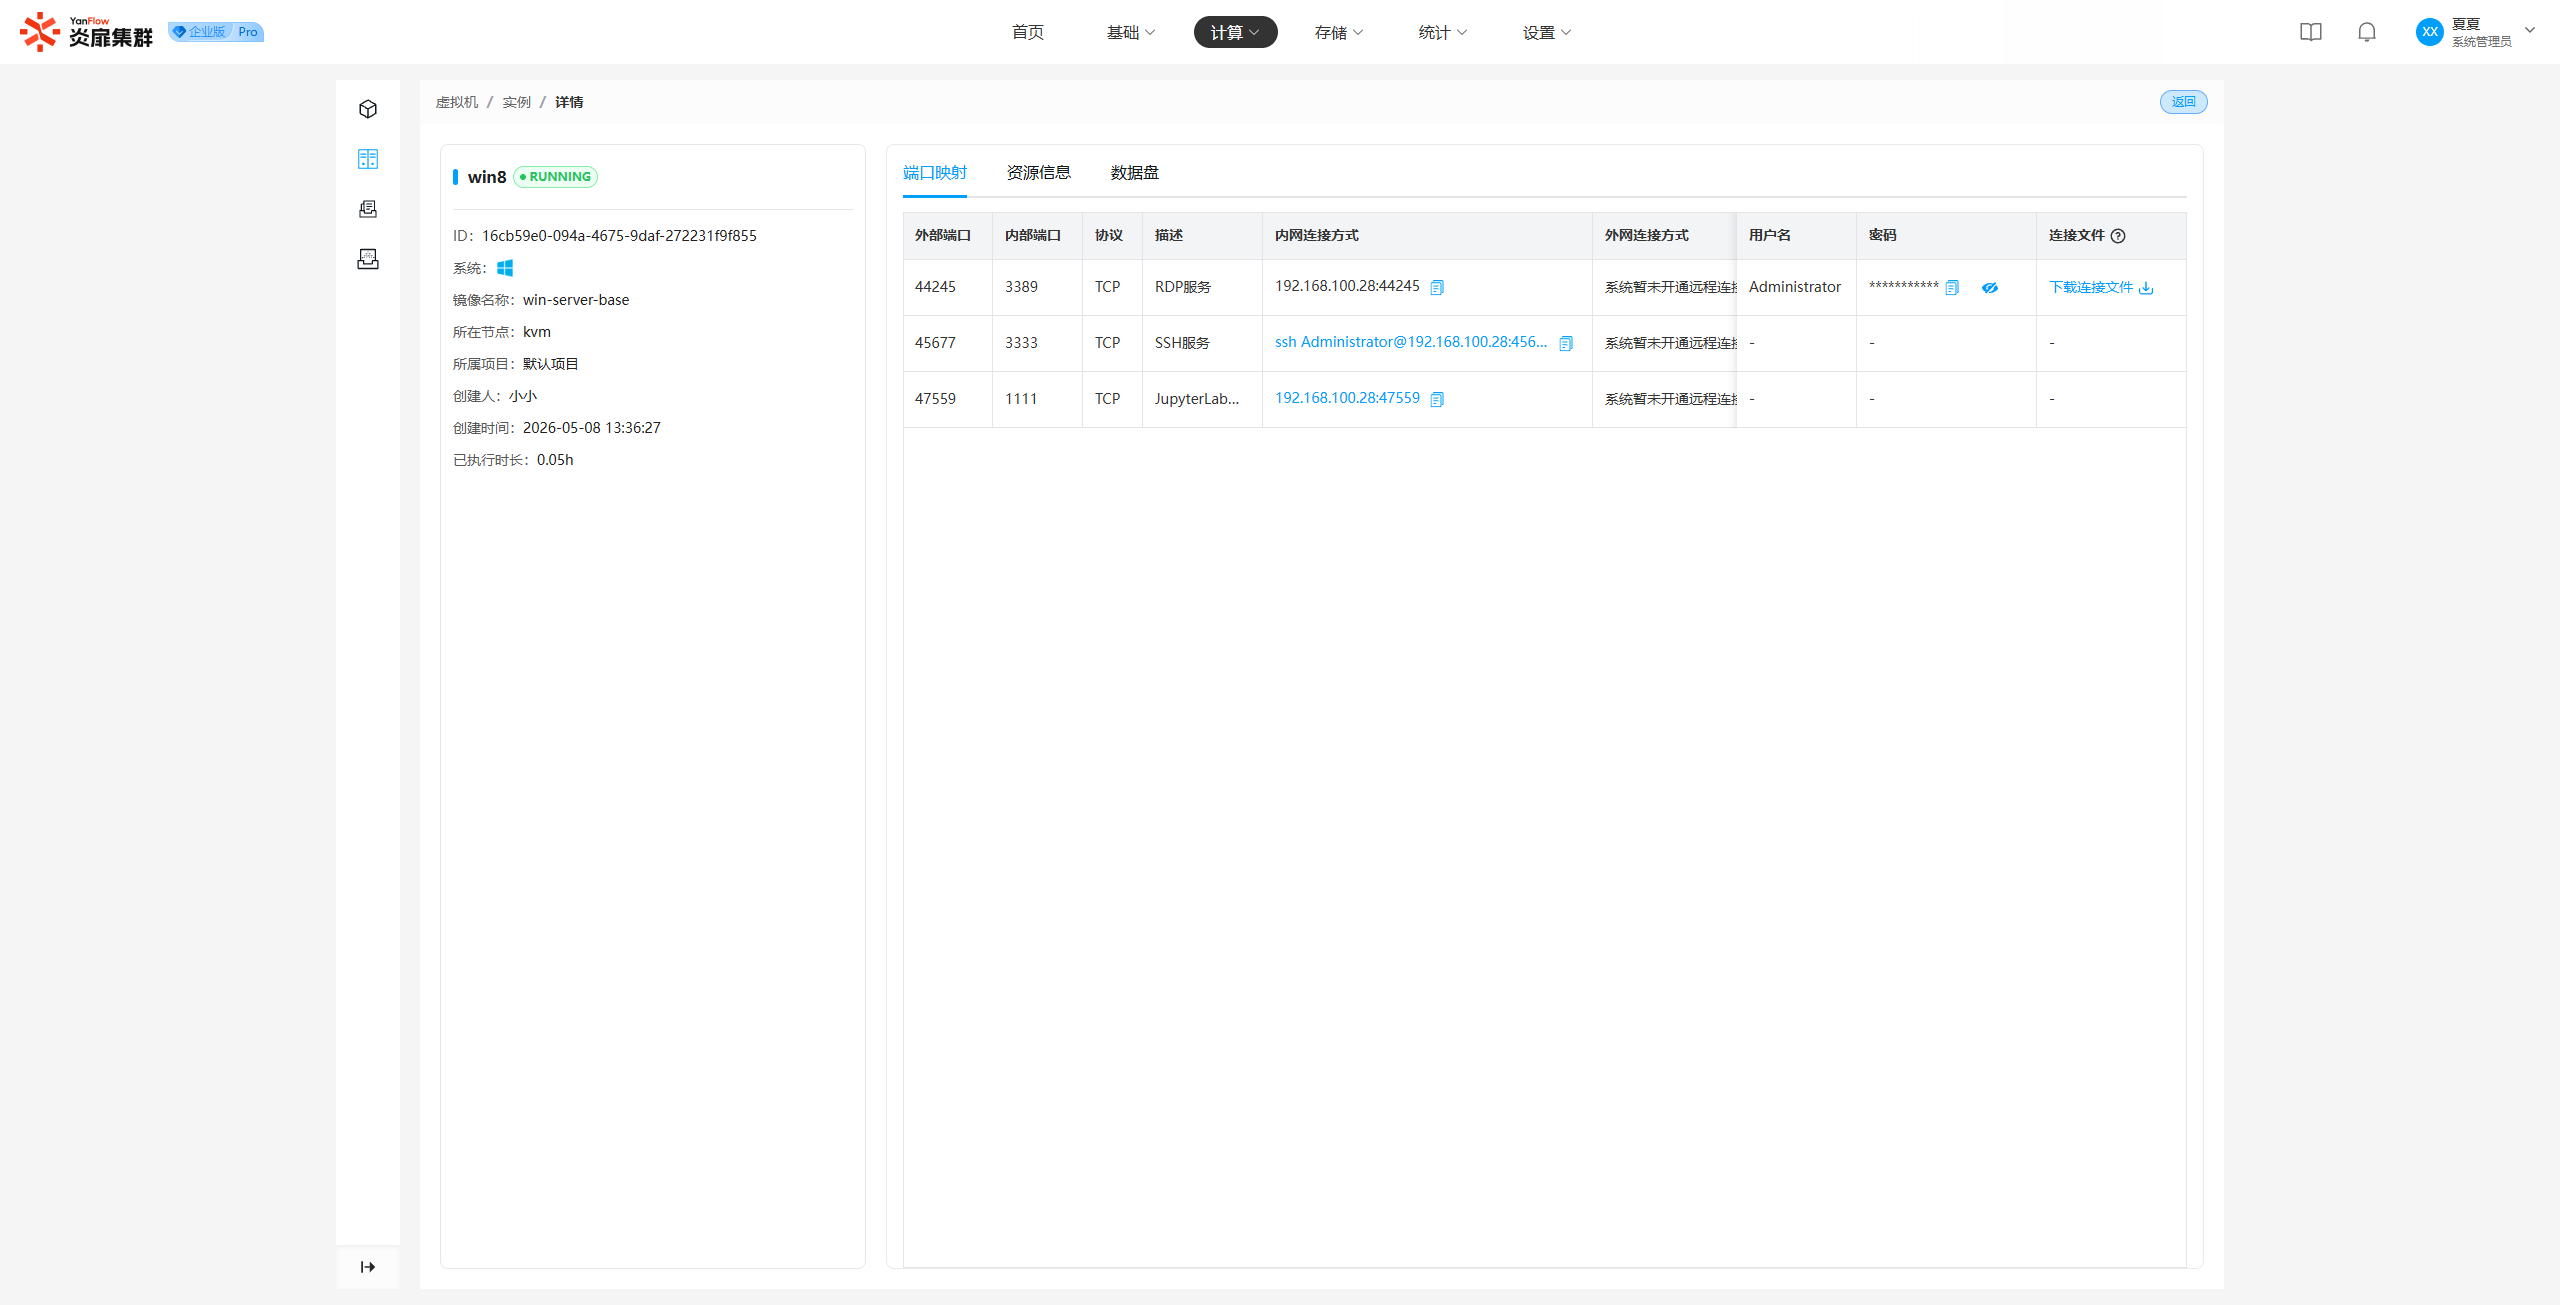
Note: Details can only be viewed in the RUNNING state.
Restart/Power On/Off/Release
System Administrators can perform Restart, Shutdown, Force Shutdown, Power On, and Release operations on instances. Click the corresponding operation, confirm in the prompt, and the action will be completed.
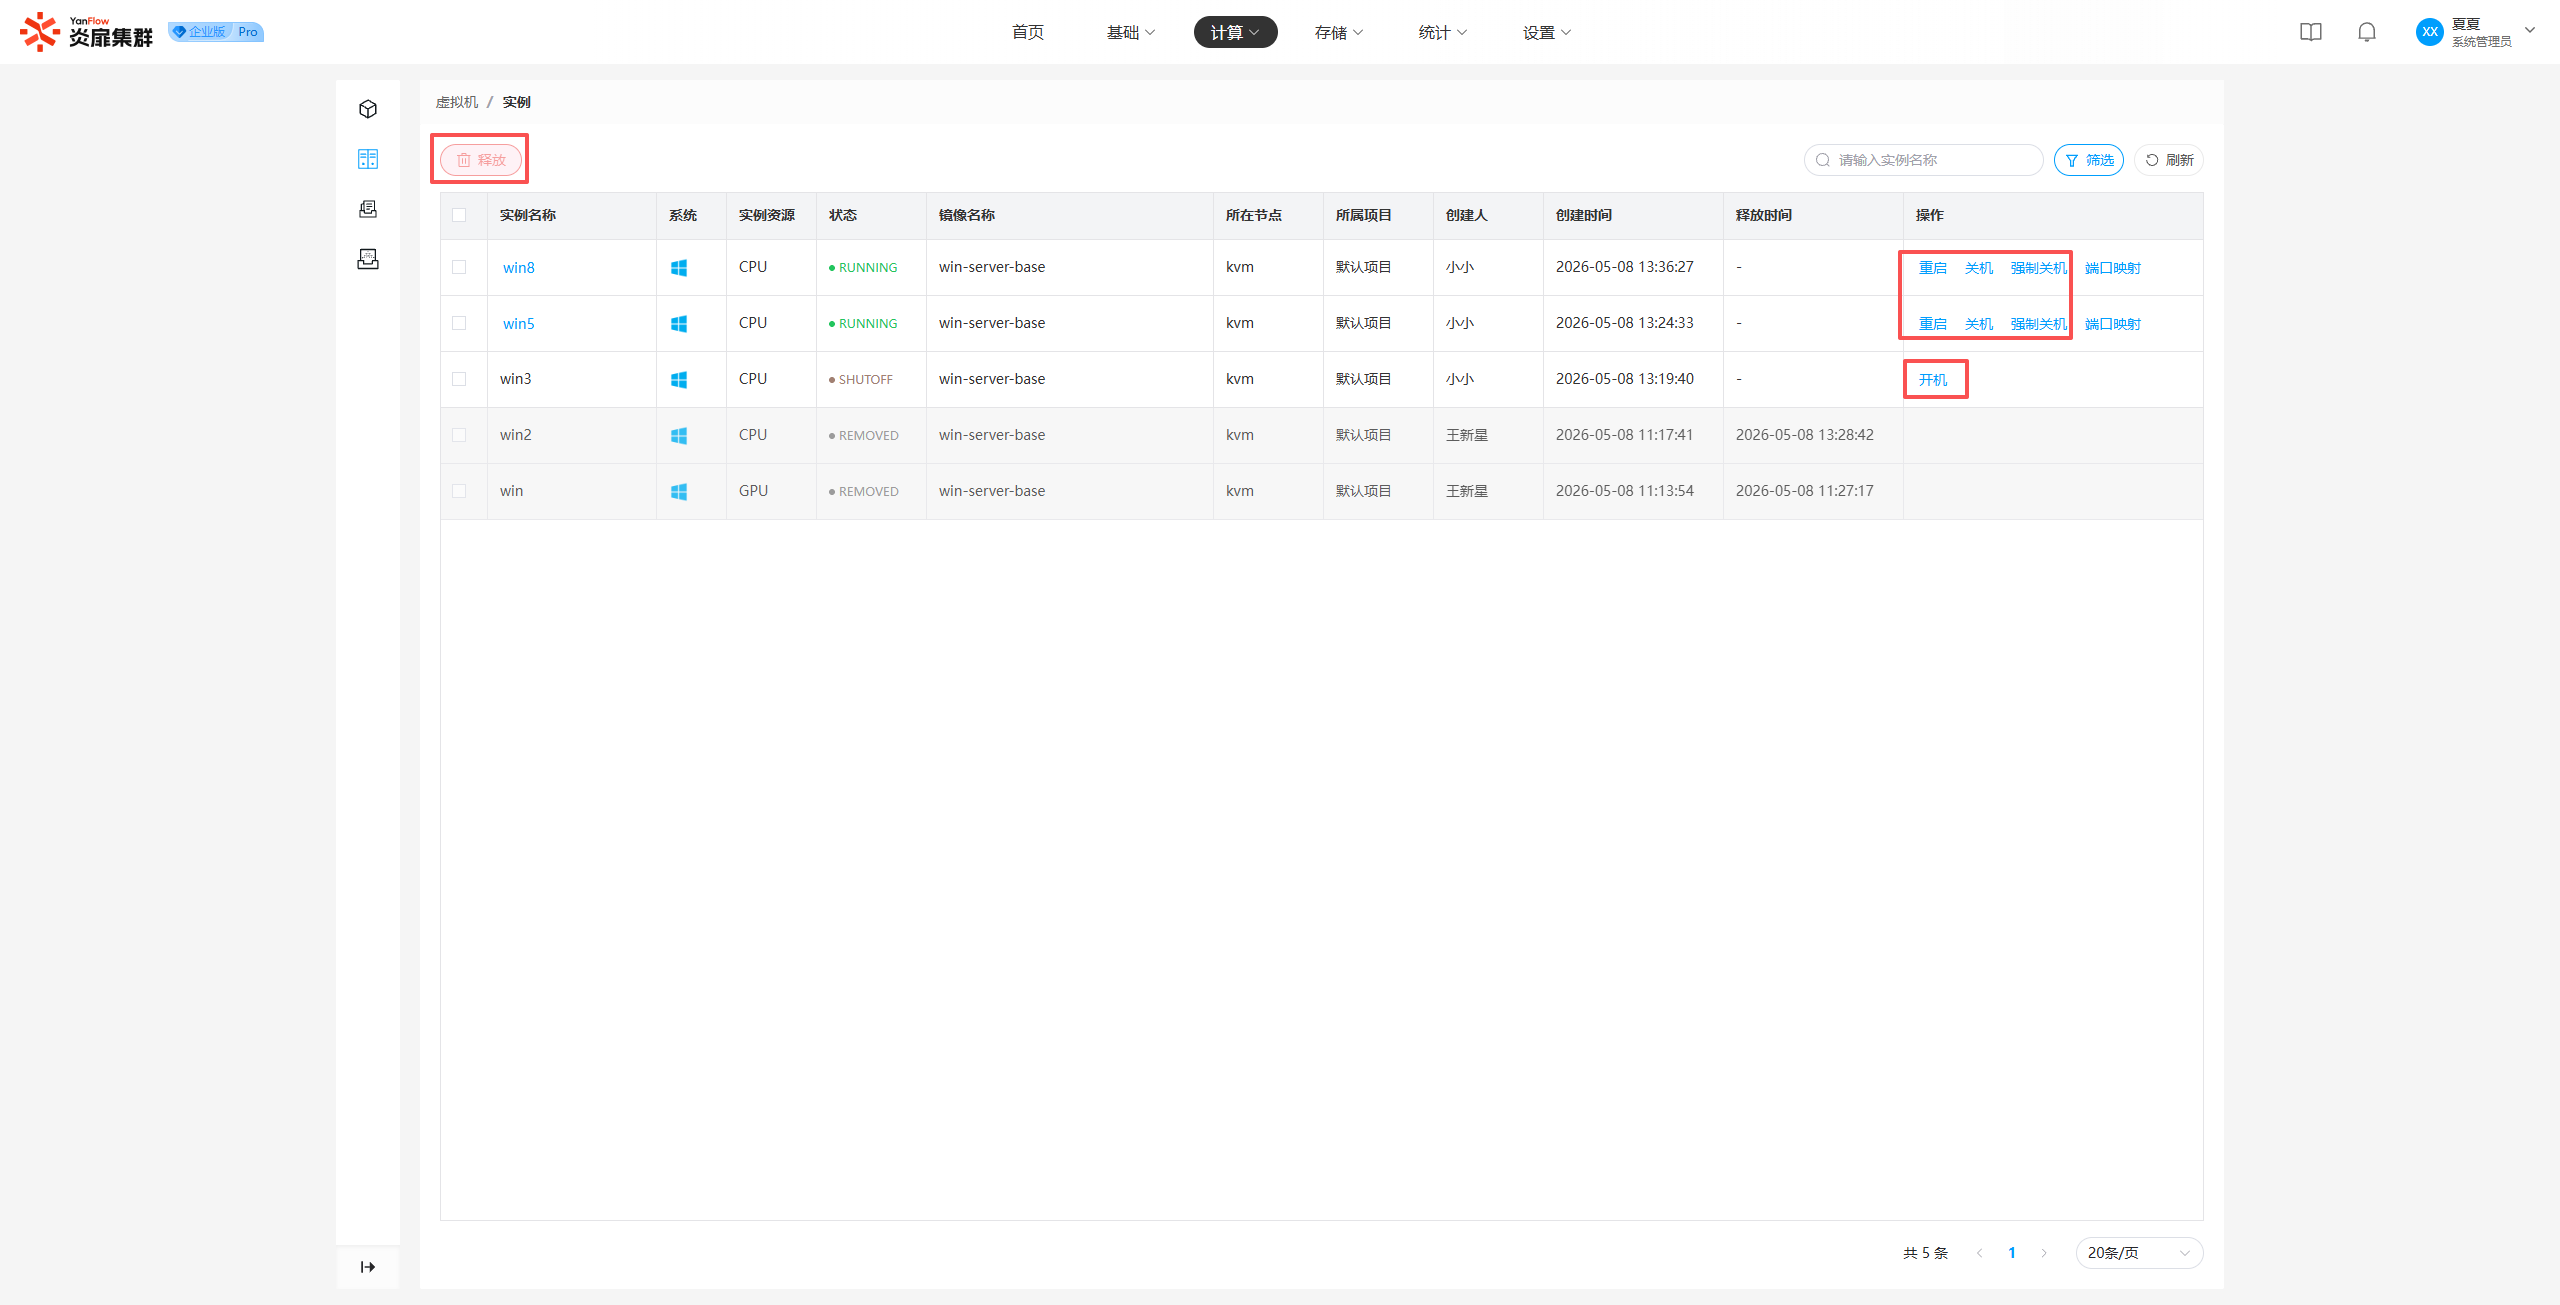
Note:
Restart,Shutdown, andForce Shutdowncan only be executed in the RUNNING state.Power Oncan only be executed in the SHUTOFF state.
Port Mapping
Click Port Mapping to show a popup with the instance's port mapping information, supporting various connection methods to access the interior of the container.
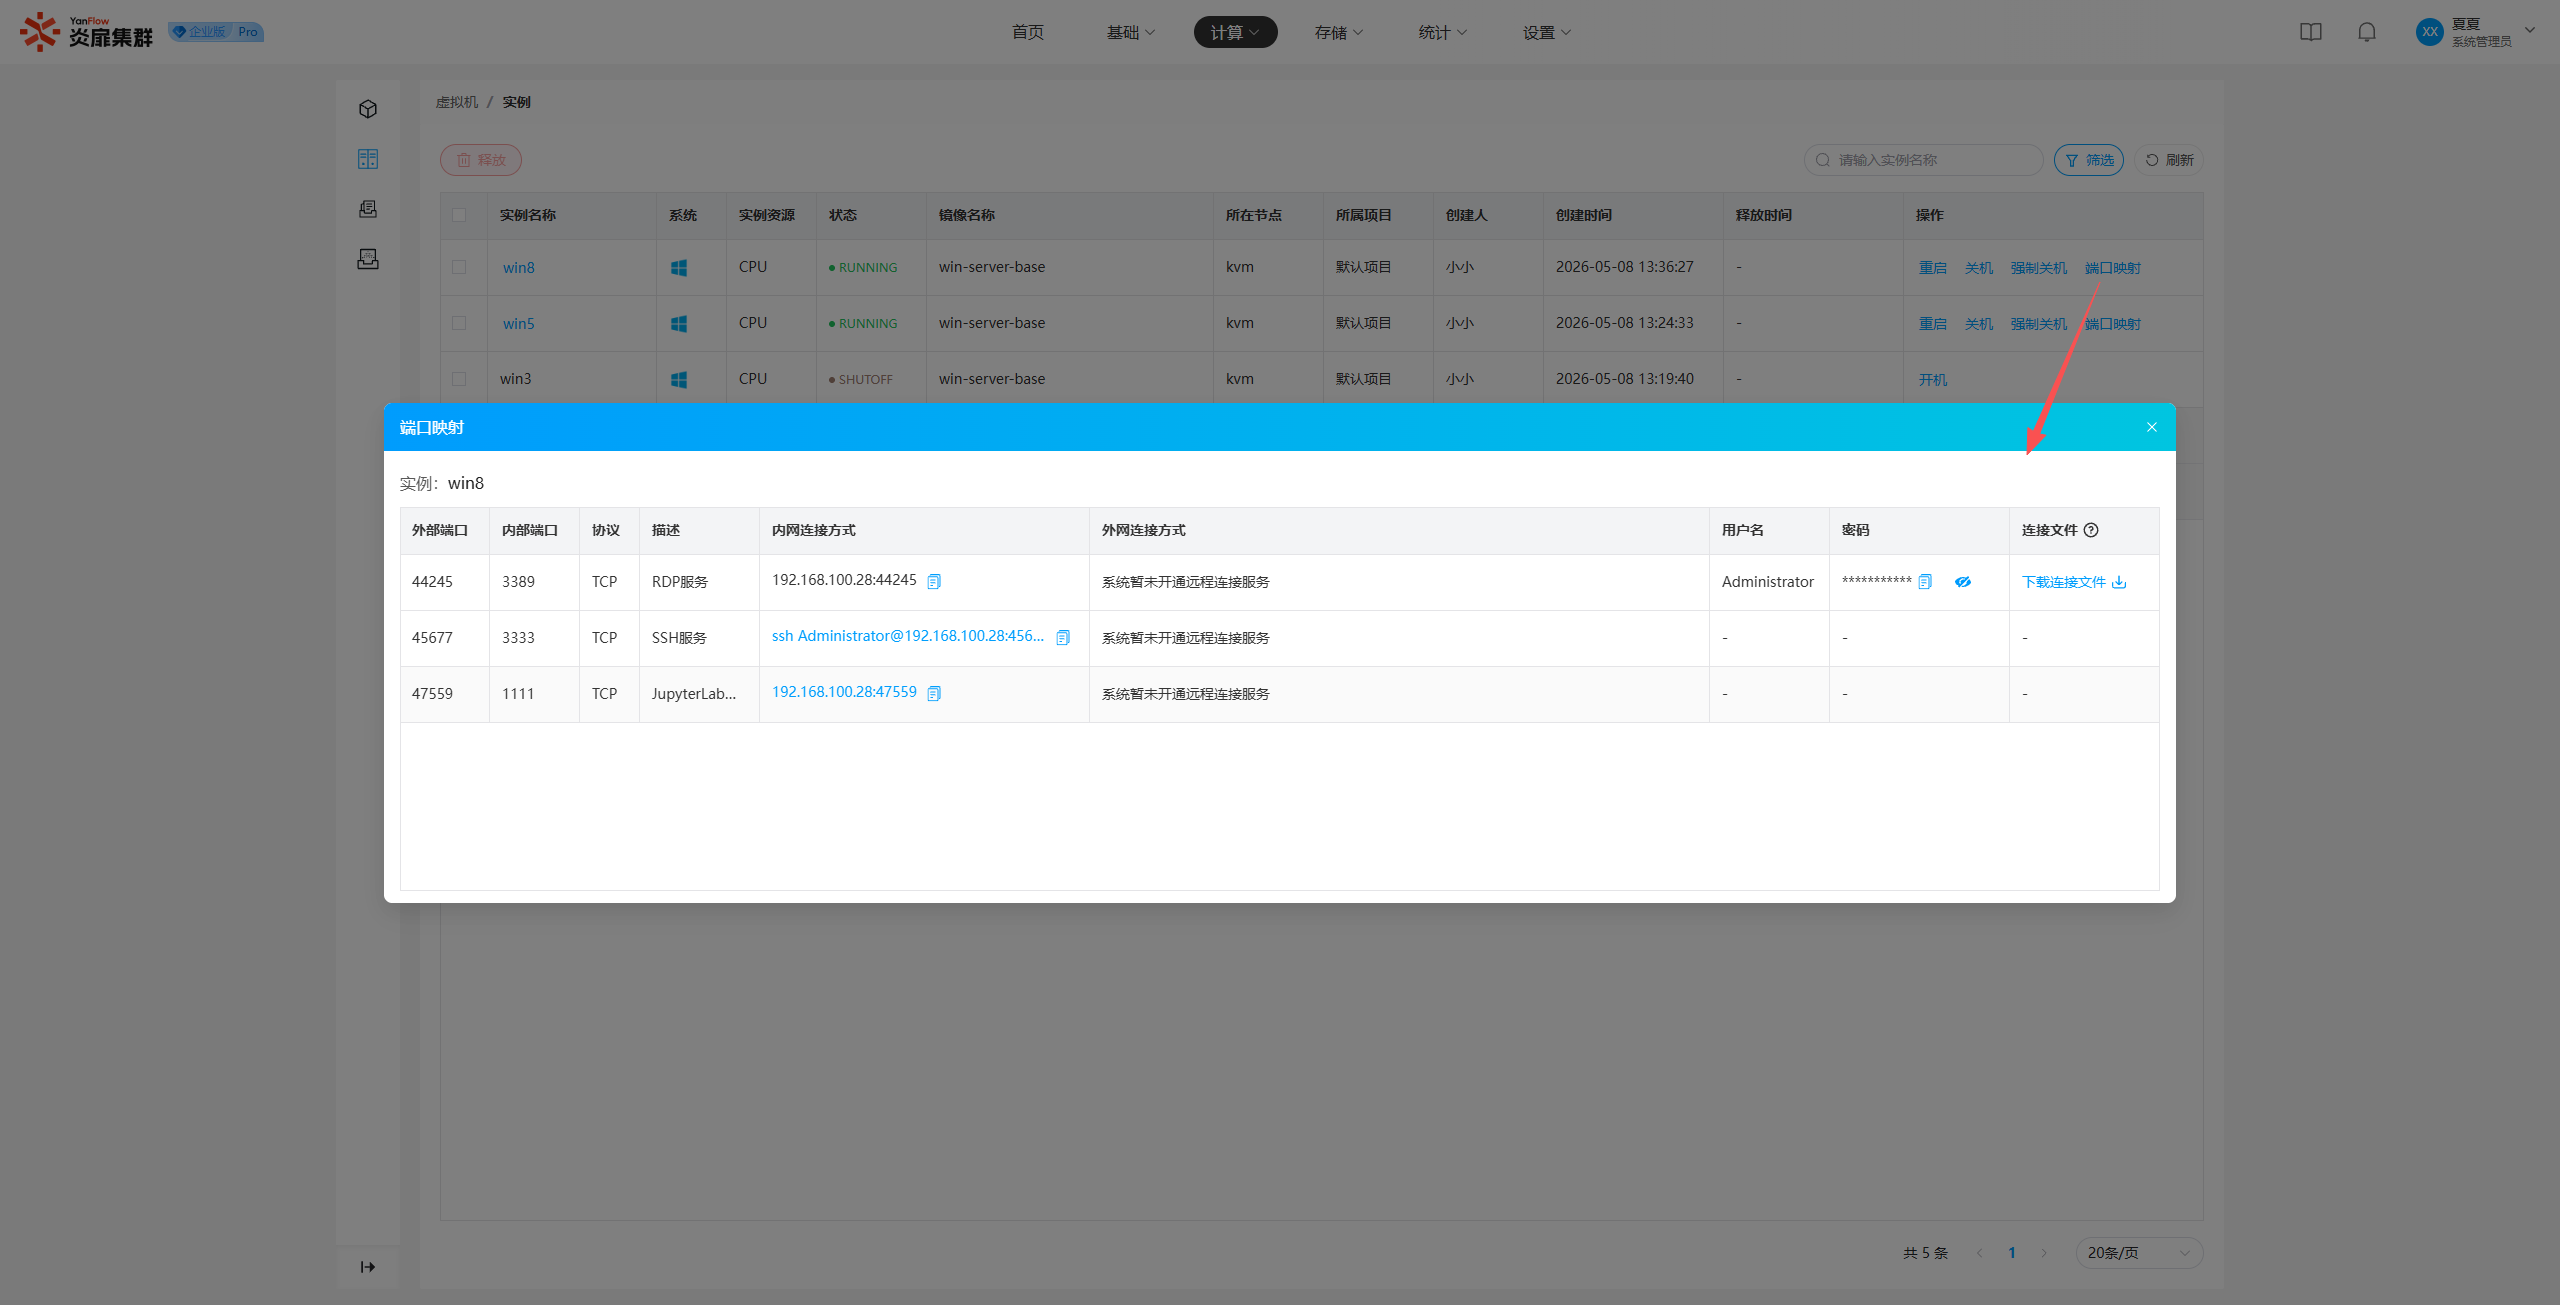
Note:
- Port mapping can only be viewed in RUNNING or PAUSED states.
- System Administrators do not have permission to toggle the
External Remote ConnectionorDownload Connection File.
Job Management
Kubernetes
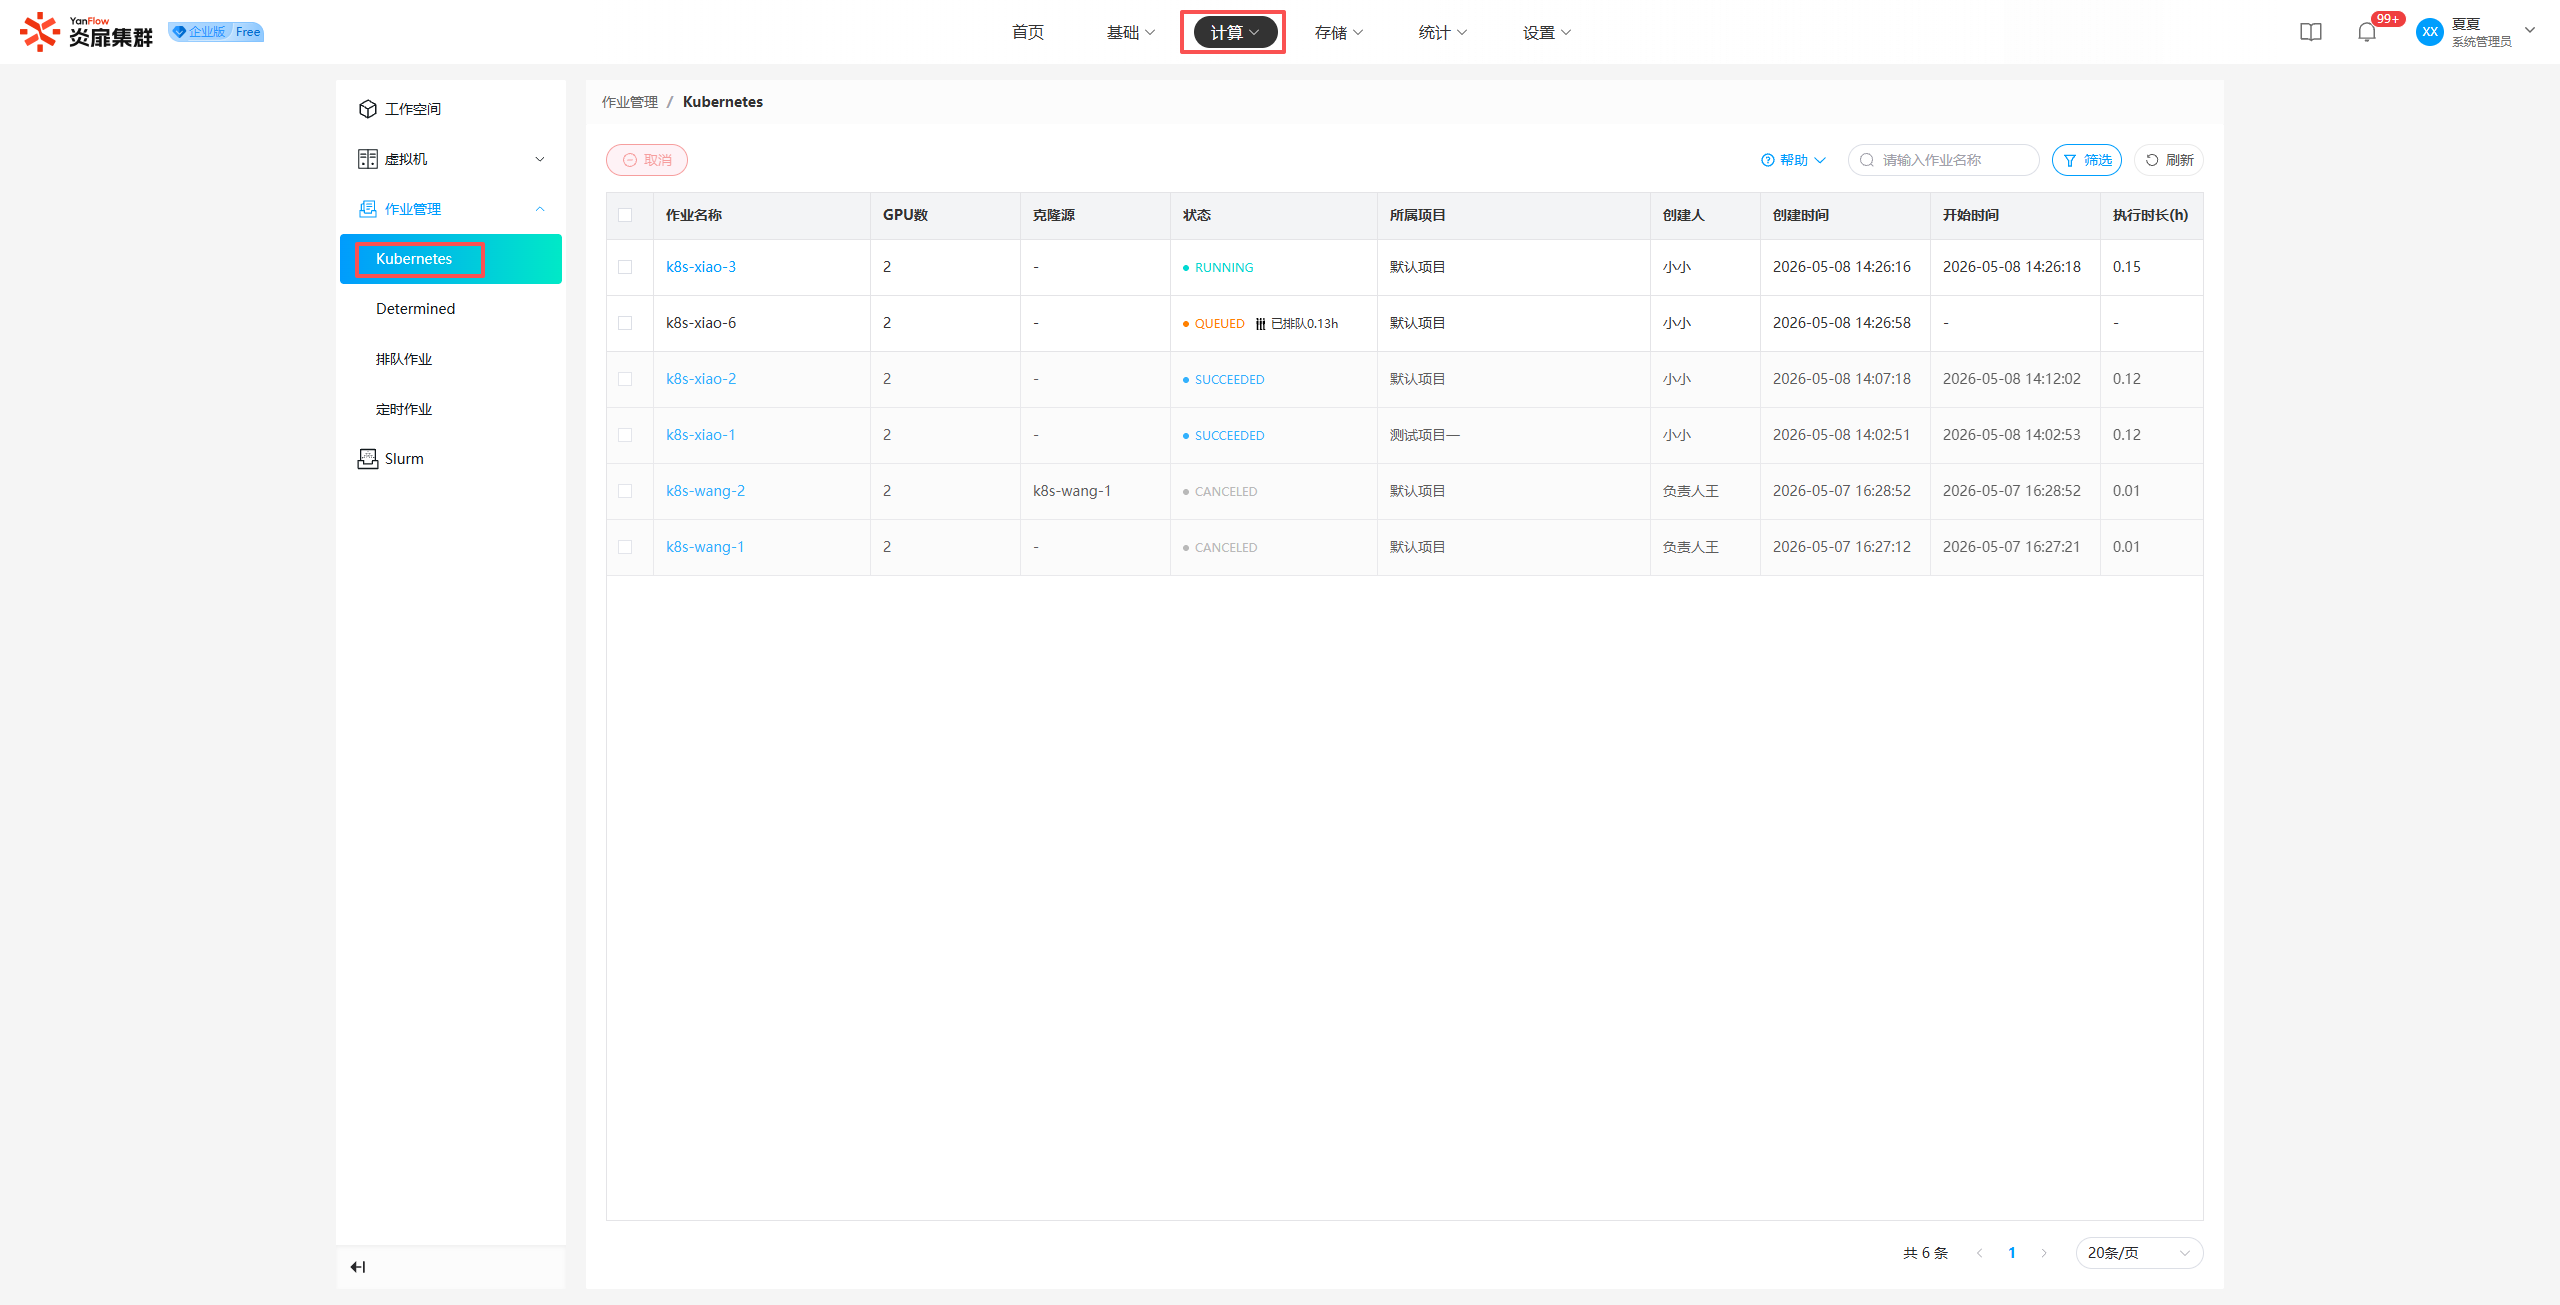
Job List
System Administrators can view all Kubernetes jobs in the system. Supports keyword search by job name and filtering by status, project, creation date, or creator.
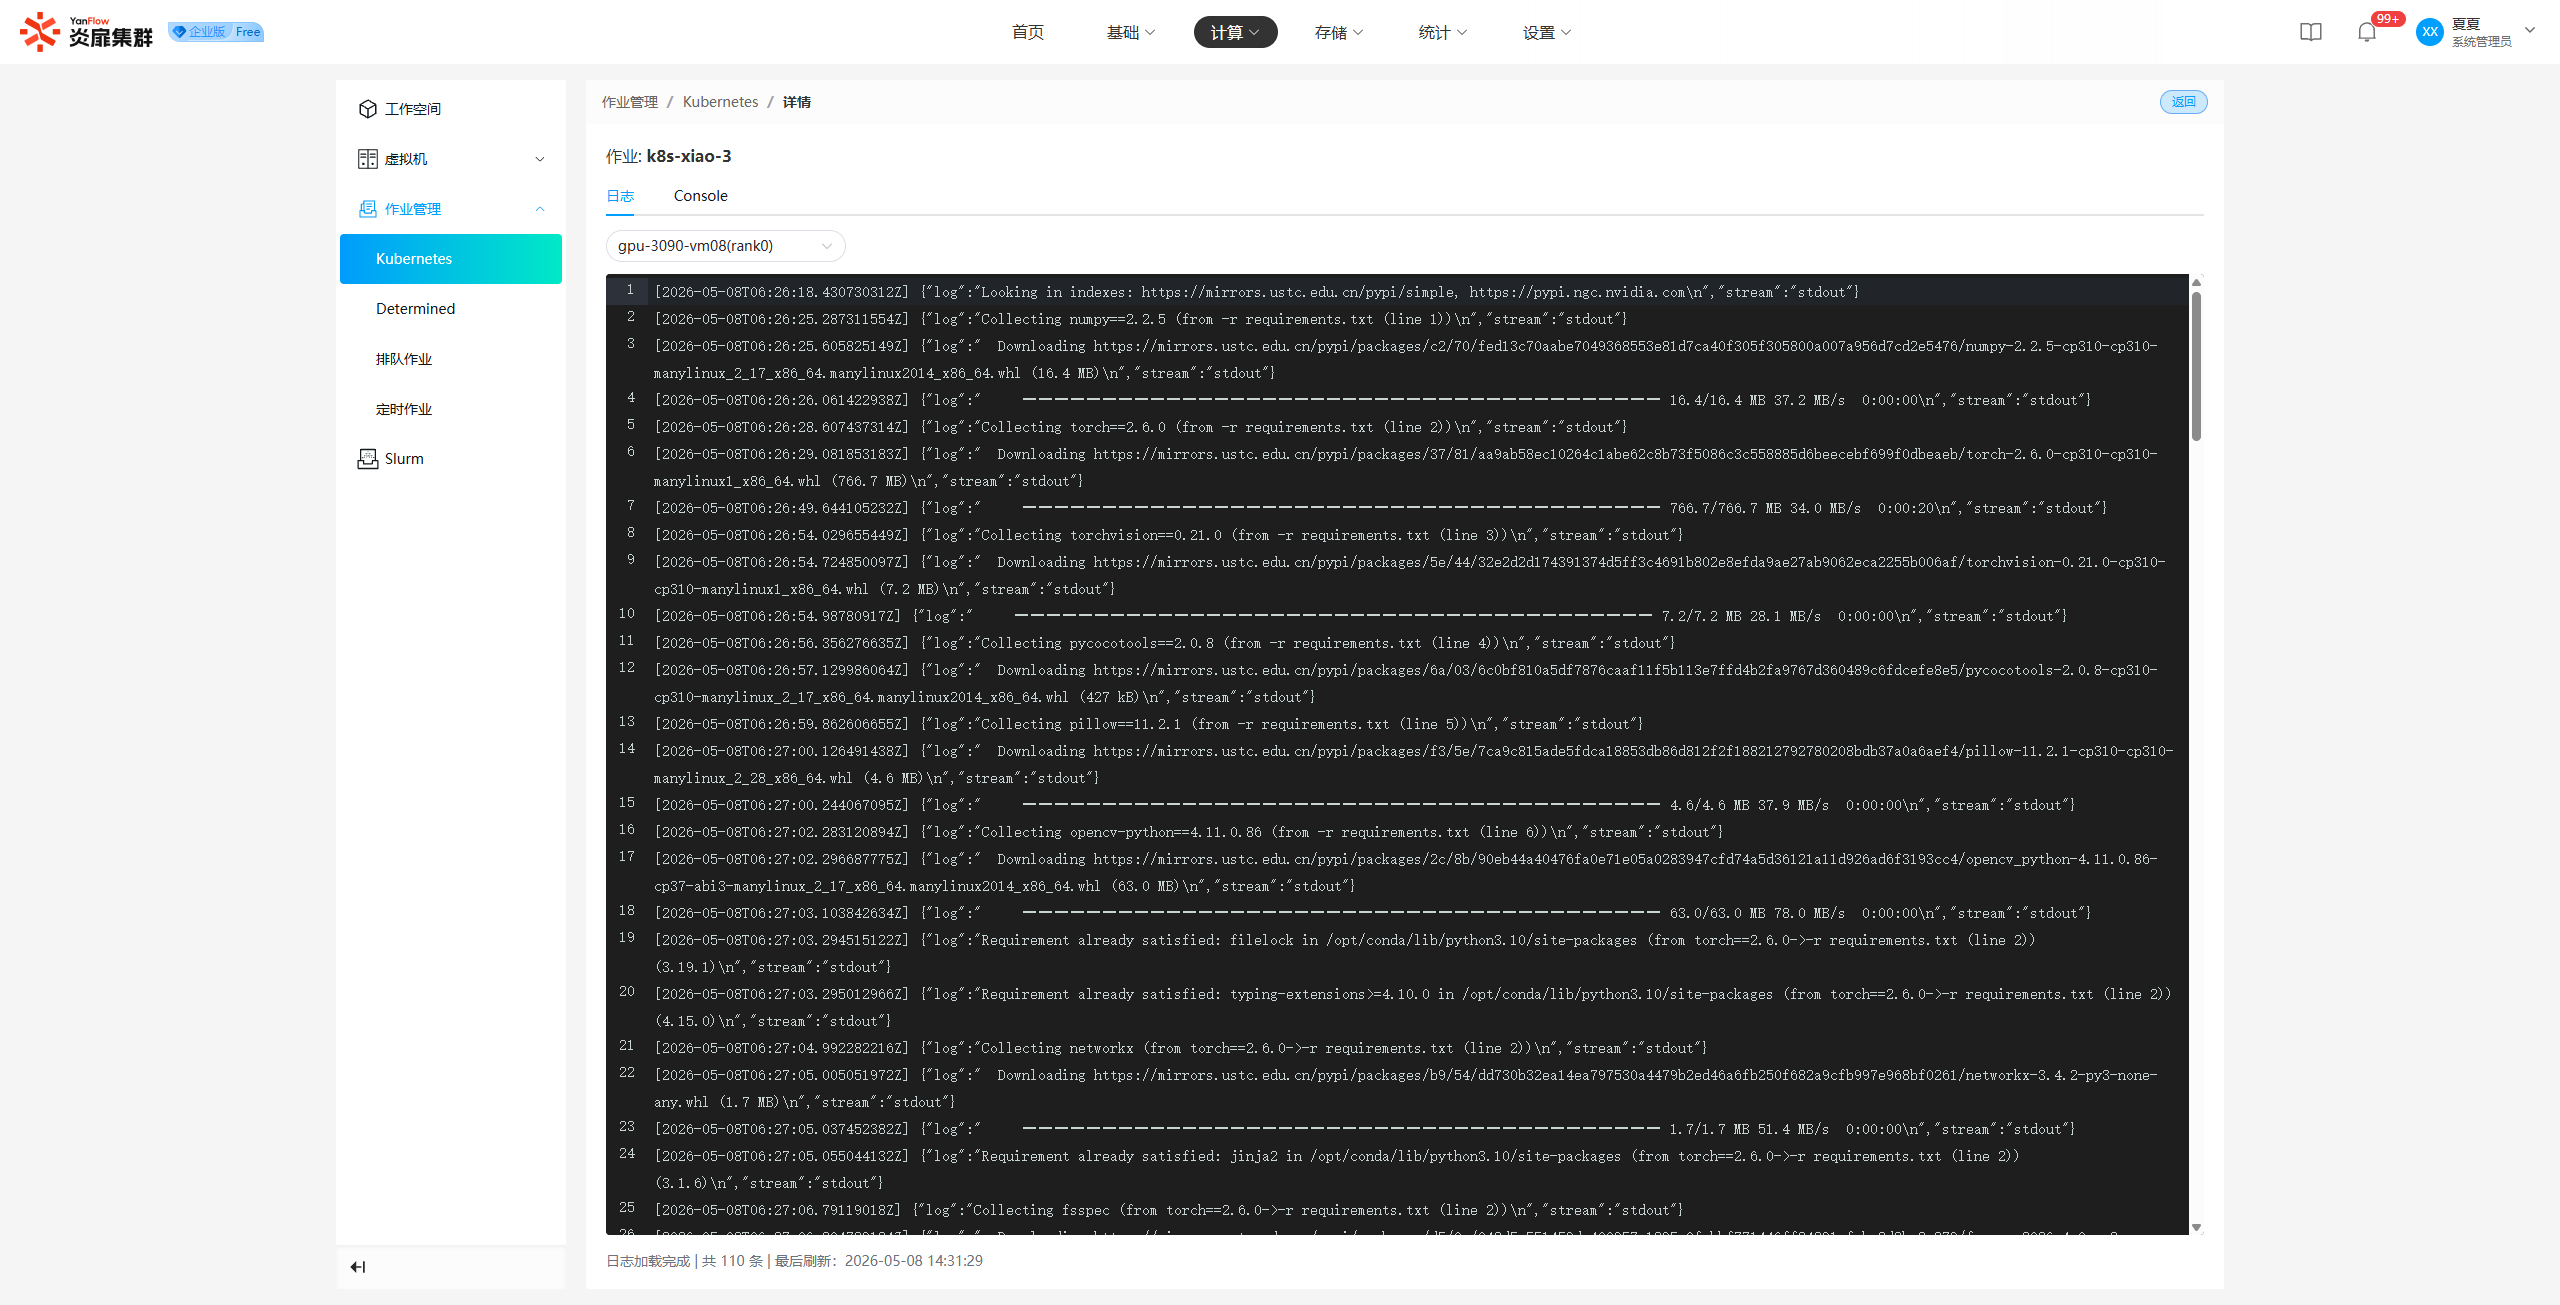
Job Details
Click the Job Name to enter the details page, which supports viewing logs and Console connections.
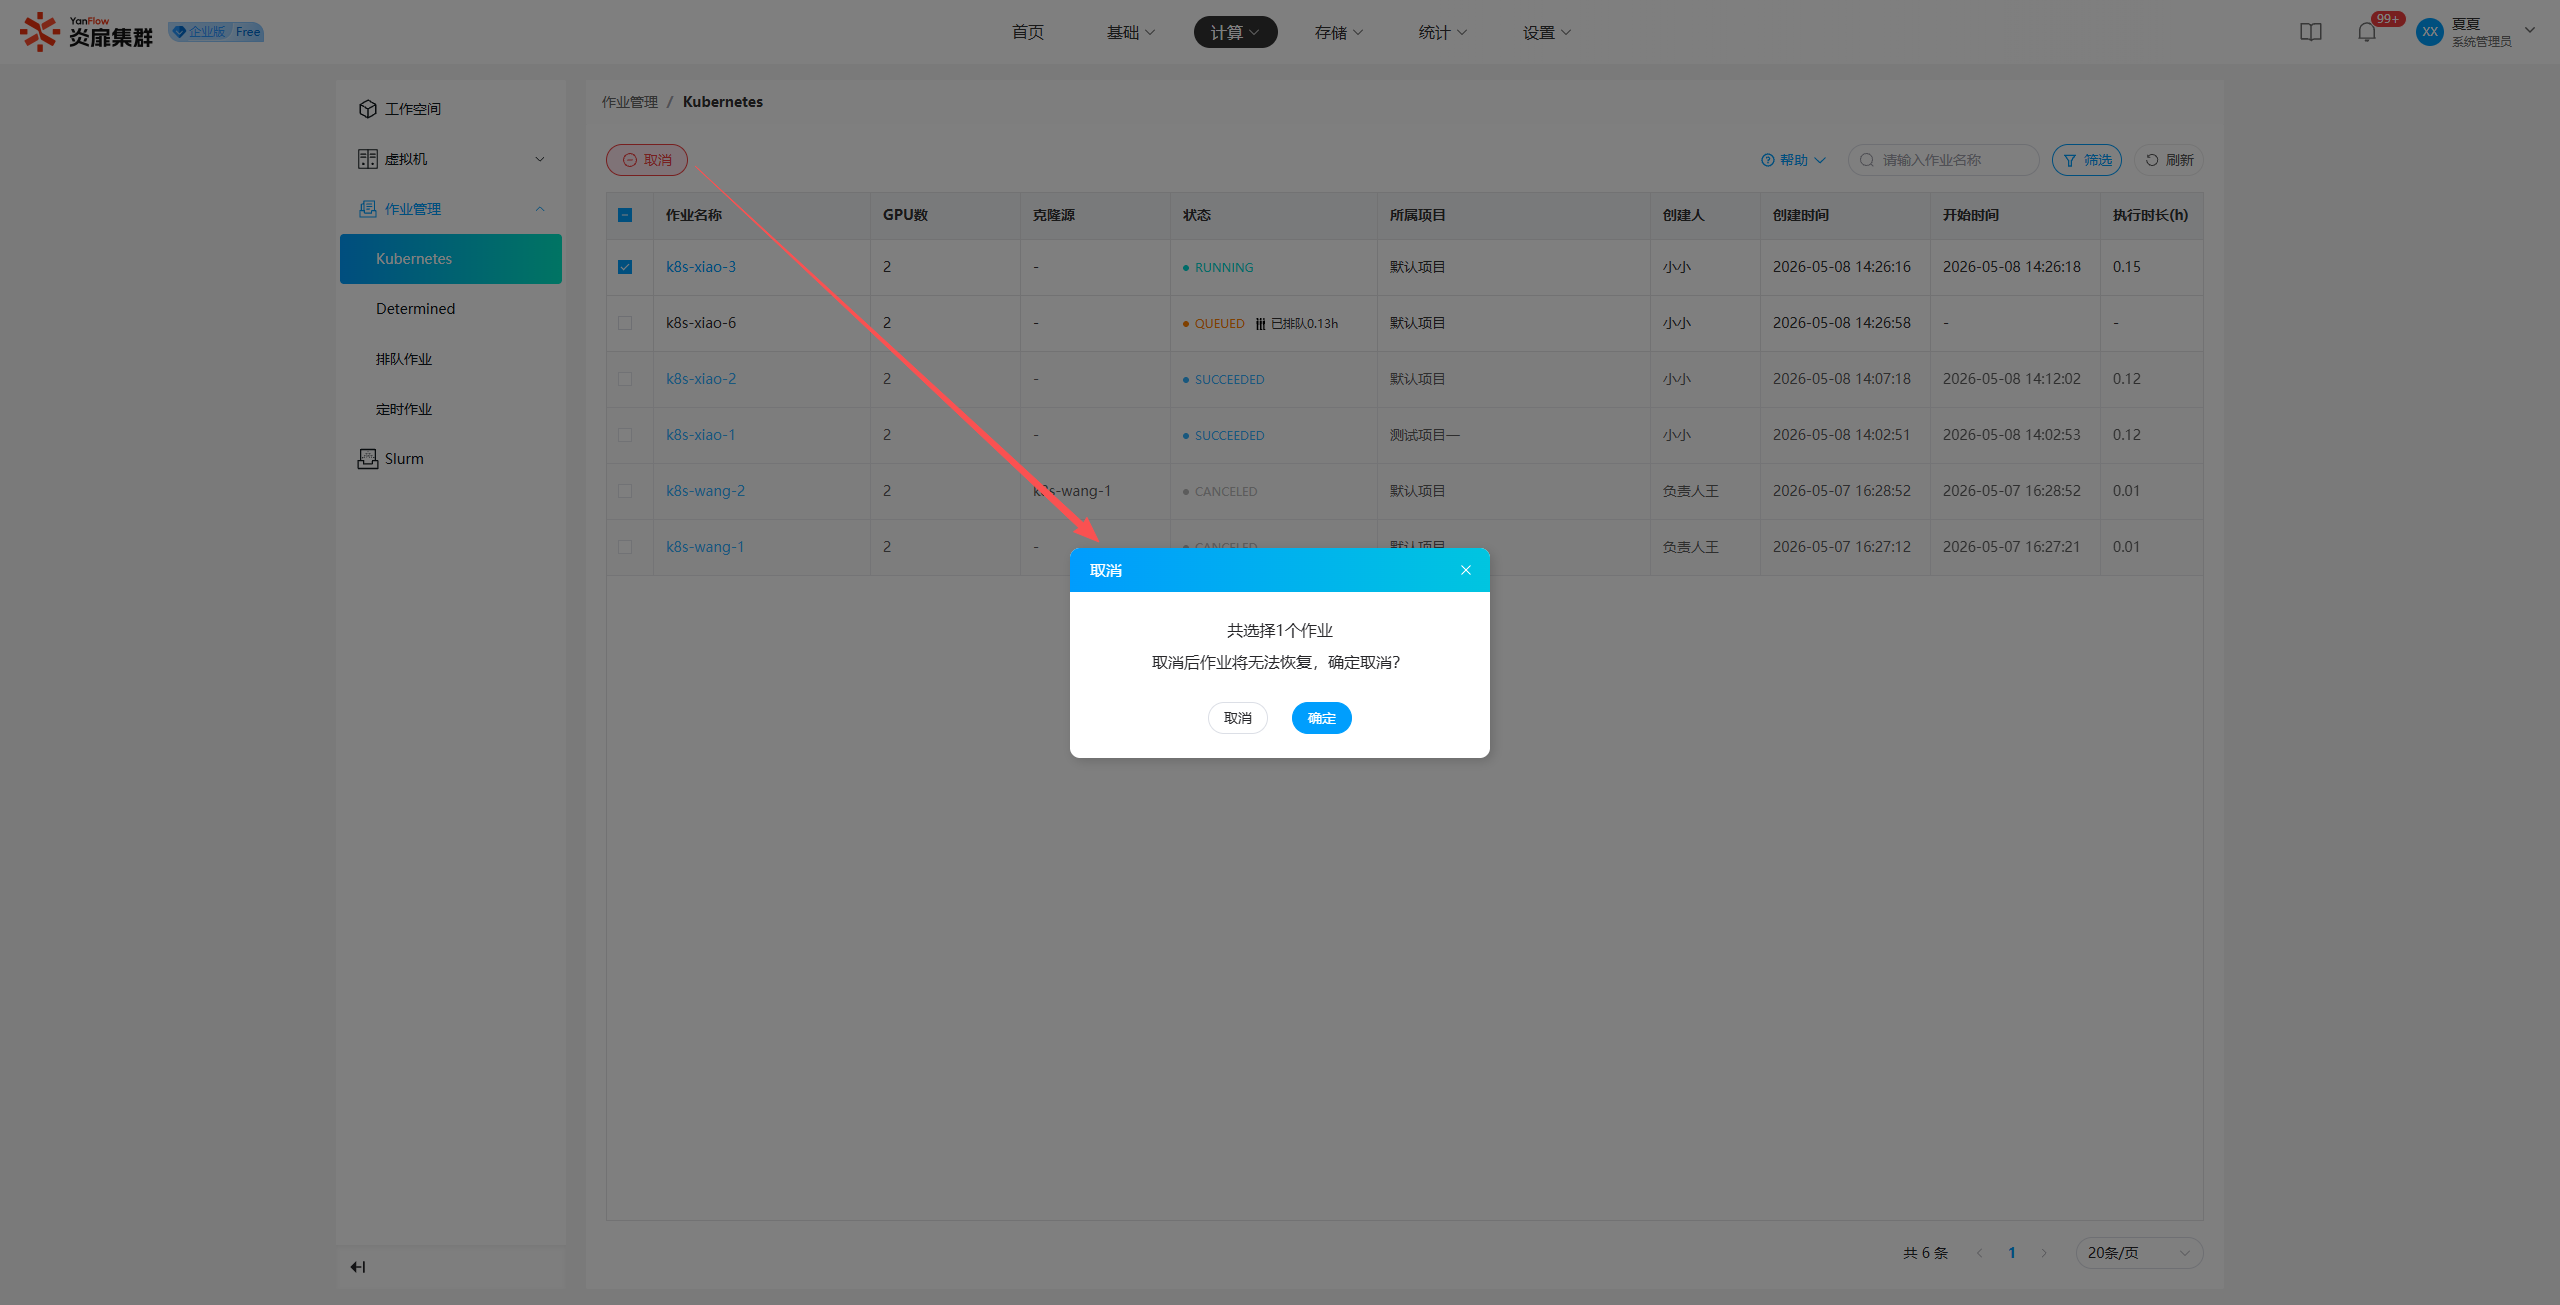
Cancel Job
System Administrators can cancel Kubernetes jobs. Select one or more jobs, click Cancel, and click Confirm in the prompt to complete the cancellation.
Determined
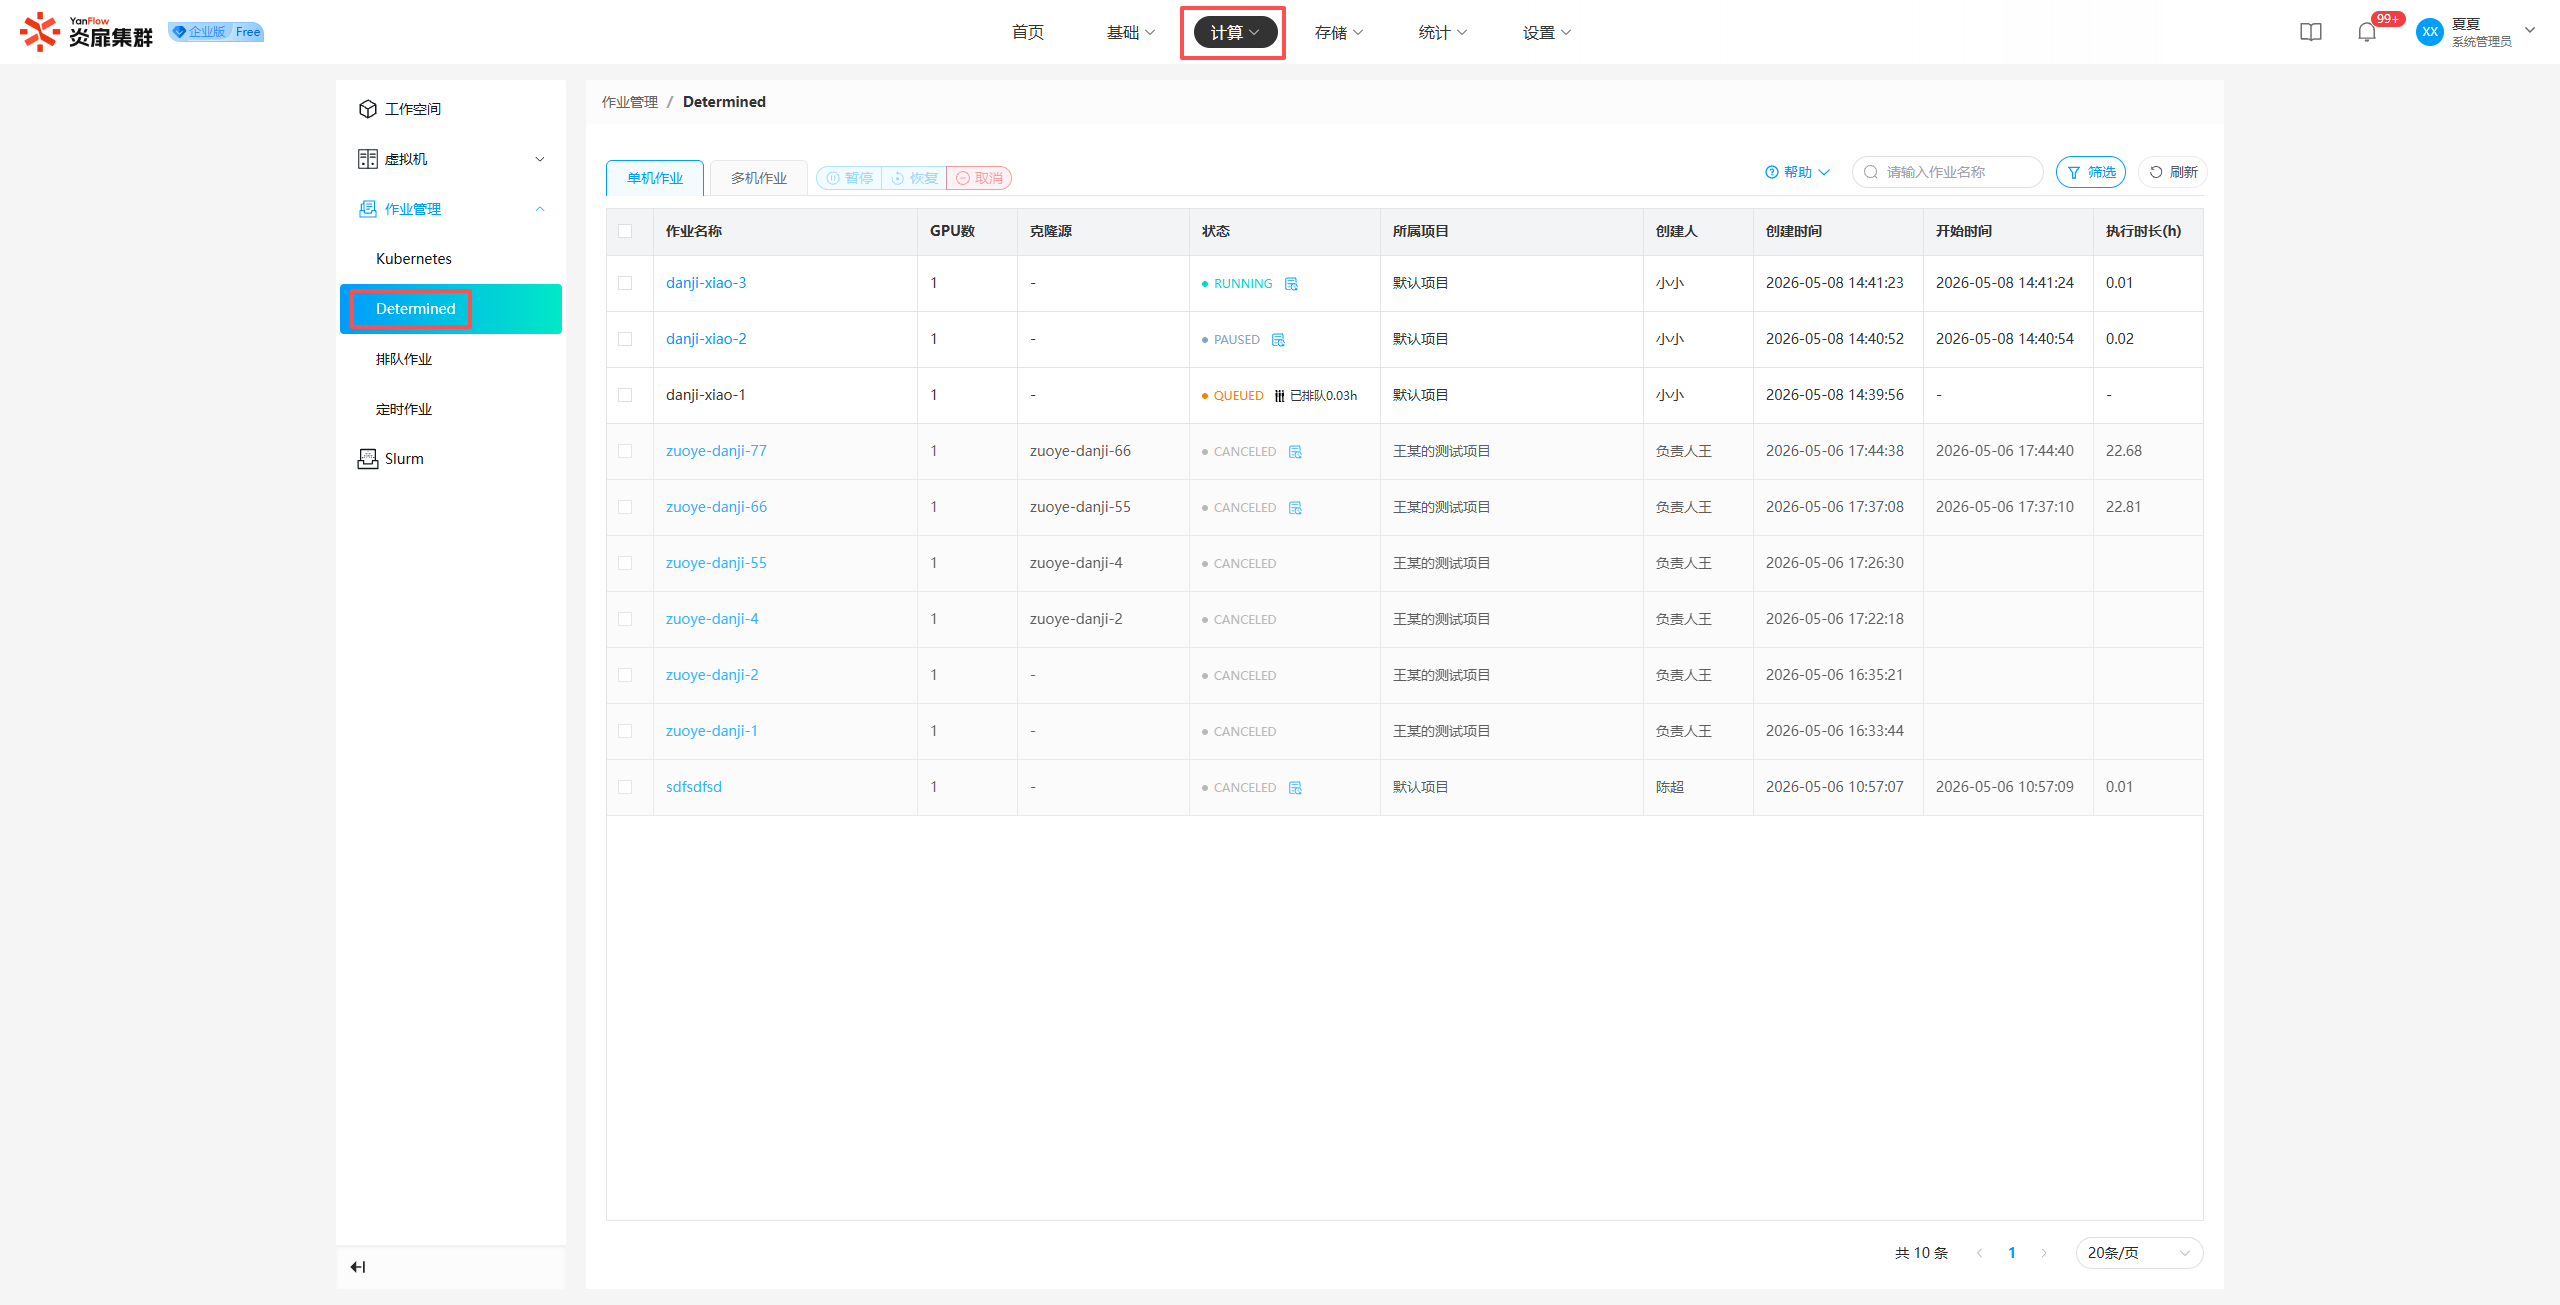
Job List
System Administrators can view all Determined jobs, including Single-machine Jobs and Multi-machine Jobs. Supports keyword search by job name and filtering by status, project, creation date, or creator.
Job Details
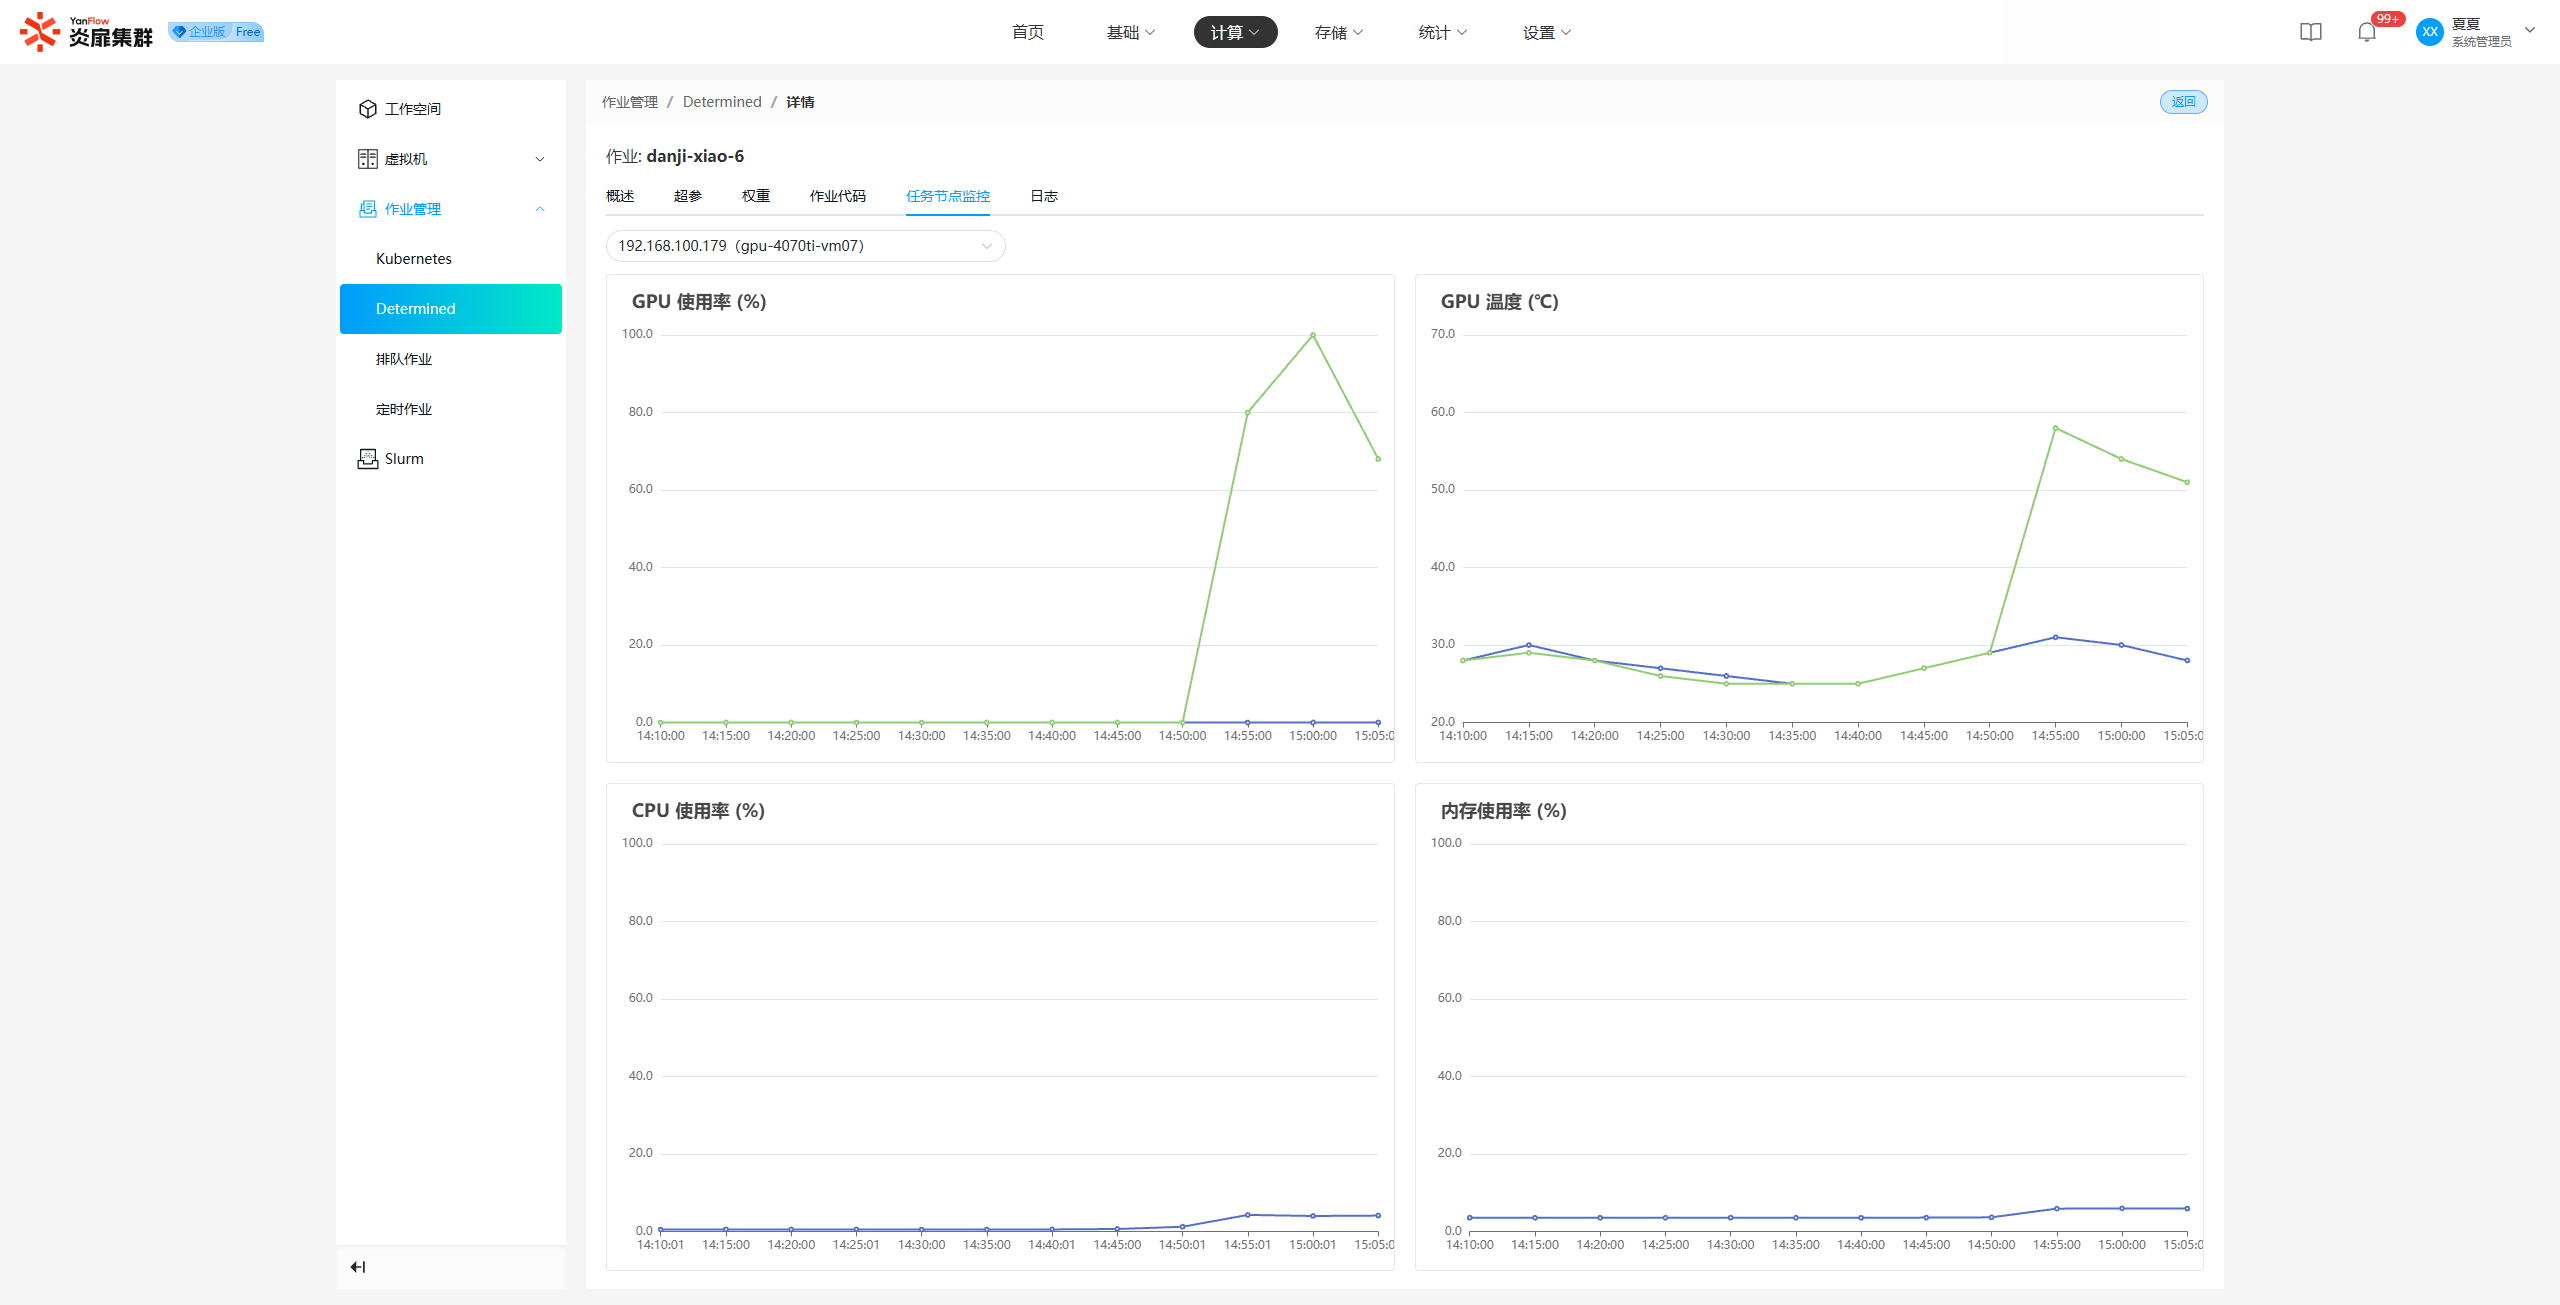
Click the Job Name to enter the details page, which supports viewing hyperparameters, weights, job code, node monitoring, logs, etc.
Pause/Resume/Cancel
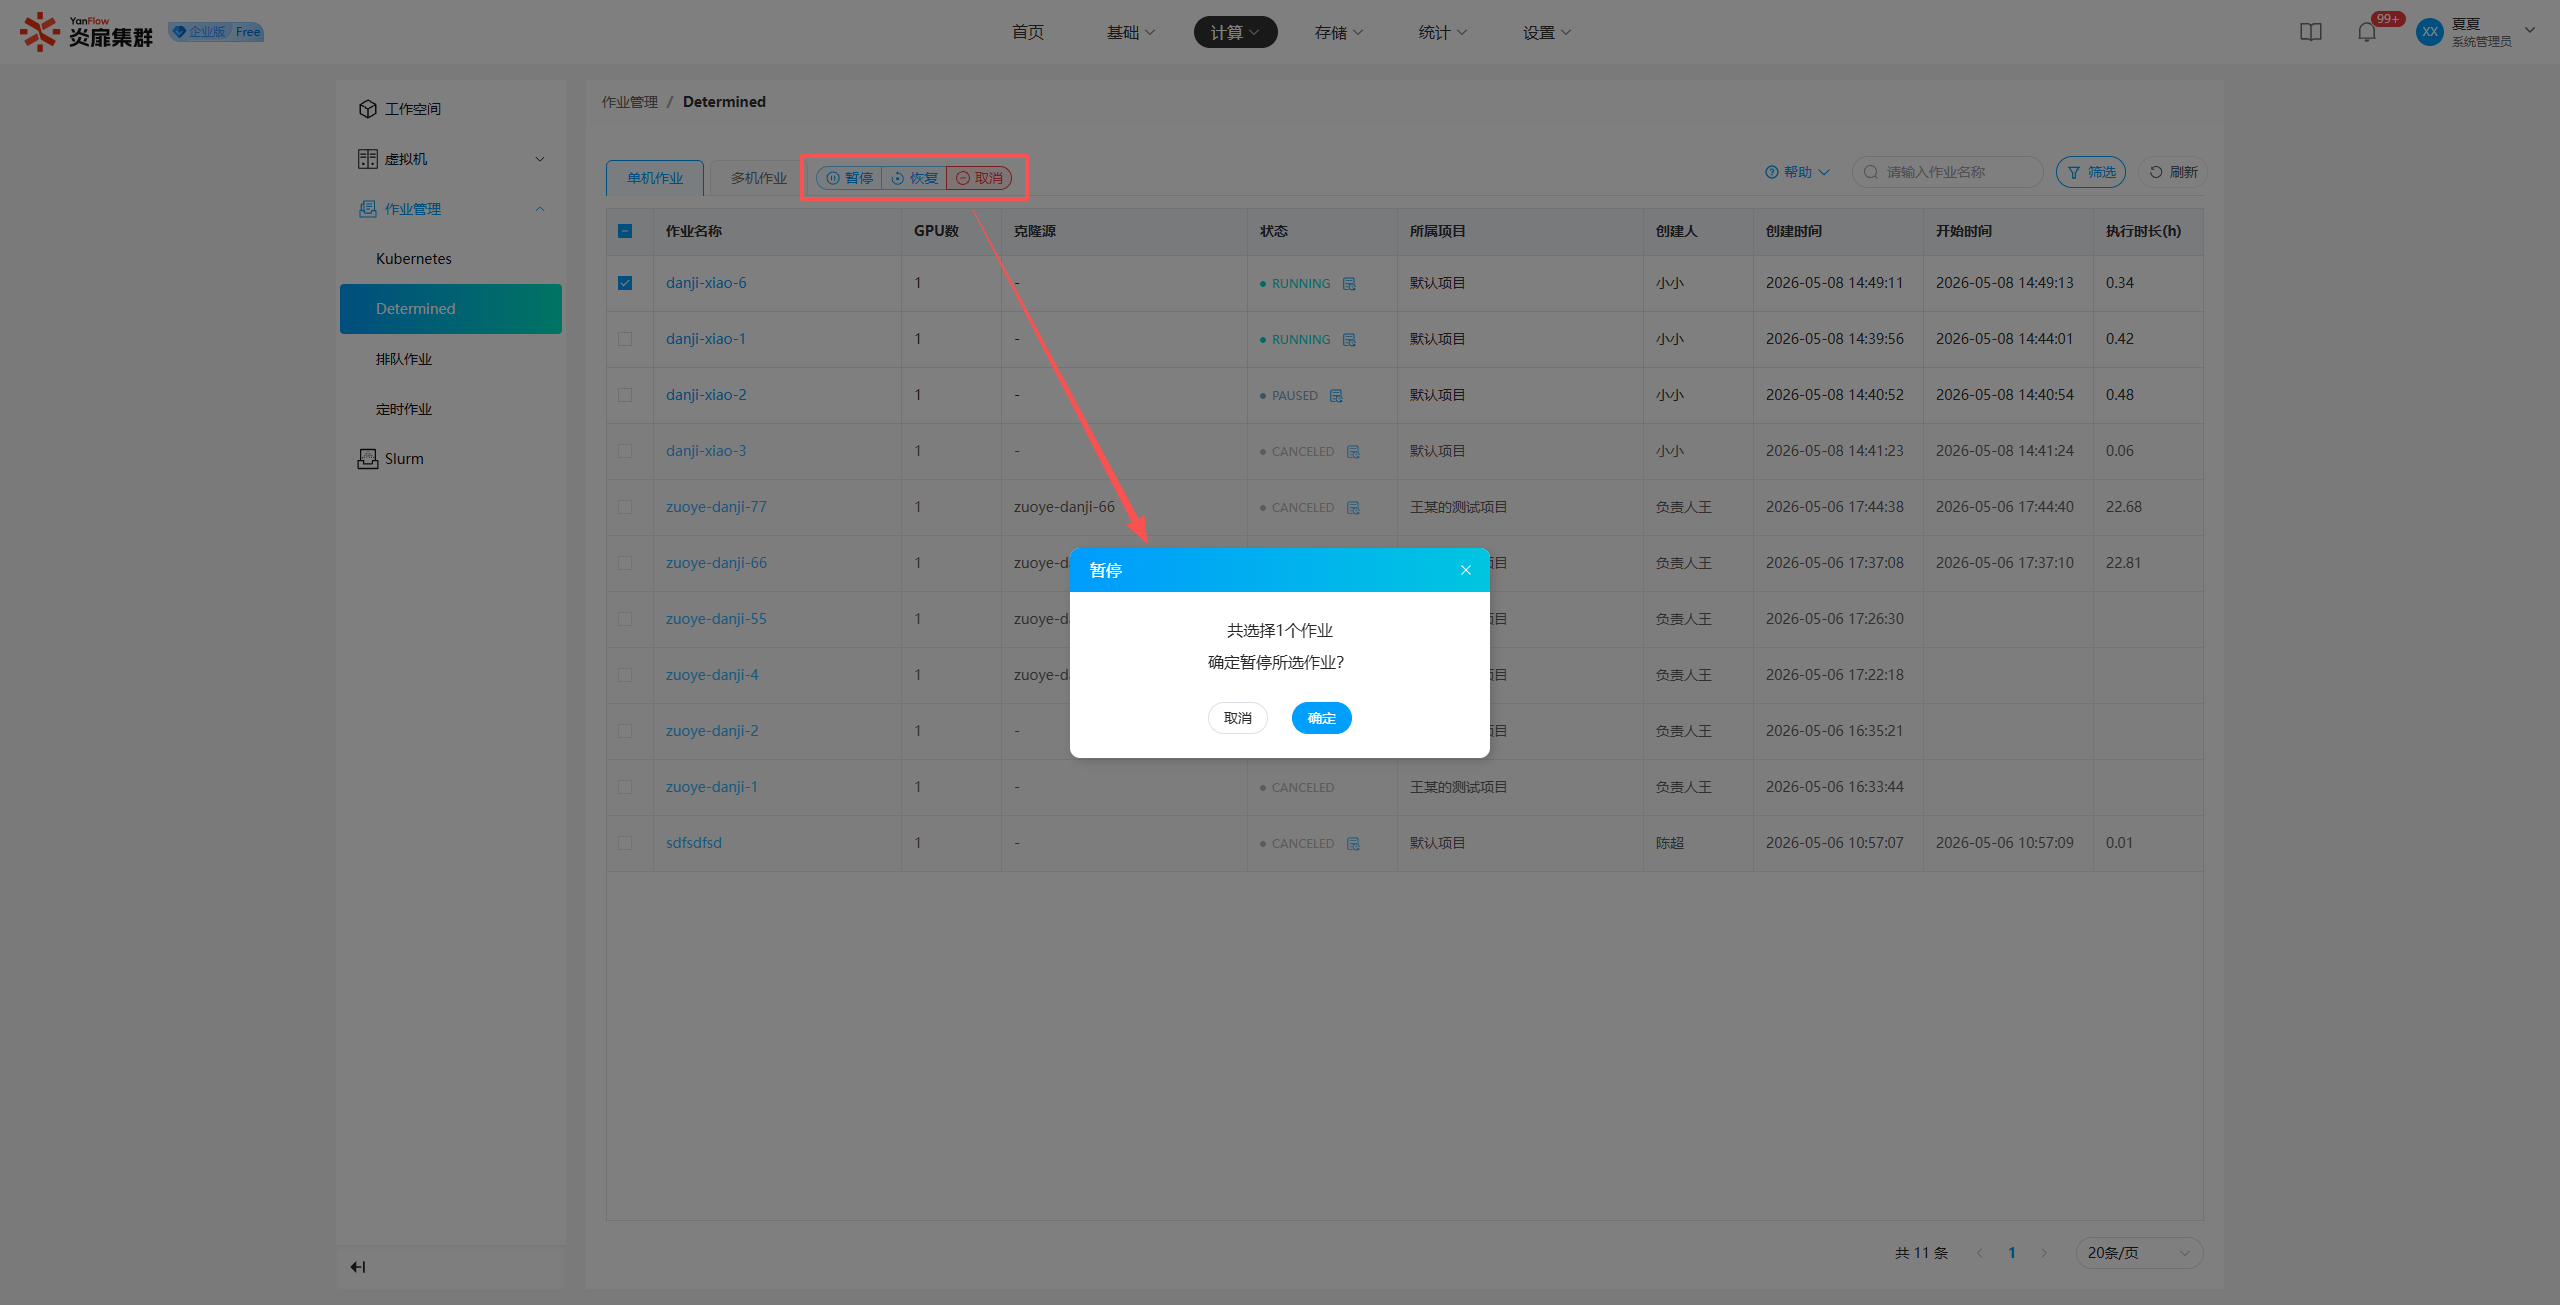
System Administrators can perform Pause, Resume, and Cancel operations on Determined jobs. Select one or more jobs, click the corresponding operation, and click Confirm in the prompt to complete the action.
Queued Jobs
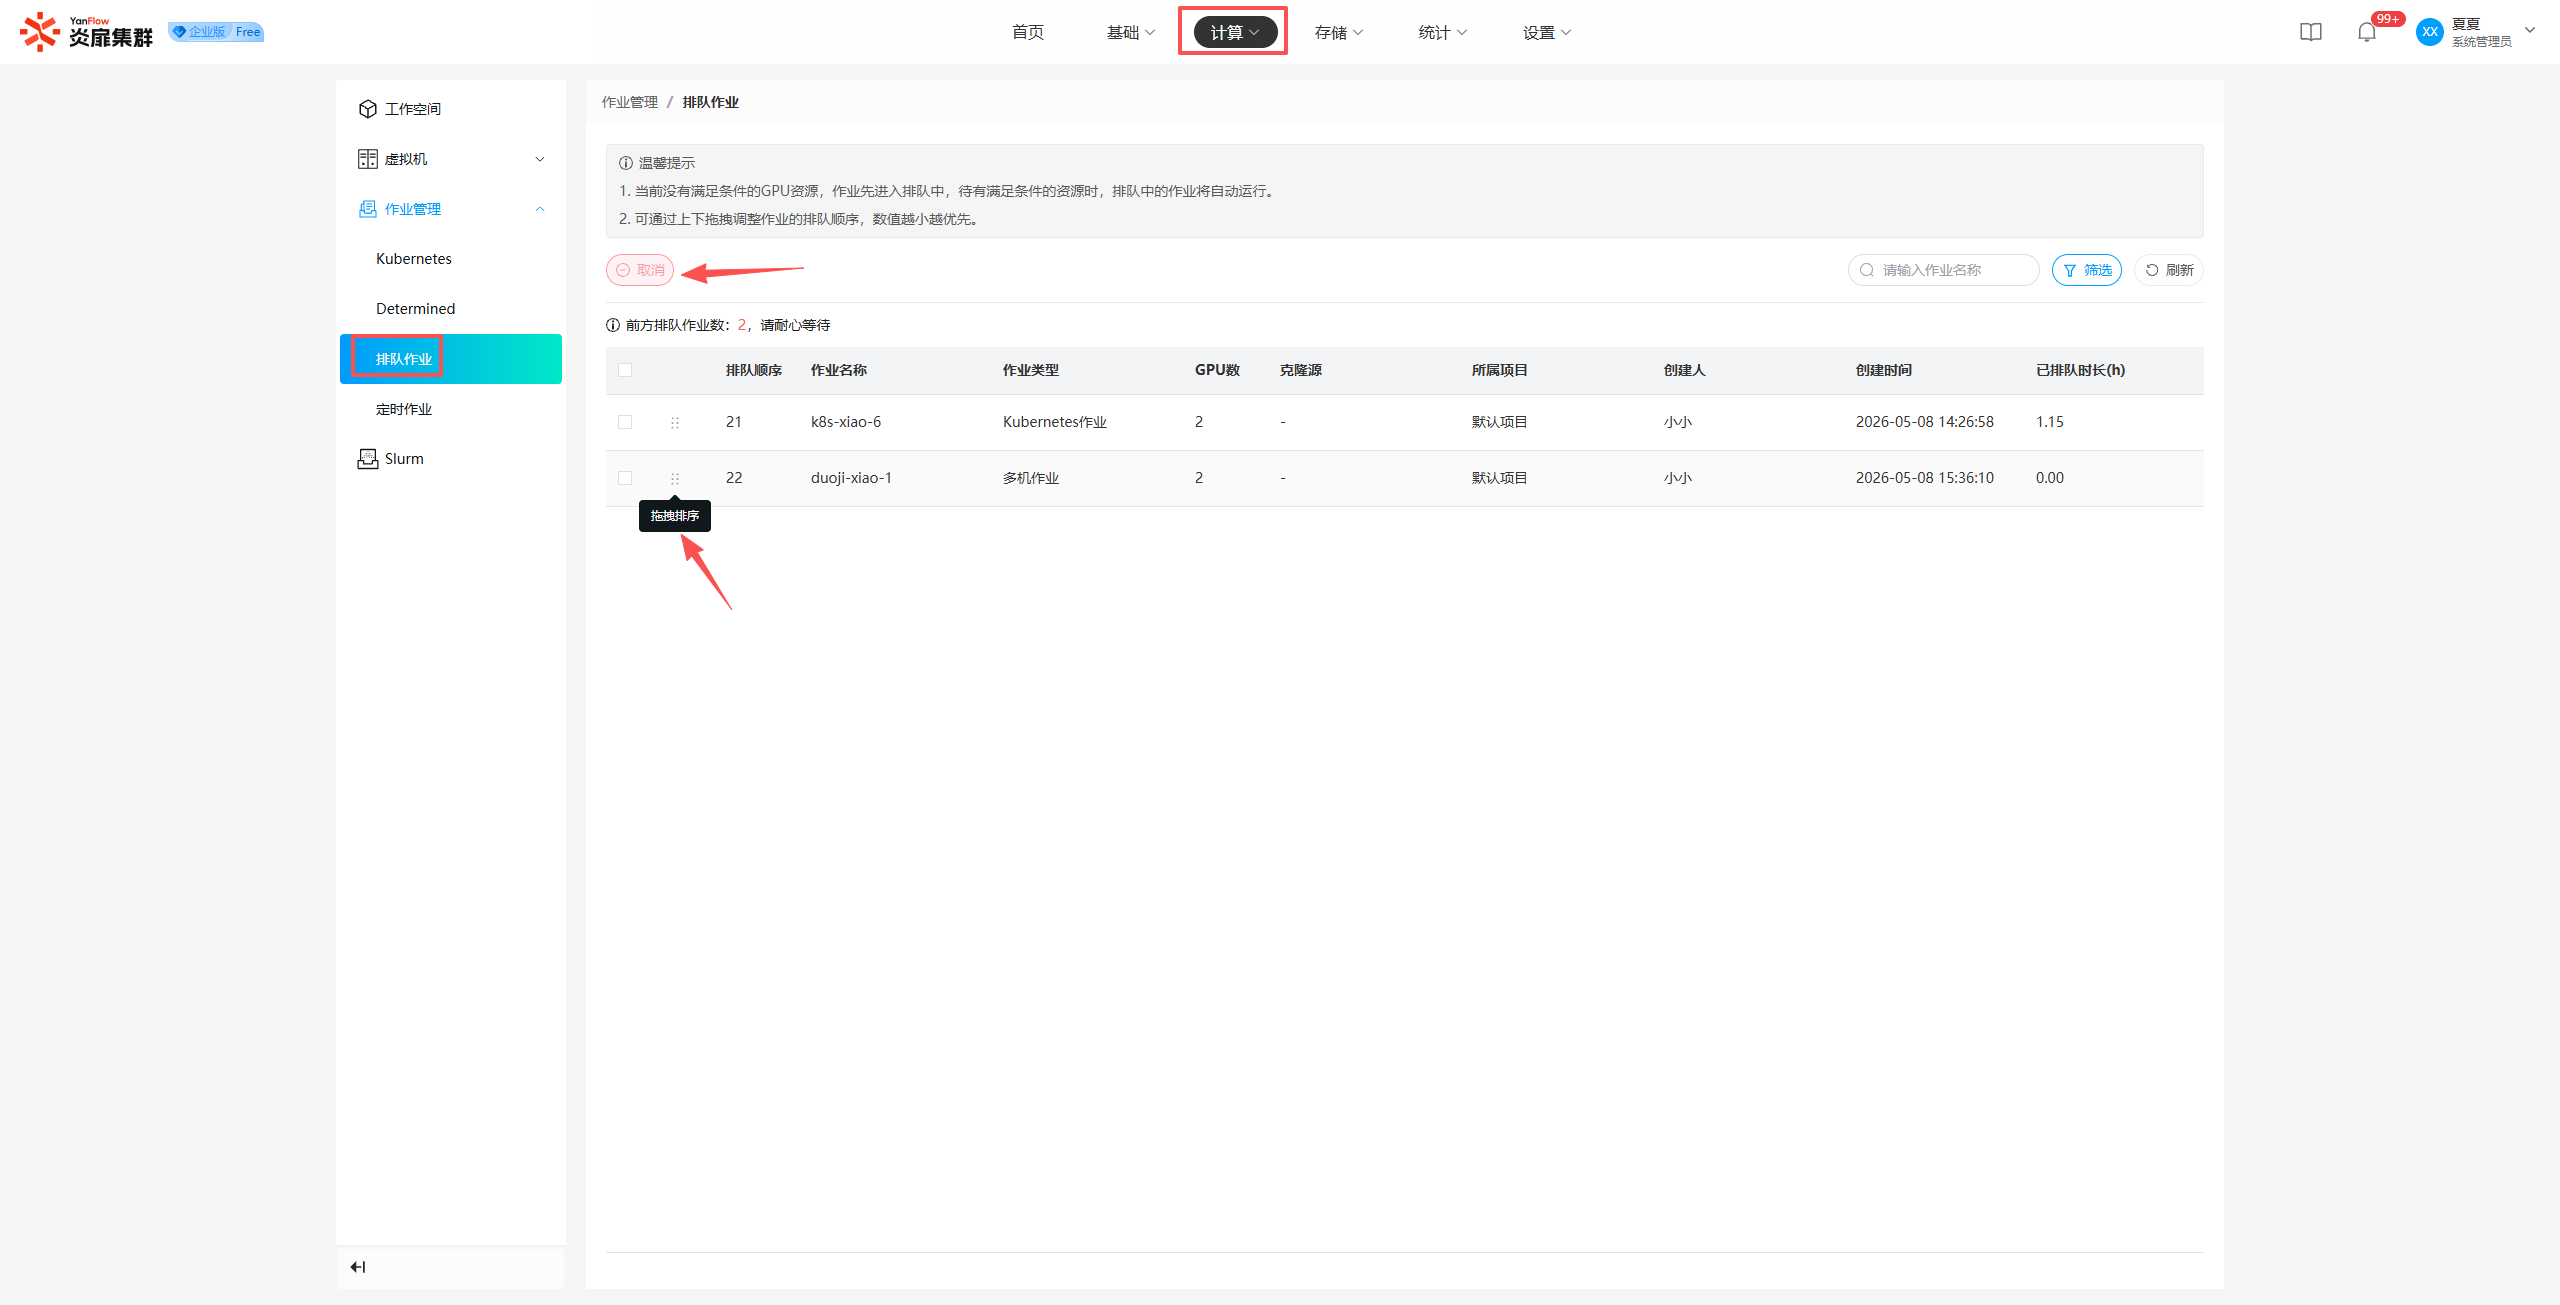
System Administrators can view all currently queued jobs. Supports keyword search by job name and filtering by project, creation date, or creator.
Drag-and-Drop Sorting: System Administrators can adjust the queue order via drag-and-drop. When resources meeting the requirements become available, queued jobs will run automatically.
Cancel Job: System Administrators can cancel queued jobs. Select one or more jobs, click Cancel, and click Confirm in the prompt to complete the cancellation.
Scheduled Jobs
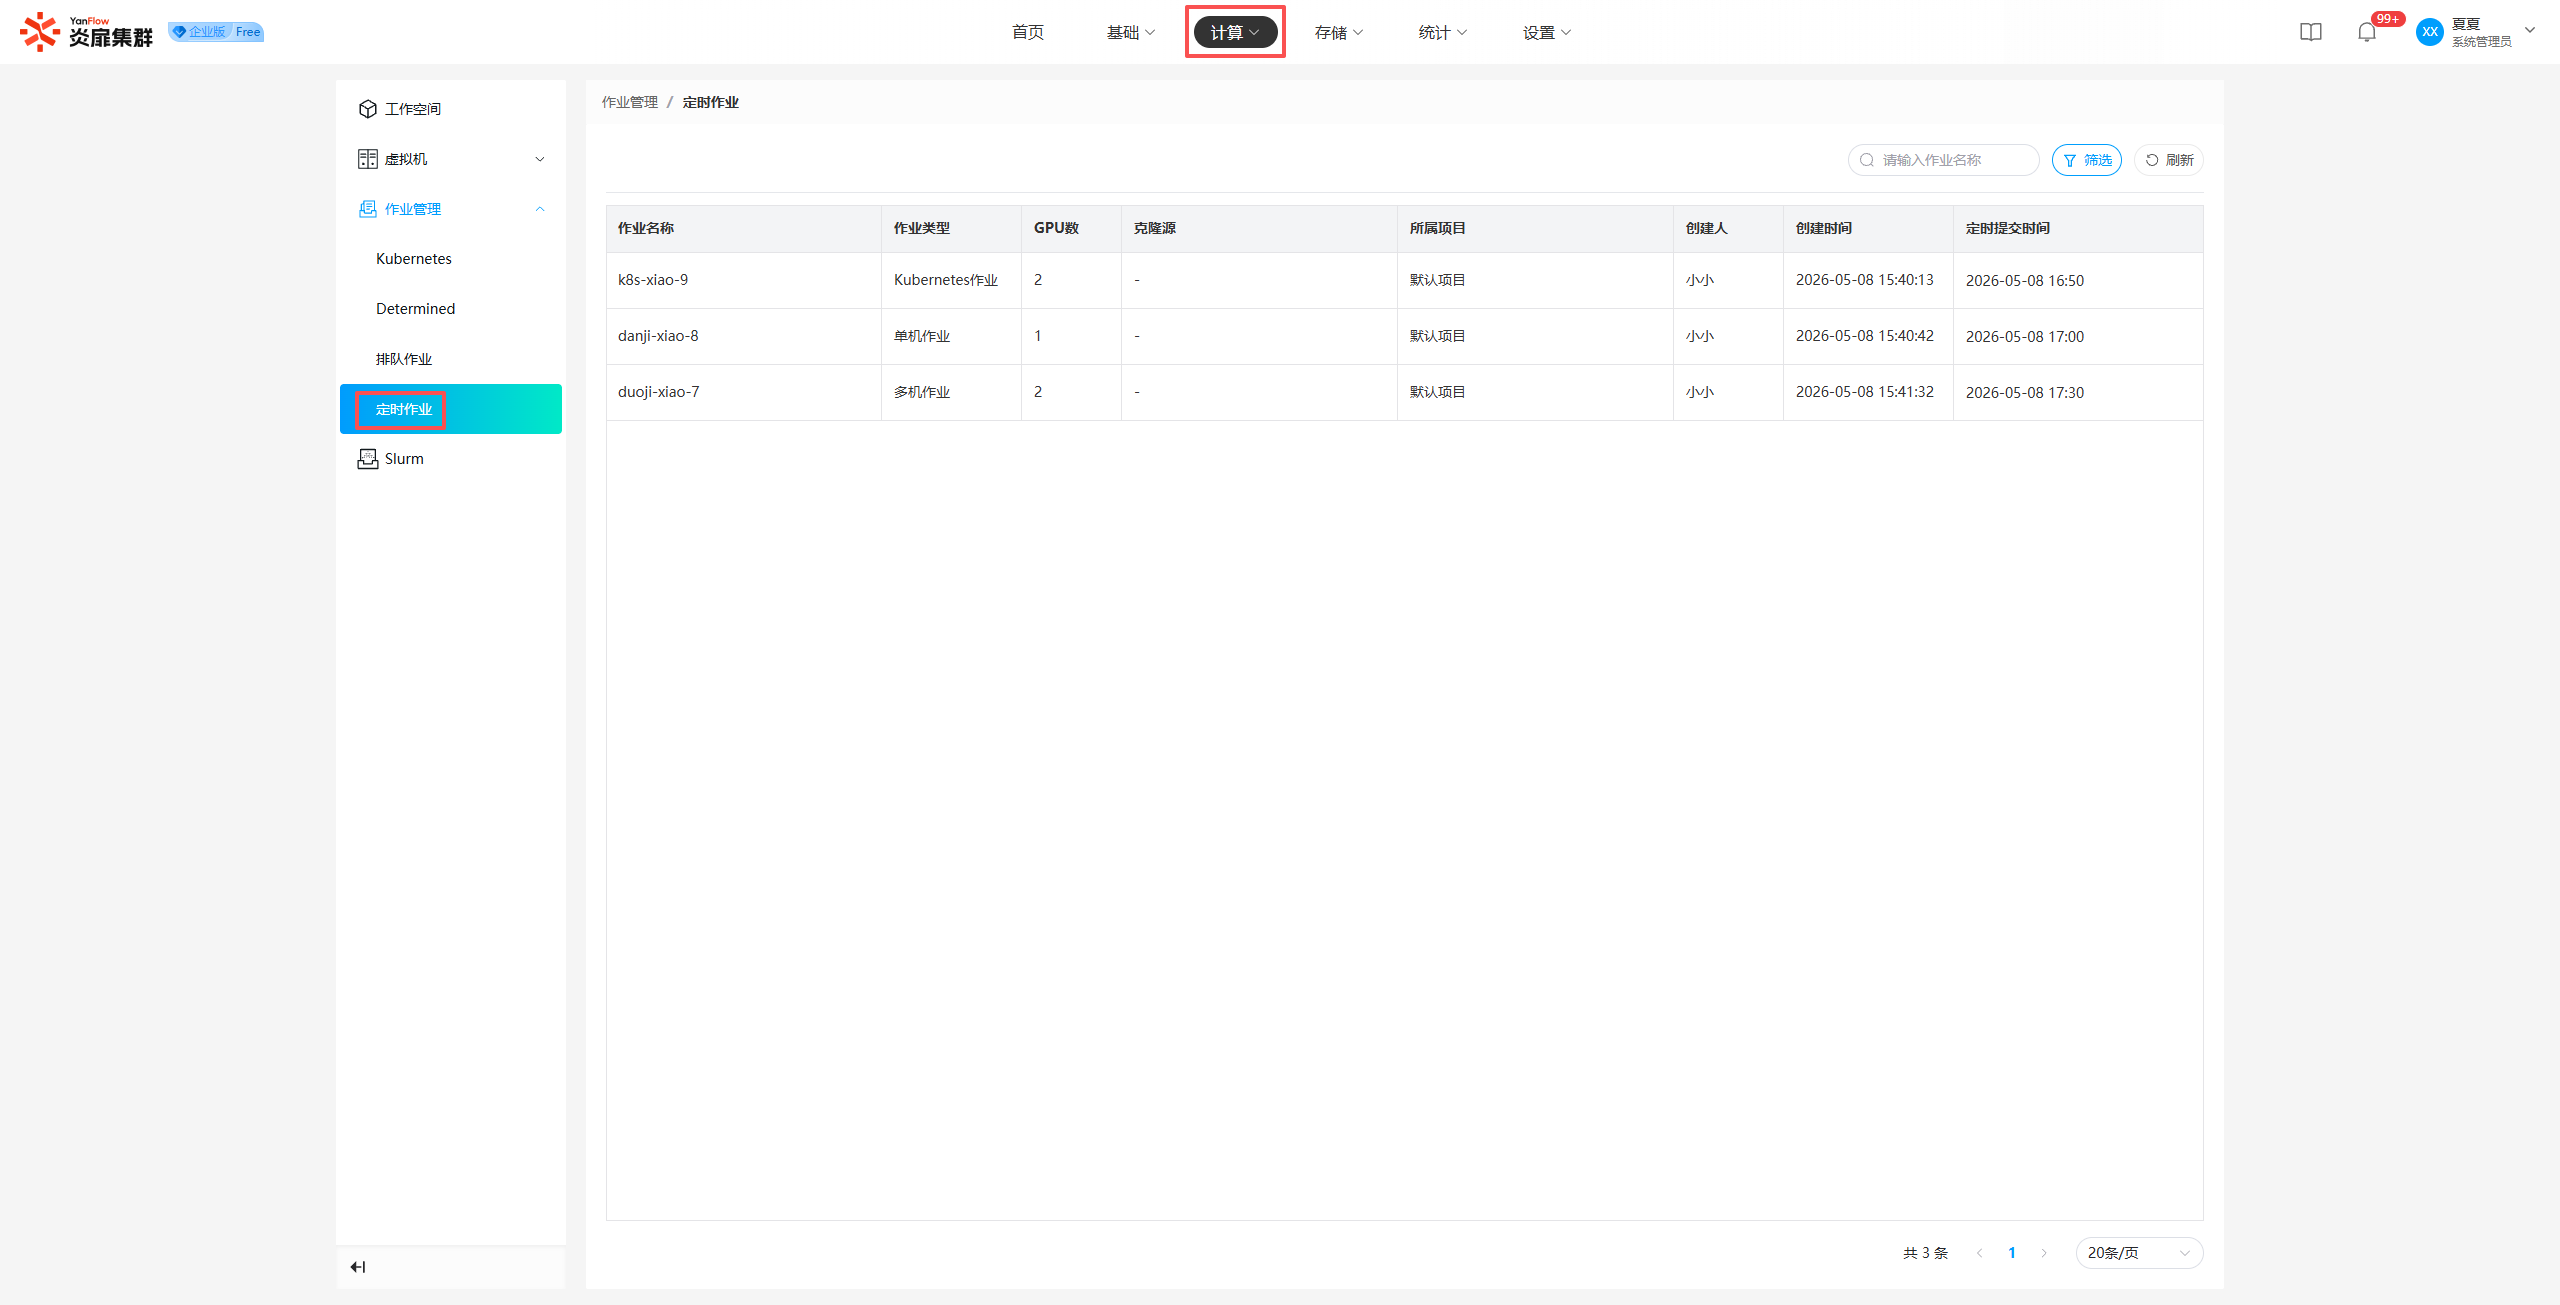
System Administrators can view all currently scheduled jobs in the system. Supports keyword search by job name and filtering by project, creation date, or creator.
Slurm
Instance List
System Administrators can view all Slurm instances in the system. Supports keyword search by master node name and filtering by status, project, creation date, or creator.
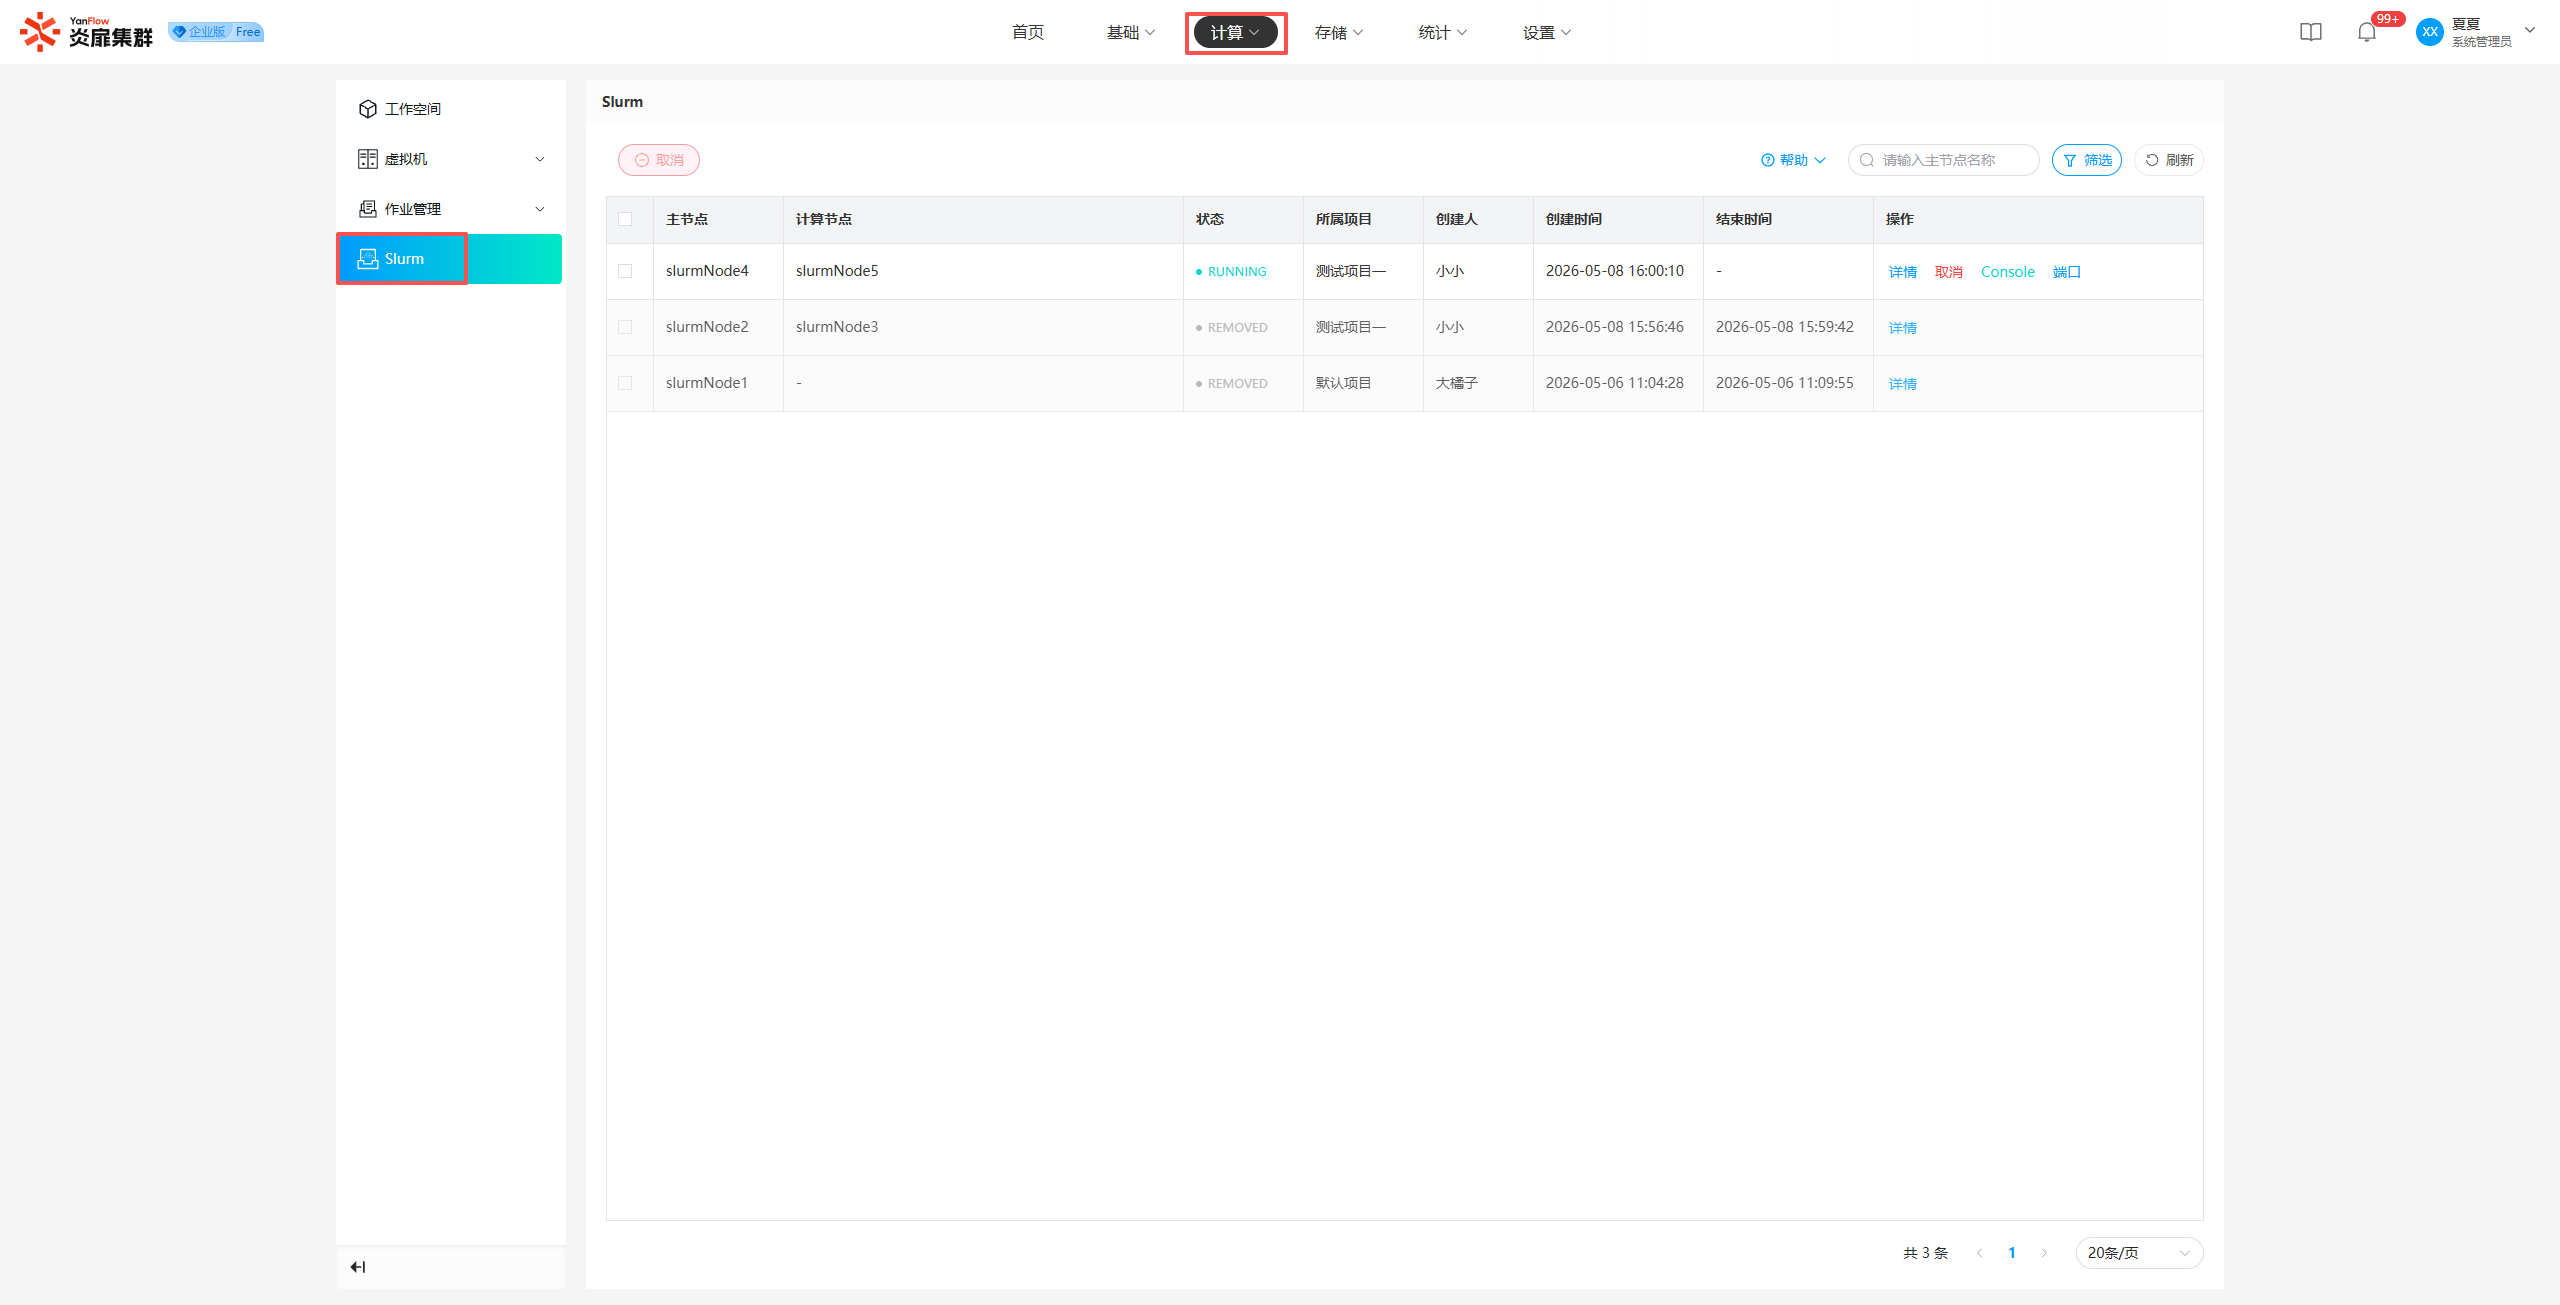
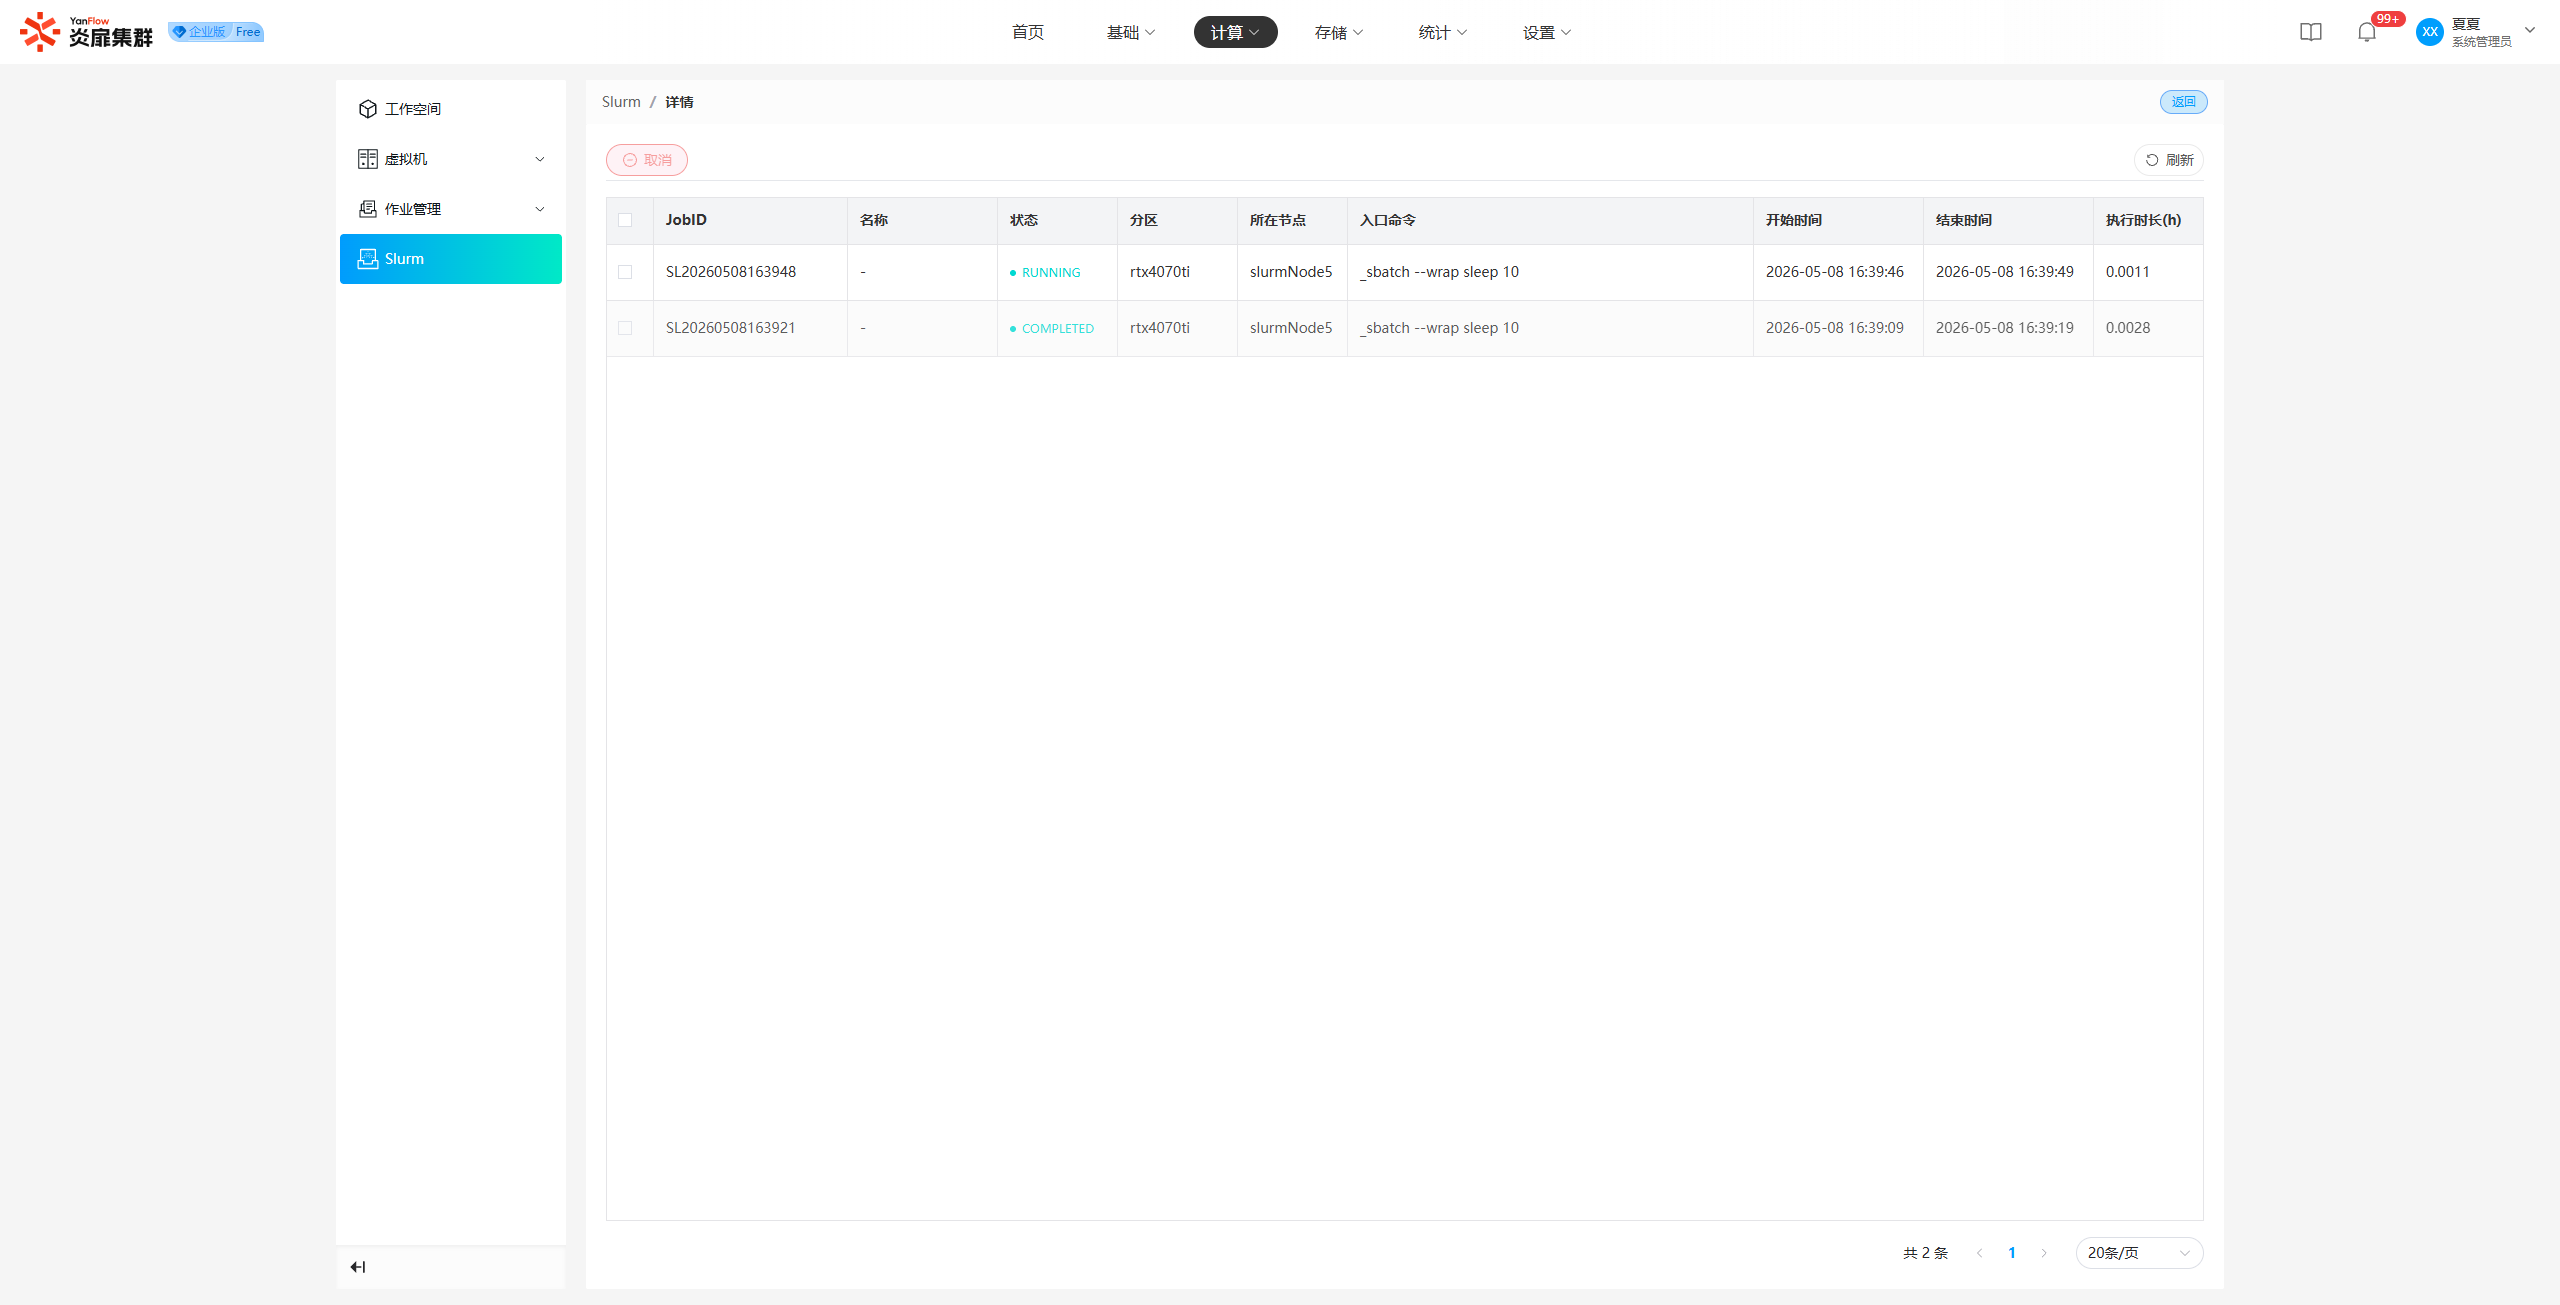
Instance Details
Click Details to enter the details page, where you can view job-related information and support Canceling jobs.
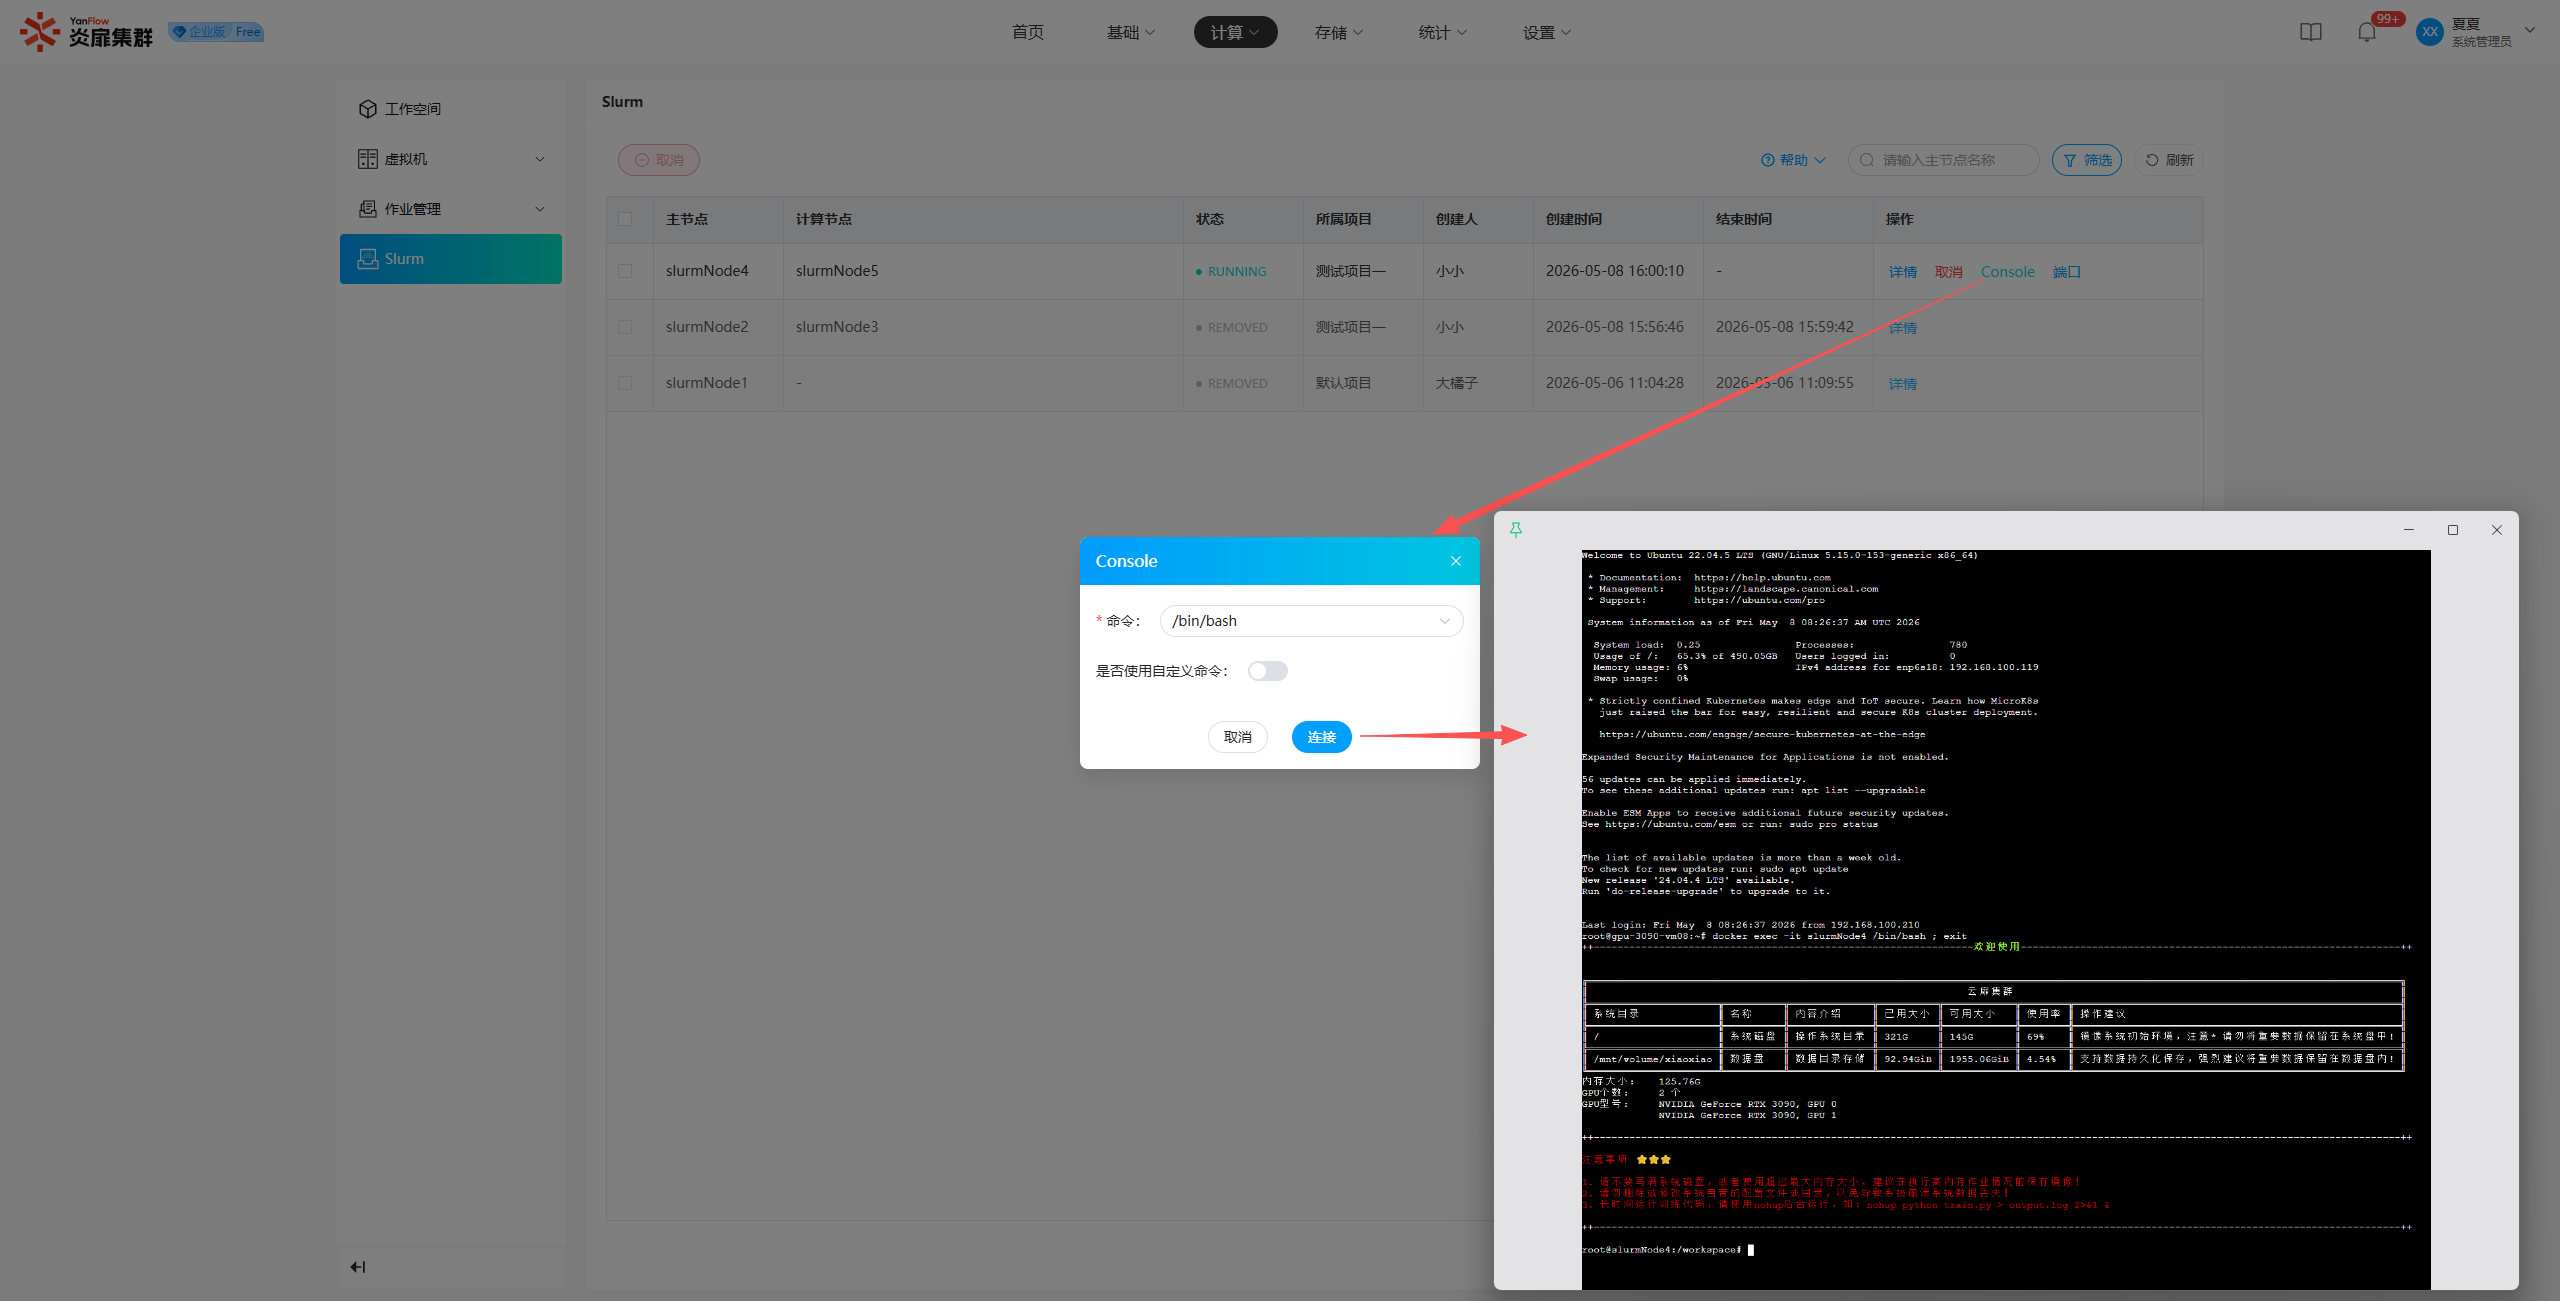
Console
Once the instance has started, click Console to connect and view relevant information.
Ports
Click Ports to show a popup with the instance's port mapping information, supporting various connection methods to access the interior of the container.
Note:
- Port mapping can only be viewed in RUNNING or PAUSED states.
- System Administrators do not have permission to toggle the
External Remote ConnectionorDownload Connection File.
Cancel Instance
System Administrators can cancel Slurm instances. Select one or more instances, click Cancel, and click Confirm in the prompt to complete the cancellation.
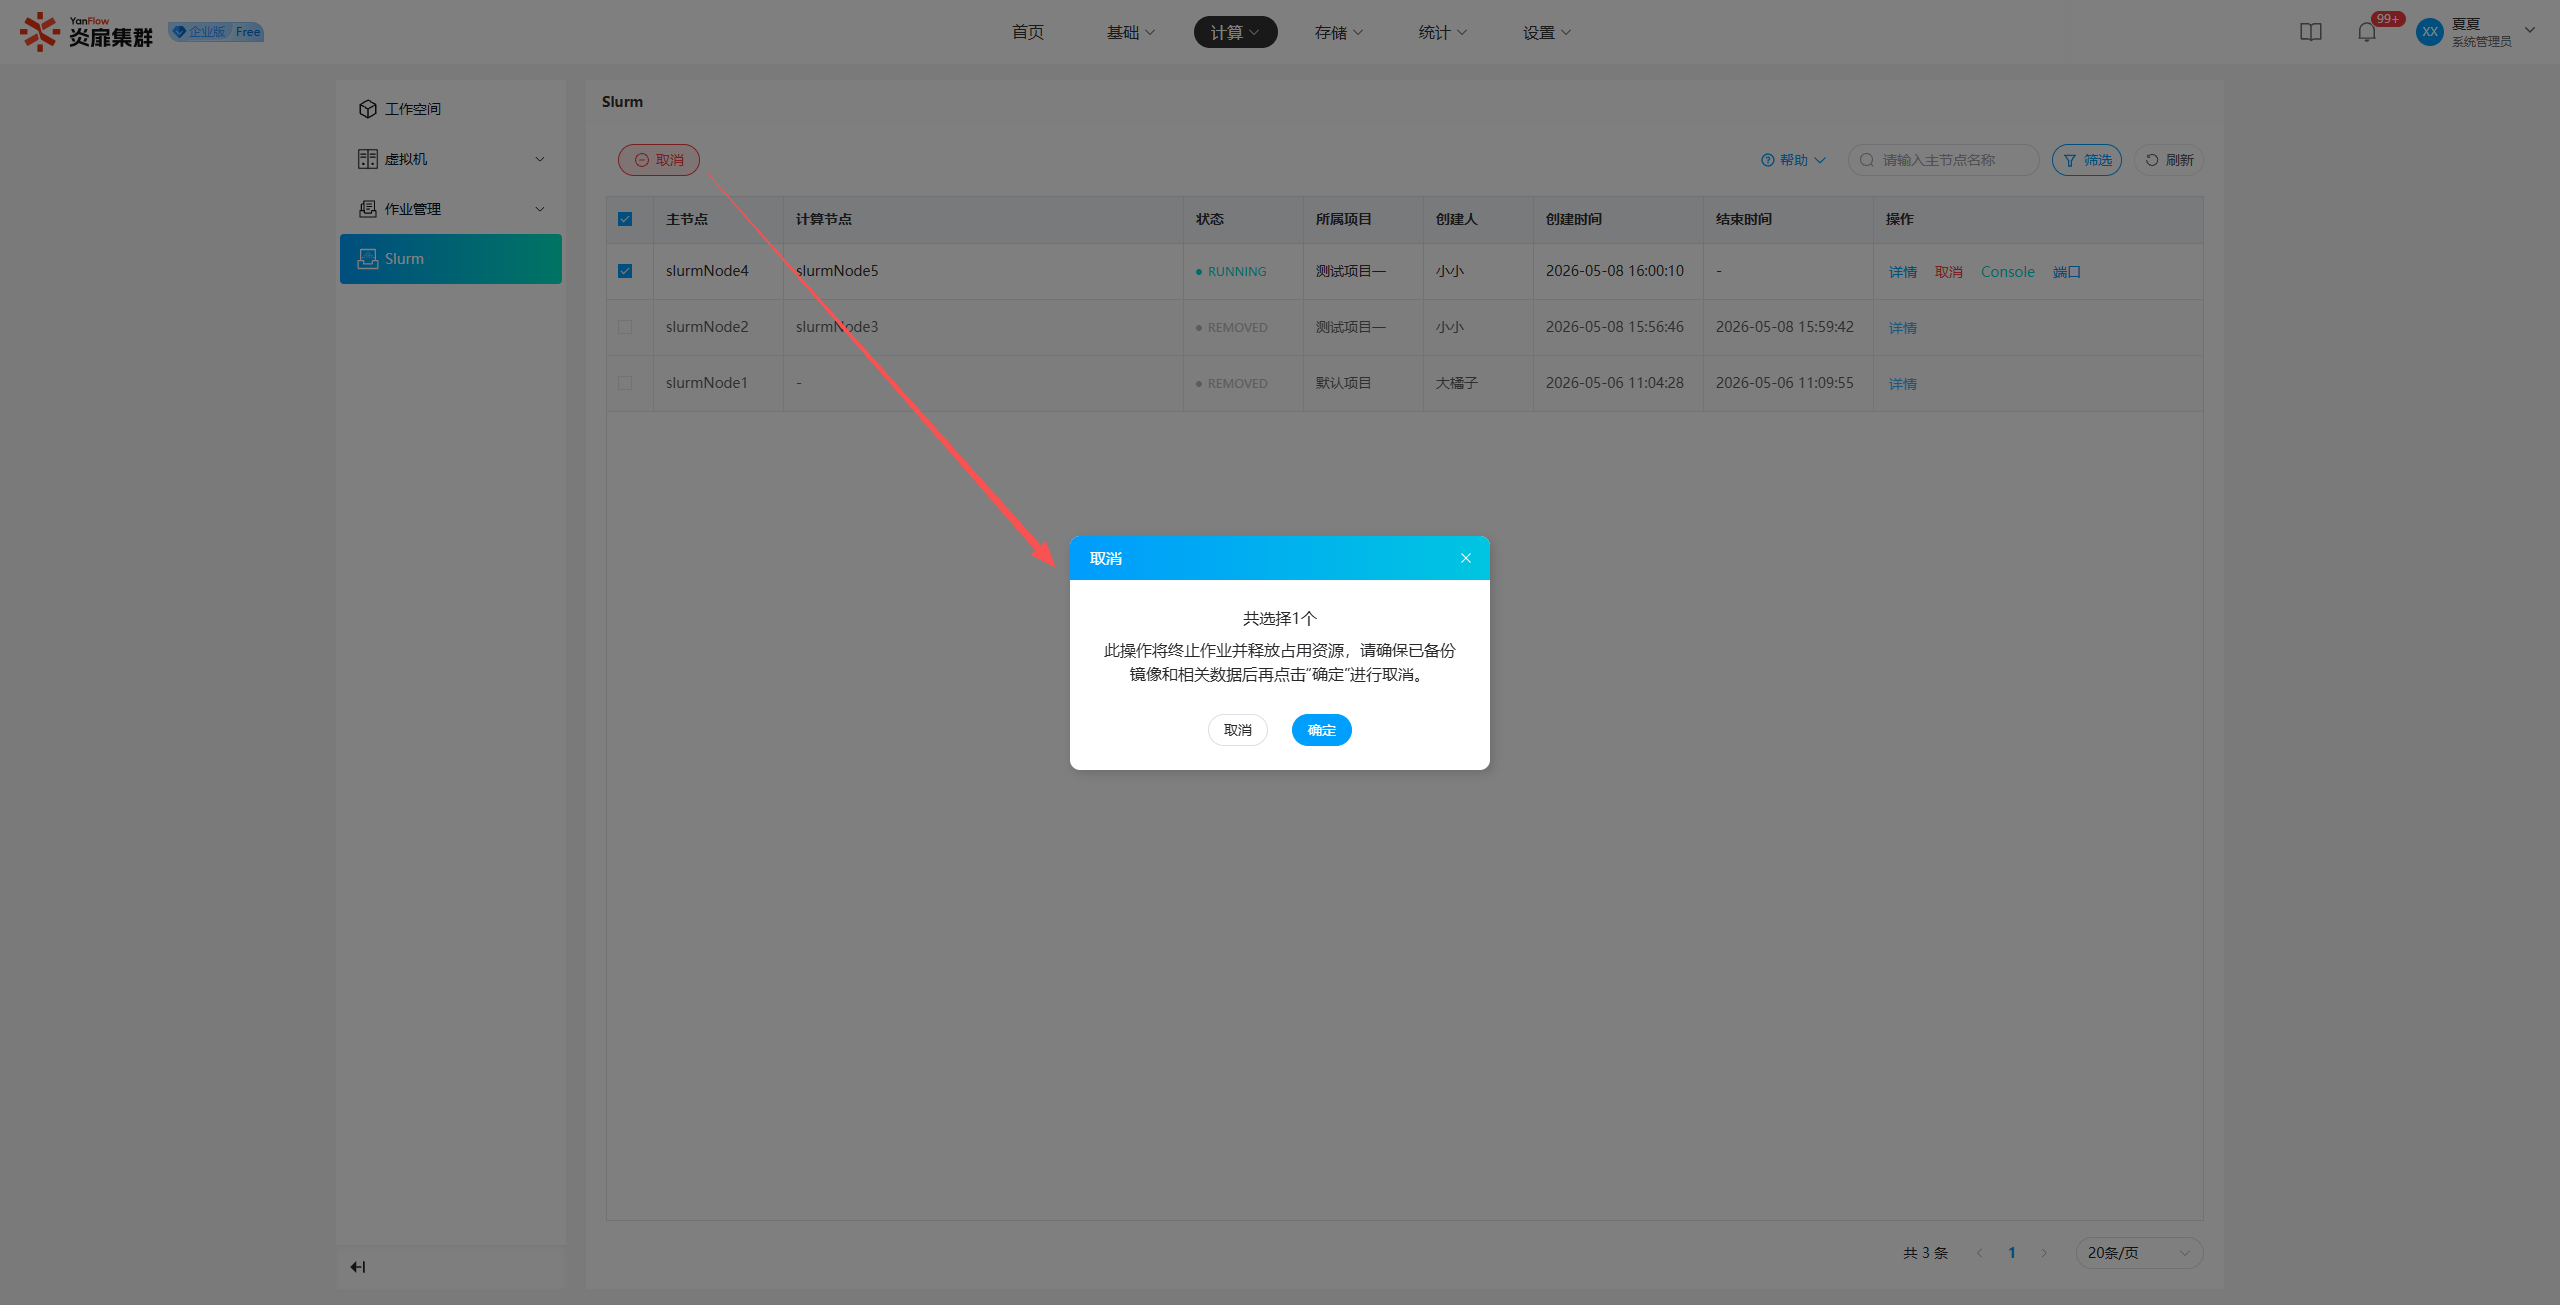
Note: Once an instance is canceled, the job within the corresponding container will also be terminated.
Storage
Template Images
Container Images
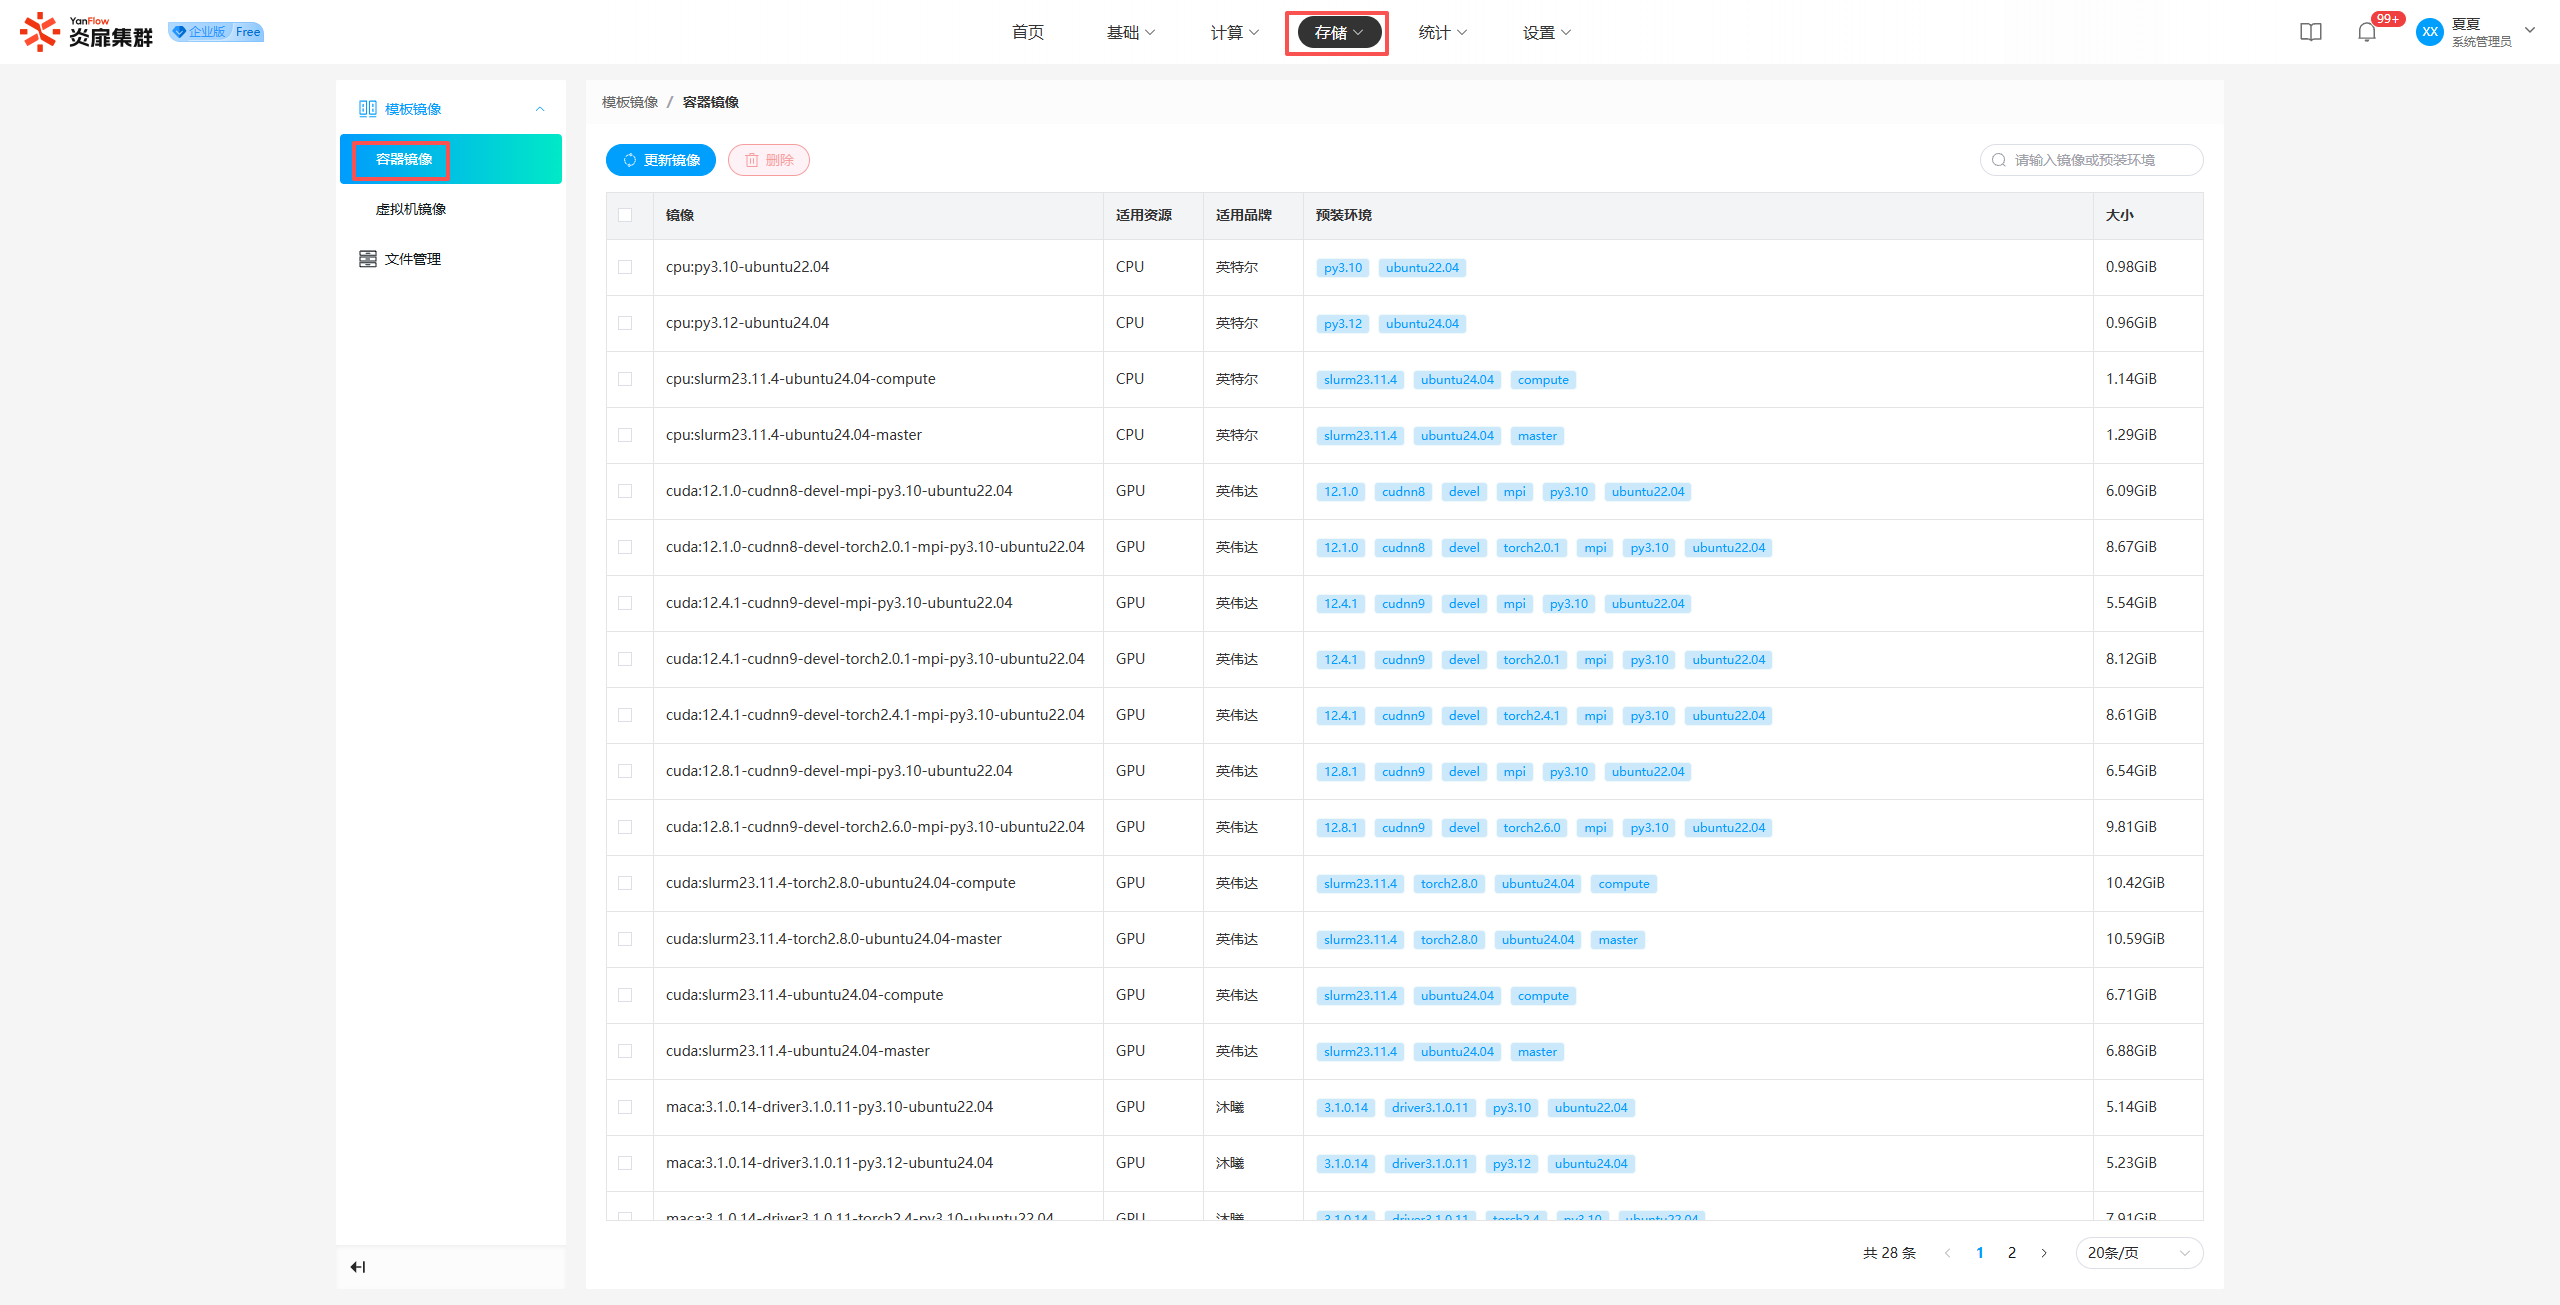
System Administrators can view all container node template images in the system. Supports keyword search by image or pre-installed environment.
Update Image: Click Update Image to fetch the latest template images.
Delete Image: Select one or more images, click Delete, and click Confirm in the prompt to delete the selected template images.
VM Images
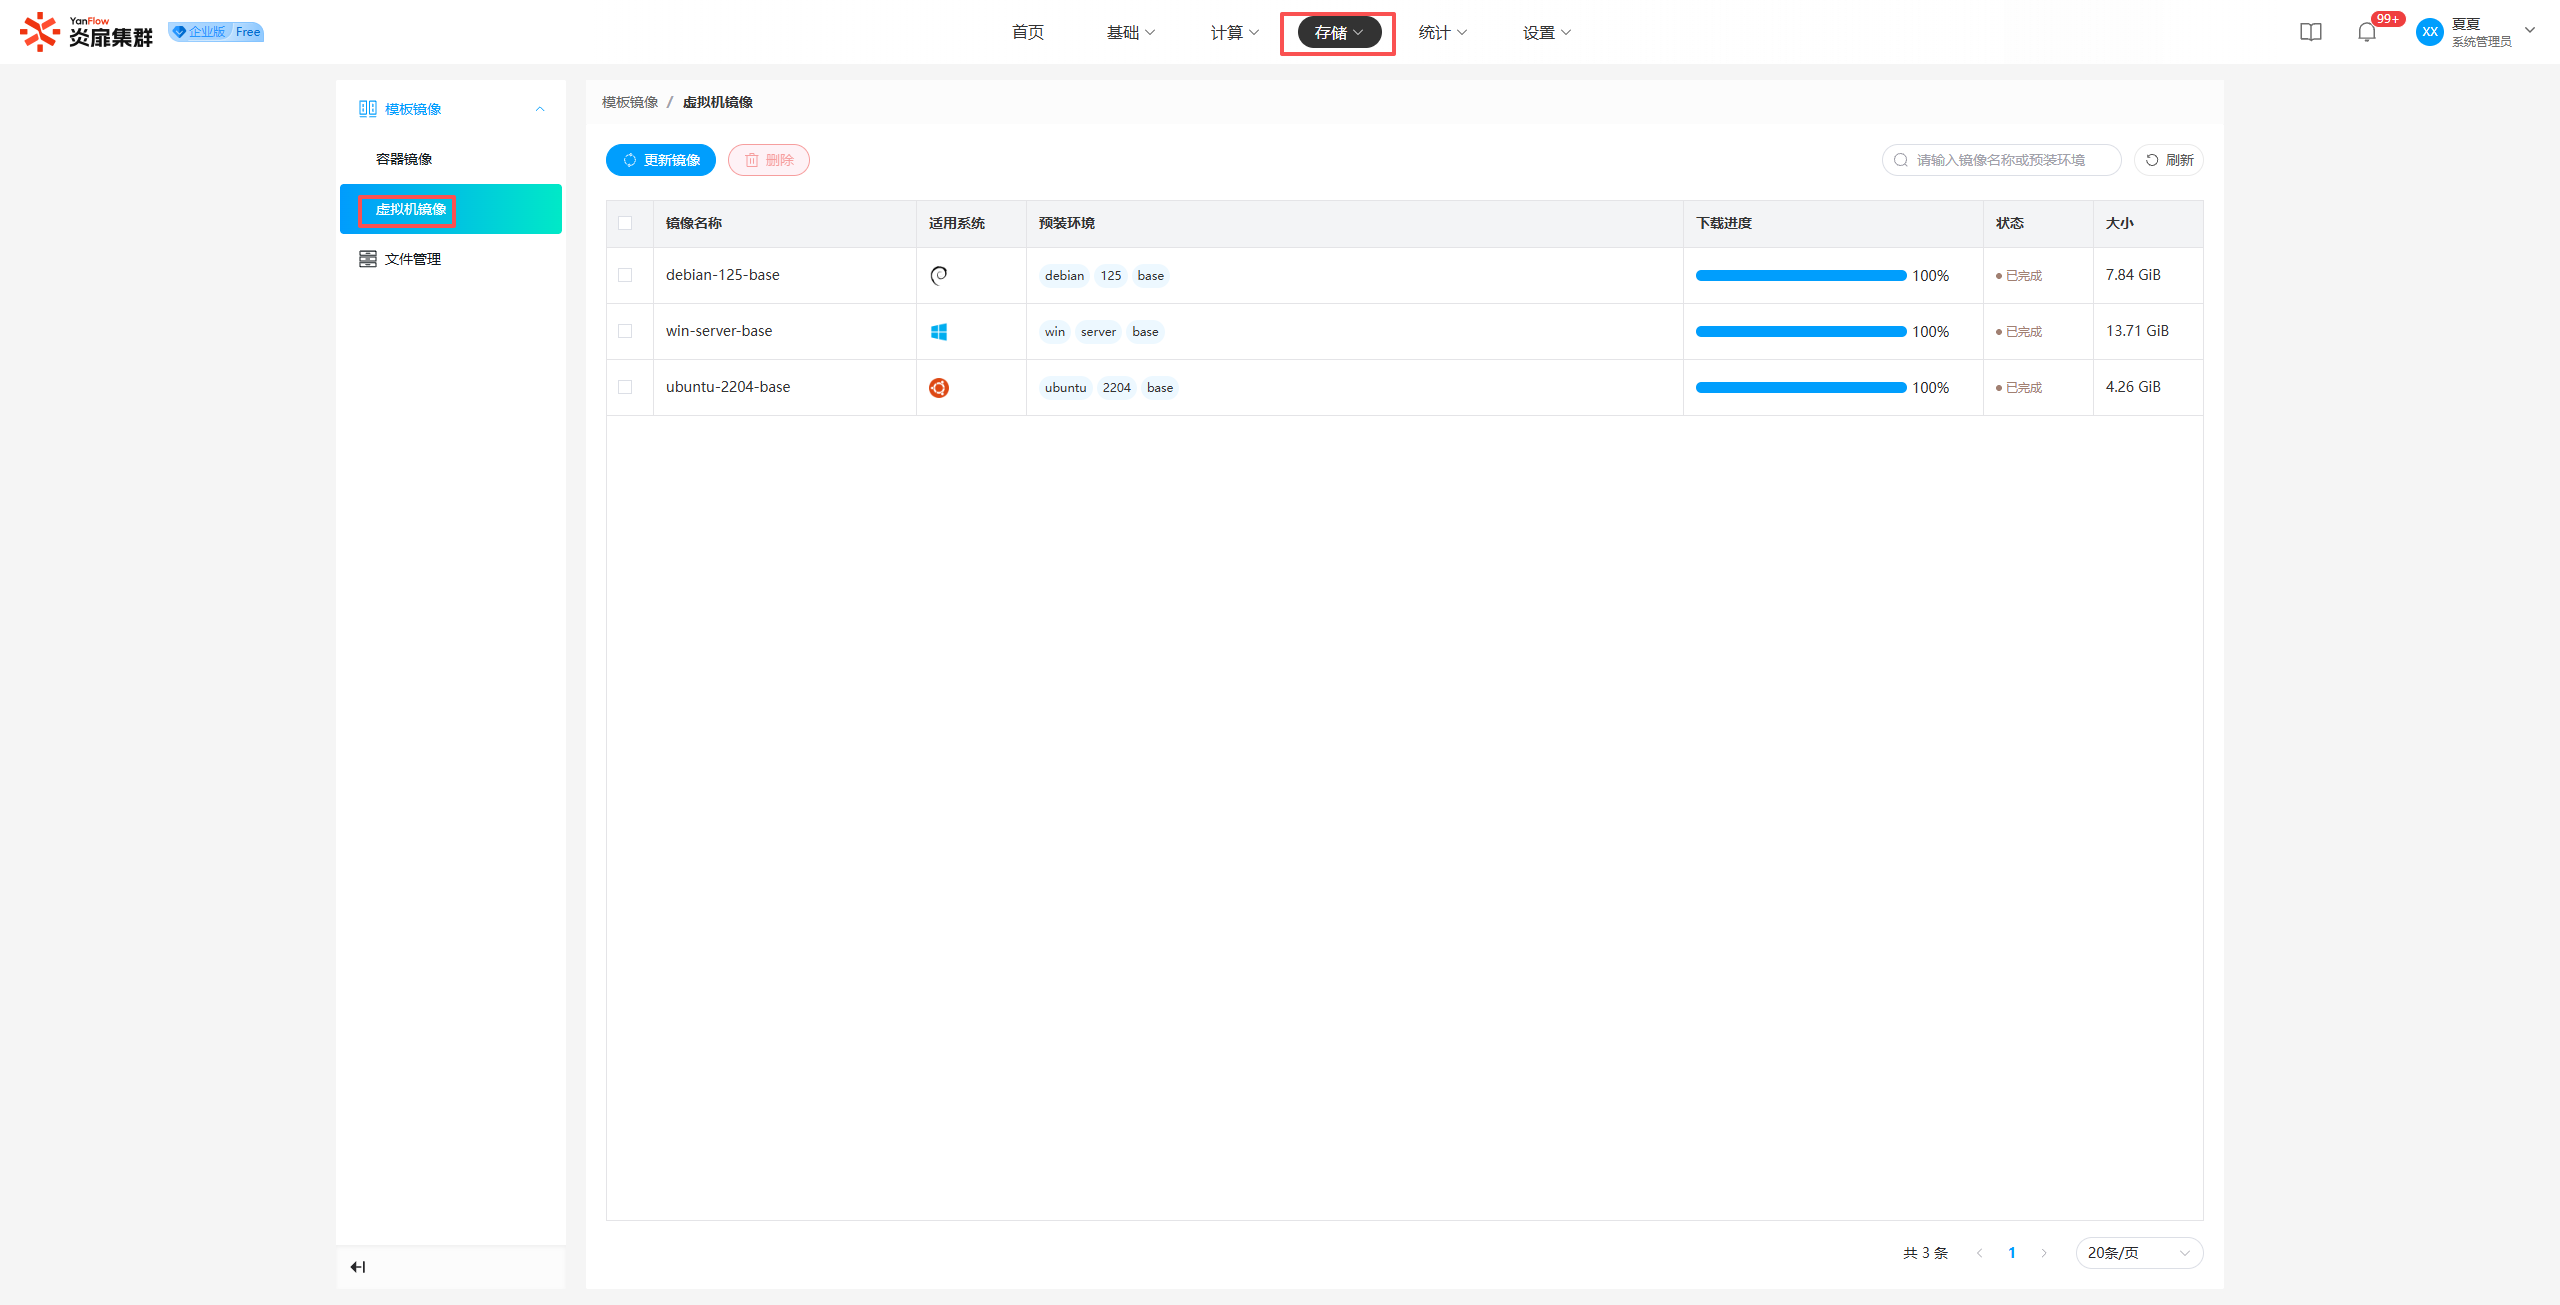
System Administrators can view all VM node template images in the system. Supports keyword search by image name or pre-installed environment.
Update Image: Click Update Image to fetch the latest template images.
Delete Image: Select one or more images, click Delete, and click Confirm in the prompt to delete the selected template images.
File Management
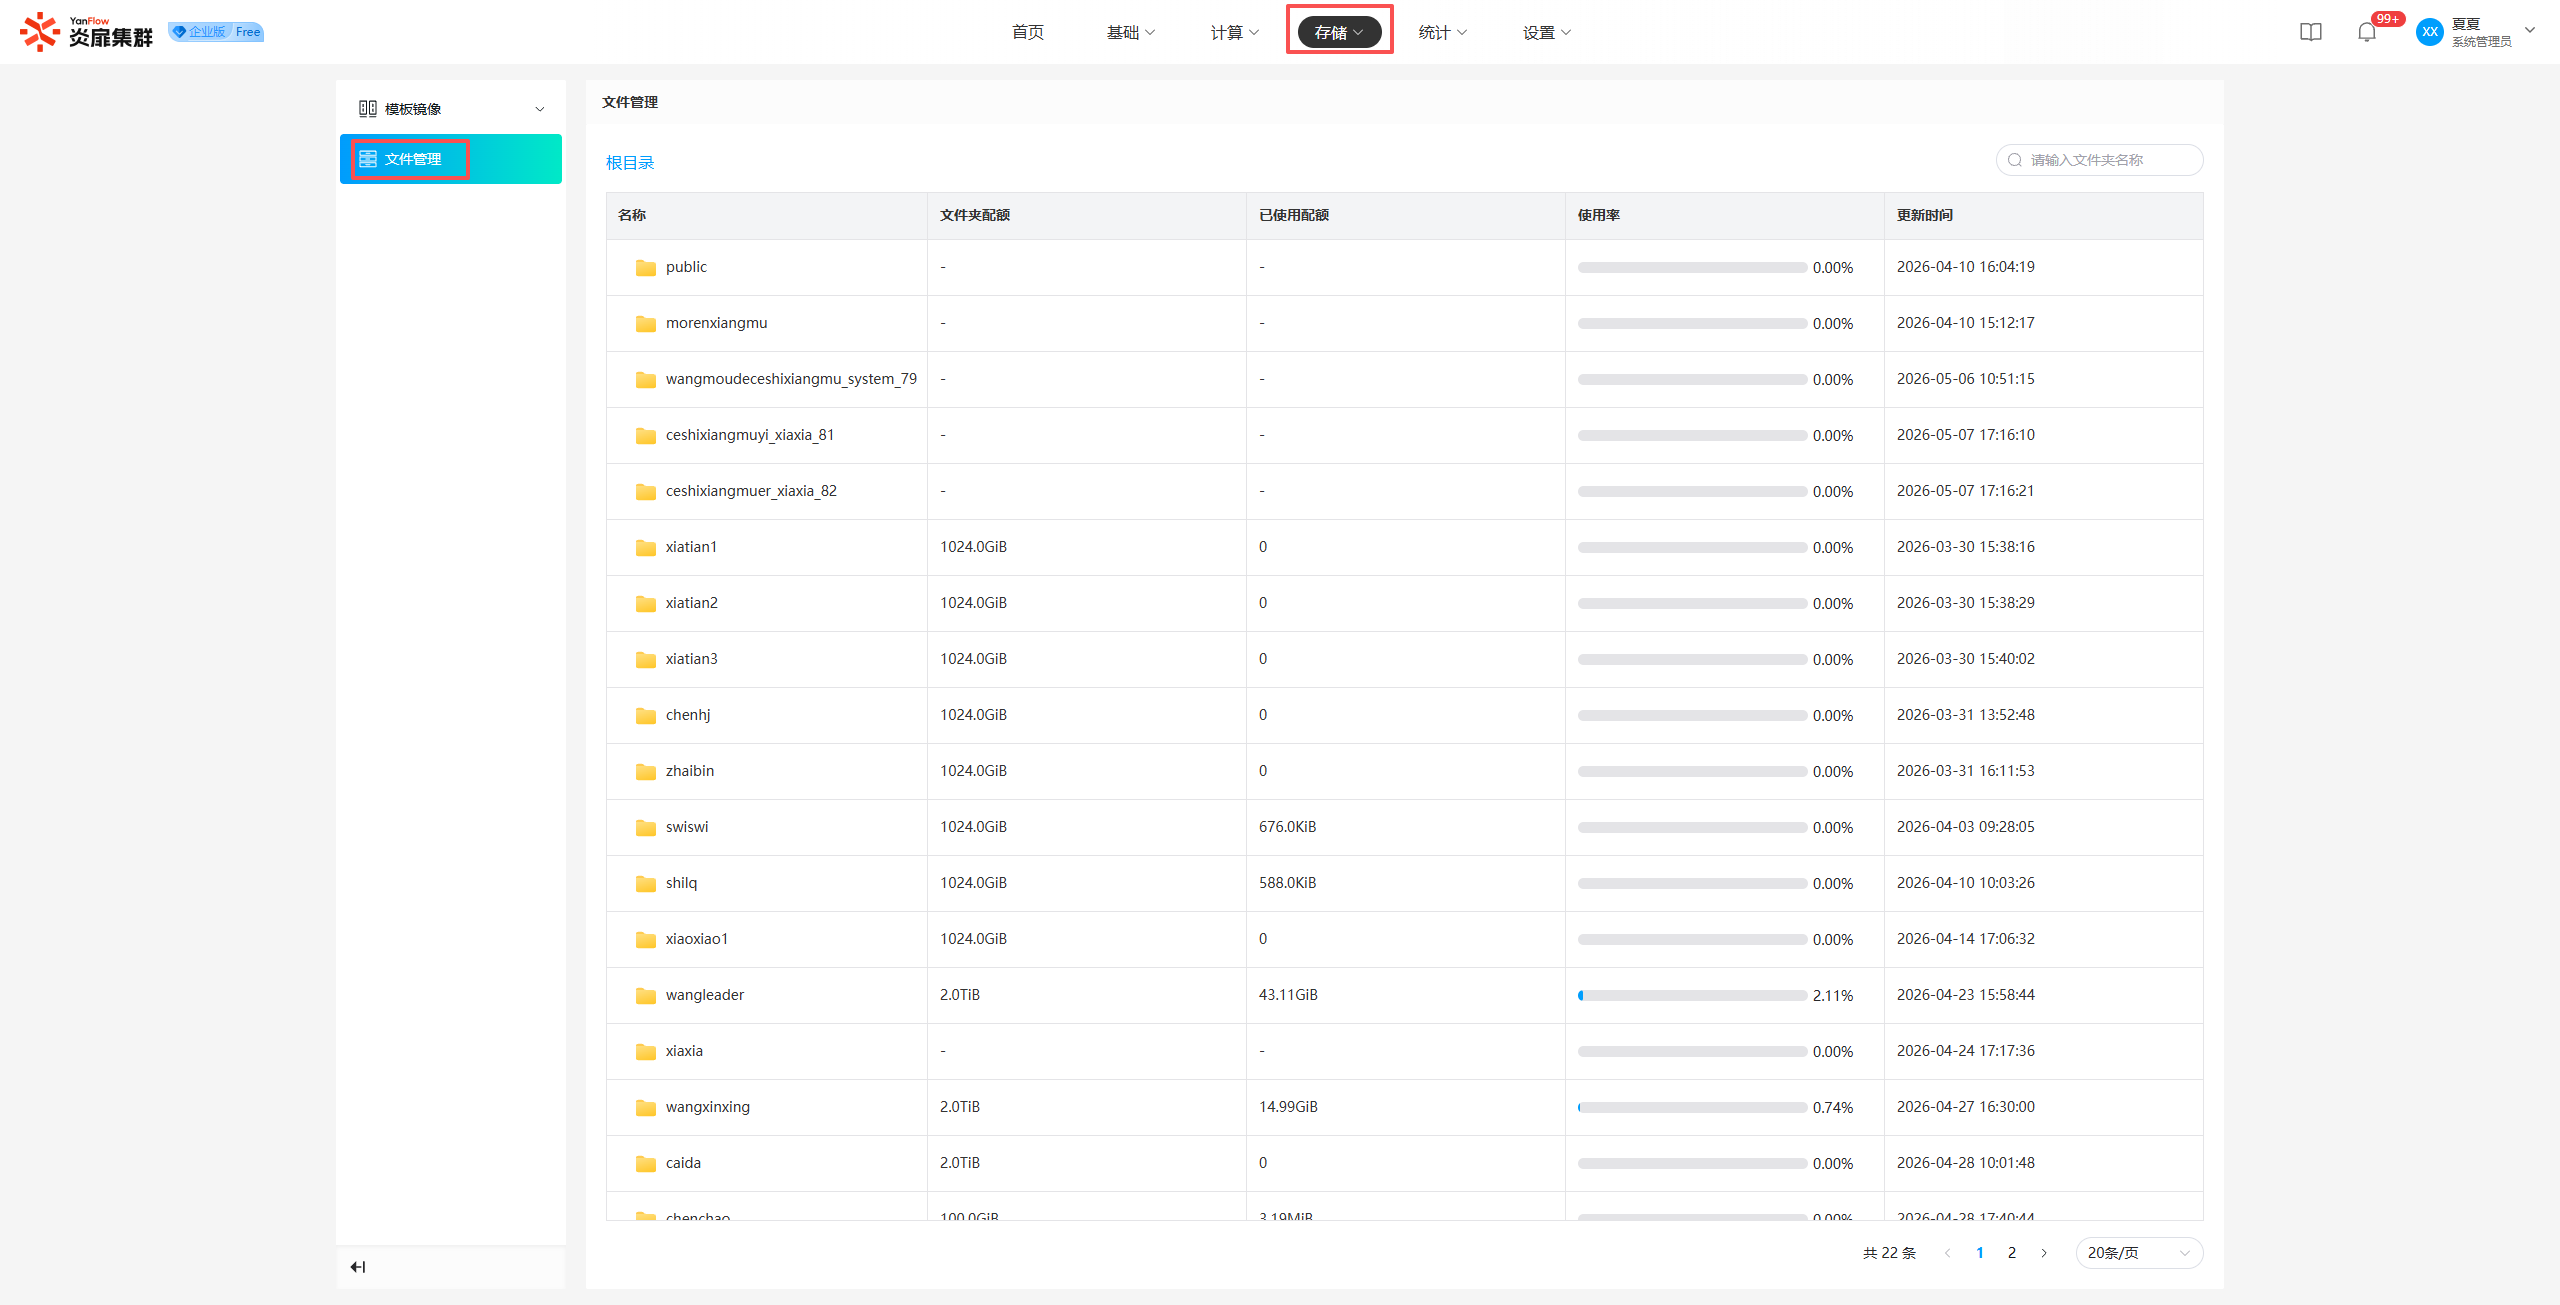
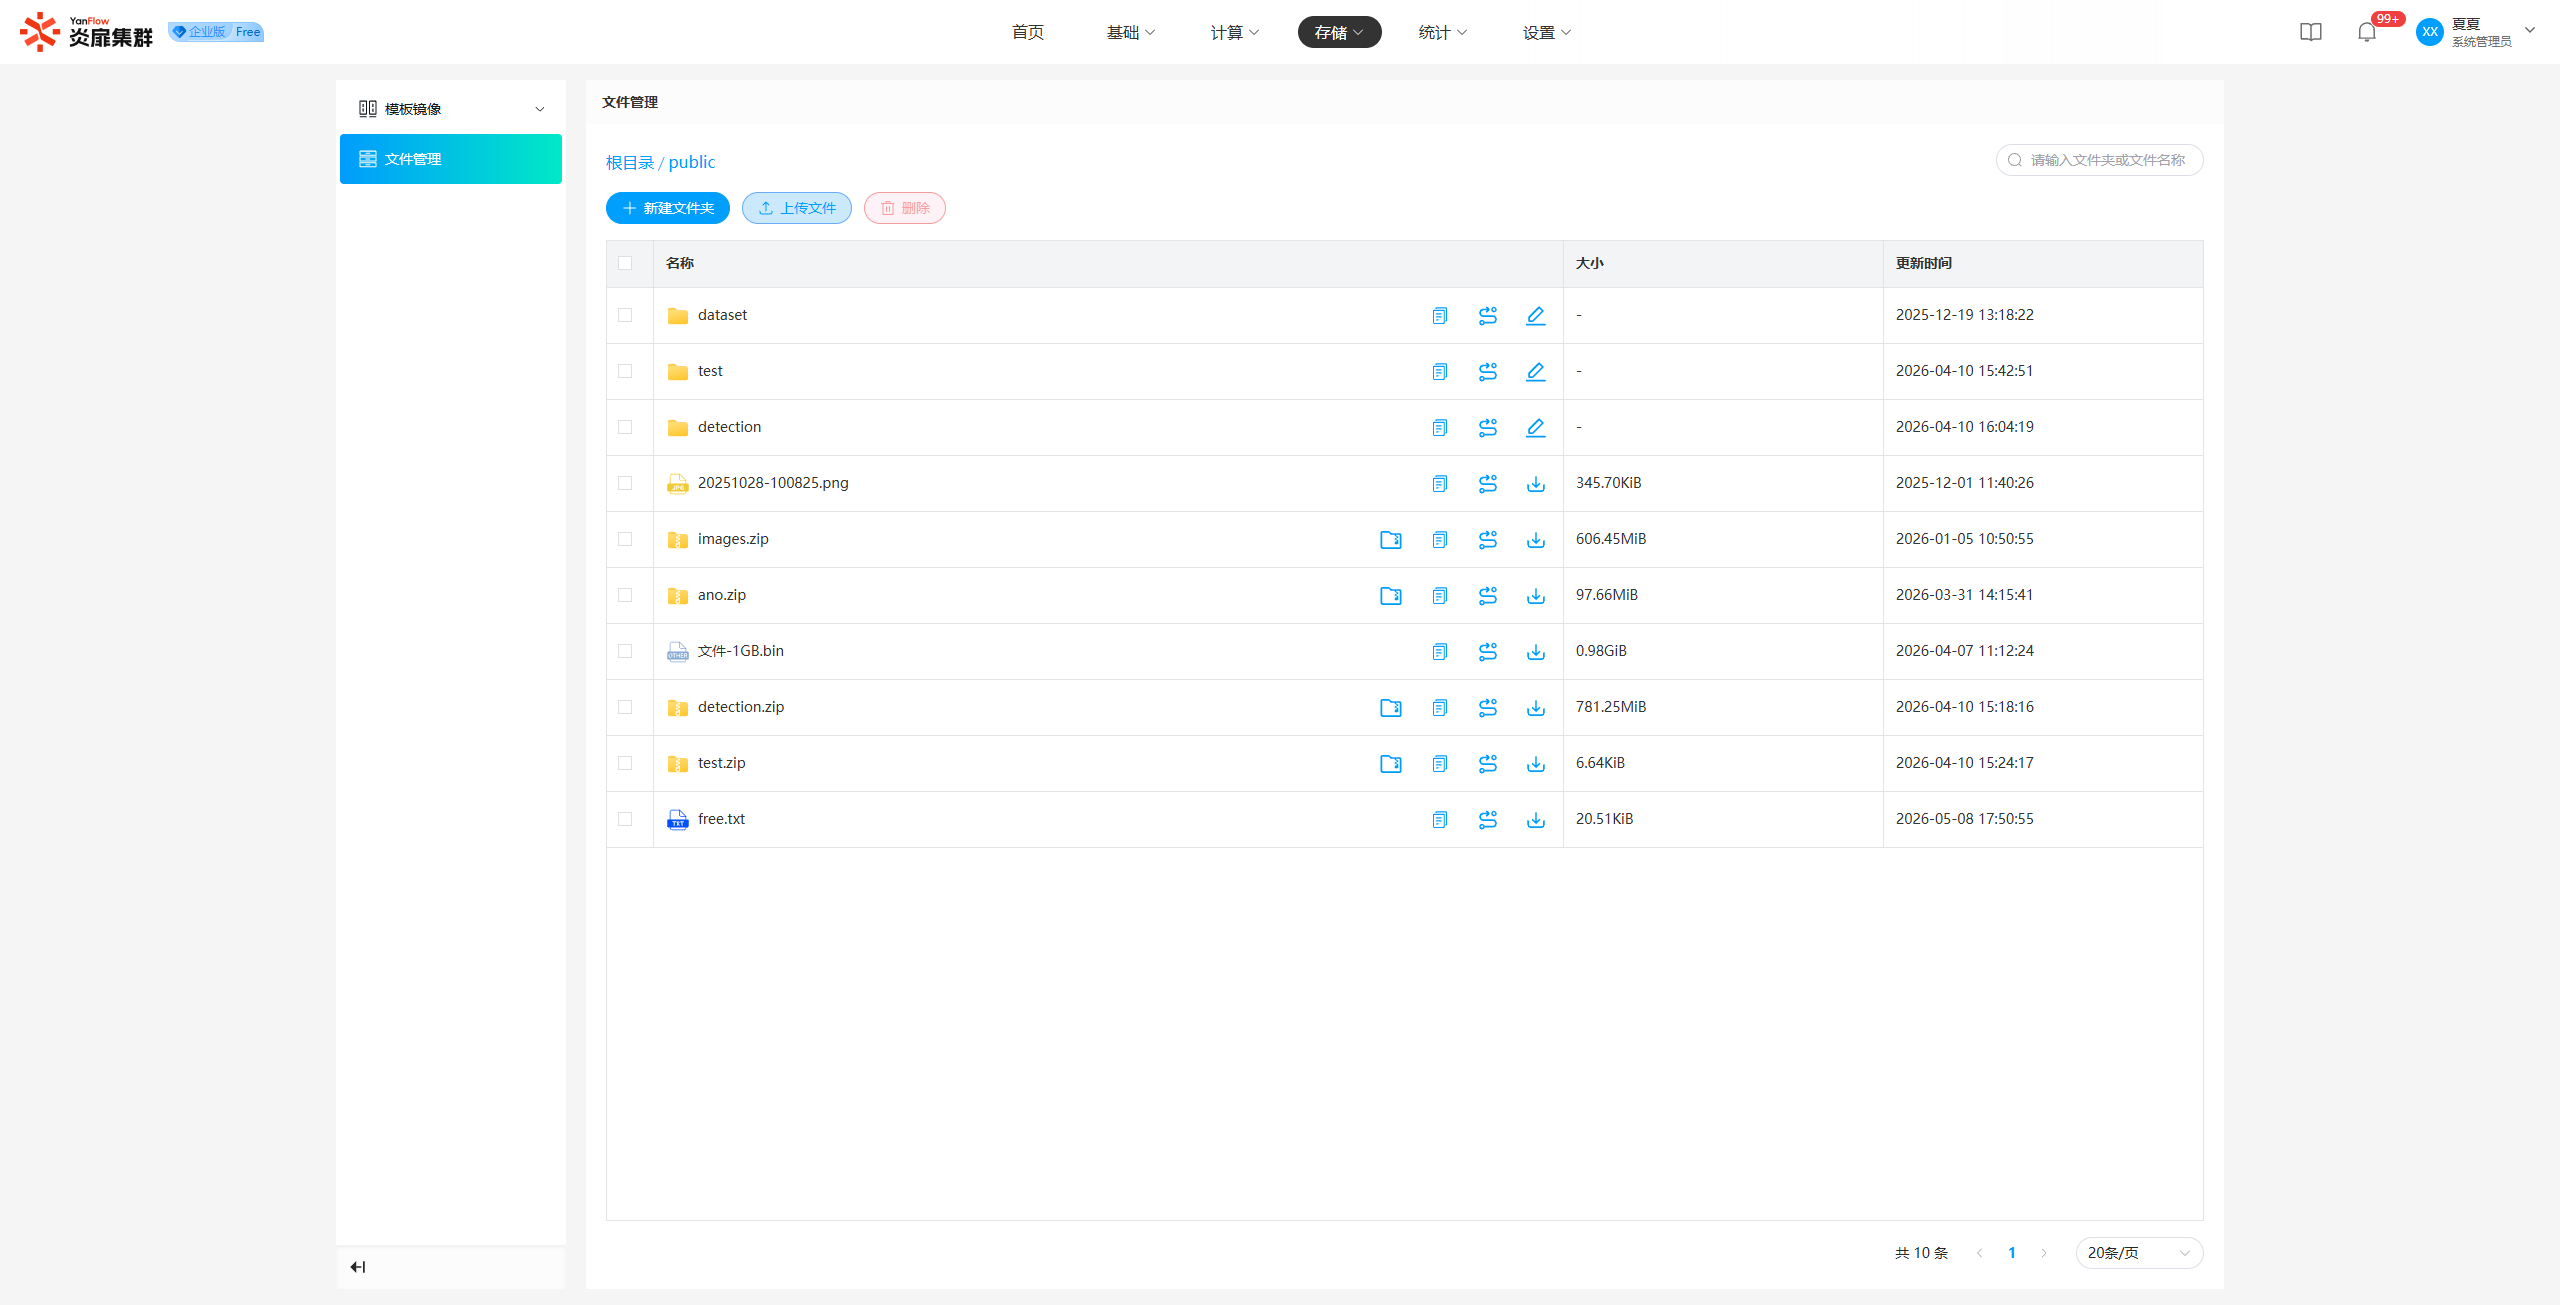
System Administrators can view all files in the system, including file content, folder quotas, and used quotas. Folder types are divided into three categories: Public Folders, Project Folders, and User Folders. Supports keyword search by folder name.
Public Folders and Project Folders: System Administrators can View, Create, Copy, Upload, Download, Rename, Move, Unzip, and Delete.
User Folders: System Administrators can only View or Download files.
Statistics
Duration Statistics
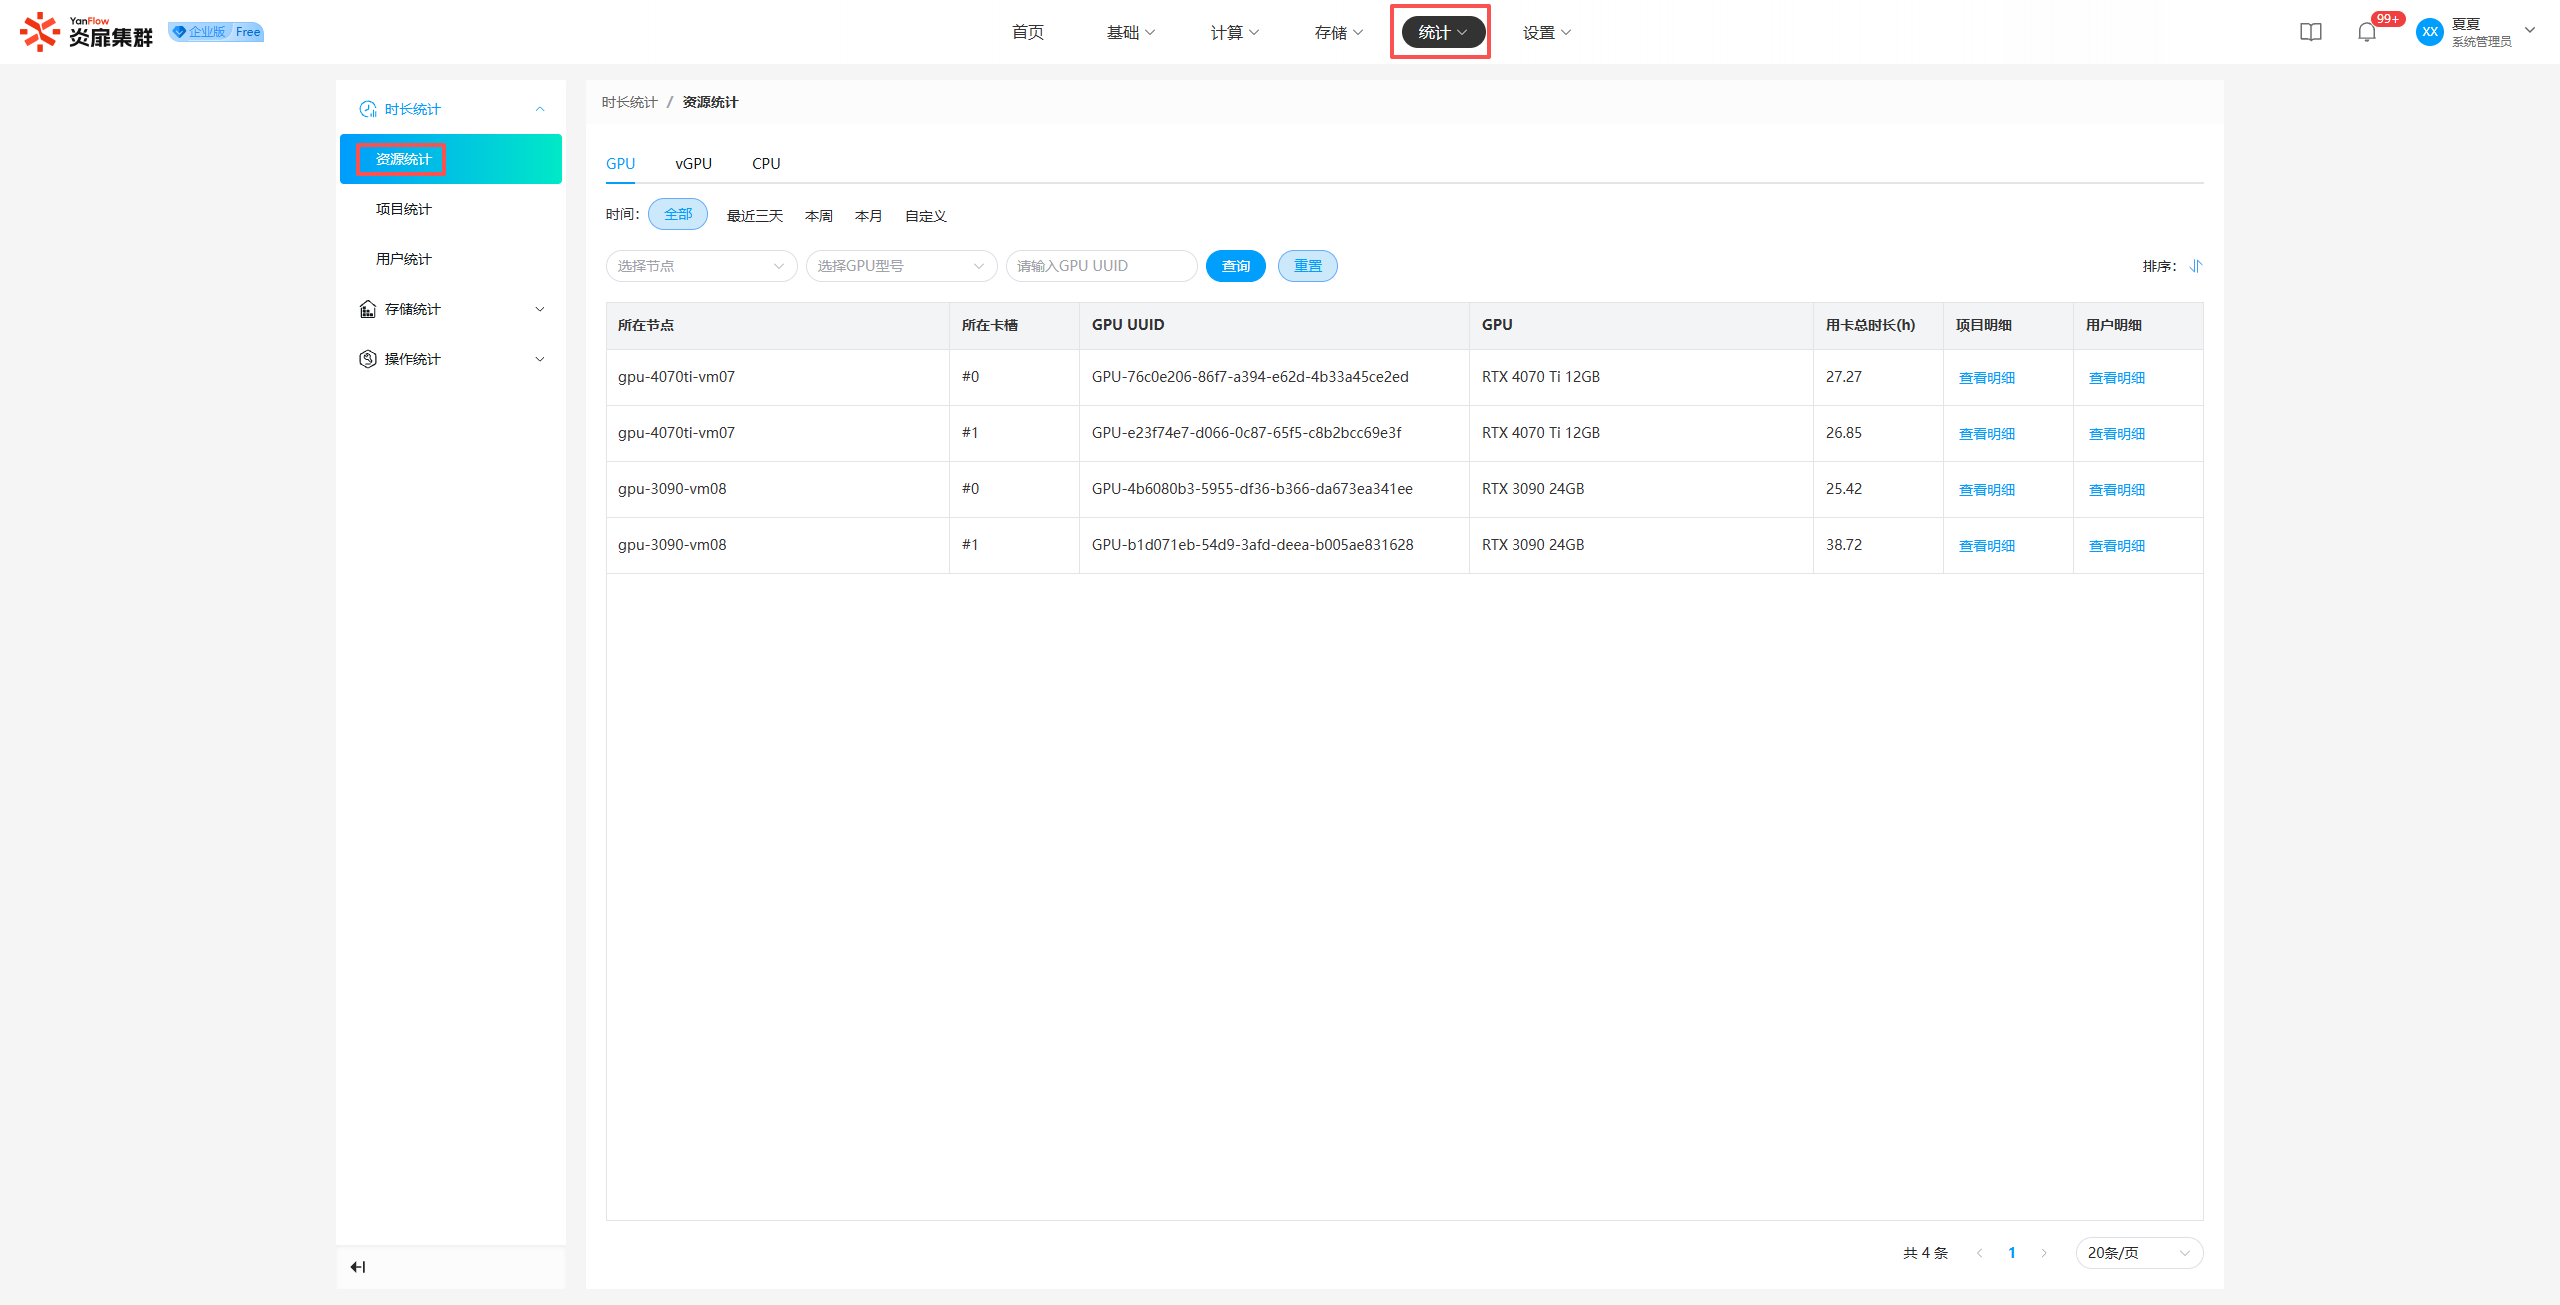
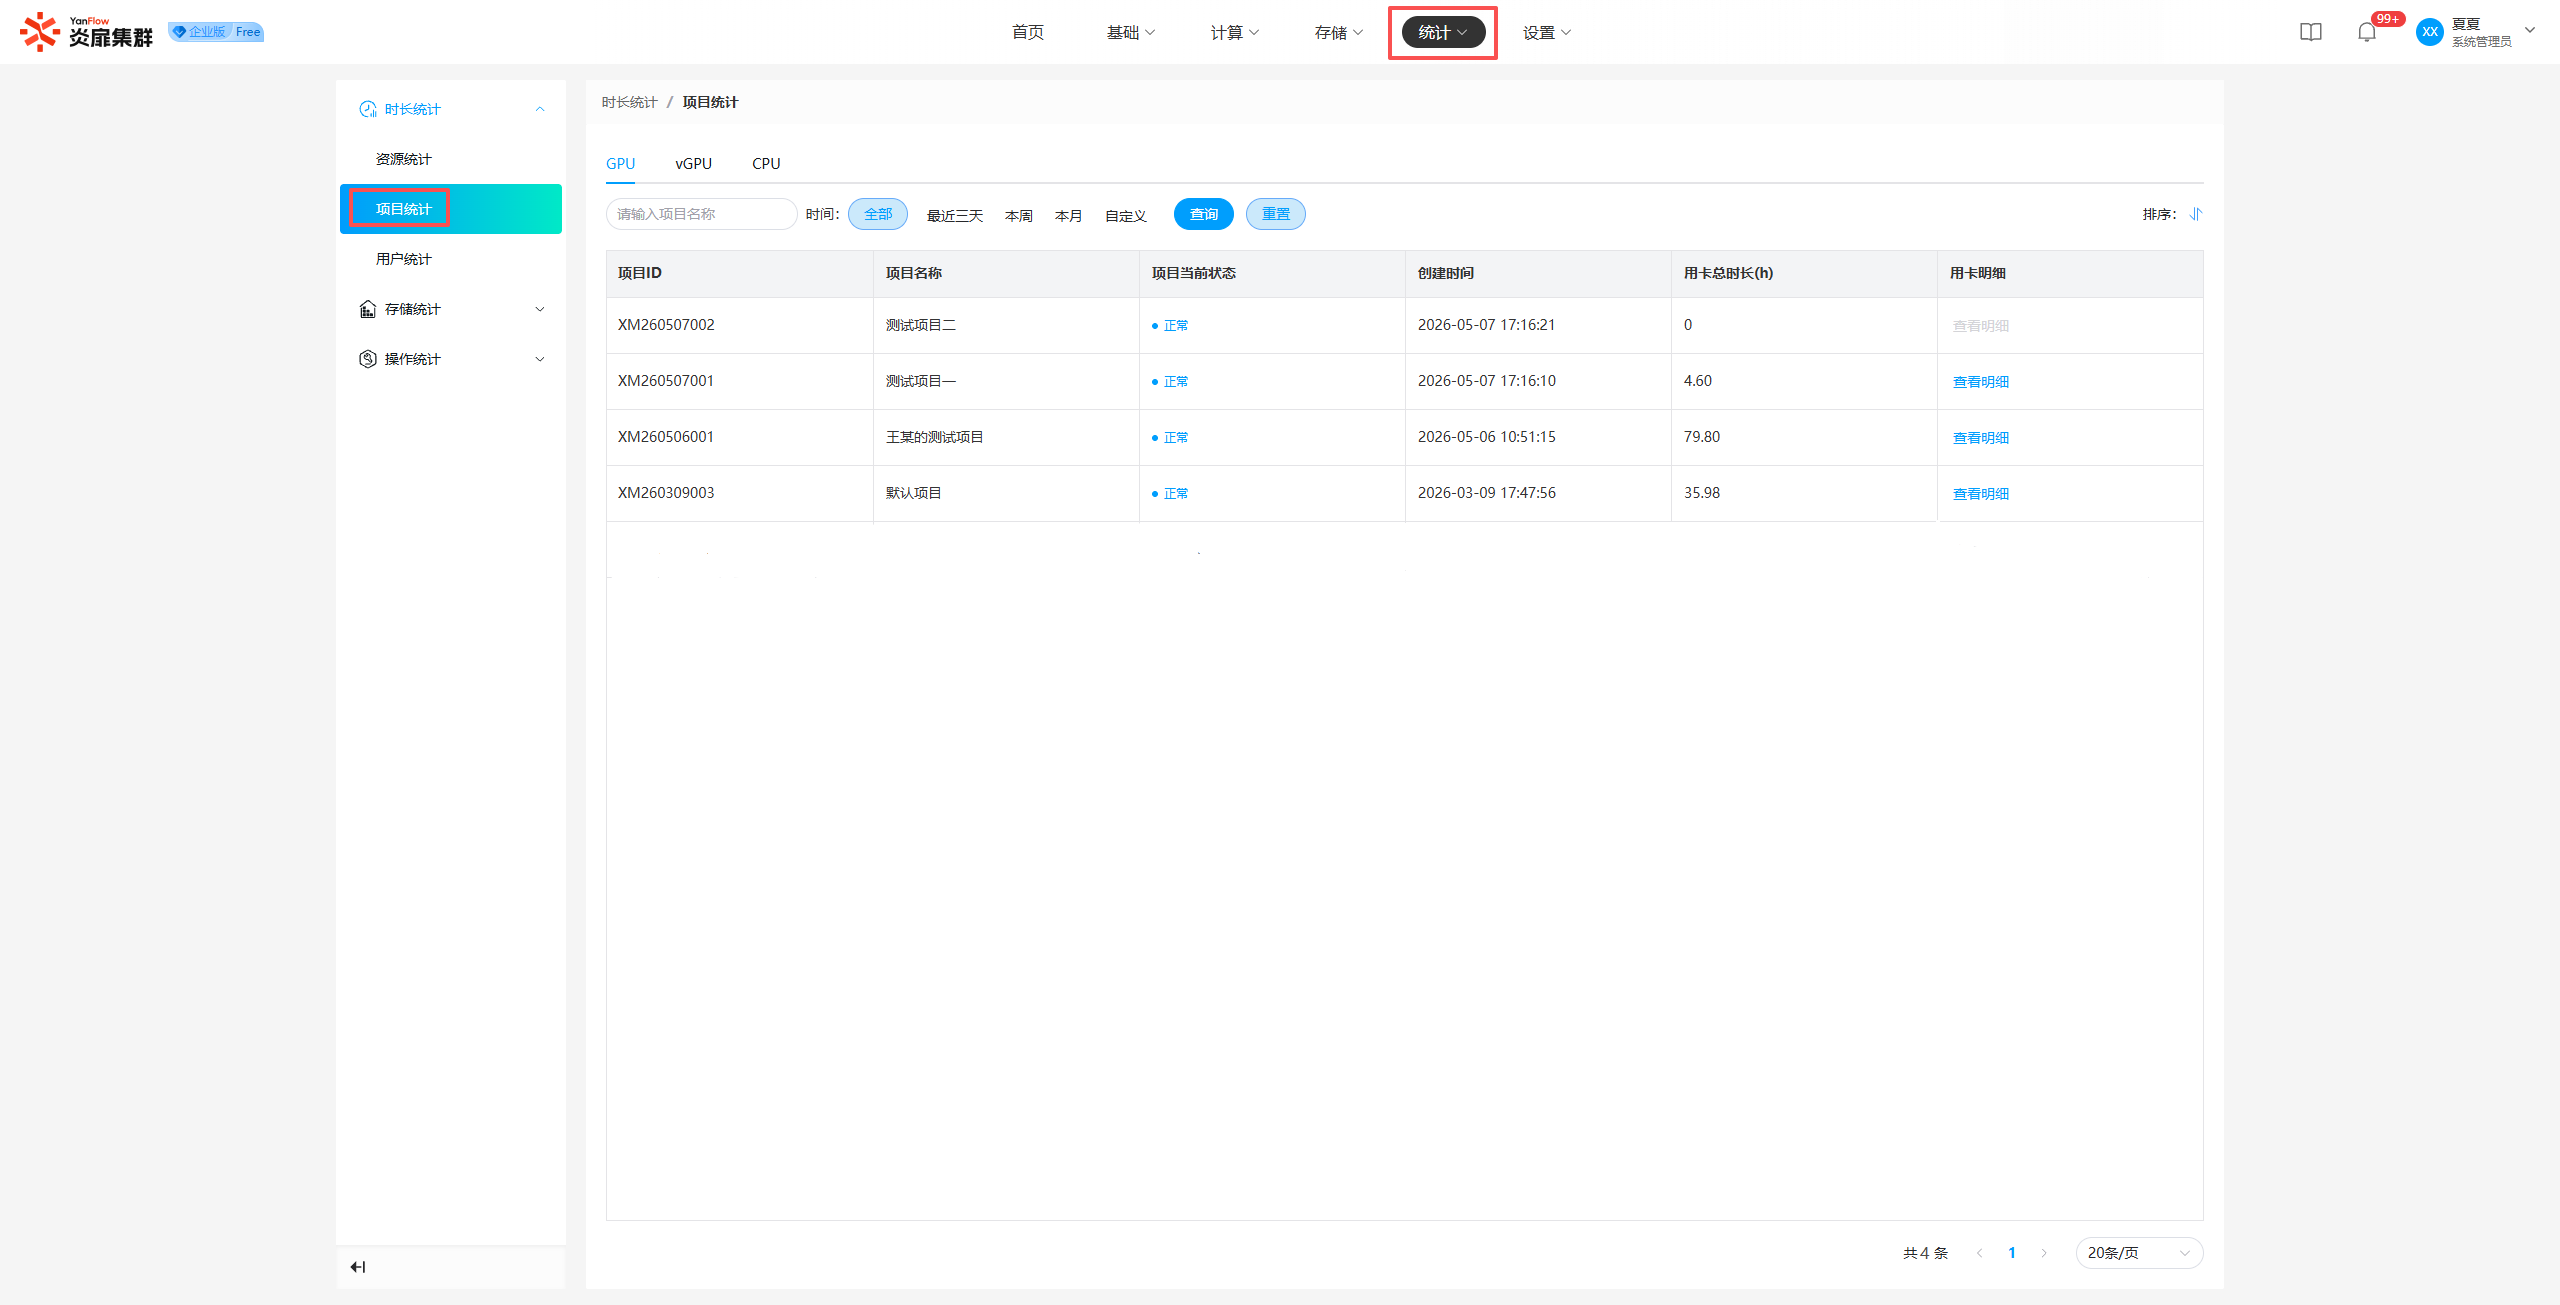
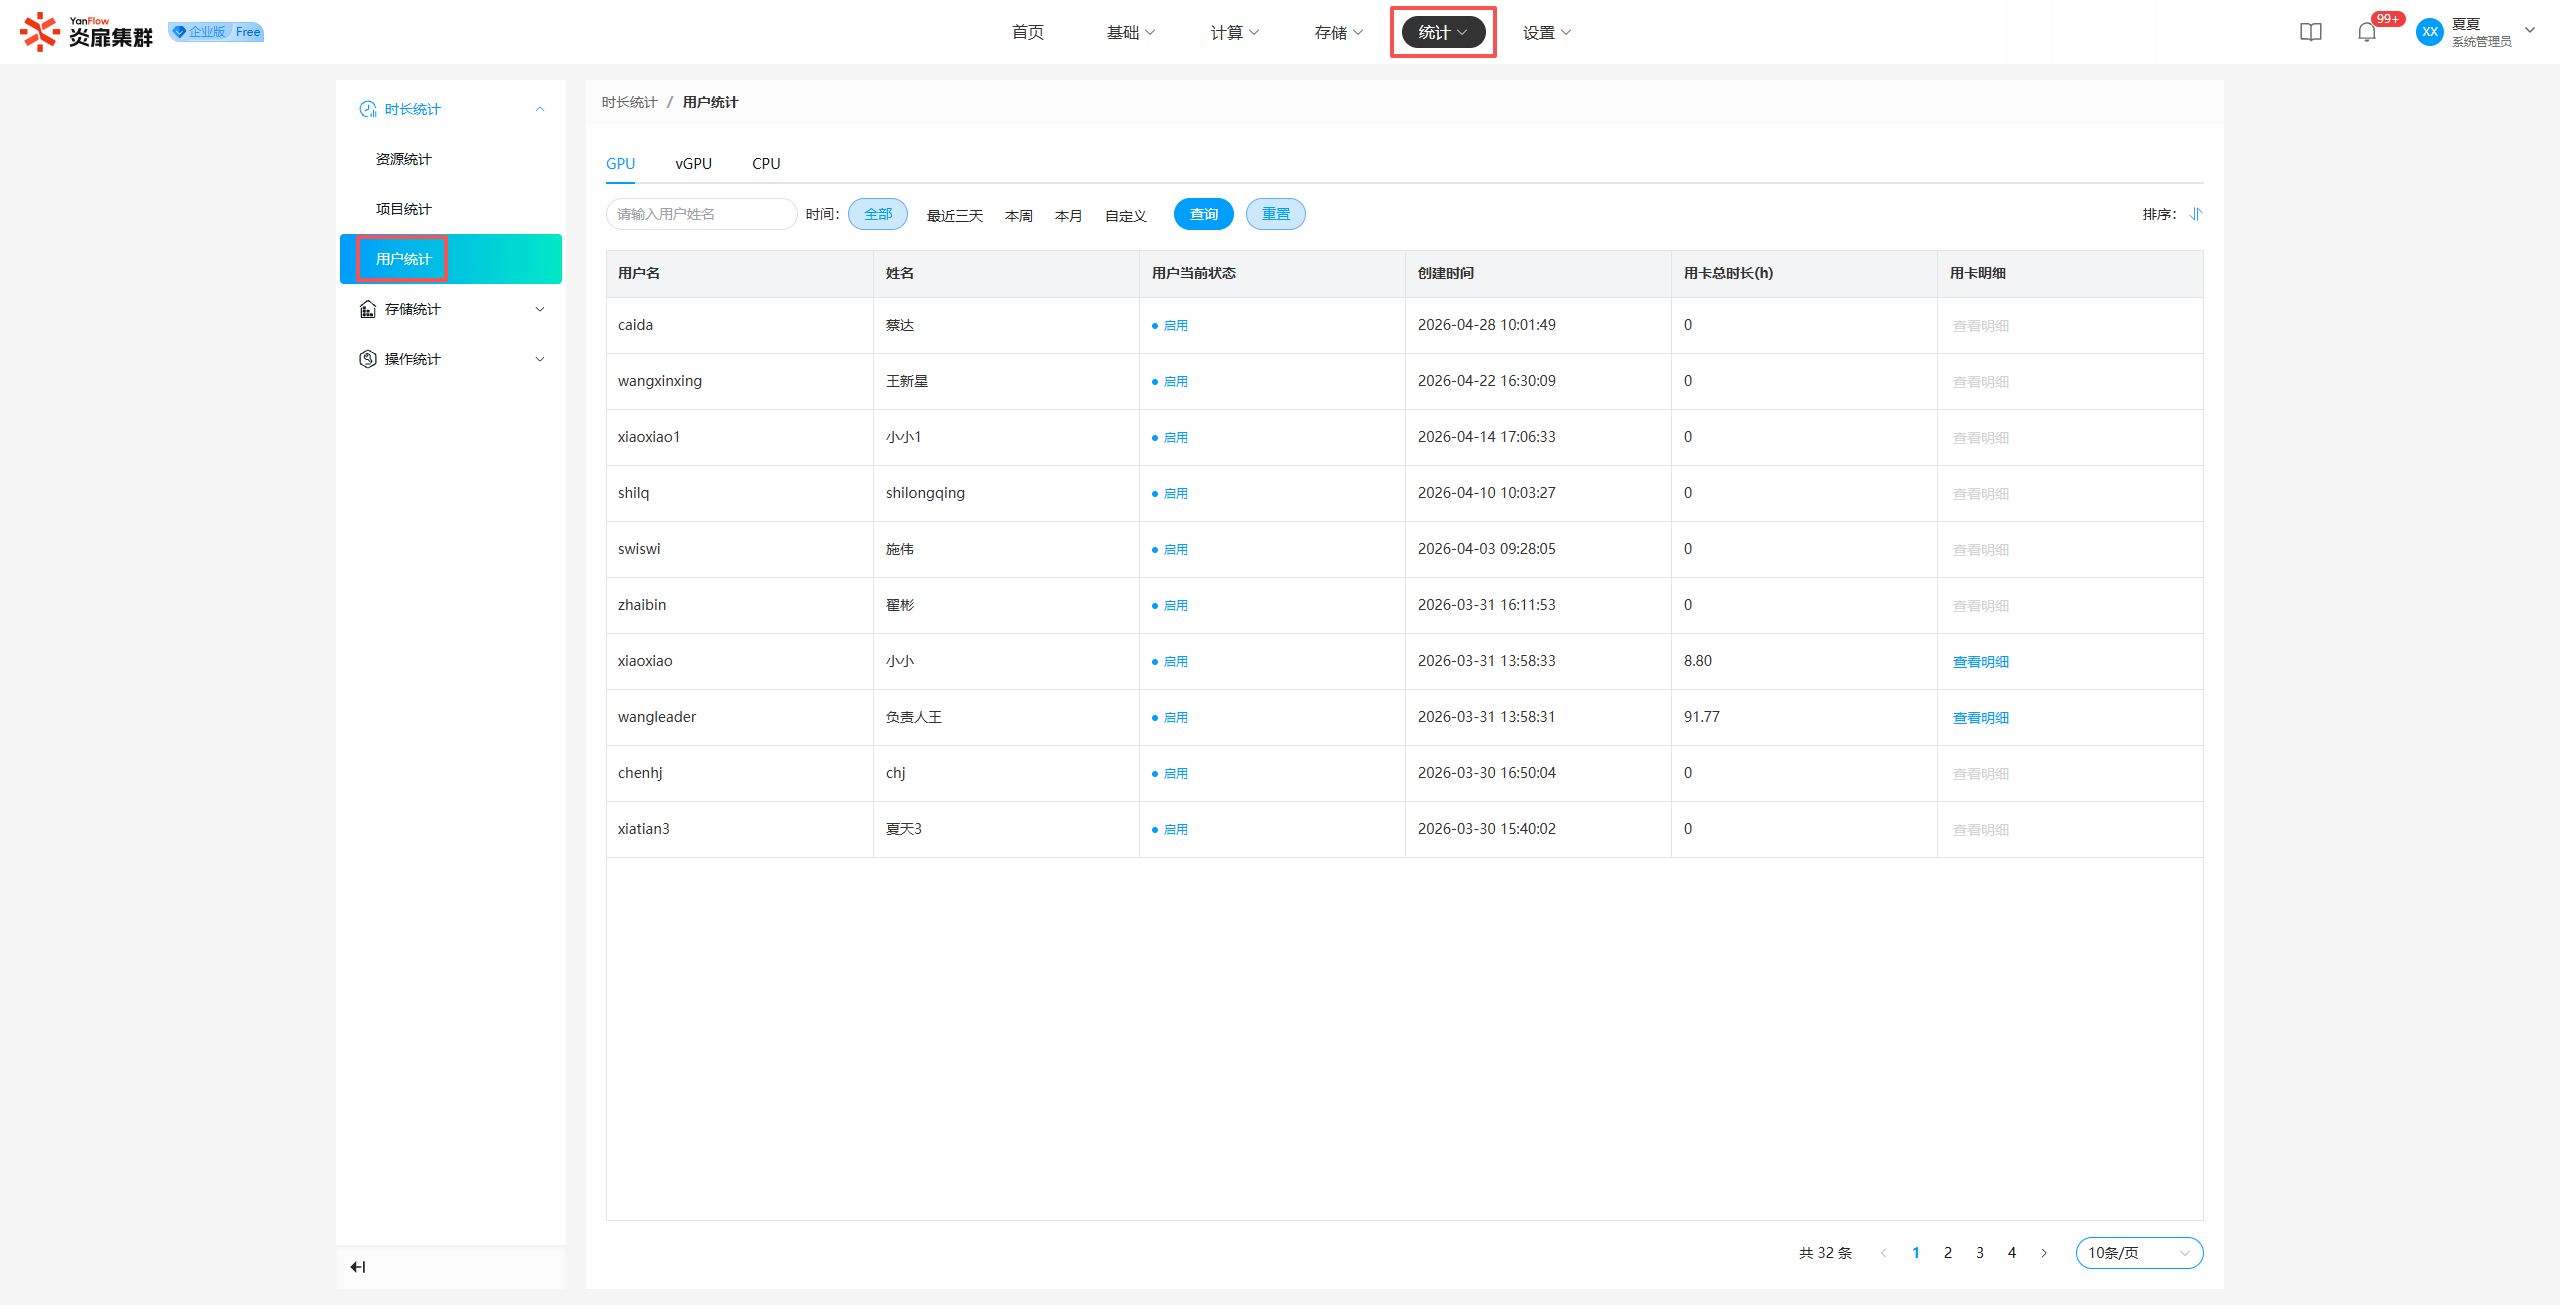
The system statistics resource usage duration across three dimensions: Resource, Project, and User.
Resource Statistics: Uses node resources as the dimension, and statistics for GPU, vGPU, and CPU types separately, including usage duration and details.
Project Statistics: Uses projects as the dimension, and statistics for GPU, vGPU, and CPU types separately, including usage duration and details.
User Statistics: Uses users as the dimension, and statistics for GPU, vGPU, and CPU types separately, including usage duration and details.
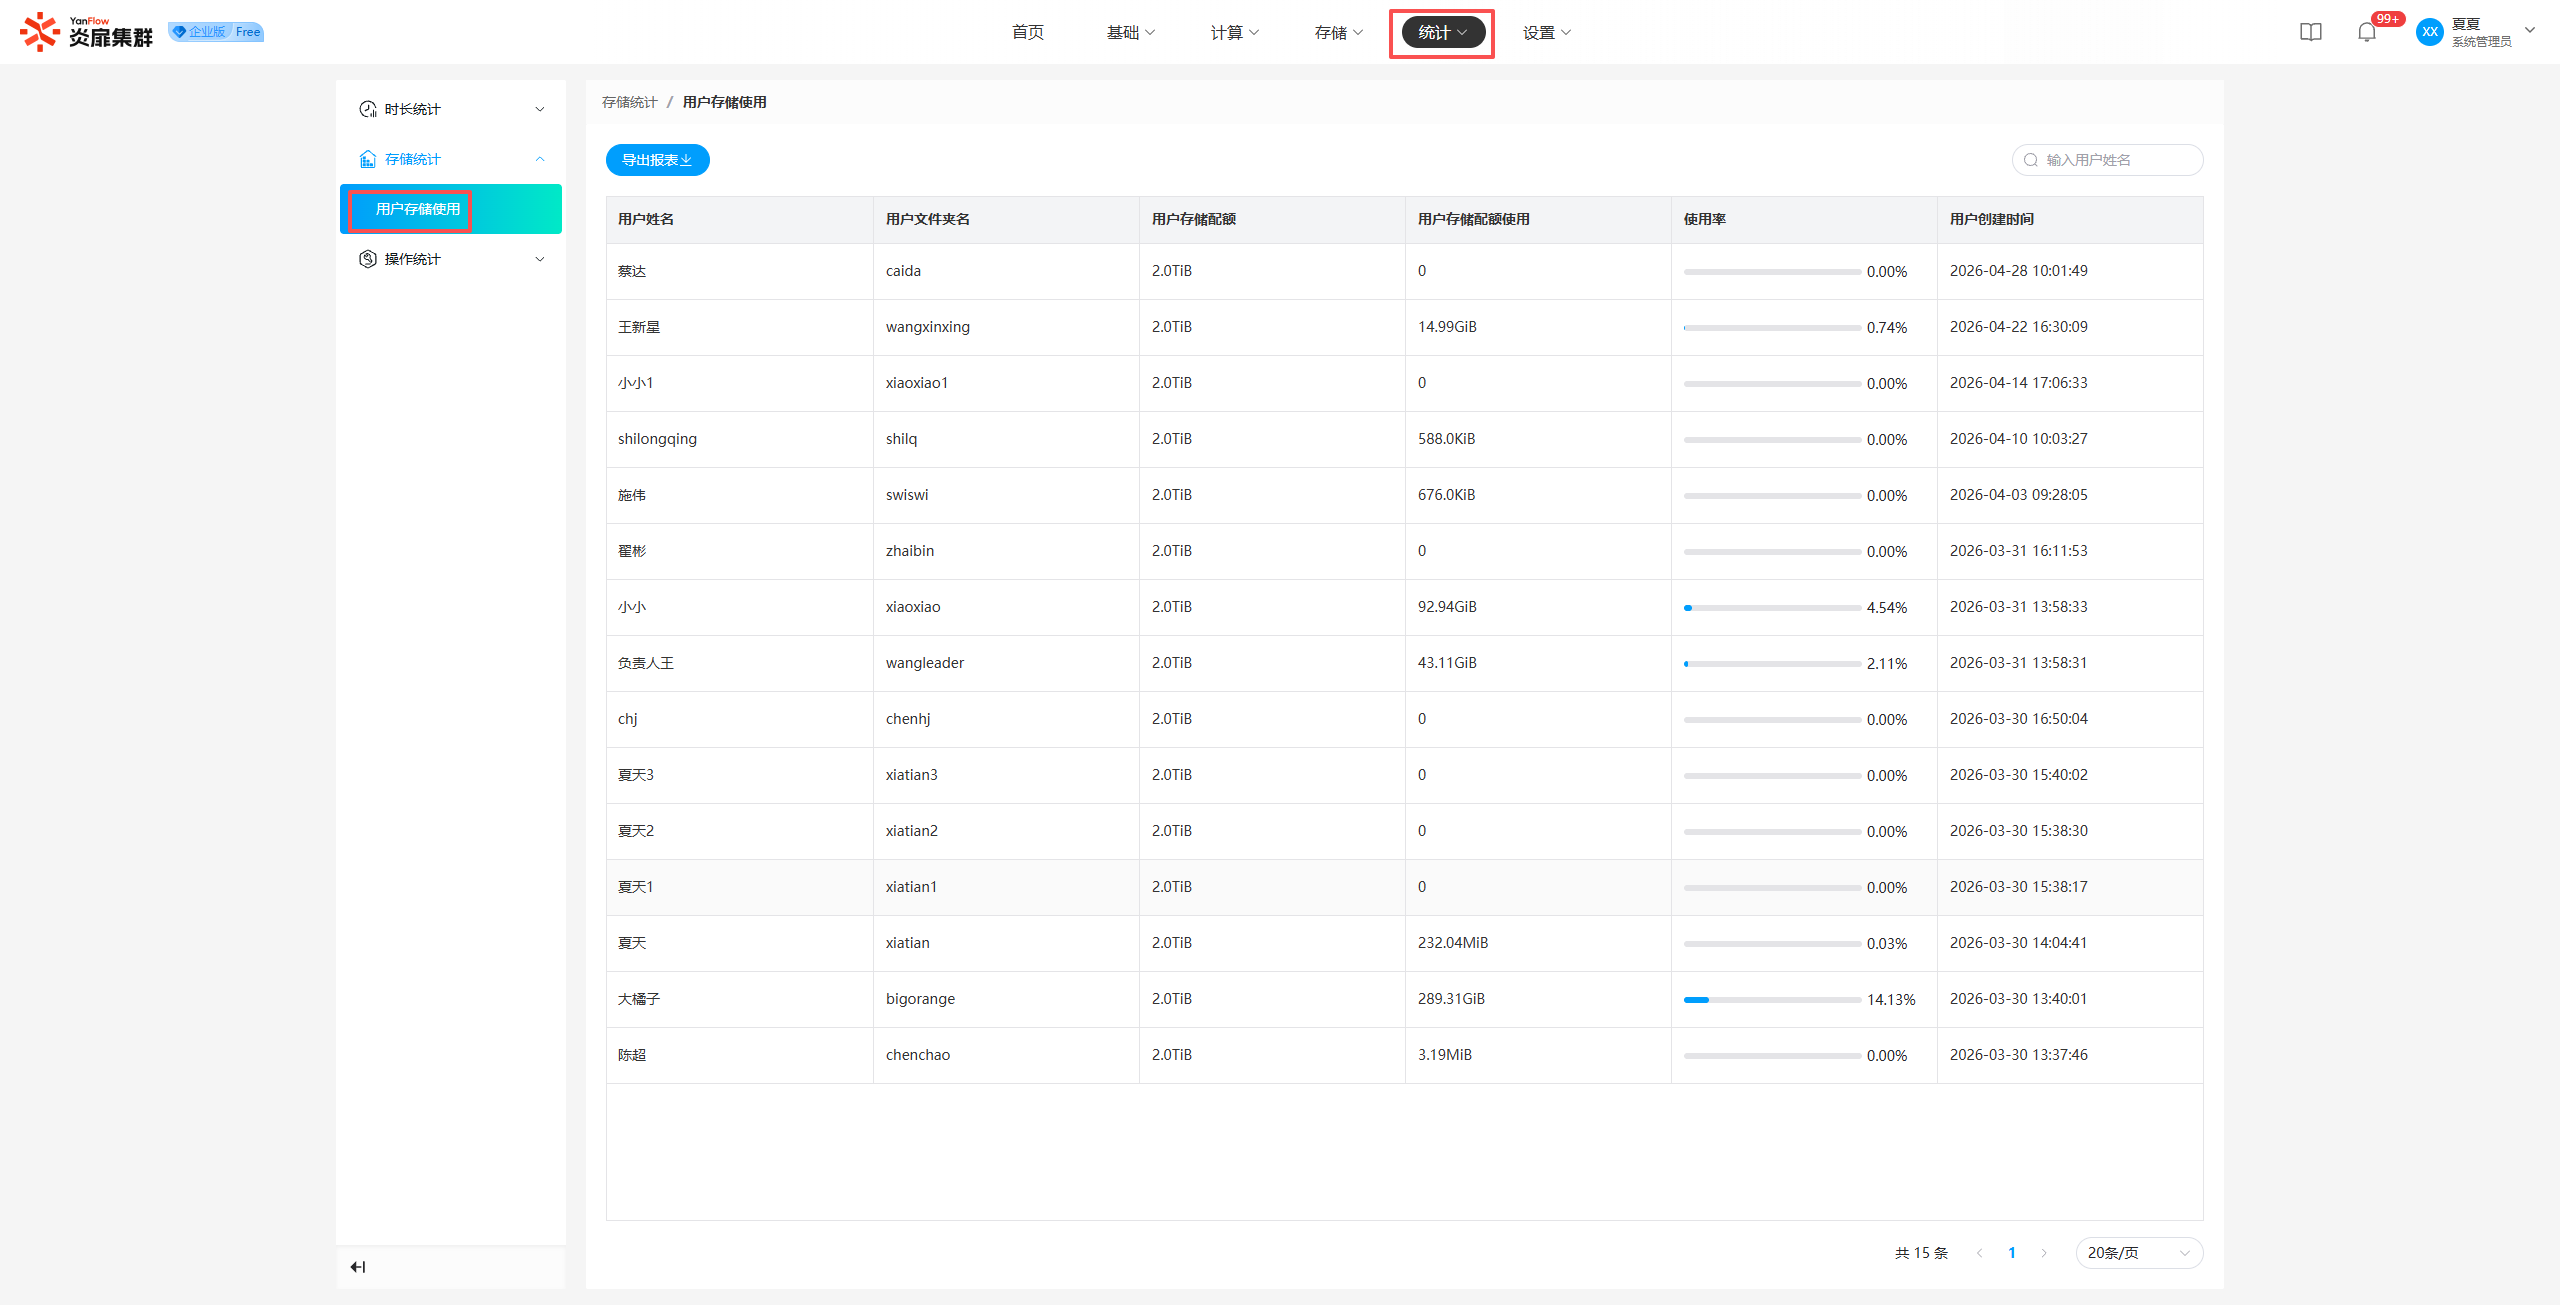
Storage Statistics
System Administrators can view data such as storage quotas and quota usage for each regular user.
Operation Statistics
System Administrators can view the operation records of all users in the system.
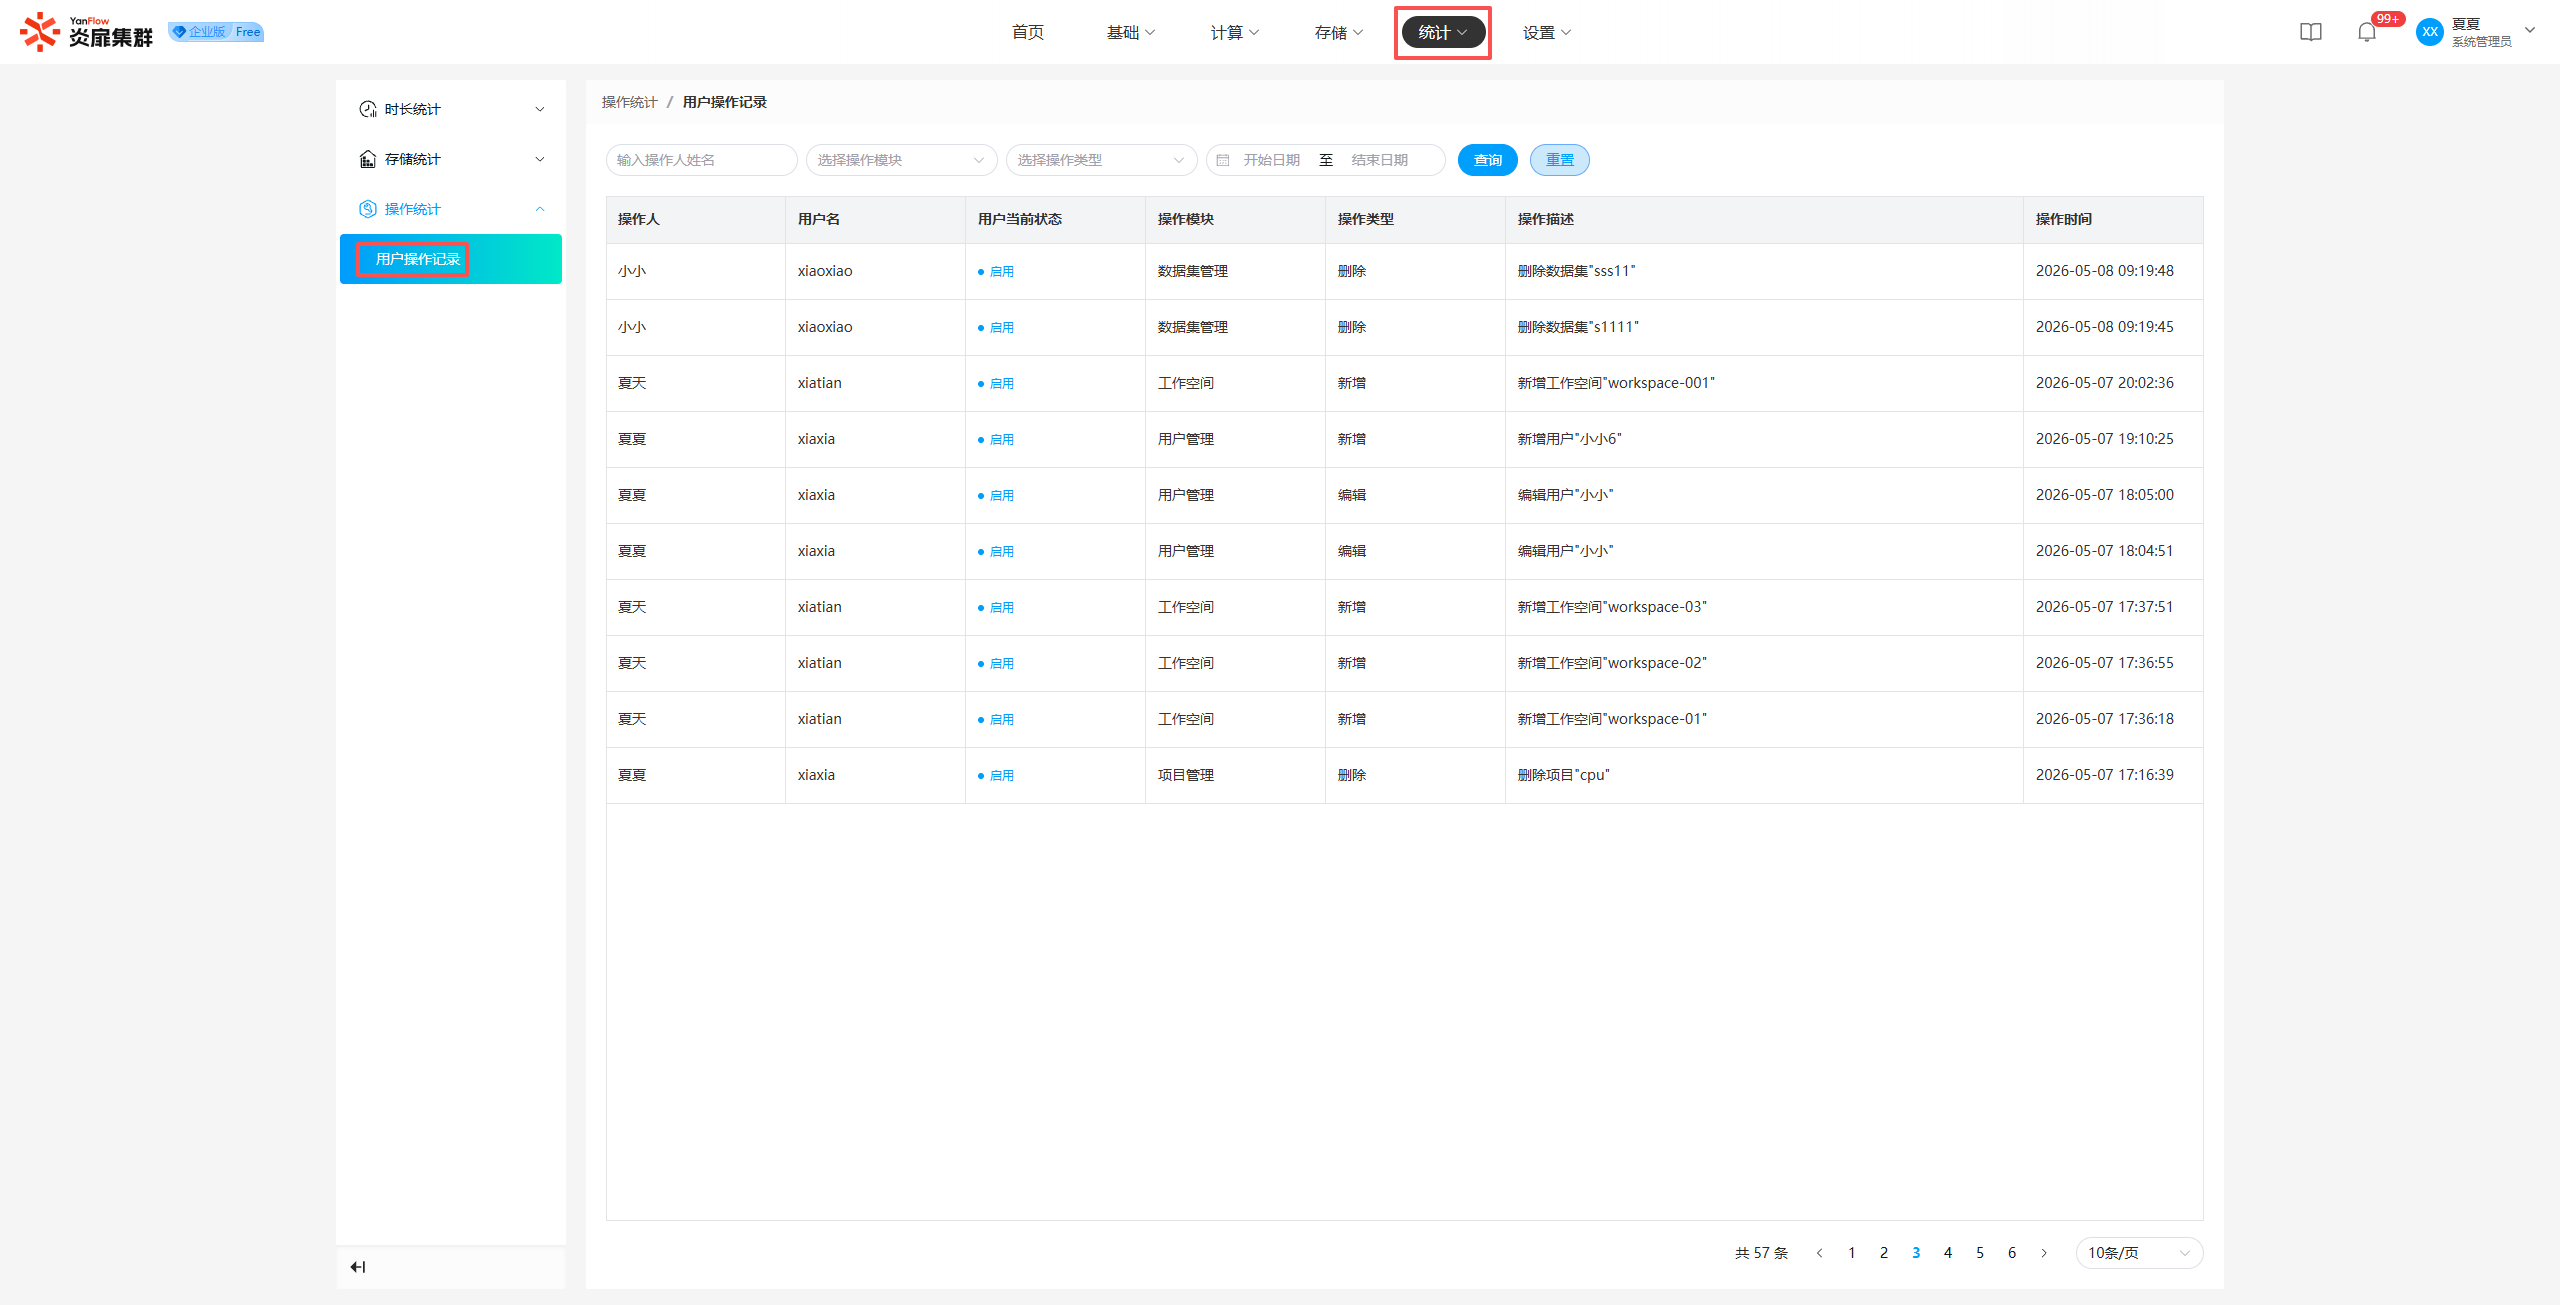
Note: The user operation record system is automatically cleaned periodically. The retention period is set by the System Administrator in Threshold Settings.
Settings
System Configuration
LLM Inference
System Administrators can enable or disable the "LLM Inference" service.
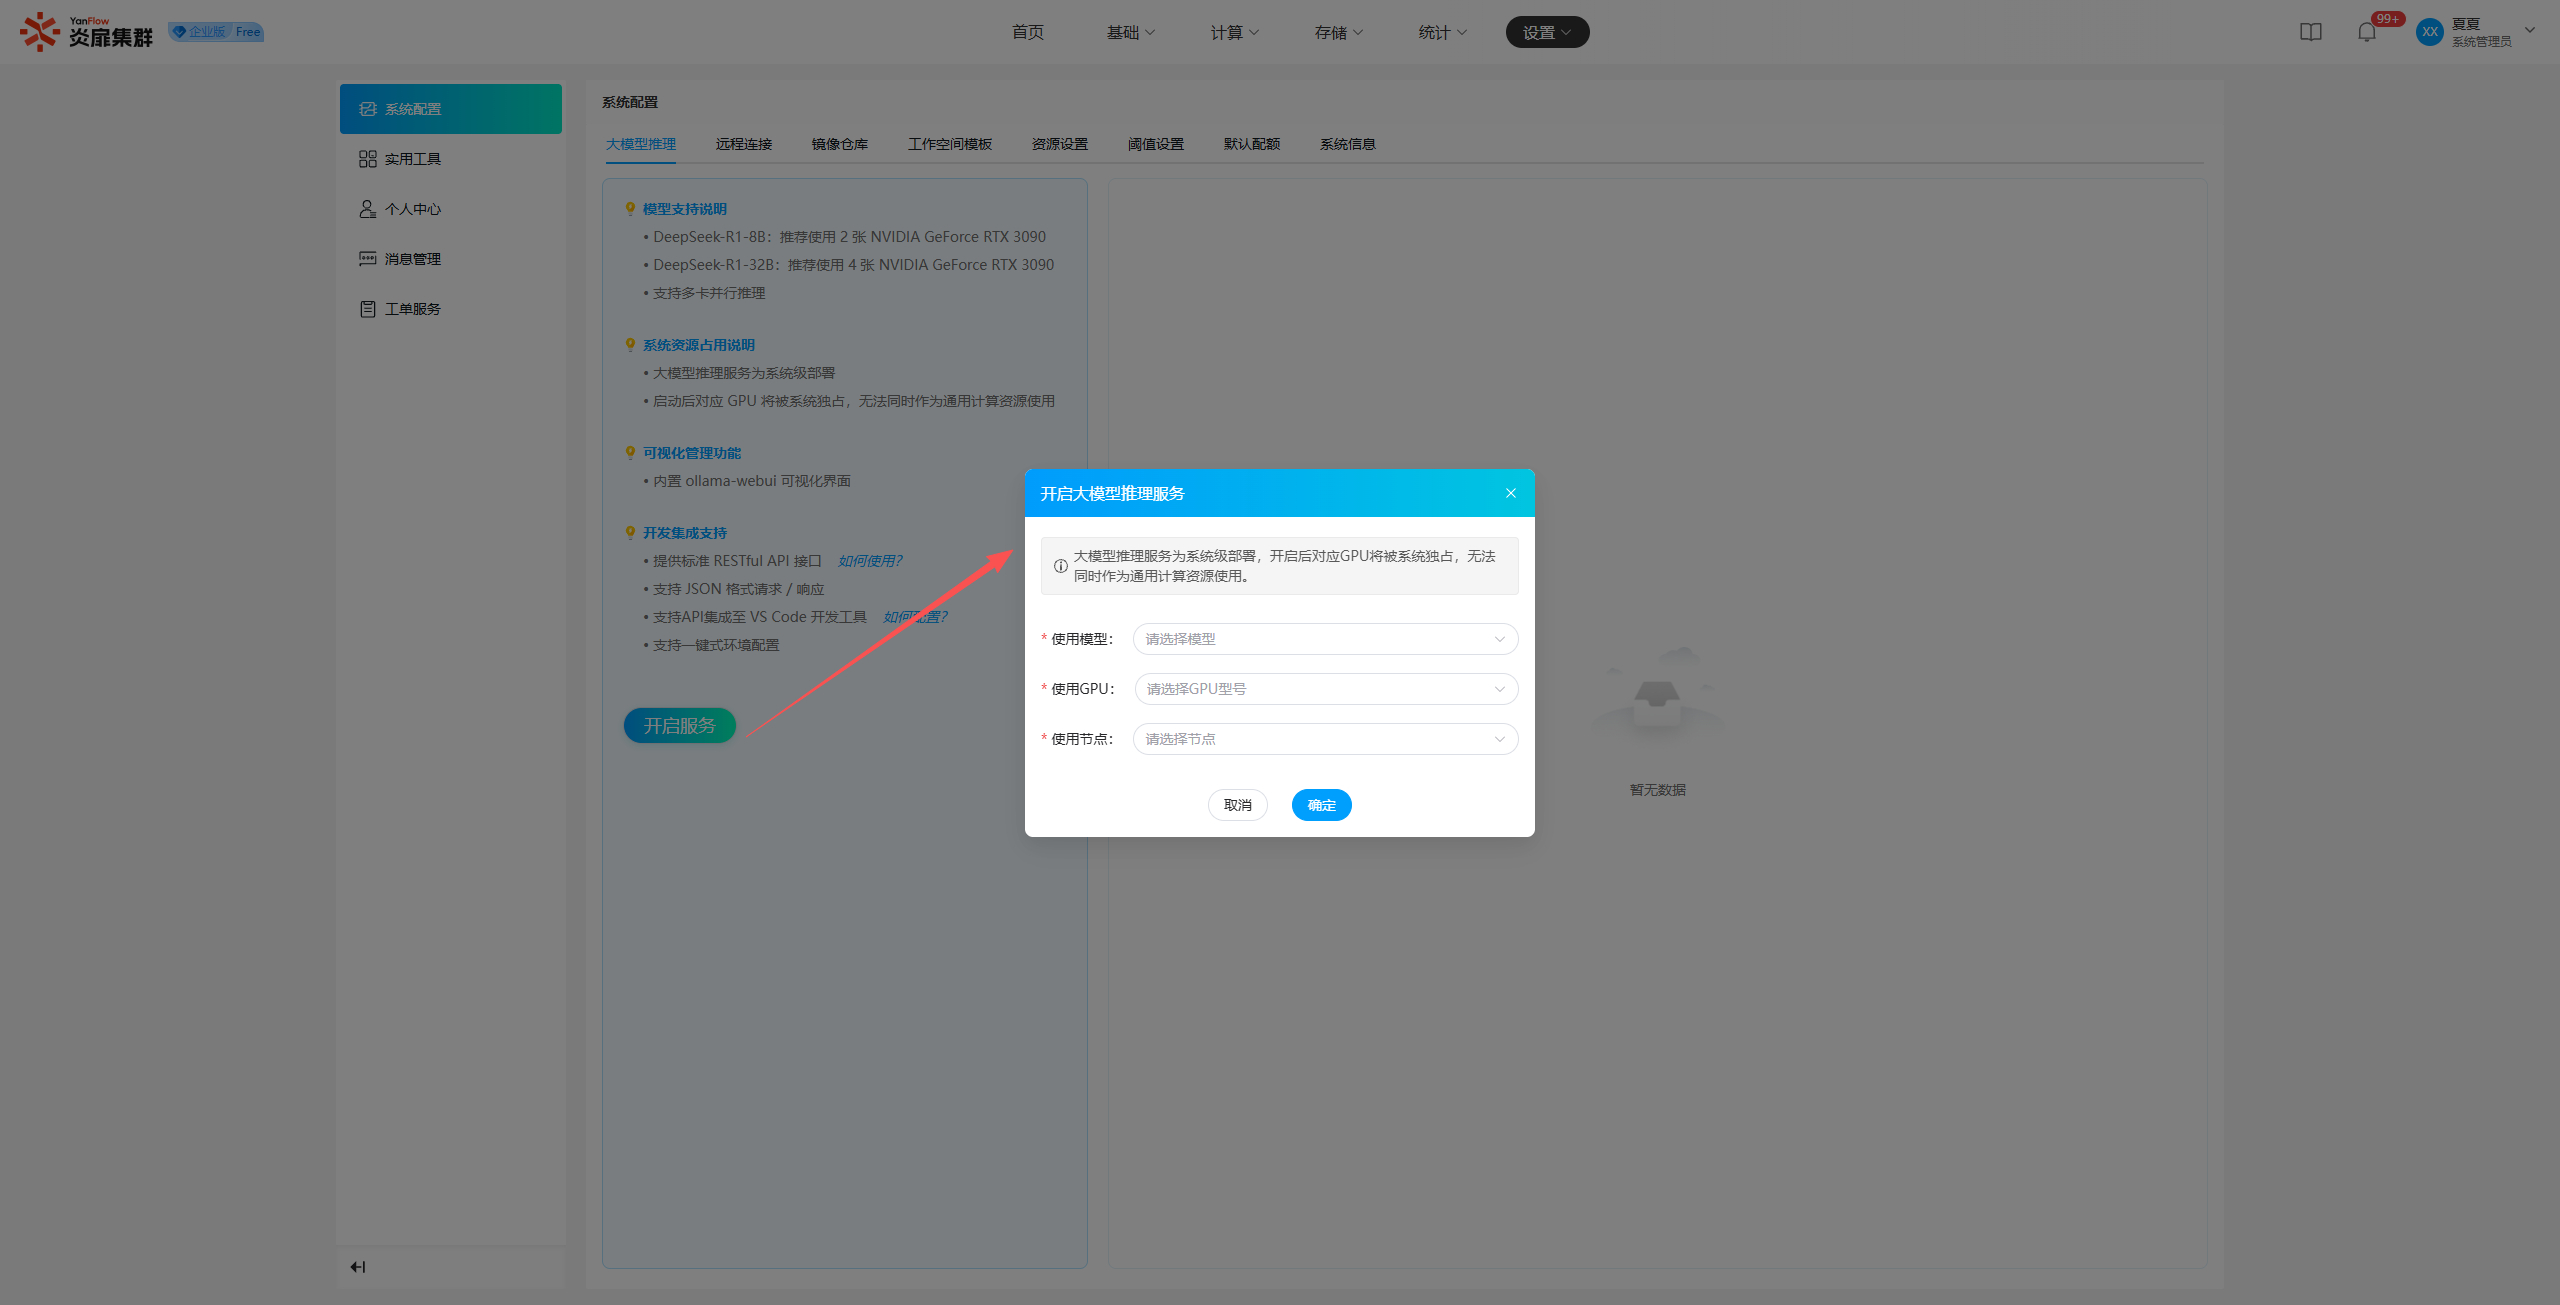
Enable Service: Click Enable Service, select the appropriate Model, GPU Model, and Node, then click Confirm to start the LLM inference service.
Use Service: Once the service is enabled, its port mapping information will be displayed. It can be accessed via Intranet or Extranet. Web-based ports can be accessed via WebUI.
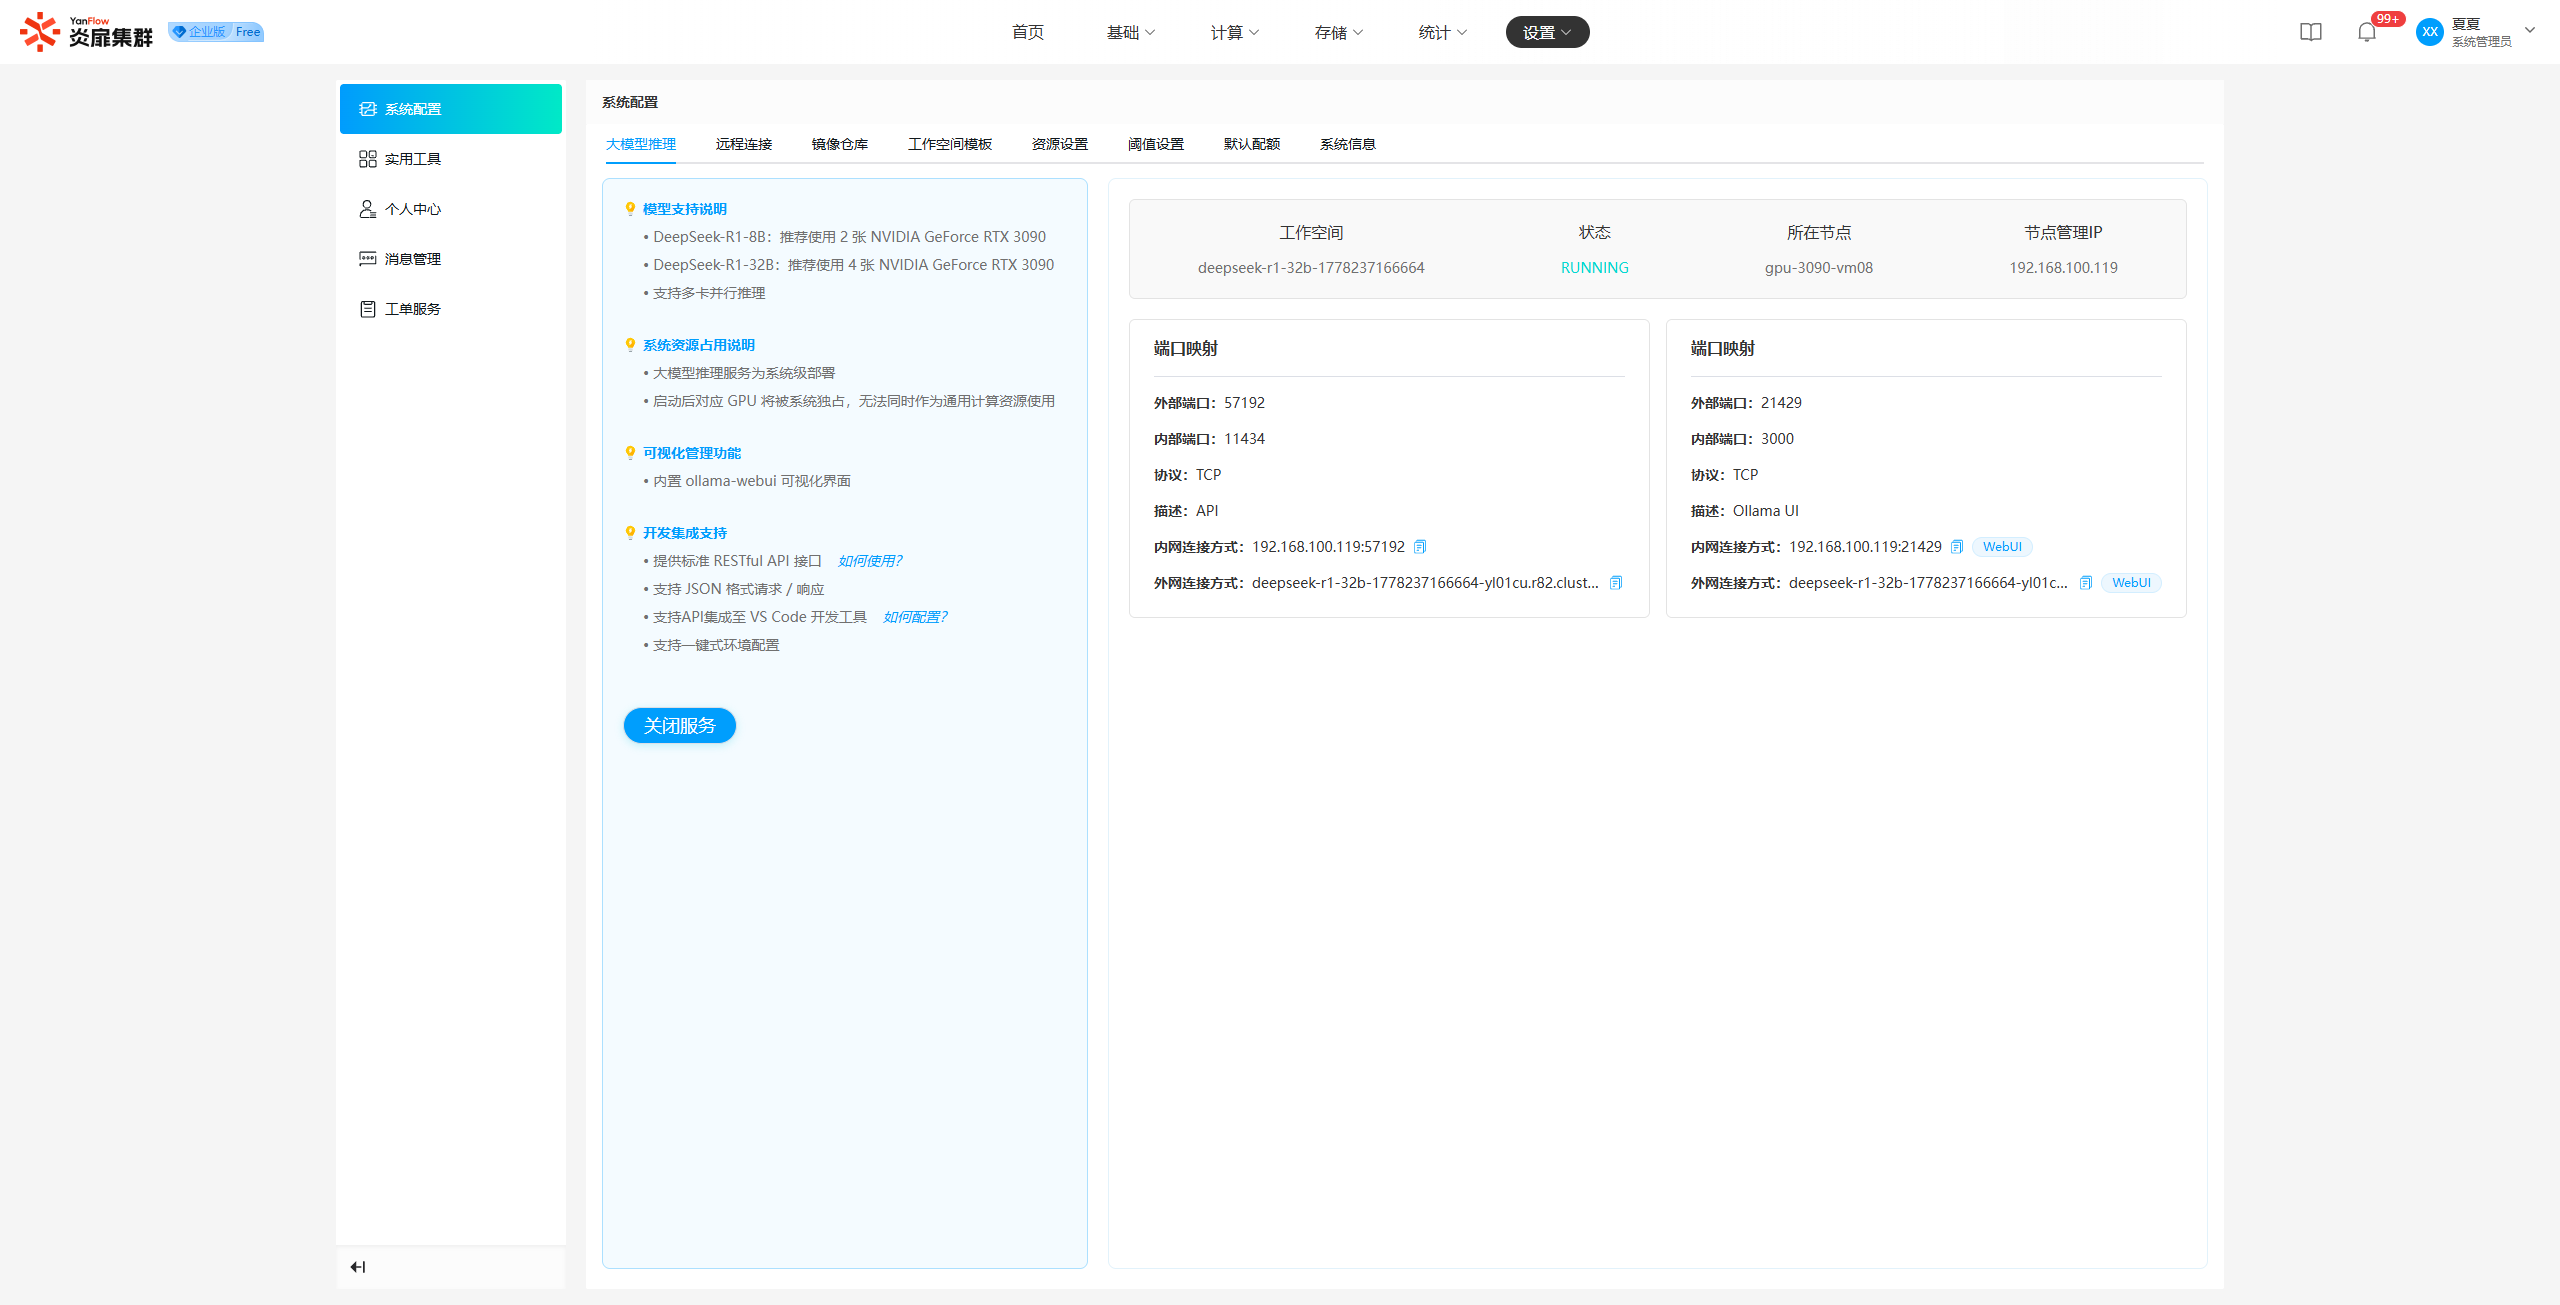
Disable Service: Click Disable Service, show the prompt, and click Confirm to turn off the LLM inference service.
Note: The LLM inference service only has an Extranet connection method after the system enables the Remote Connection service.
Remote Connection
System Administrators can enable or disable the "Remote Connection" service.
Enable Service: Click Go to Enable, show the activation popup, select a region, enter a redemption code, and click Redeem to enable the remote connection service.
Access Address: Once remote connection is enabled, relevant information is displayed. Click Access Address to access the cluster system via a domain name.
Package Information: Hover over the package name to display package details.
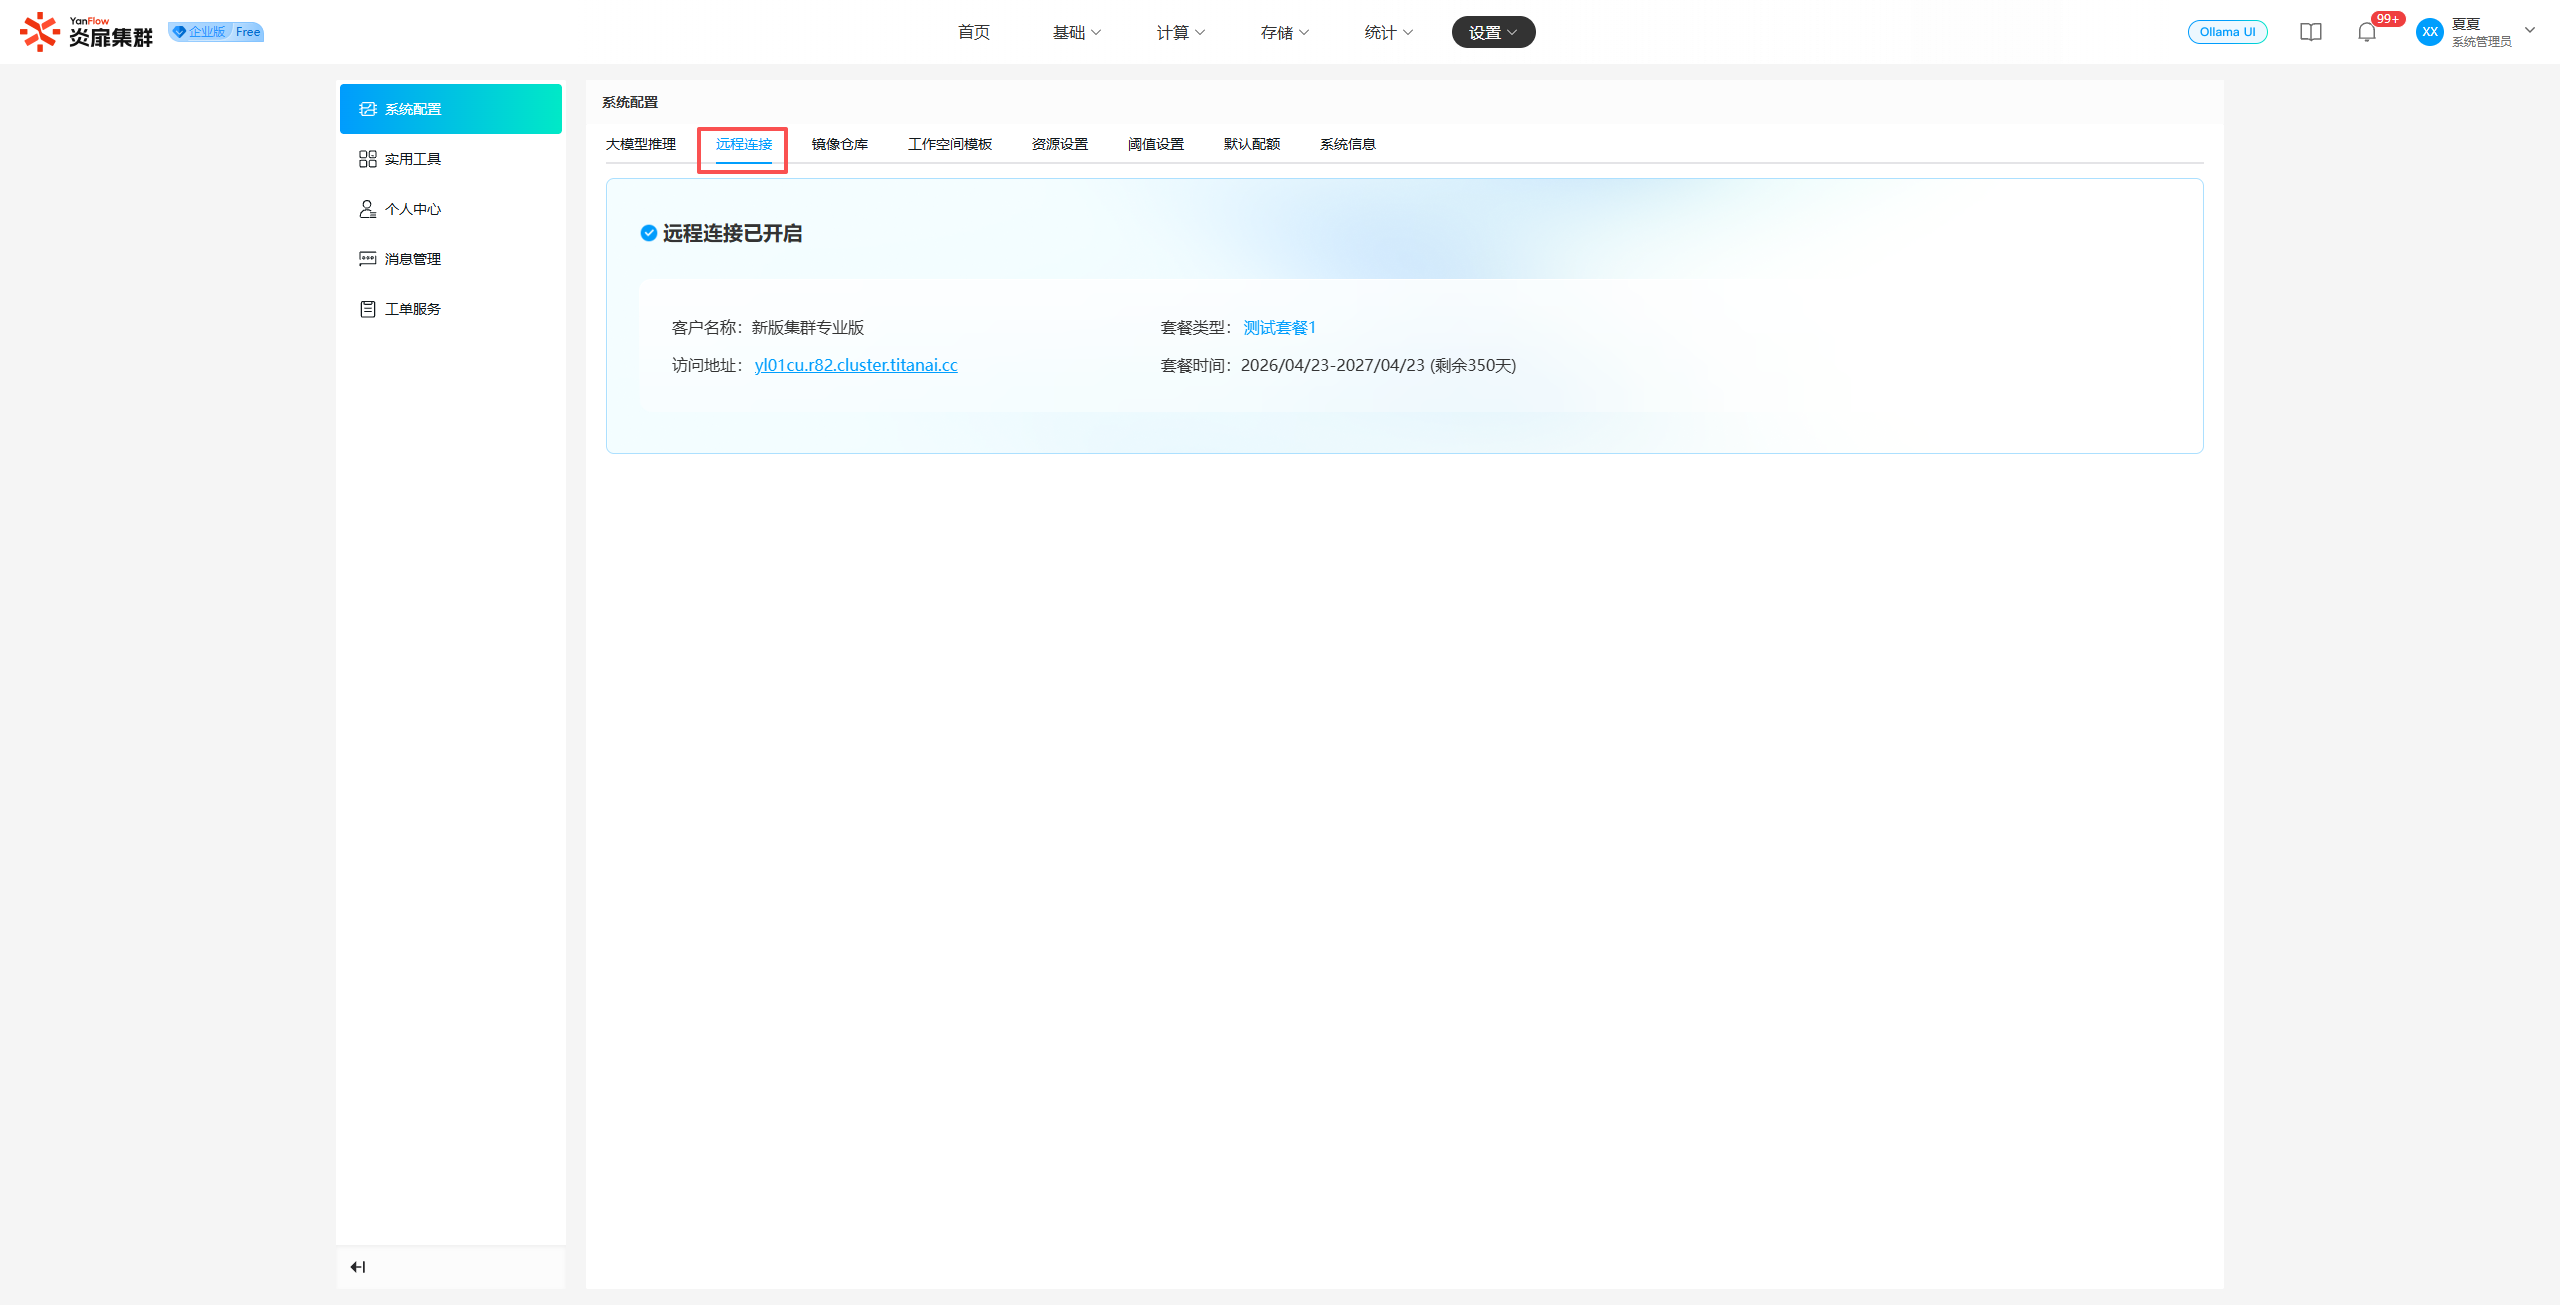
Image Repository
System Administrators can view and manage all image repositories in the system, including Add, Edit, and Delete. Supports keyword search by repository name.
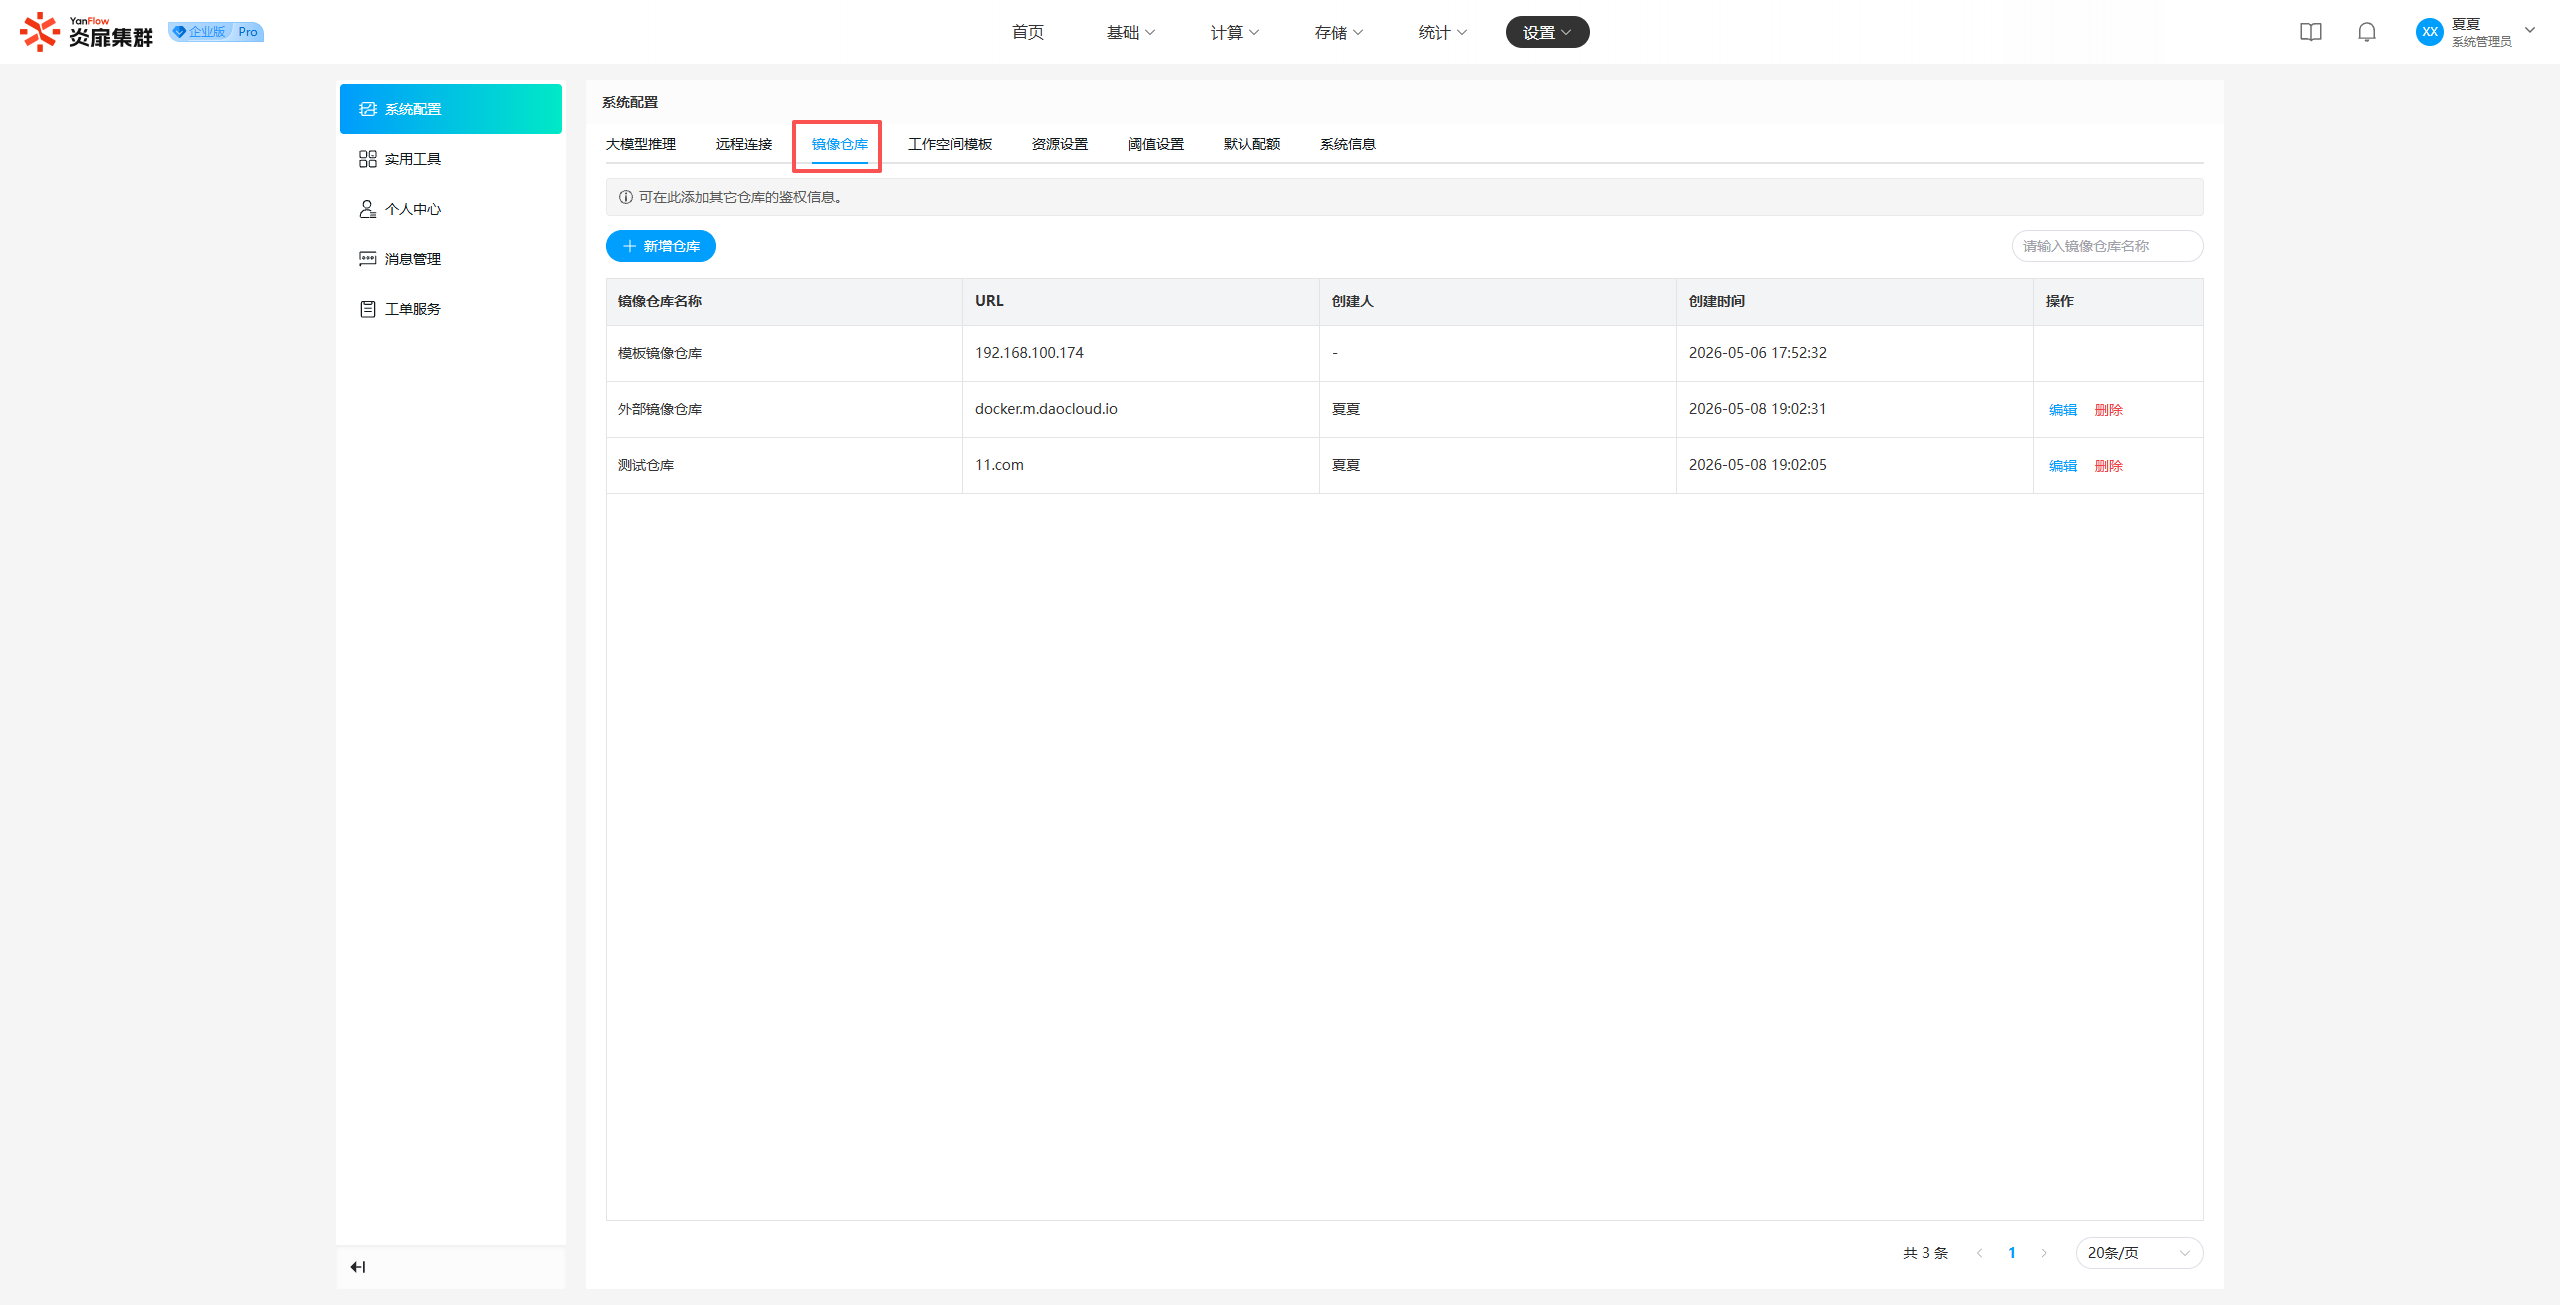
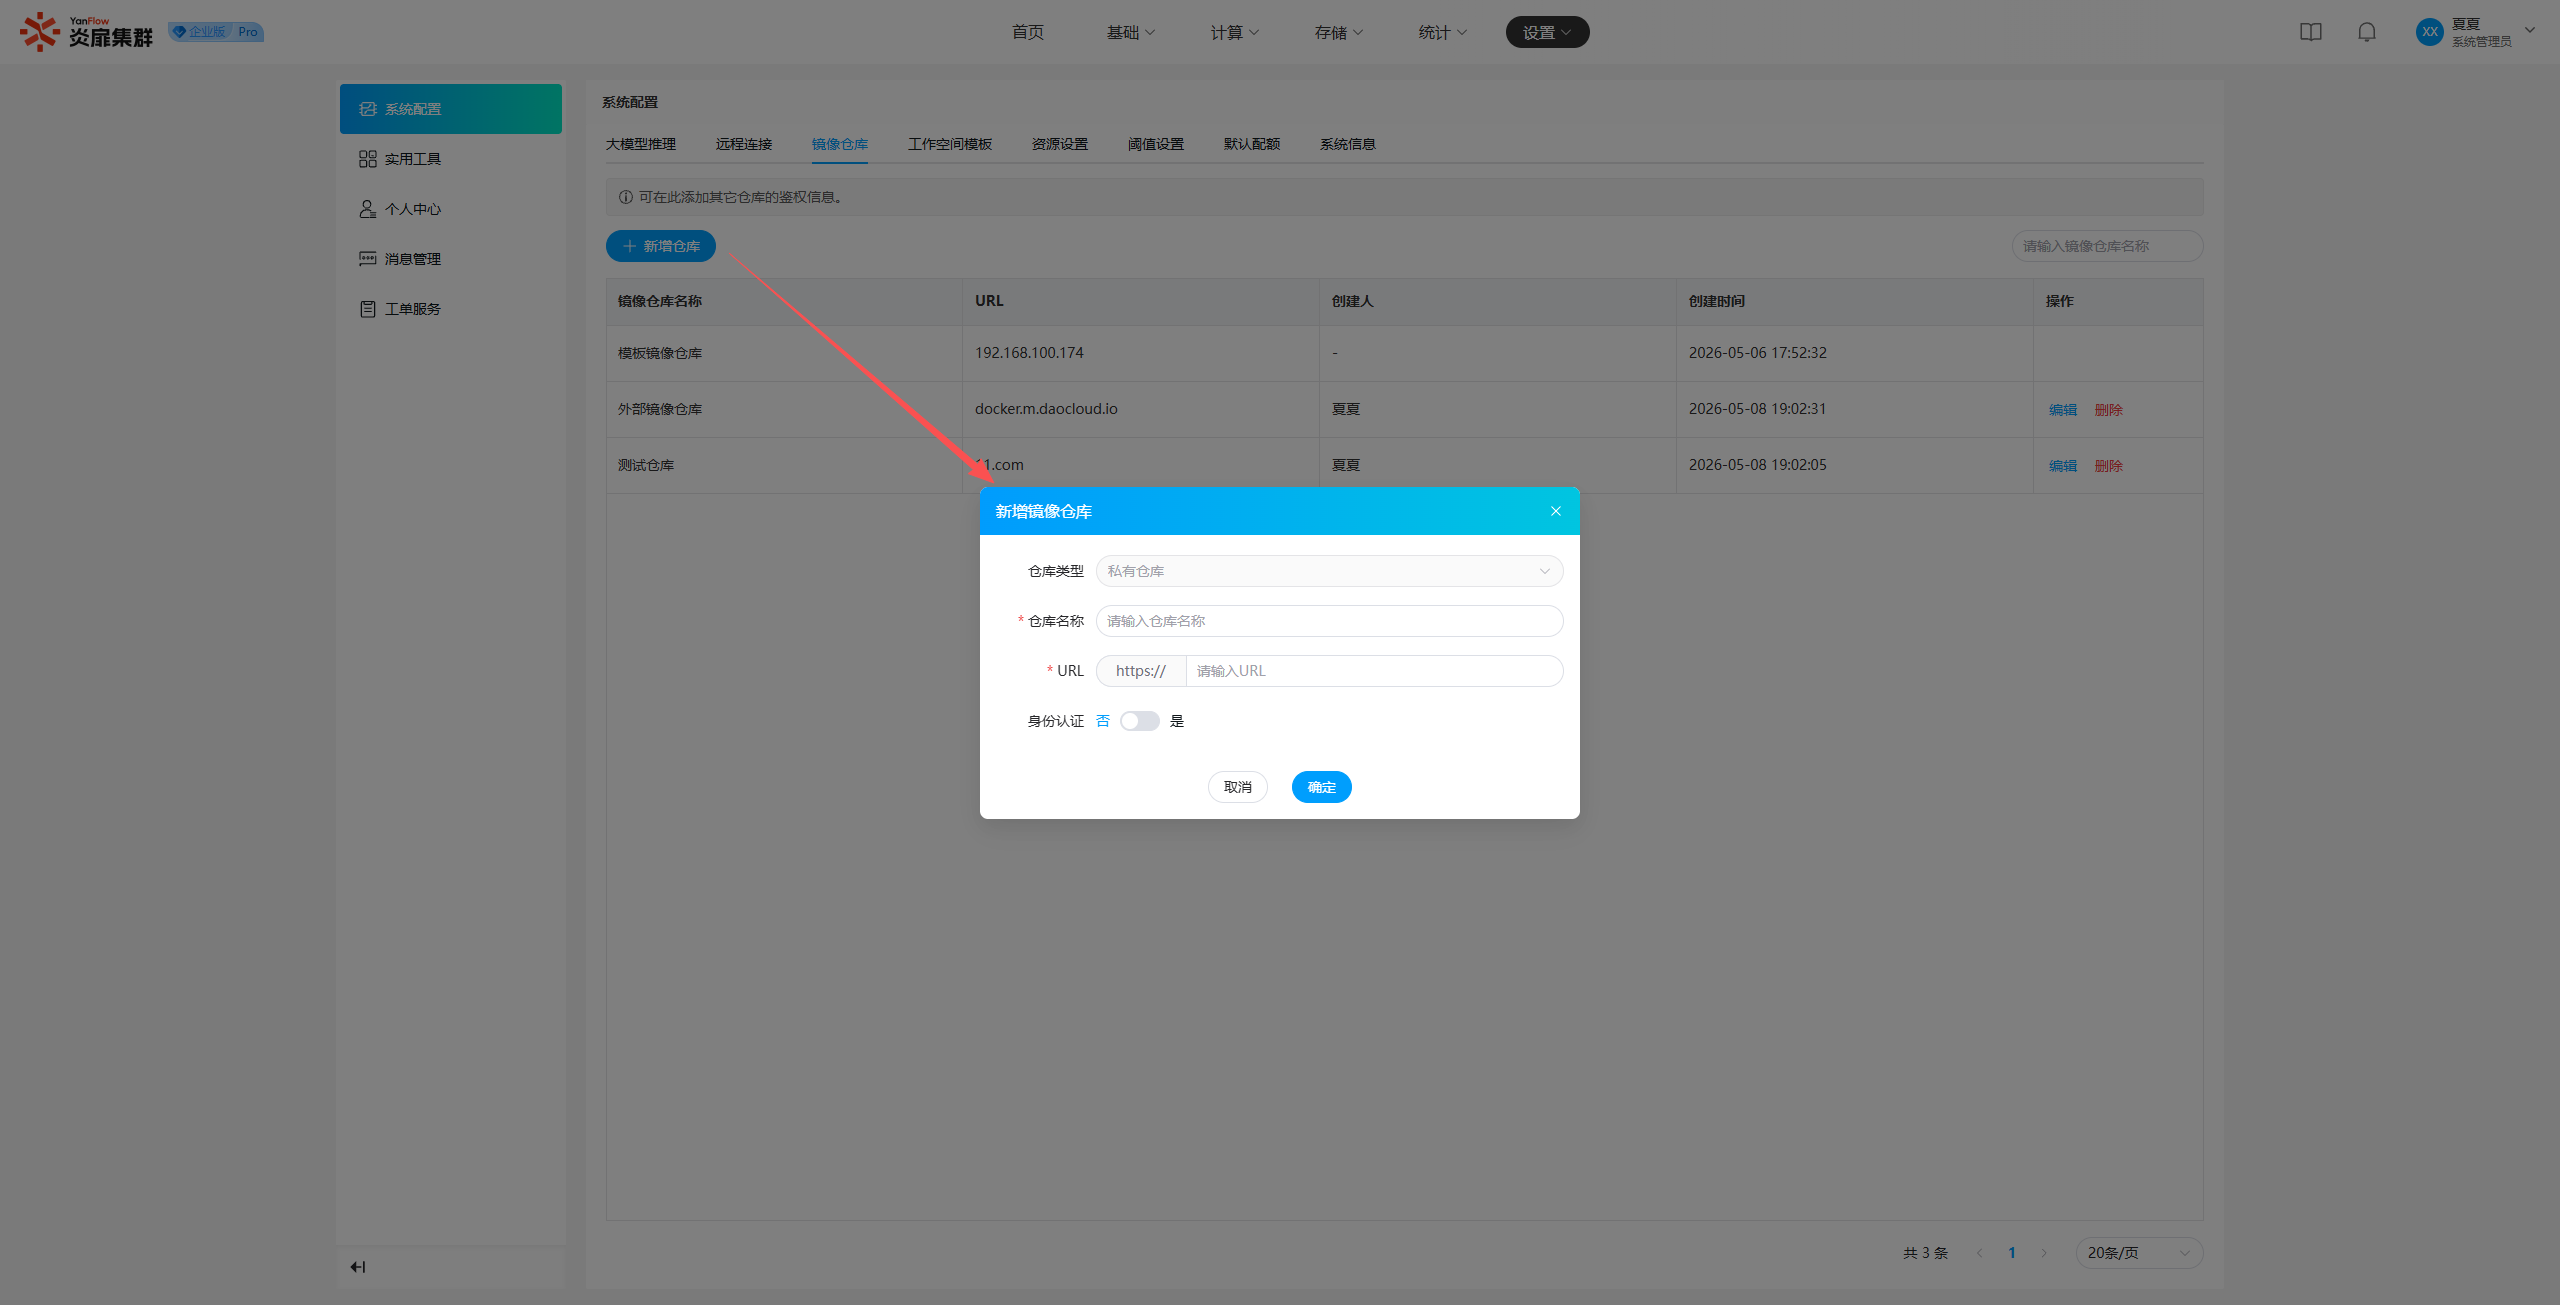
Add Repository: Click the Add Repository button to open the creation popup. Set the relevant information and click Confirm. Once validated, authentication information for a new private repository will be created.
Edit: Click Edit to open the editing popup. Modify the relevant information and click Confirm to complete the edit.
Delete: Click Delete to show a prompt. Click Confirm to delete the repository.
Note: The pre-installed Template Image Repositories do not support editing or deletion.
Workspace Templates
System Administrators can view and manage all workspace templates in the system, including Add, Edit, and Delete. Supports keyword search by template name and filtering by resource type. Regular users can use workspace templates to quickly create new workspaces.
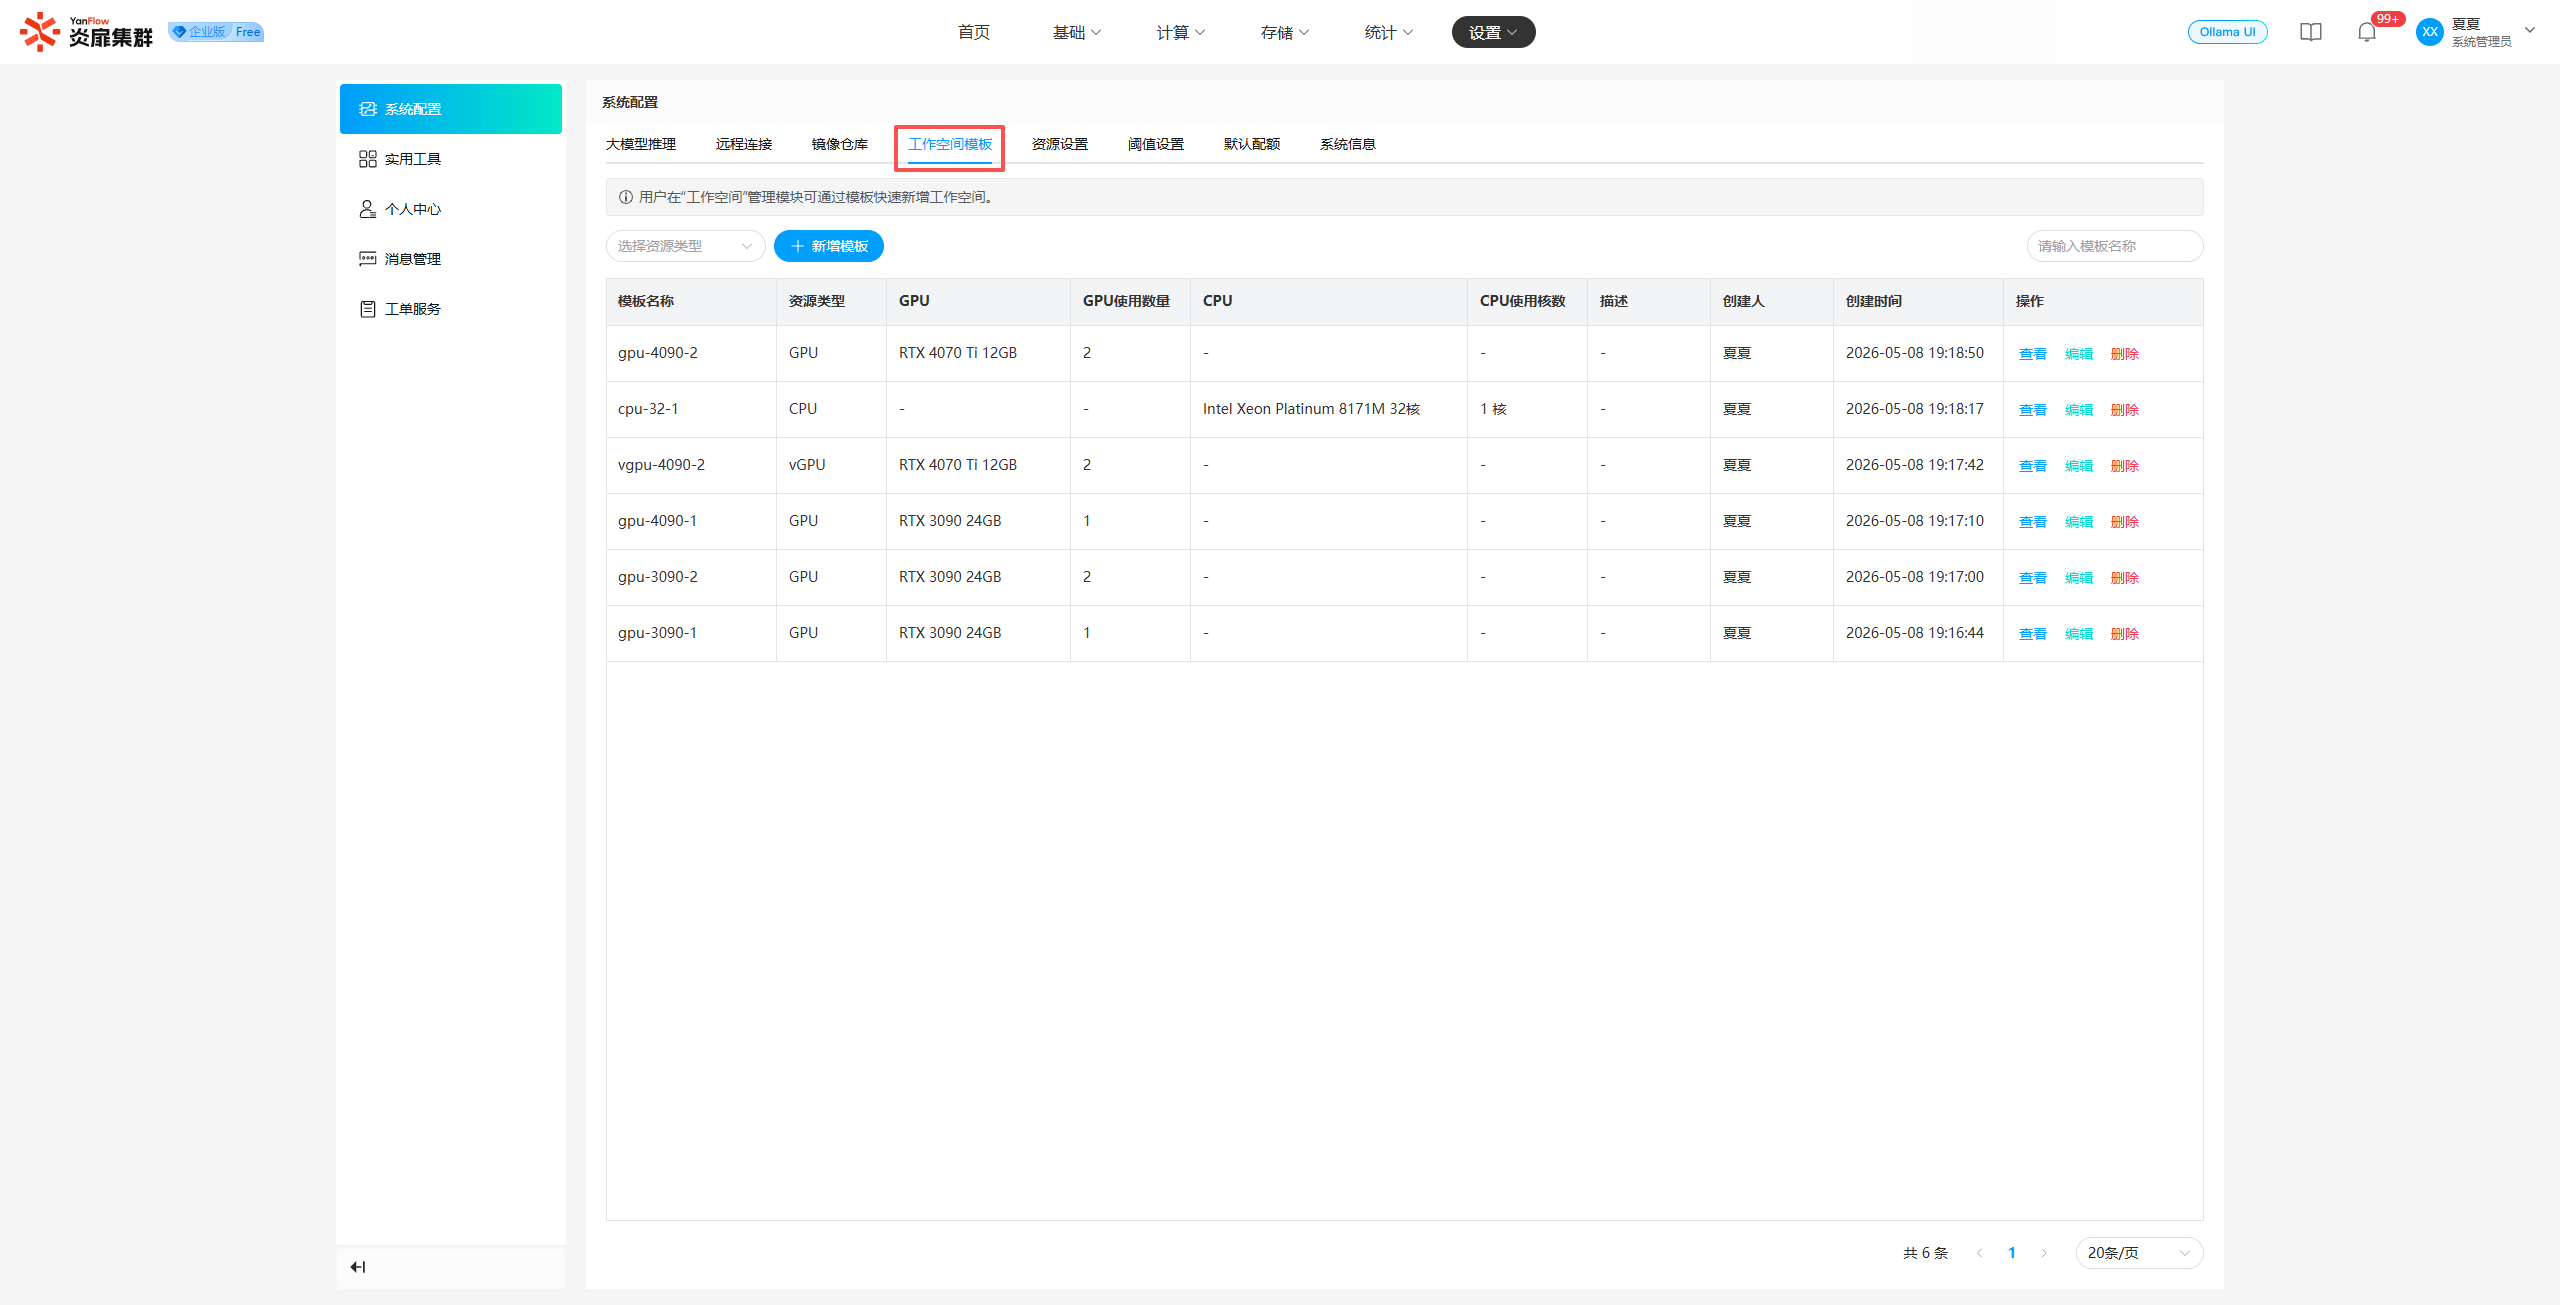
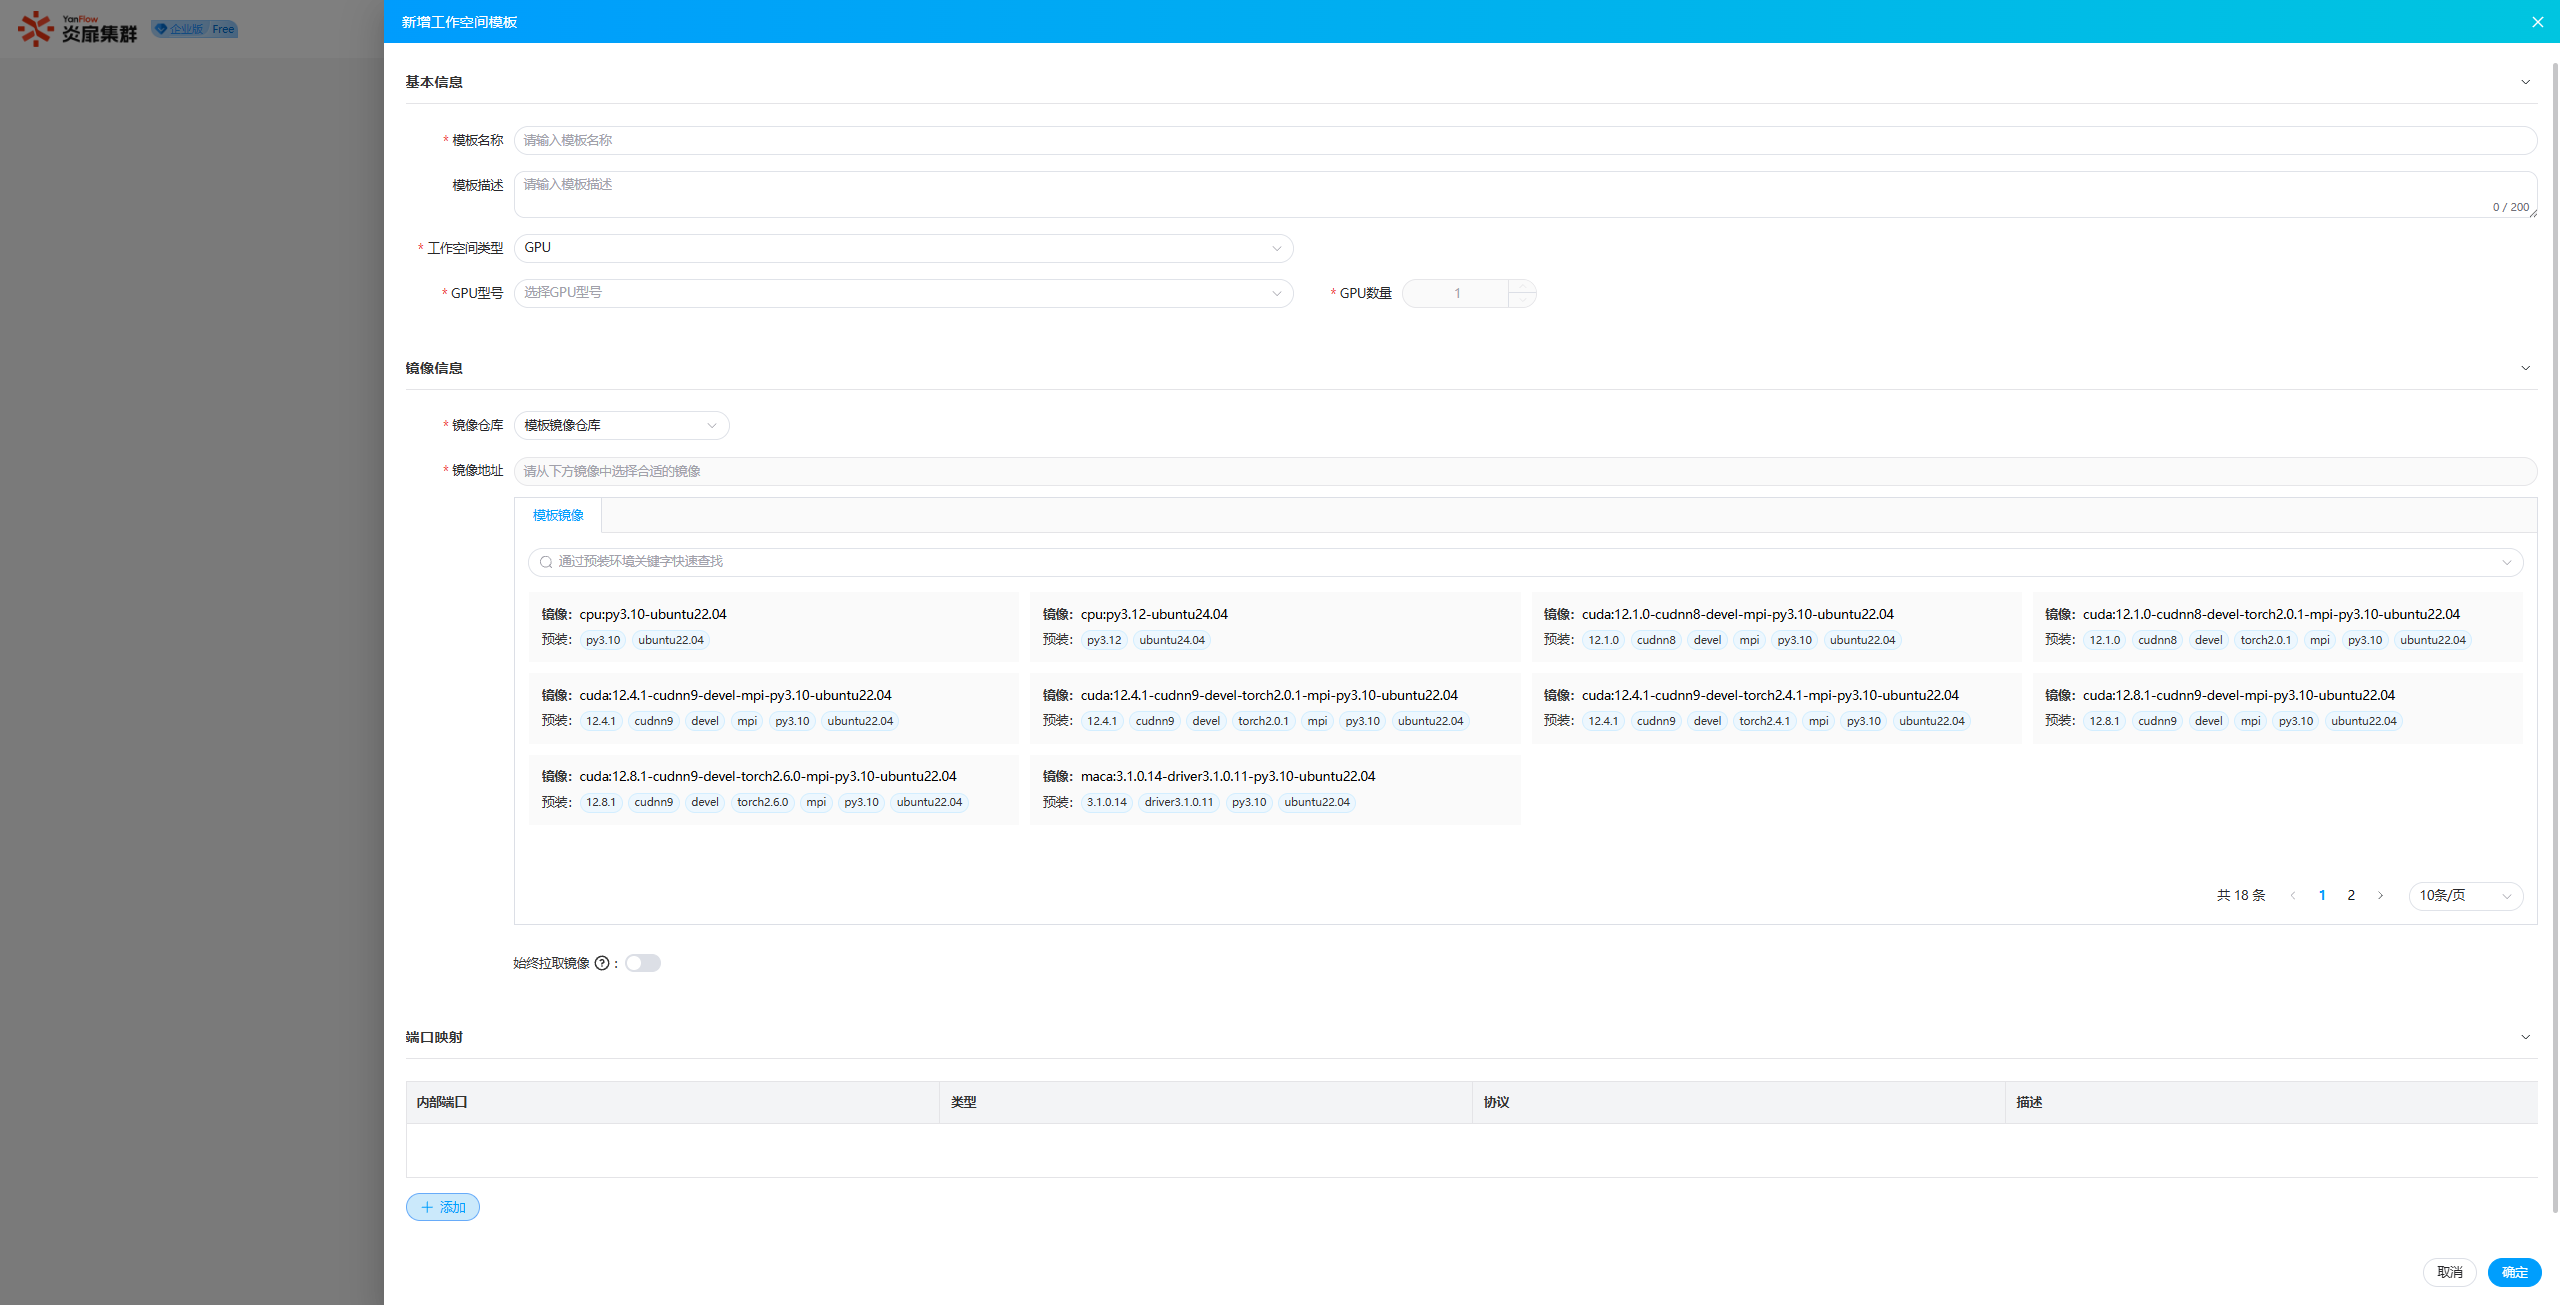
Add Template: Click Add Template to open the creation popup. Set the relevant information and click Confirm. Once validated, a new workspace template will be created.
View: Click View to open the viewing popup to see detailed template information.
Edit: Click Edit to open the editing popup. Modify the information and click Confirm. Once validated, the edit is complete.
Delete: Click Delete to show a prompt. Click Confirm to delete the template.
Resource Settings
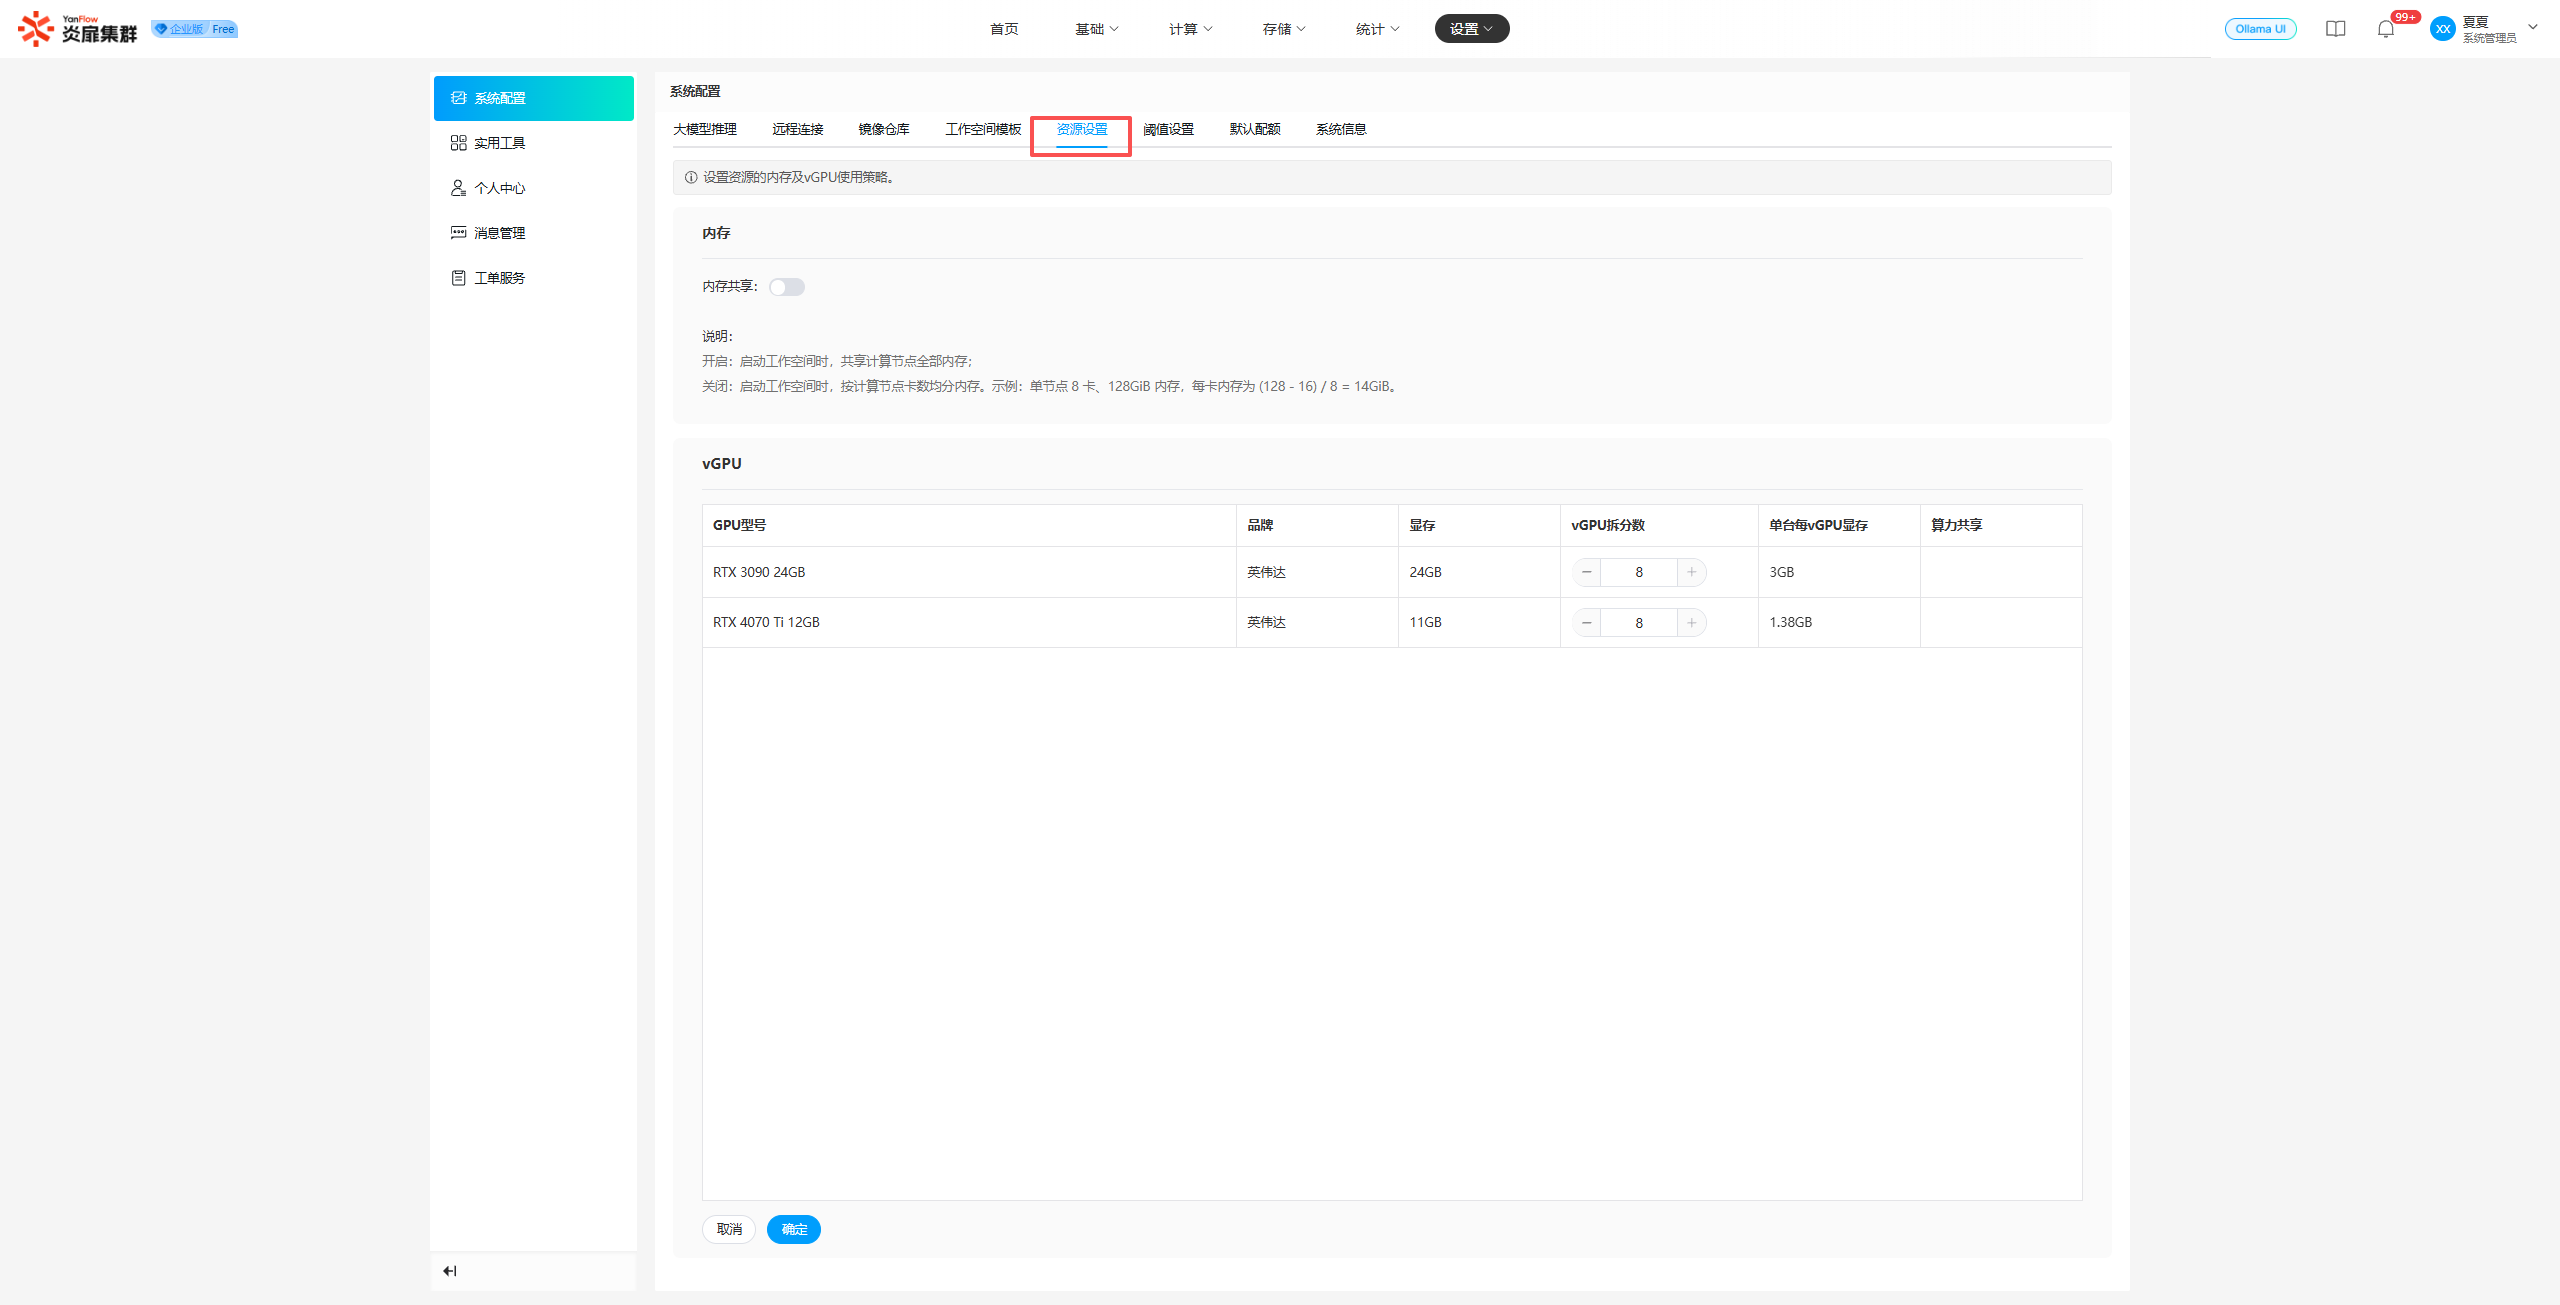
System Administrators can set the memory and vGPU usage policies for resources.
Memory Sharing: Provides options to enable or disable memory sharing. Enable: Once enabled, memory utilization is maximized. Workspaces use an on-demand preemption mechanism to dynamically share the entire memory of the node. Disable: Once disabled, workspaces follow a memory equal distribution mechanism, where memory is distributed equally based on the number of GPUs on the computing node.
vGPU Settings: You can set the vGPU split factor for each GPU card and enable computing power sharing. Click
Confirmto save the settings.
Note:
- The minimum value for the vGPU split factor is 1, and the maximum is 8.
- If a vGPU workspace is already running on a node of a certain GPU model, adjusting the vGPU split factor for that node is temporarily not supported.
- Computing power sharing is only available for Moore Threads brand GPU cards.
Threshold Settings
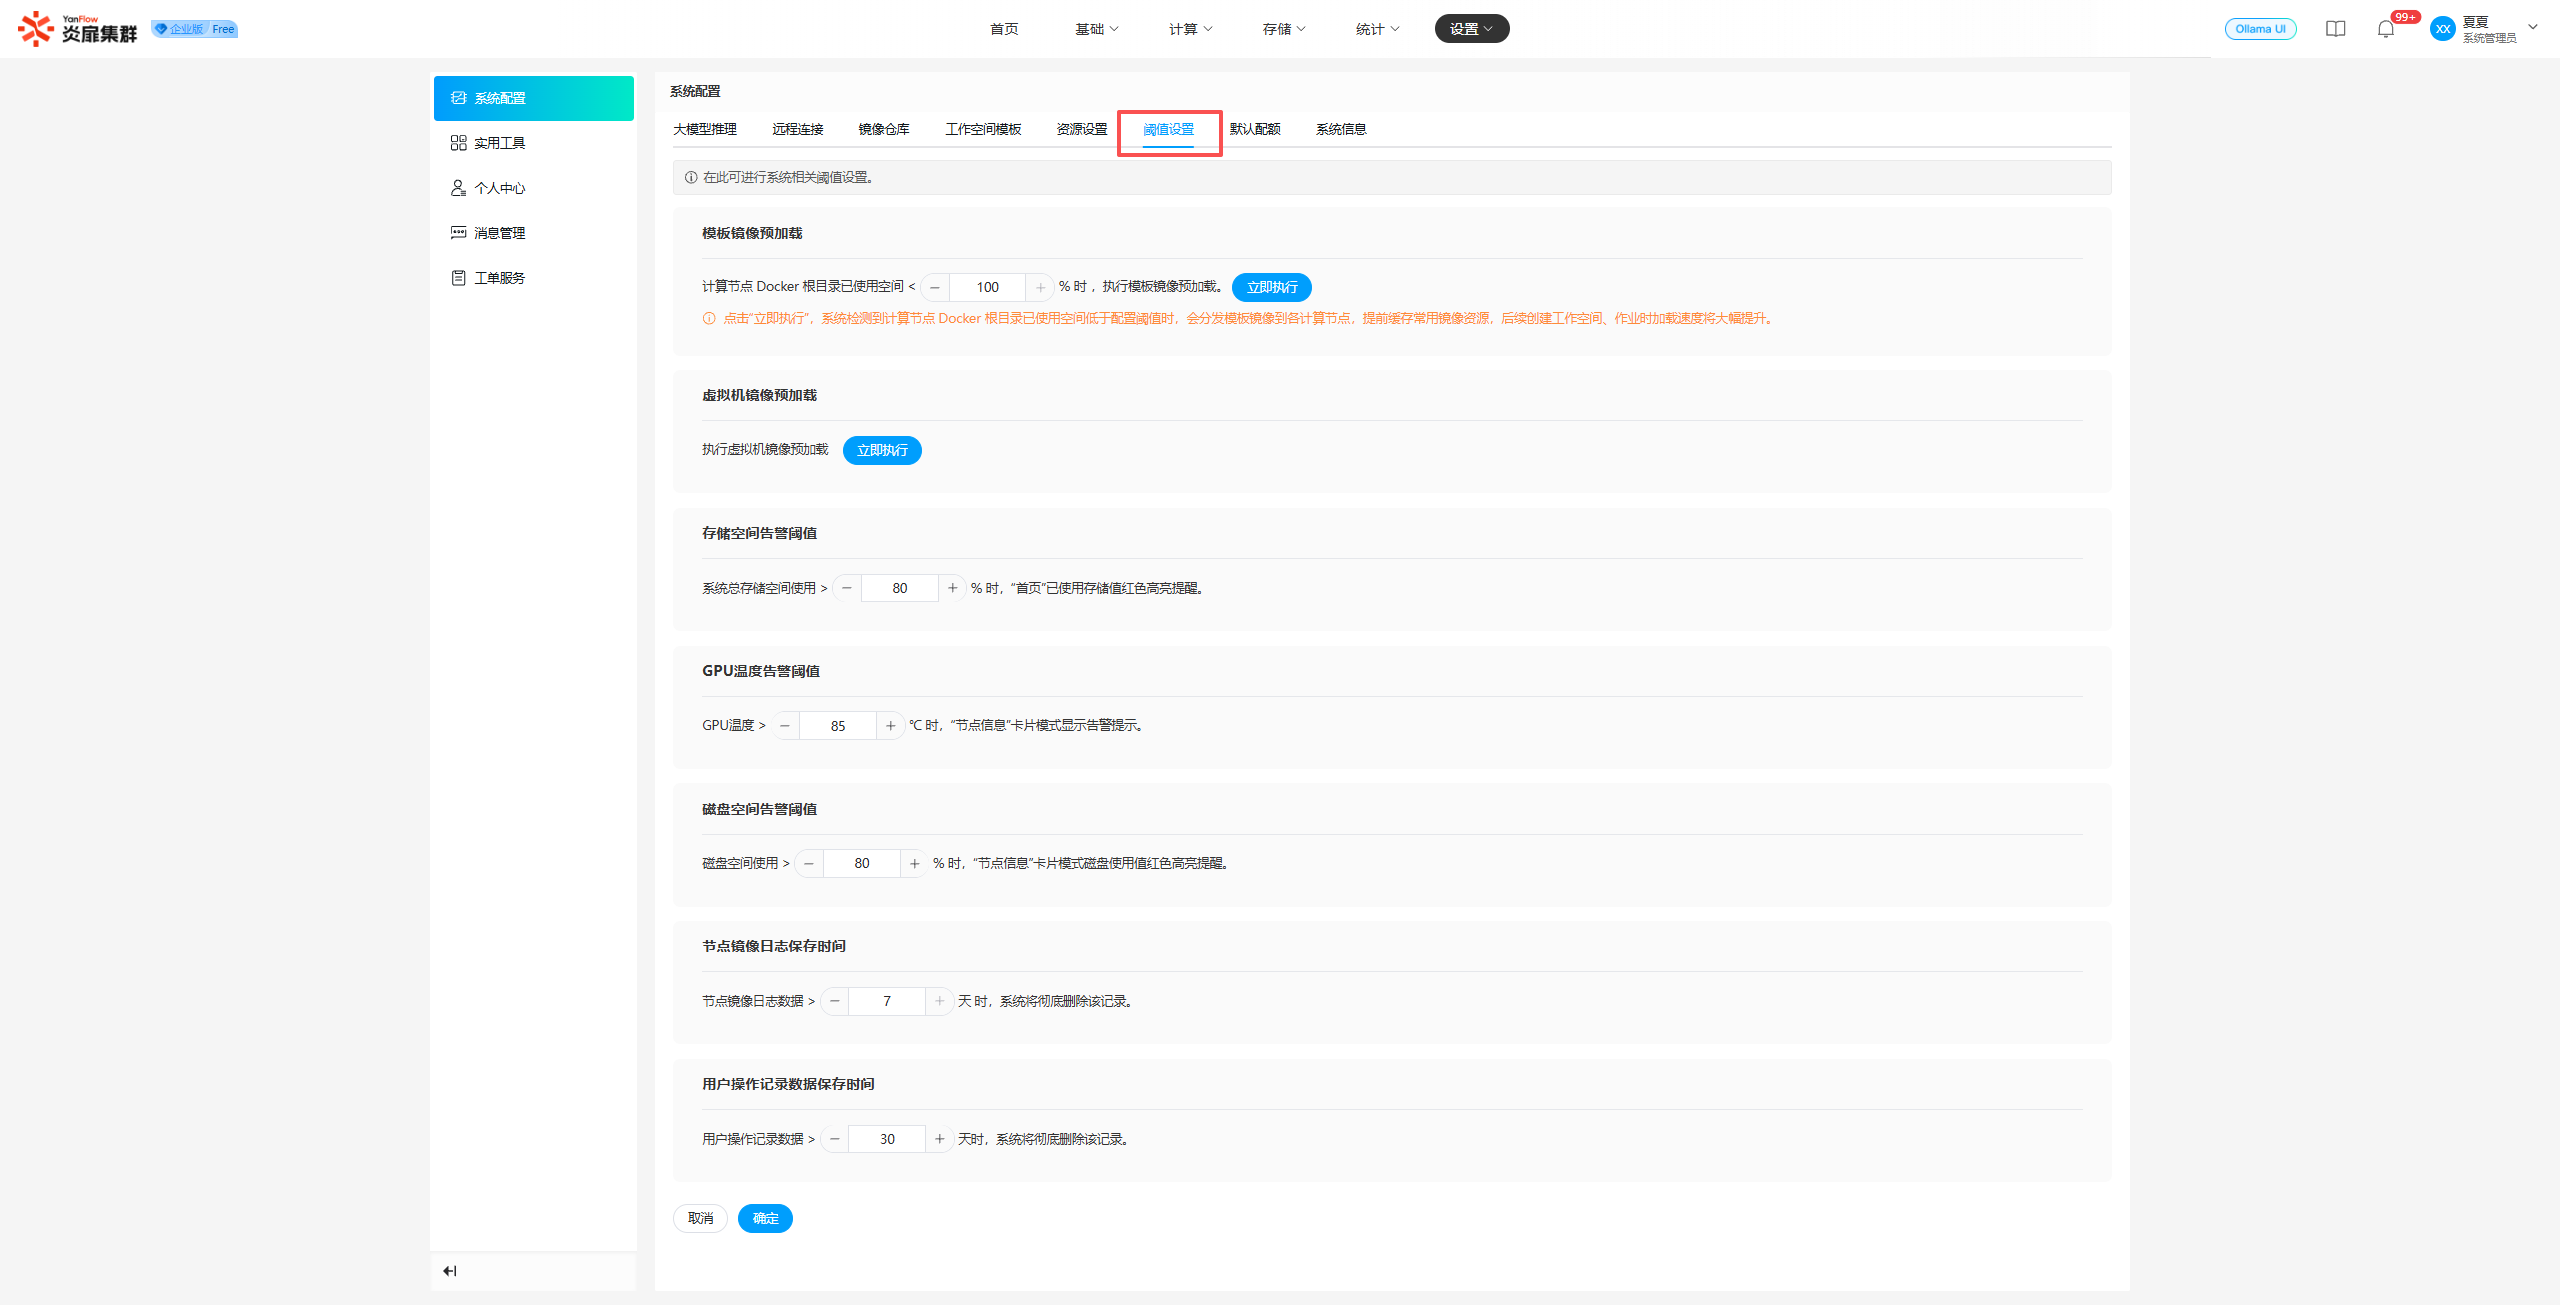
Template Image Preloading: Set the threshold first, then click
Execute Immediately. The system will then detect the used space in the Docker root directory of the container nodes. If it is below the configured threshold, the system will distribute container template images to the container nodes to cache common image resources in advance. This significantly improves loading speeds when creating workspaces or jobs later.VM Image Preloading: Click
Execute Immediately, and the system will automatically distribute VM template images to each VM node to cache common image resources in advance, significantly improving loading speeds when creating VM instances later.Other Threshold Settings: System Administrators can set various thresholds, including System Storage Usage, GPU Temperature Warning, Disk Space Warning, Node Image Log Retention Time, and User Operation Record Retention Time. Click
Confirmto save the settings.
Default Quota
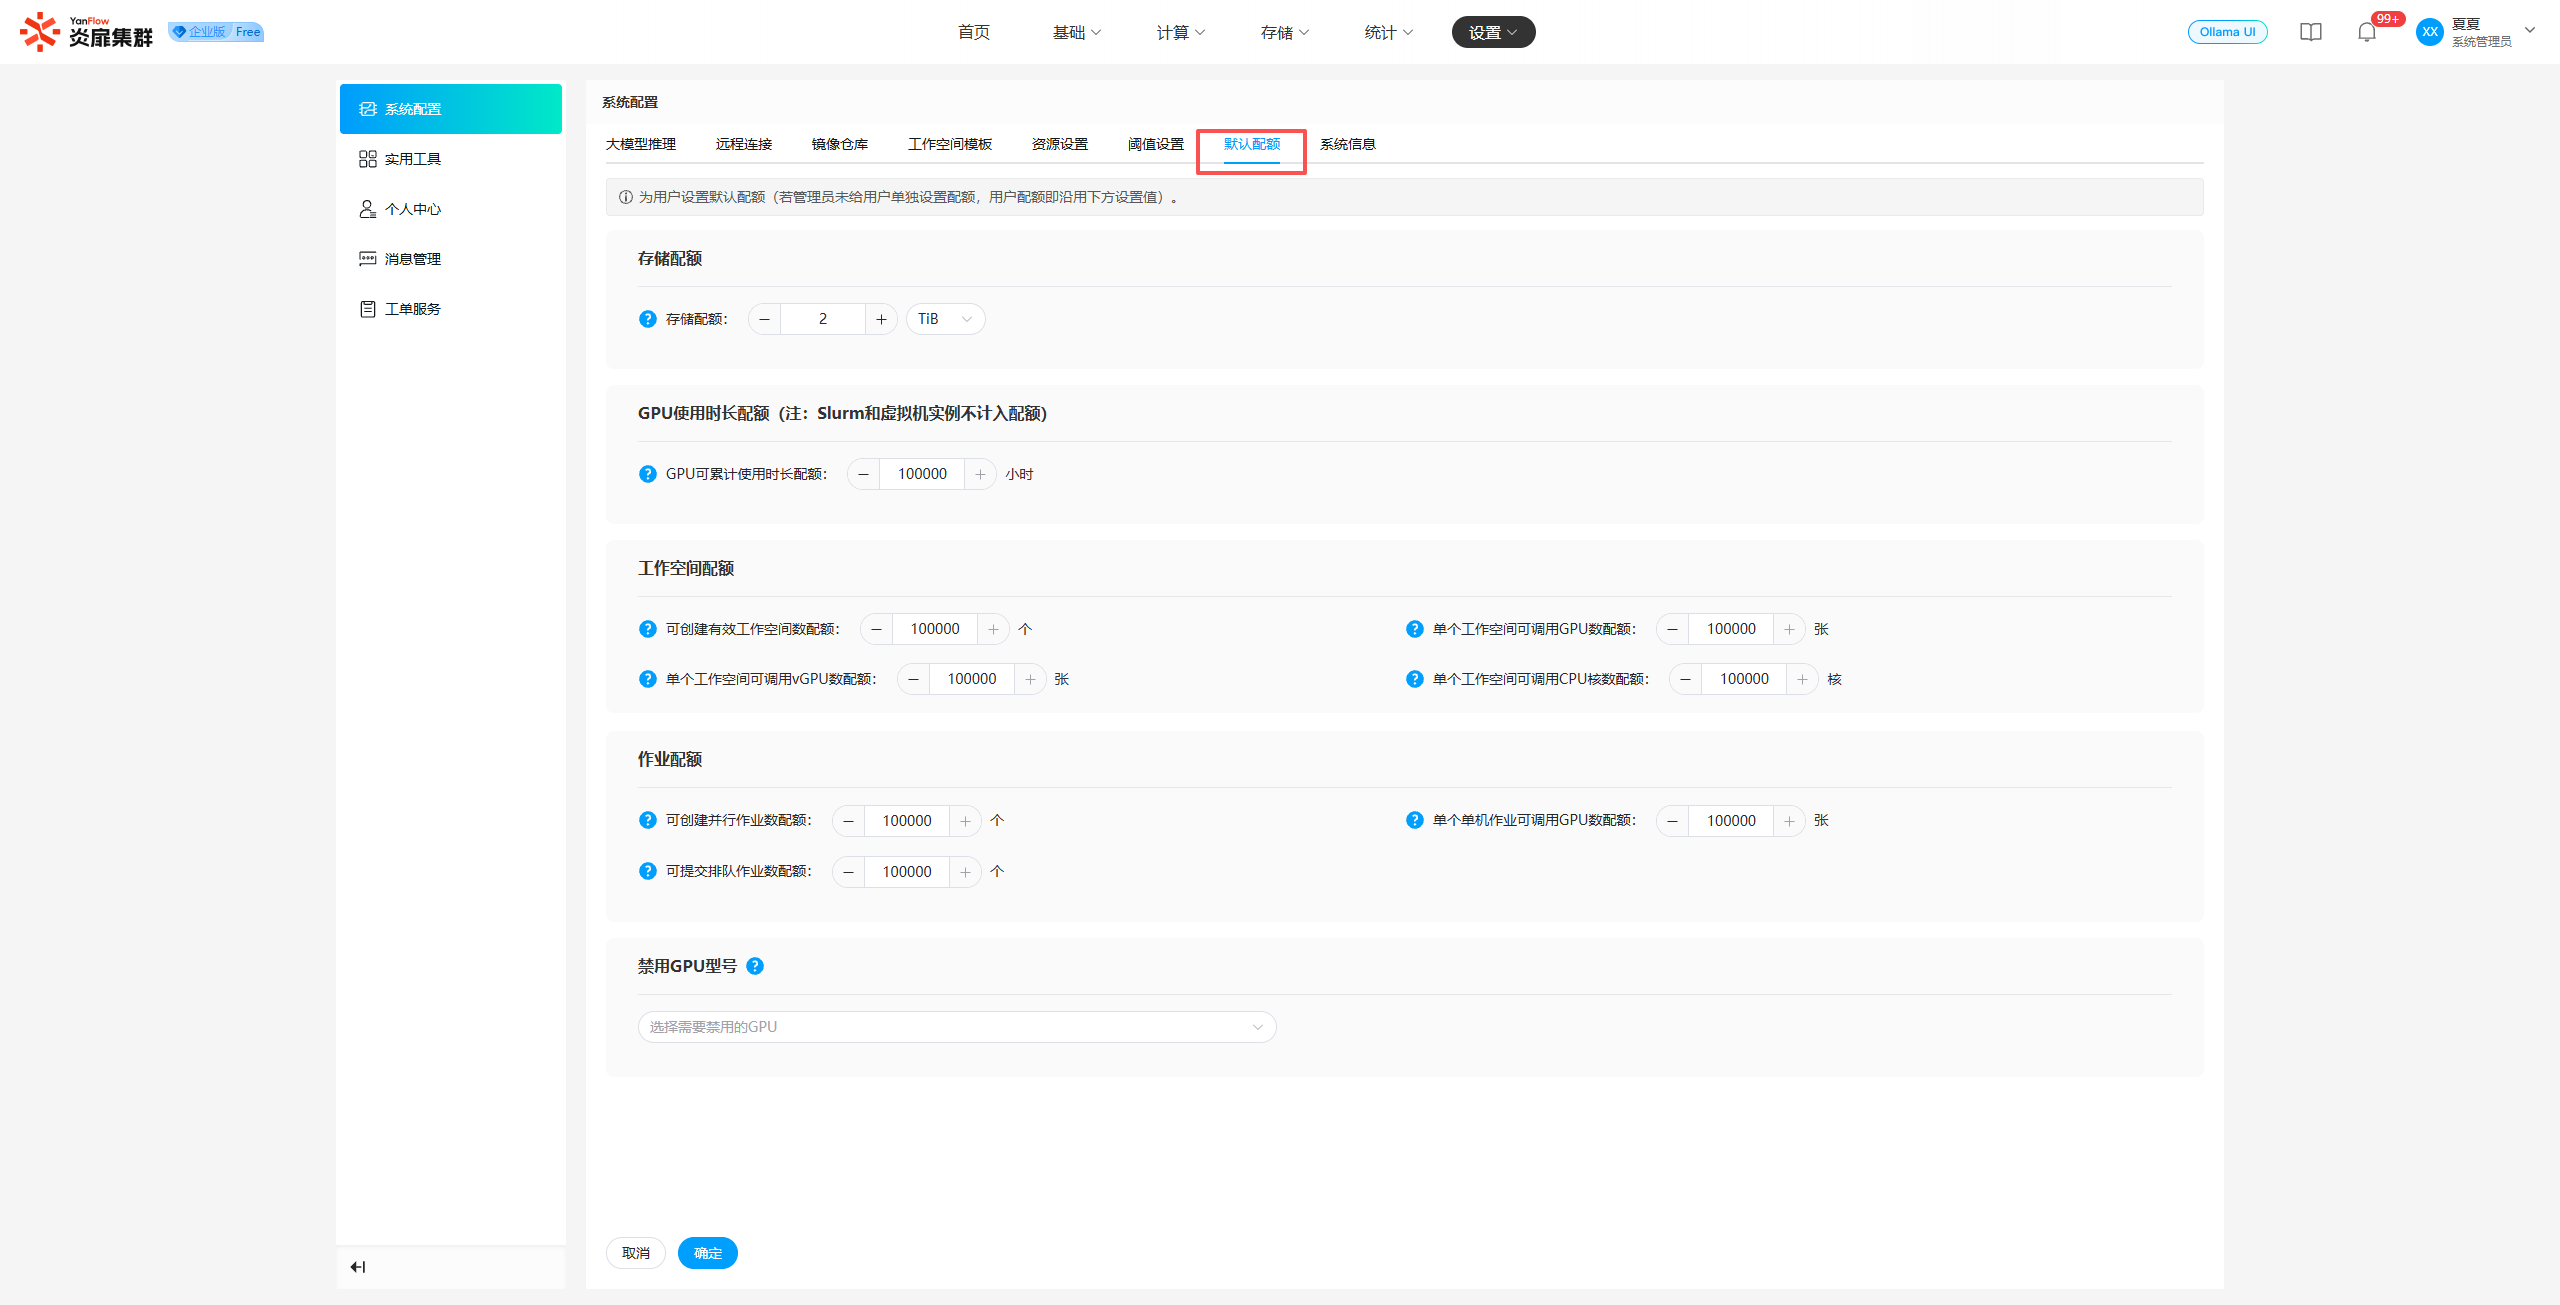
System Administrators can set the default quota for users. Newly added users will use the system default quota by default.
Quota settings include: Storage Quota, GPU Usage Duration Quota, Workspace Quota, Job Quota, and Disabled GPU Models.
Note:
- The default value and upper limit for the storage quota are the total quota of the system's distributed storage native mount path.
- GPU duration quota usage currently does not include Slurm and VM instances.
System Information
Displays basic system information, authorization information, and service information. Clicking the Restart button in the service information allows you to restart the corresponding service.
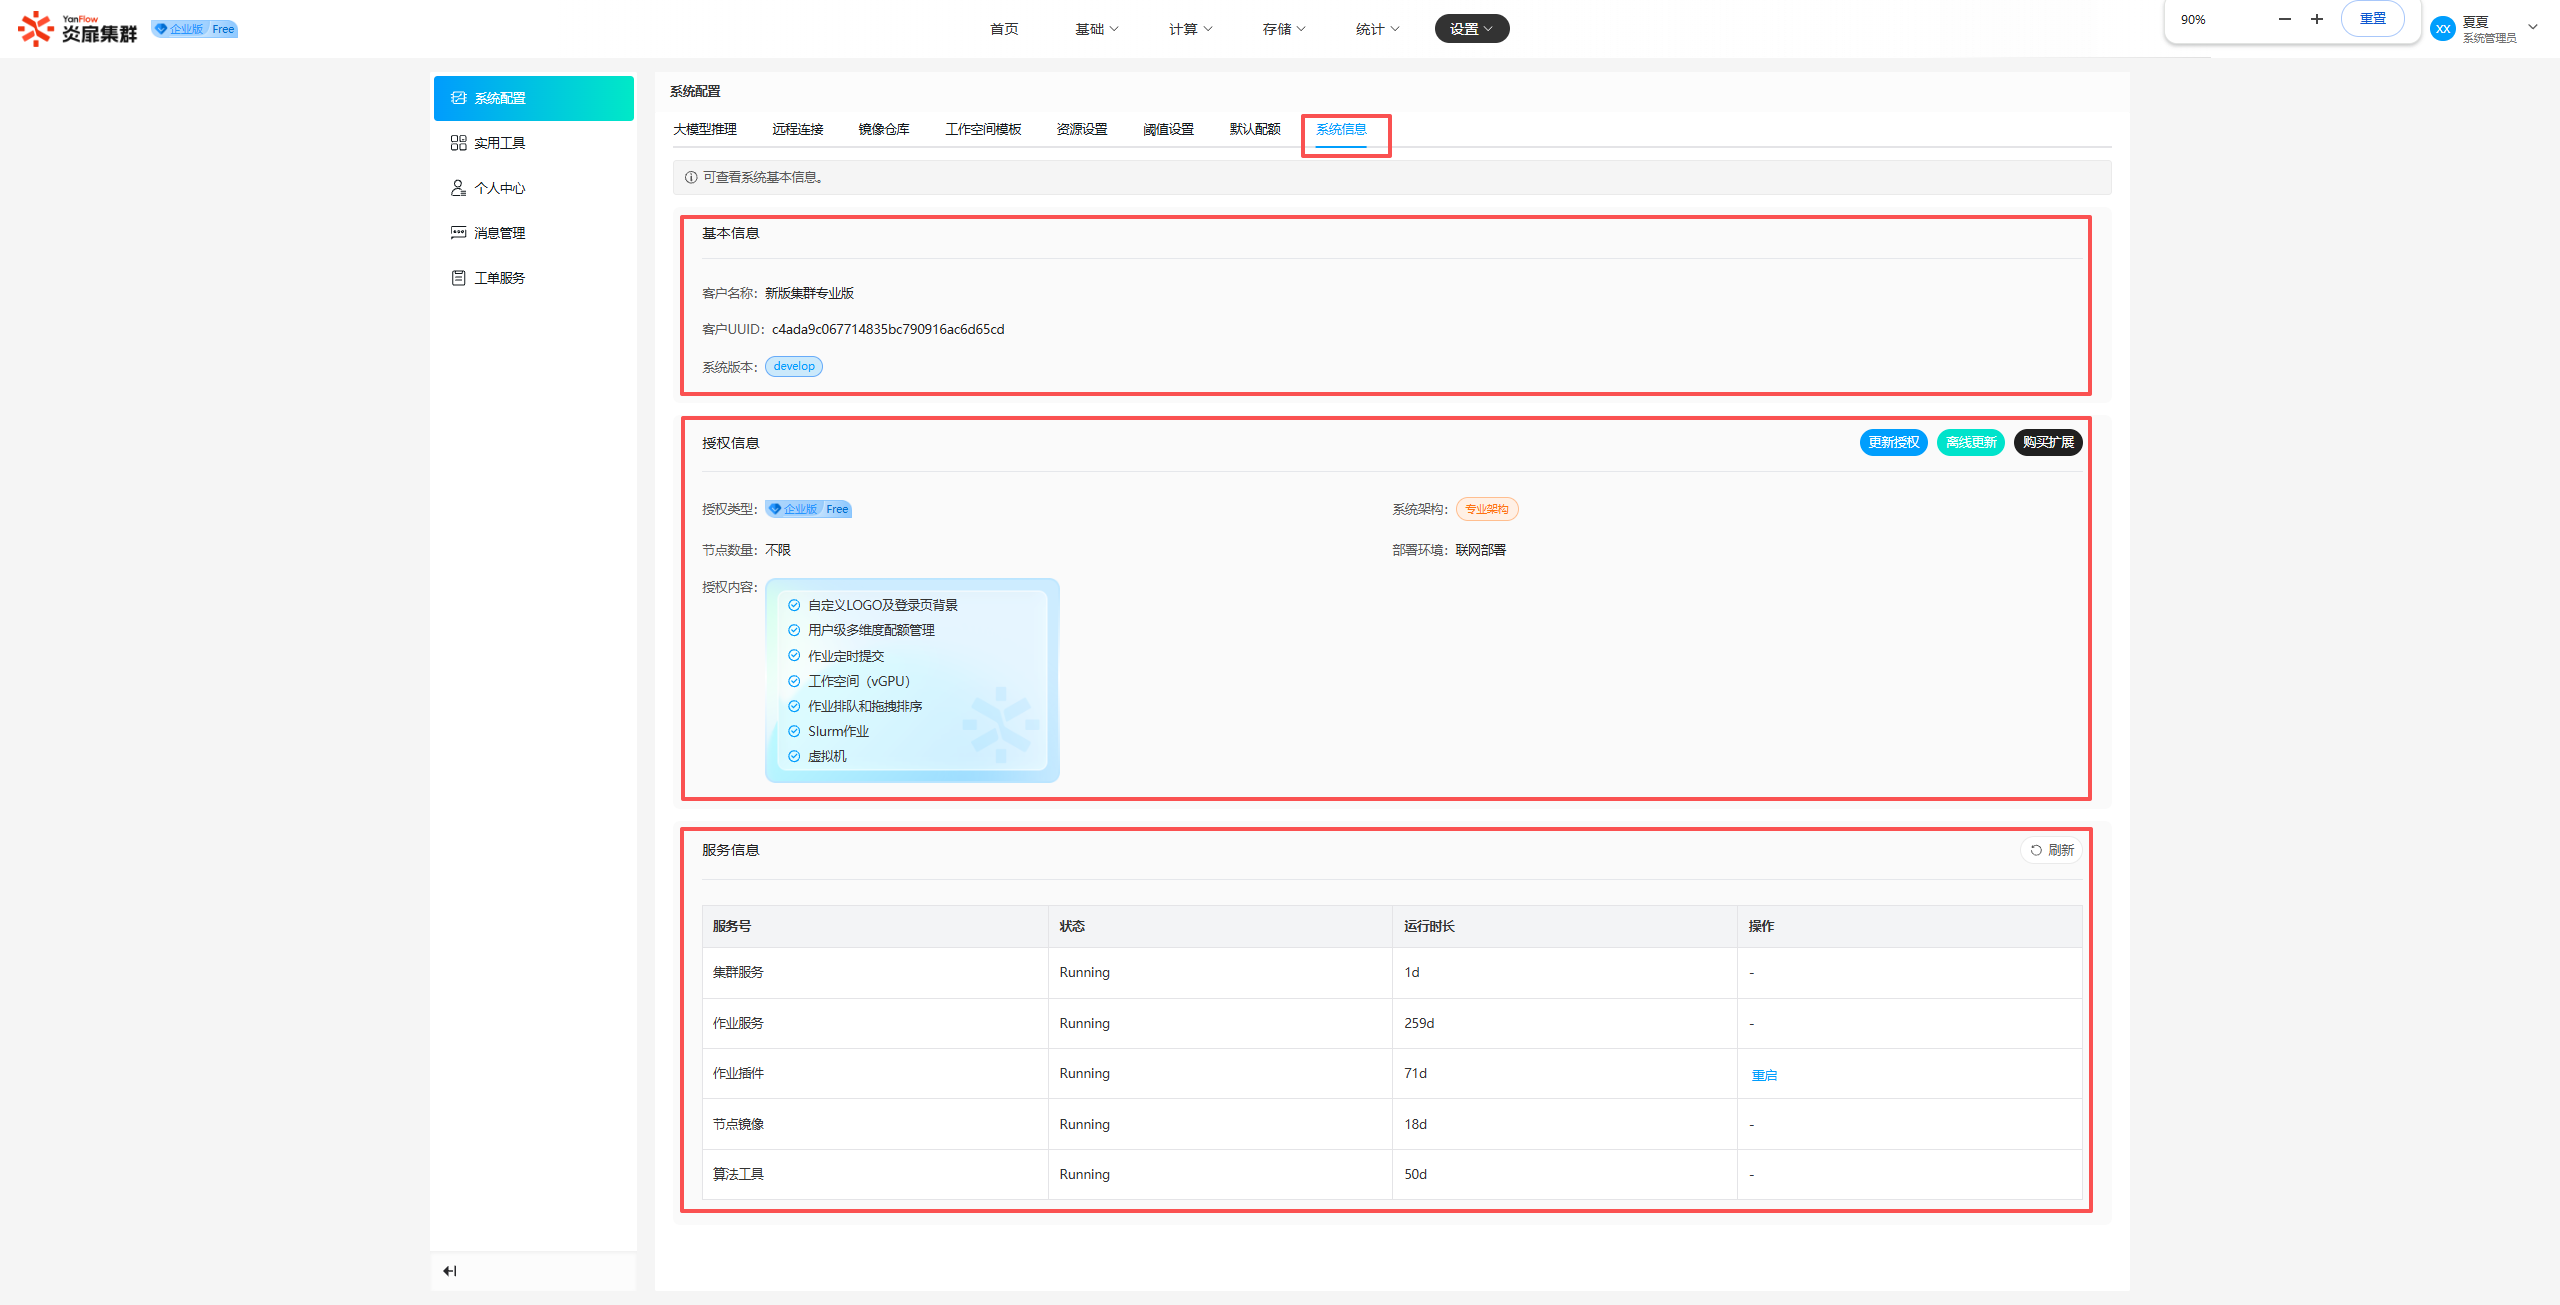
Basic Information: Displays the customer name, customer UUID, and version information.
Authorization Information: Displays the current system authorization type, number of nodes, system architecture, deployment environment, and authorization content.
Update Authorization: Click to immediately fetch and update to the customer's latest authorization.Offline Update: Contact customer service to obtain the latest authorization file, then upload it to update the authorization.Purchase Extension: This entry is only available for the Enterprise Edition Free. Click to go to the Cluster Official Website to purchase extended features.
Service Information: Displays relevant system service information. The Job Plugin service provides a Restart operation, which is supported only when no jobs are currently running.
Utility Tools
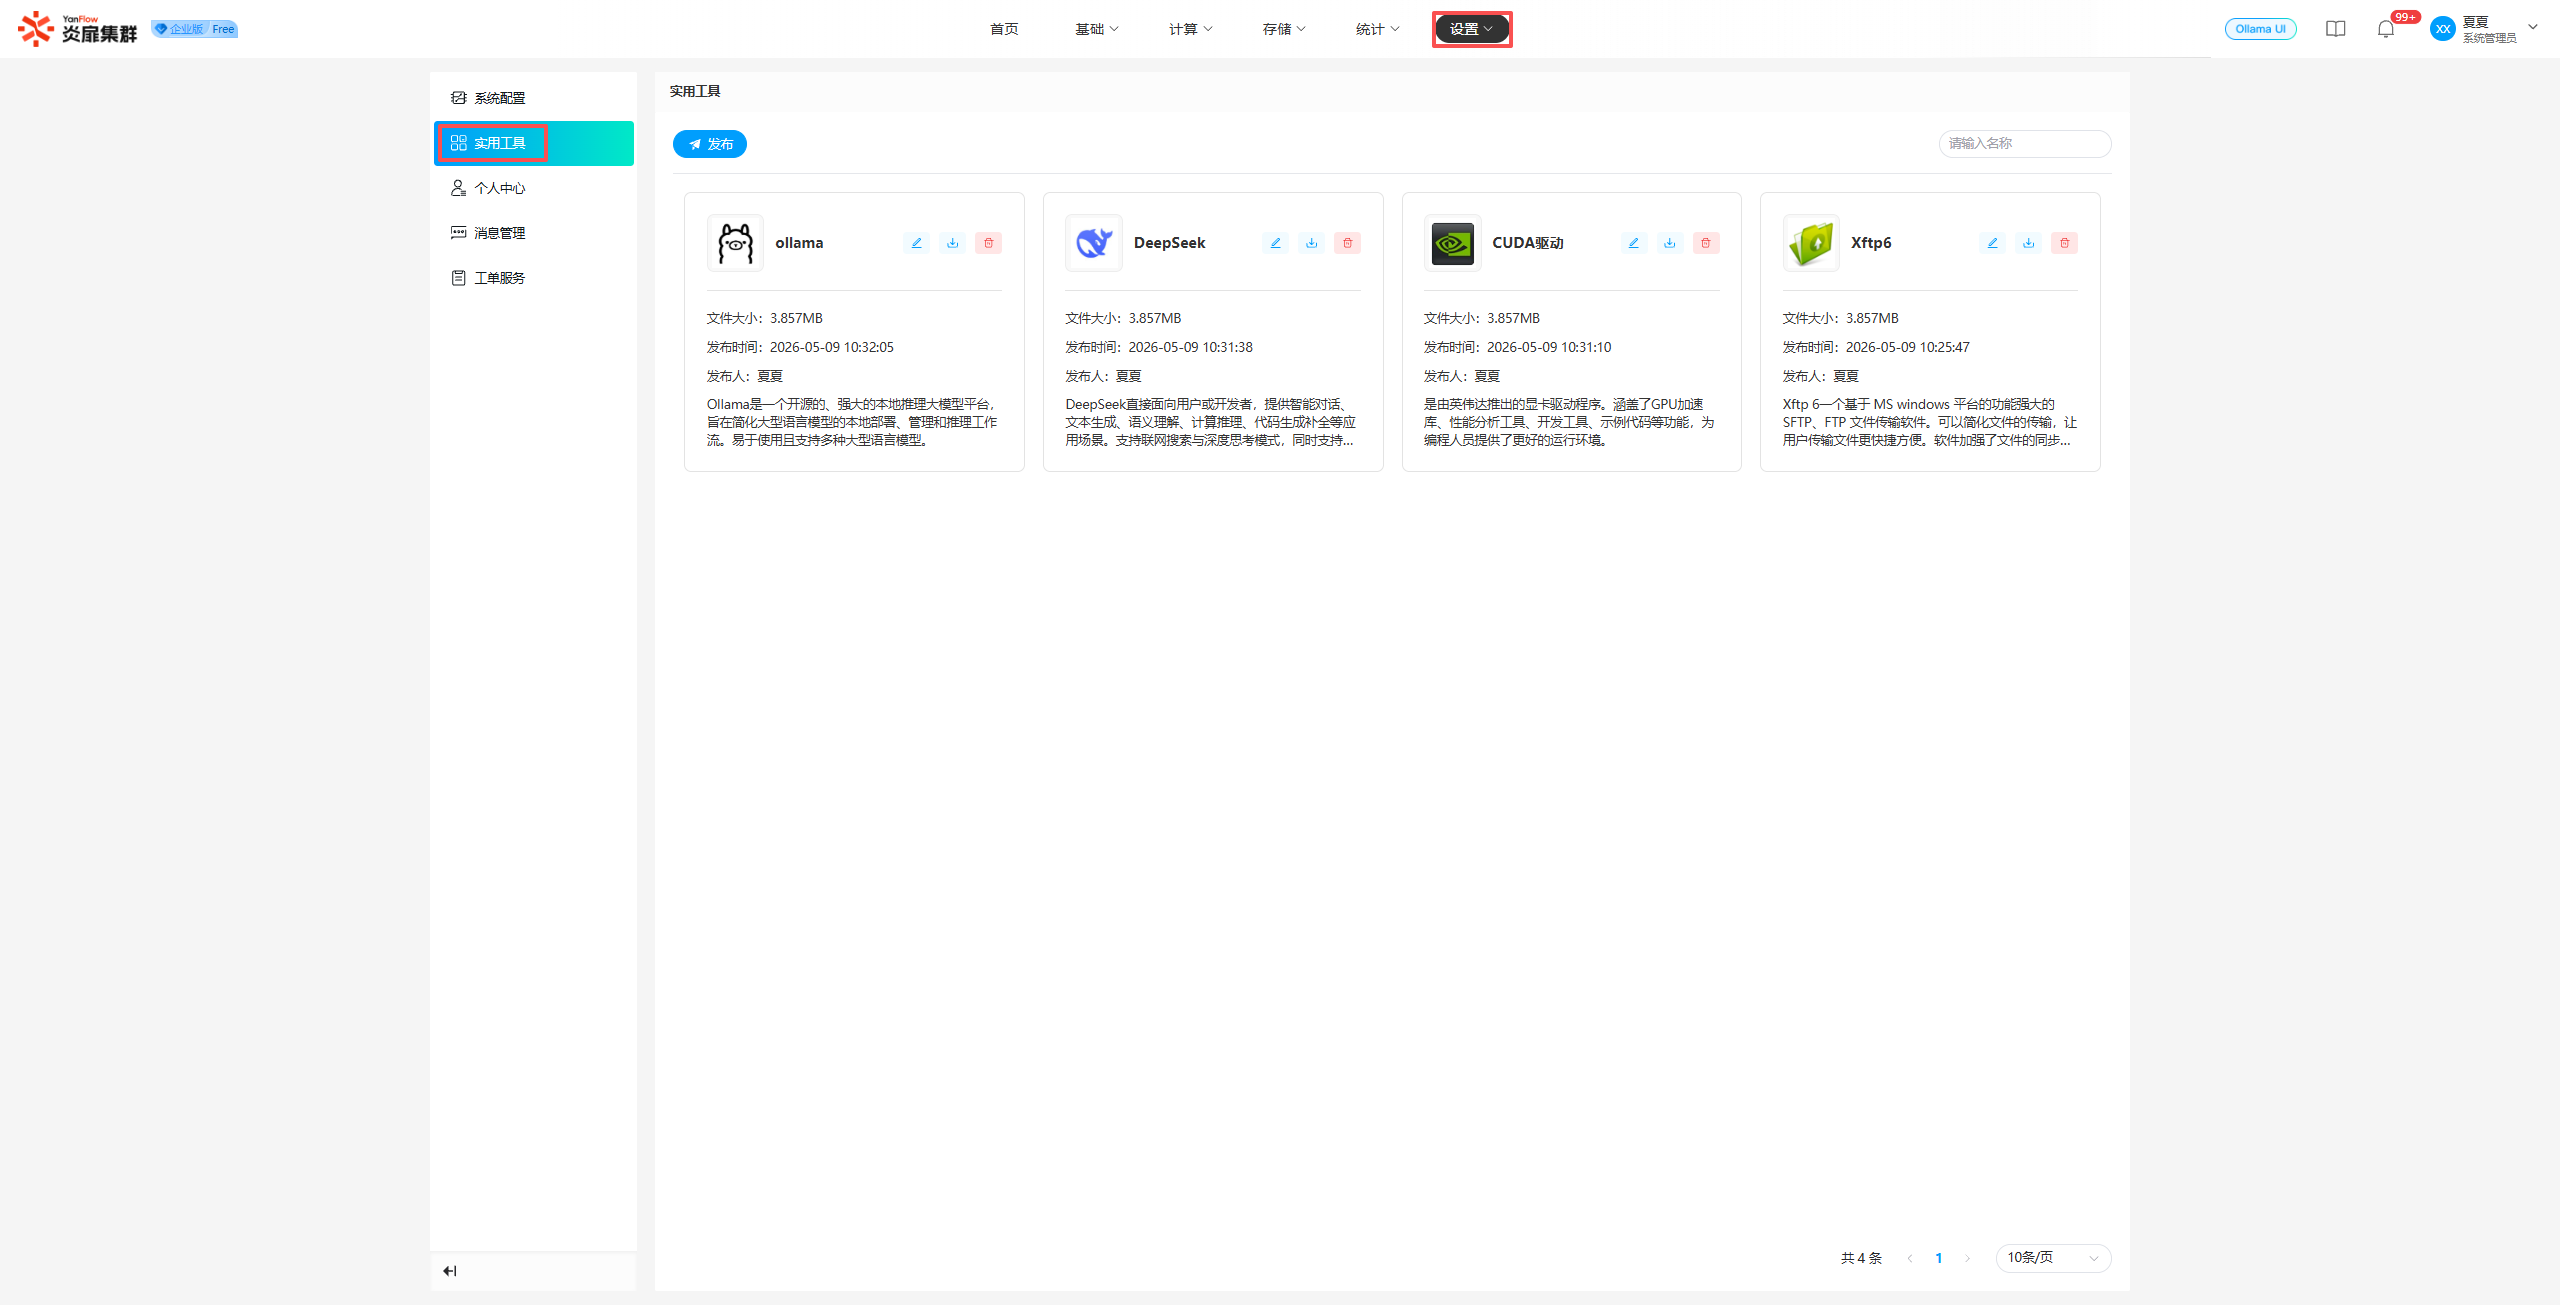
Tool List
System Administrators can view and manage all utility tools in the system, including Publish, Edit, Download, and Delete. Supports keyword search by tool name.
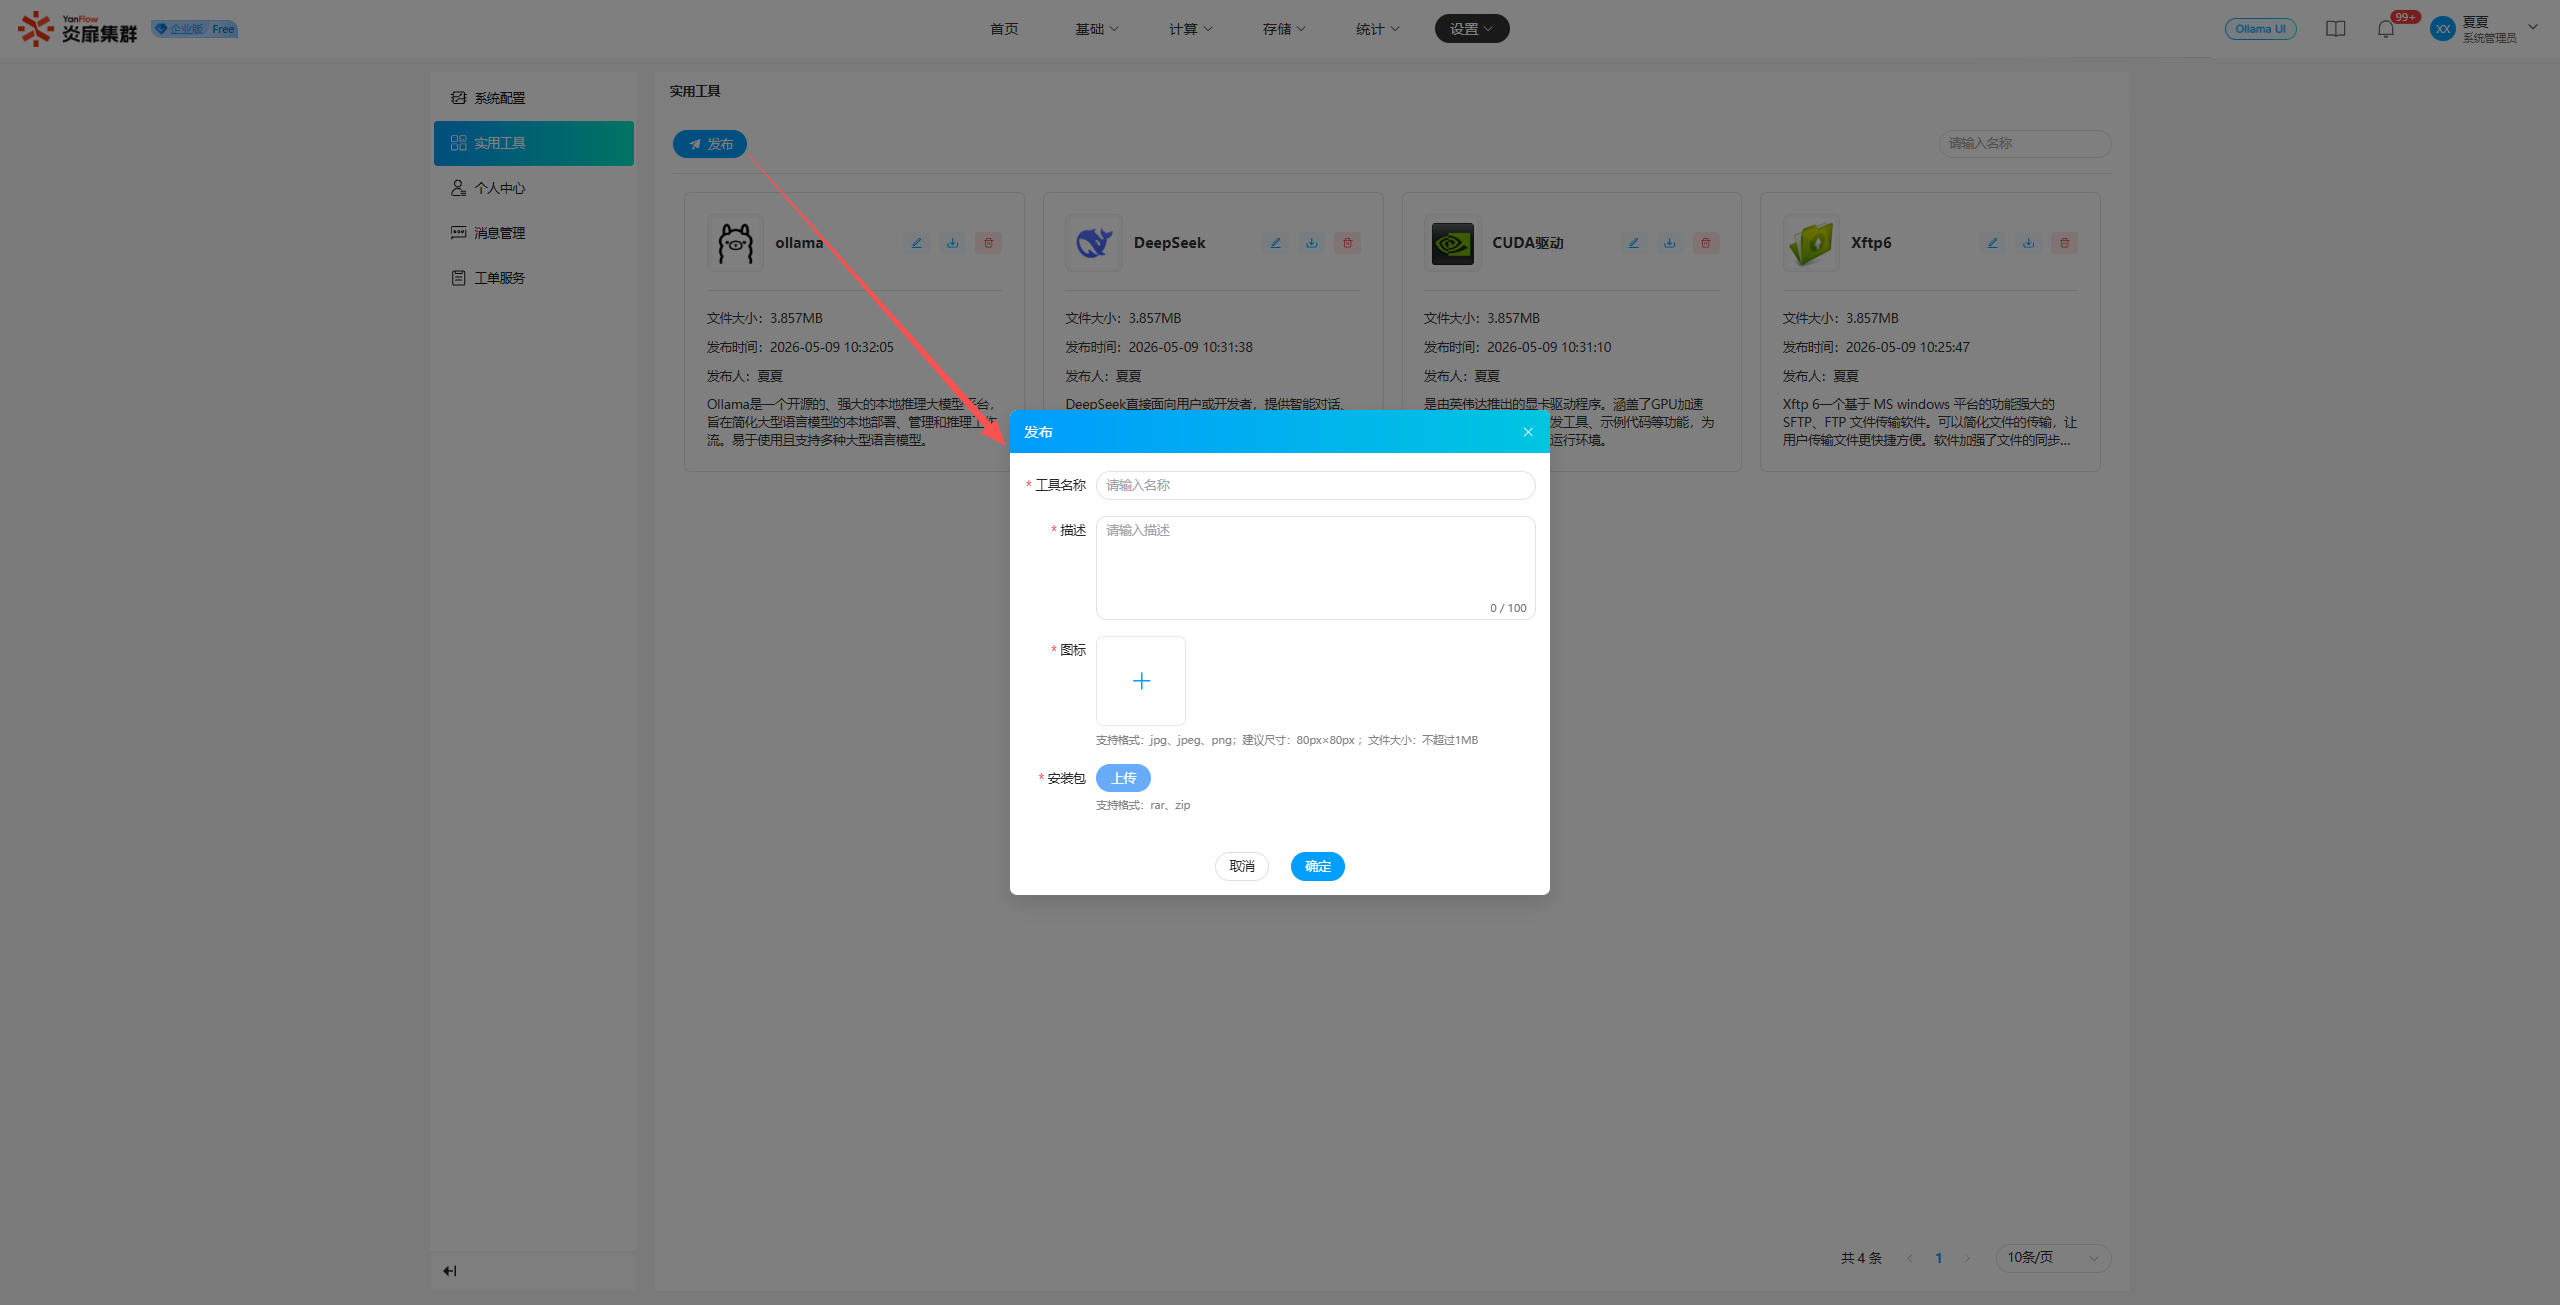
Publish
Click Publish to open the publication popup. Set the relevant information and click Confirm. Once validated, a new tool will be published.
Edit
Click the Edit button to open the editing popup. Modify the information that needs changing and click Confirm to update the application information.
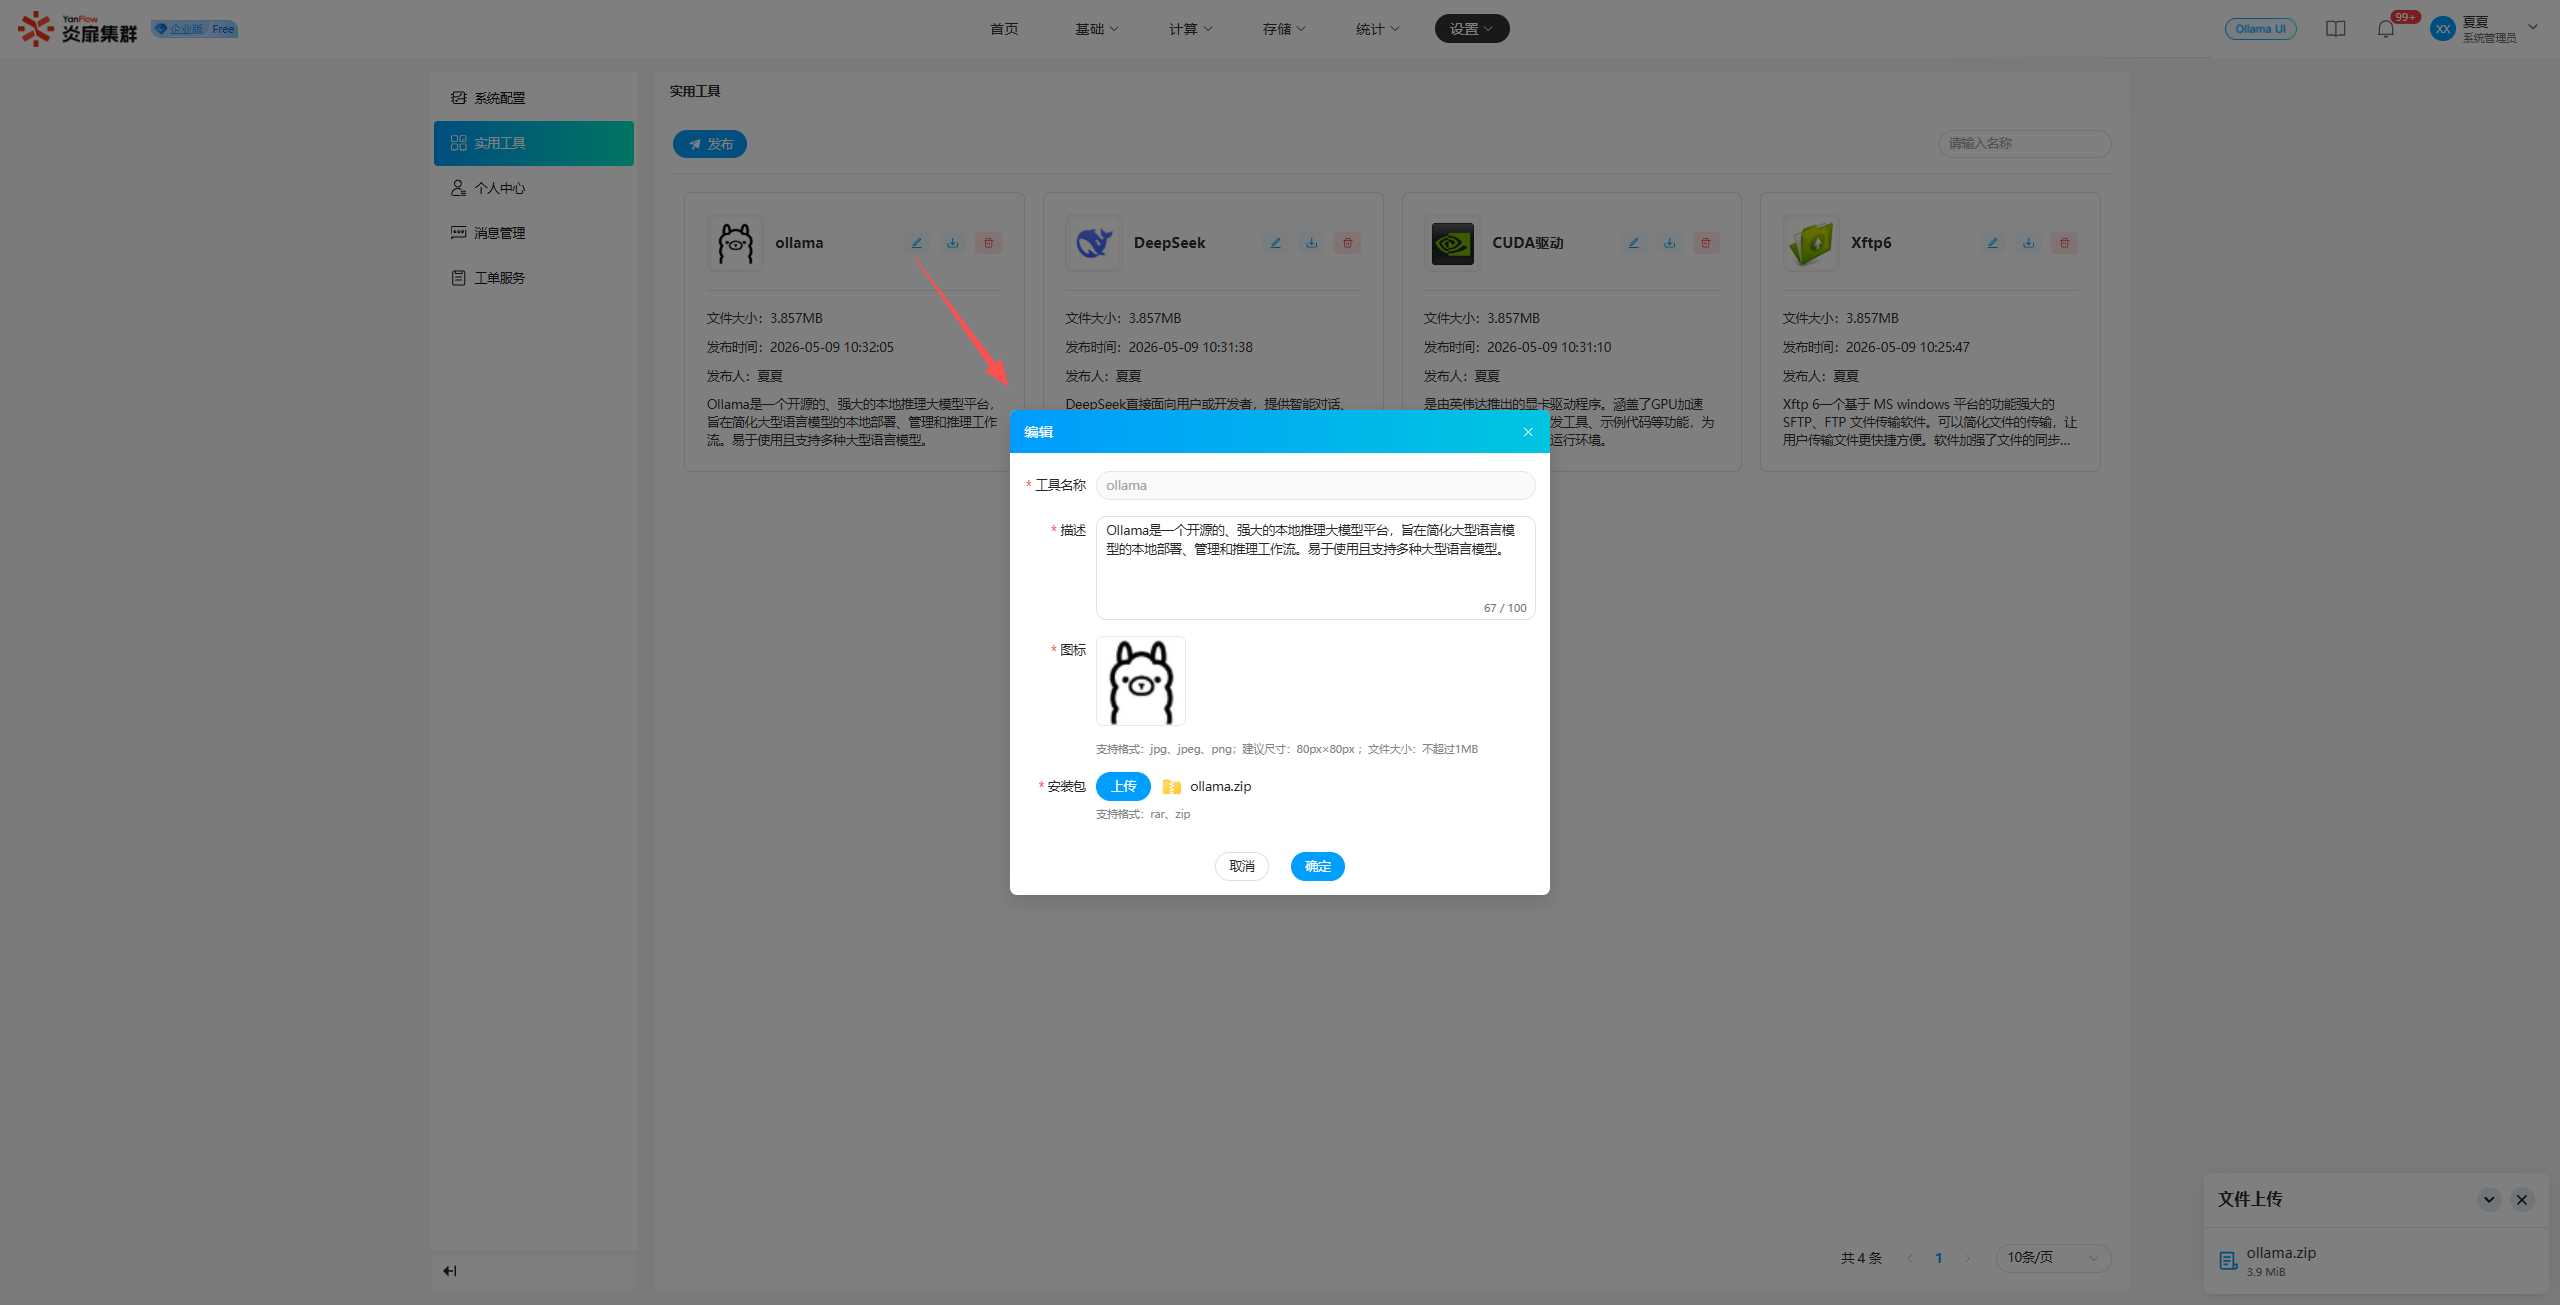
Note: The tool name cannot be modified during editing.
Download
Click Download to immediately download the tool package file to your local machine.
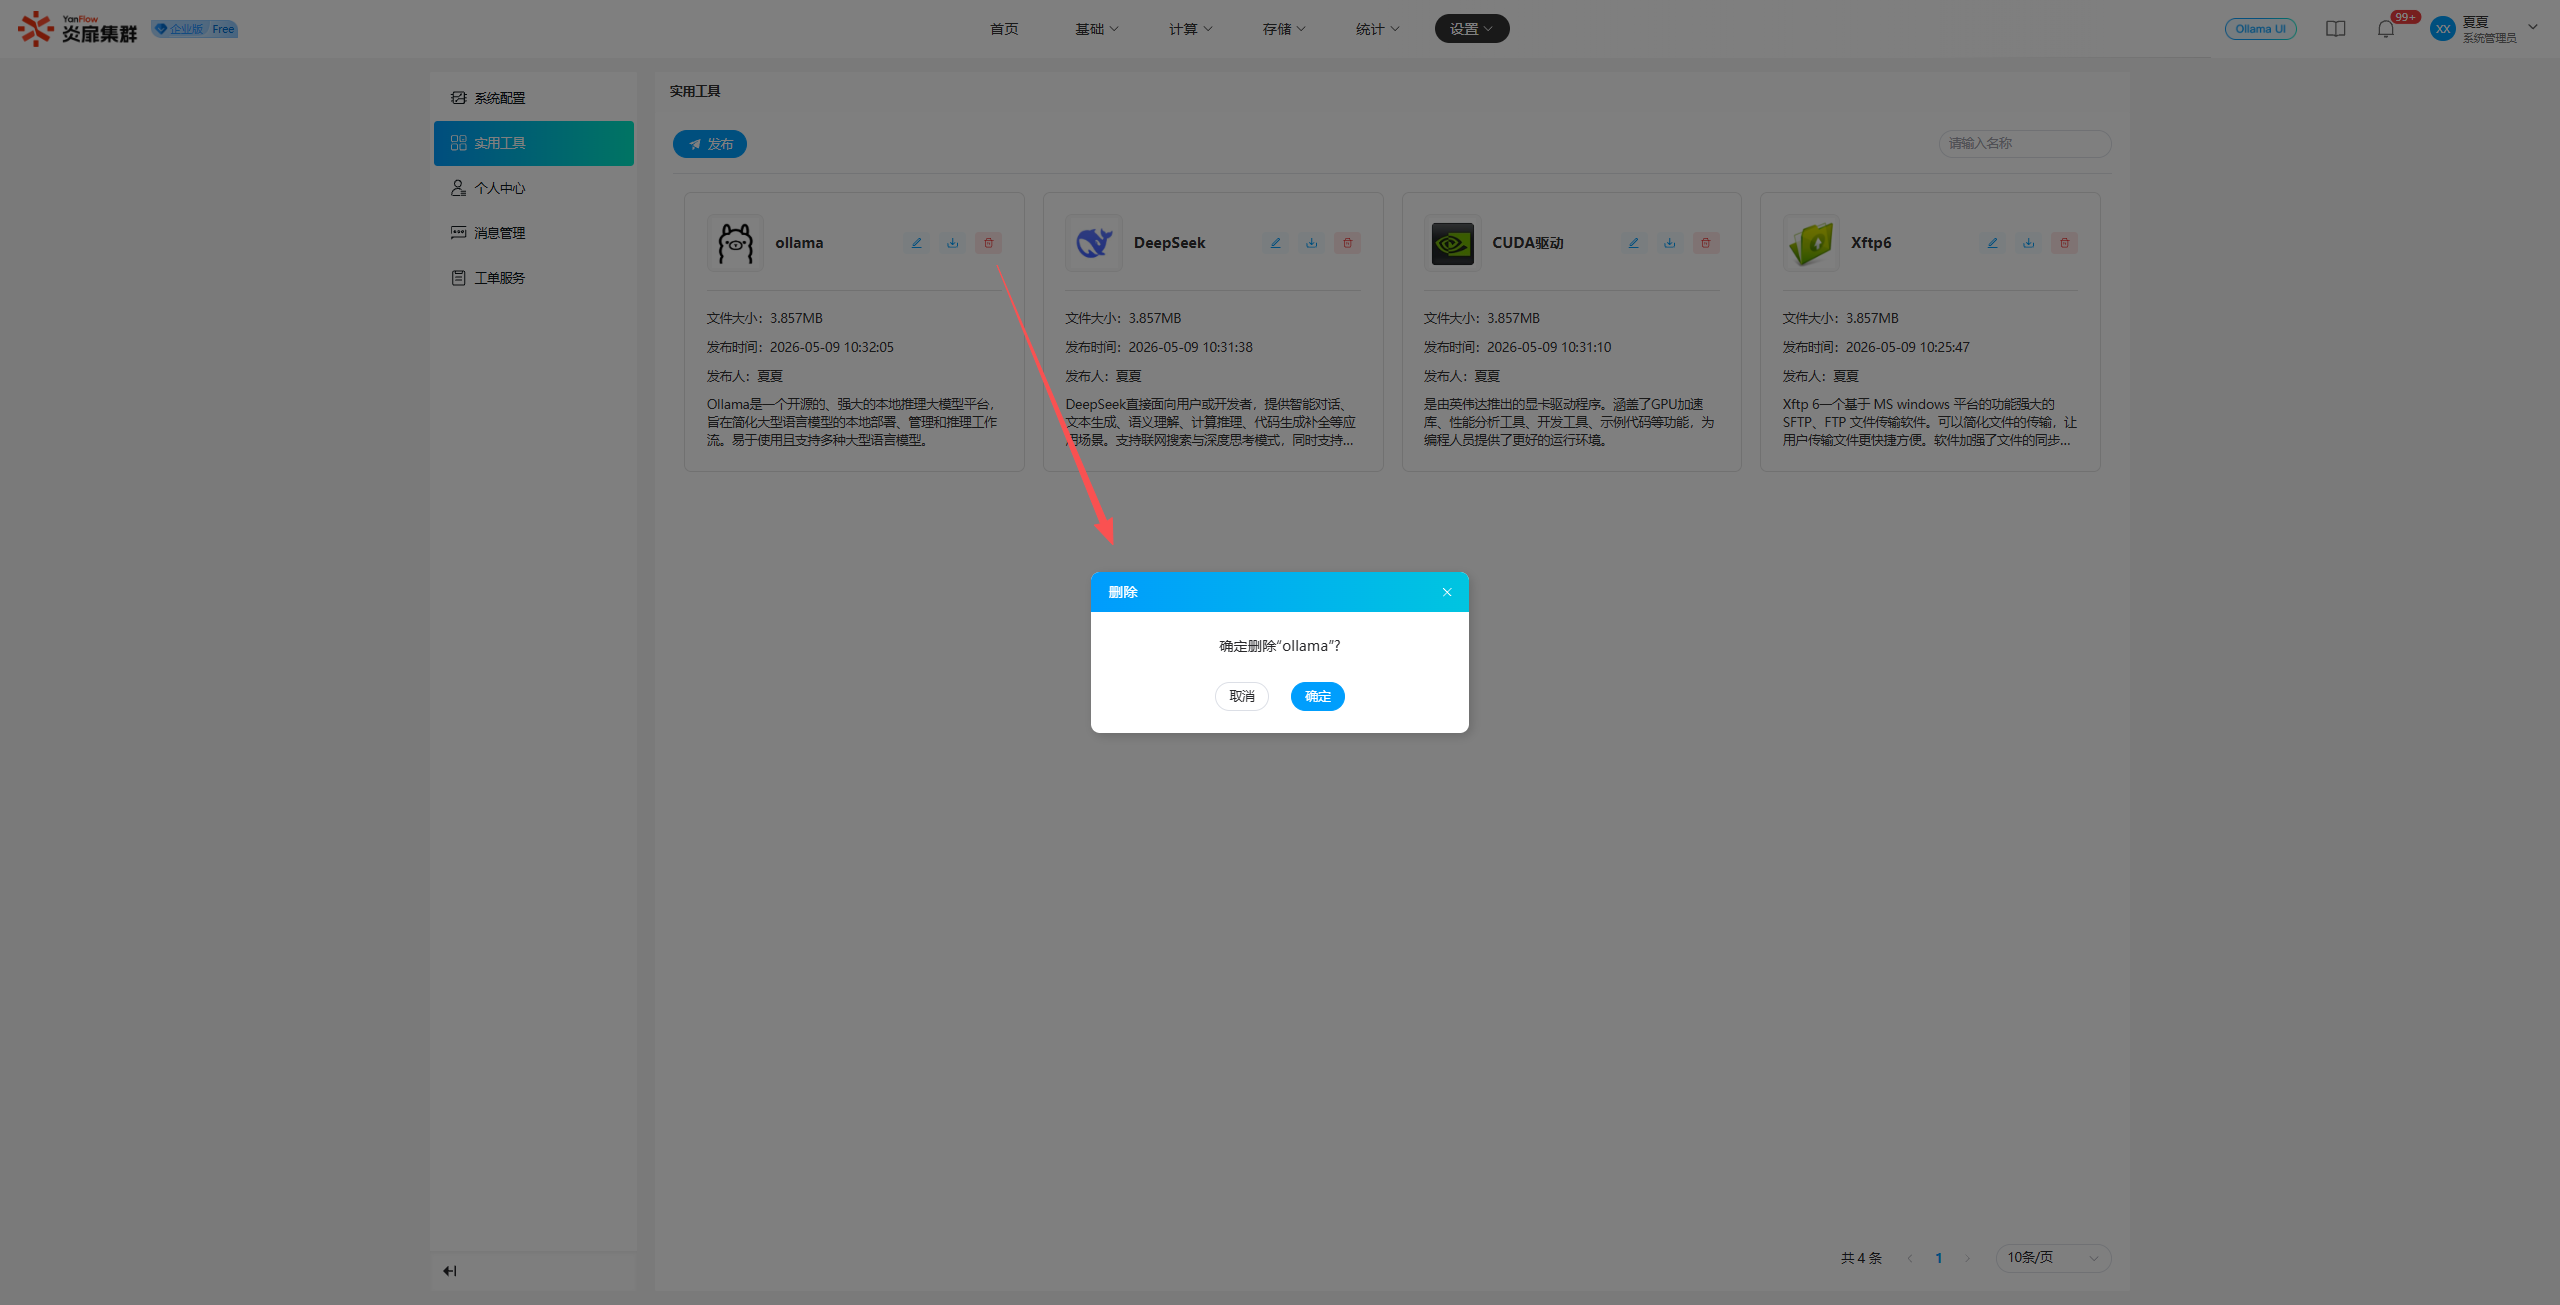
Delete
Click Delete to show a prompt. Click Confirm to delete the tool.
Personal Center
Click Settings - Personal Center or click the Username in the top right corner and select Personal Center to enter the page where you can view and maintain your basic information.
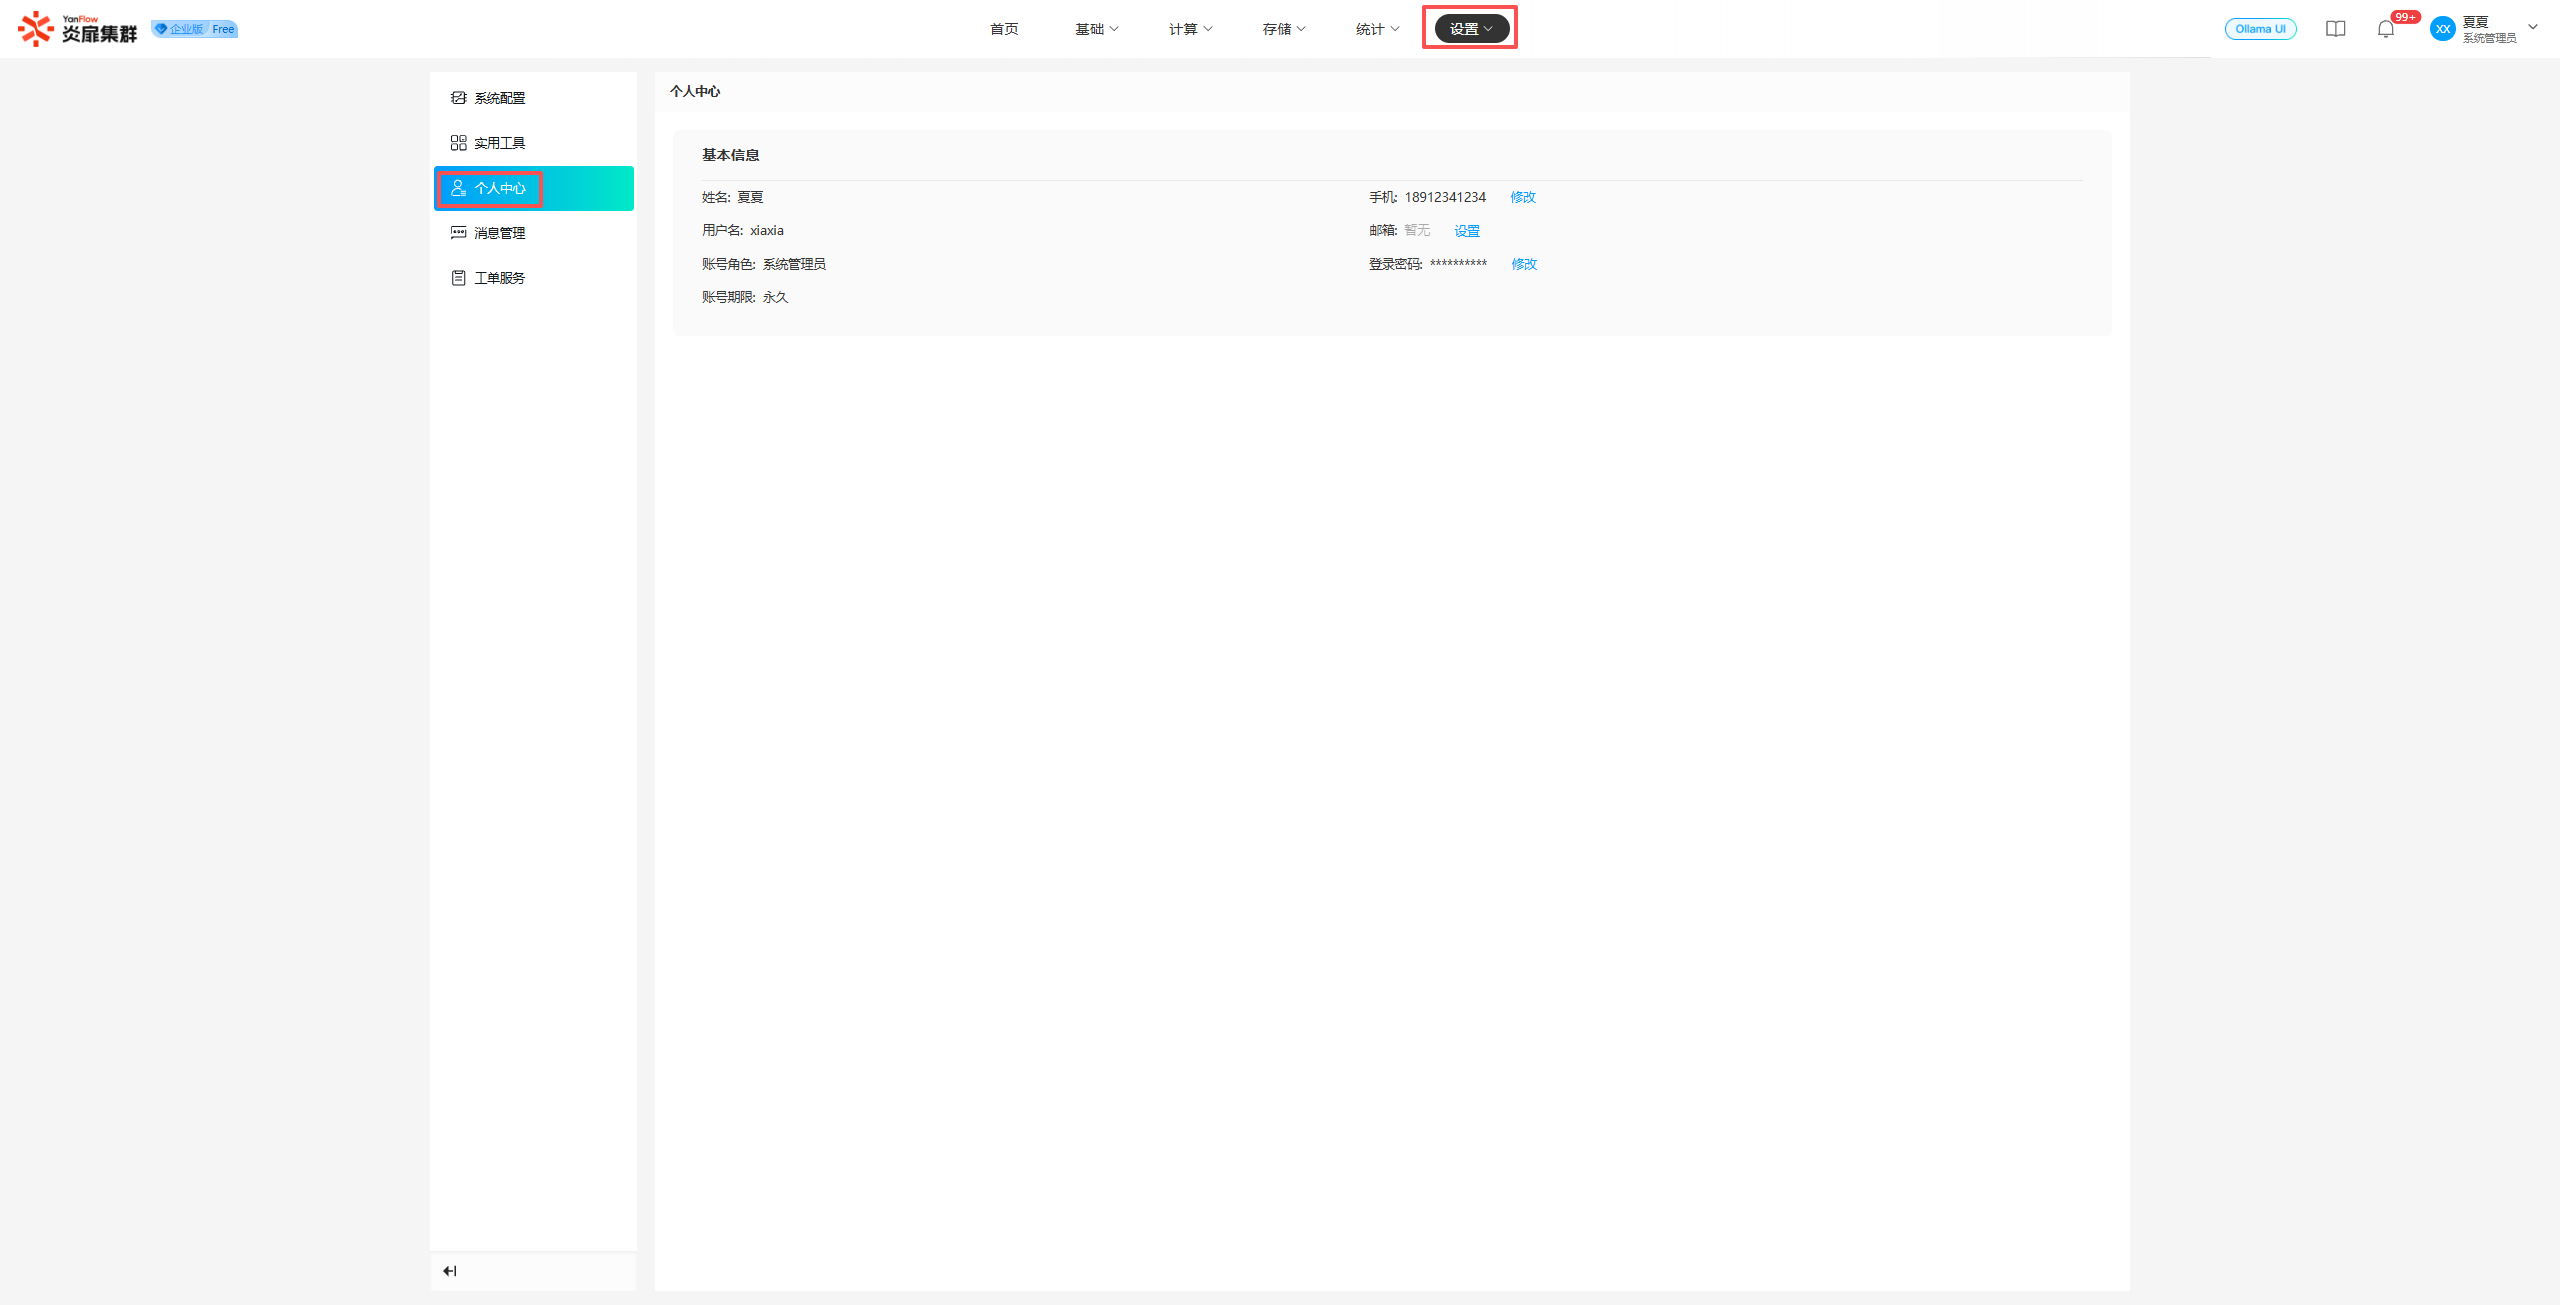
Modify Phone Number: Click Modify next to the phone number, enter the new phone number and verification code, then click Confirm. Once validated, the phone number will be updated.
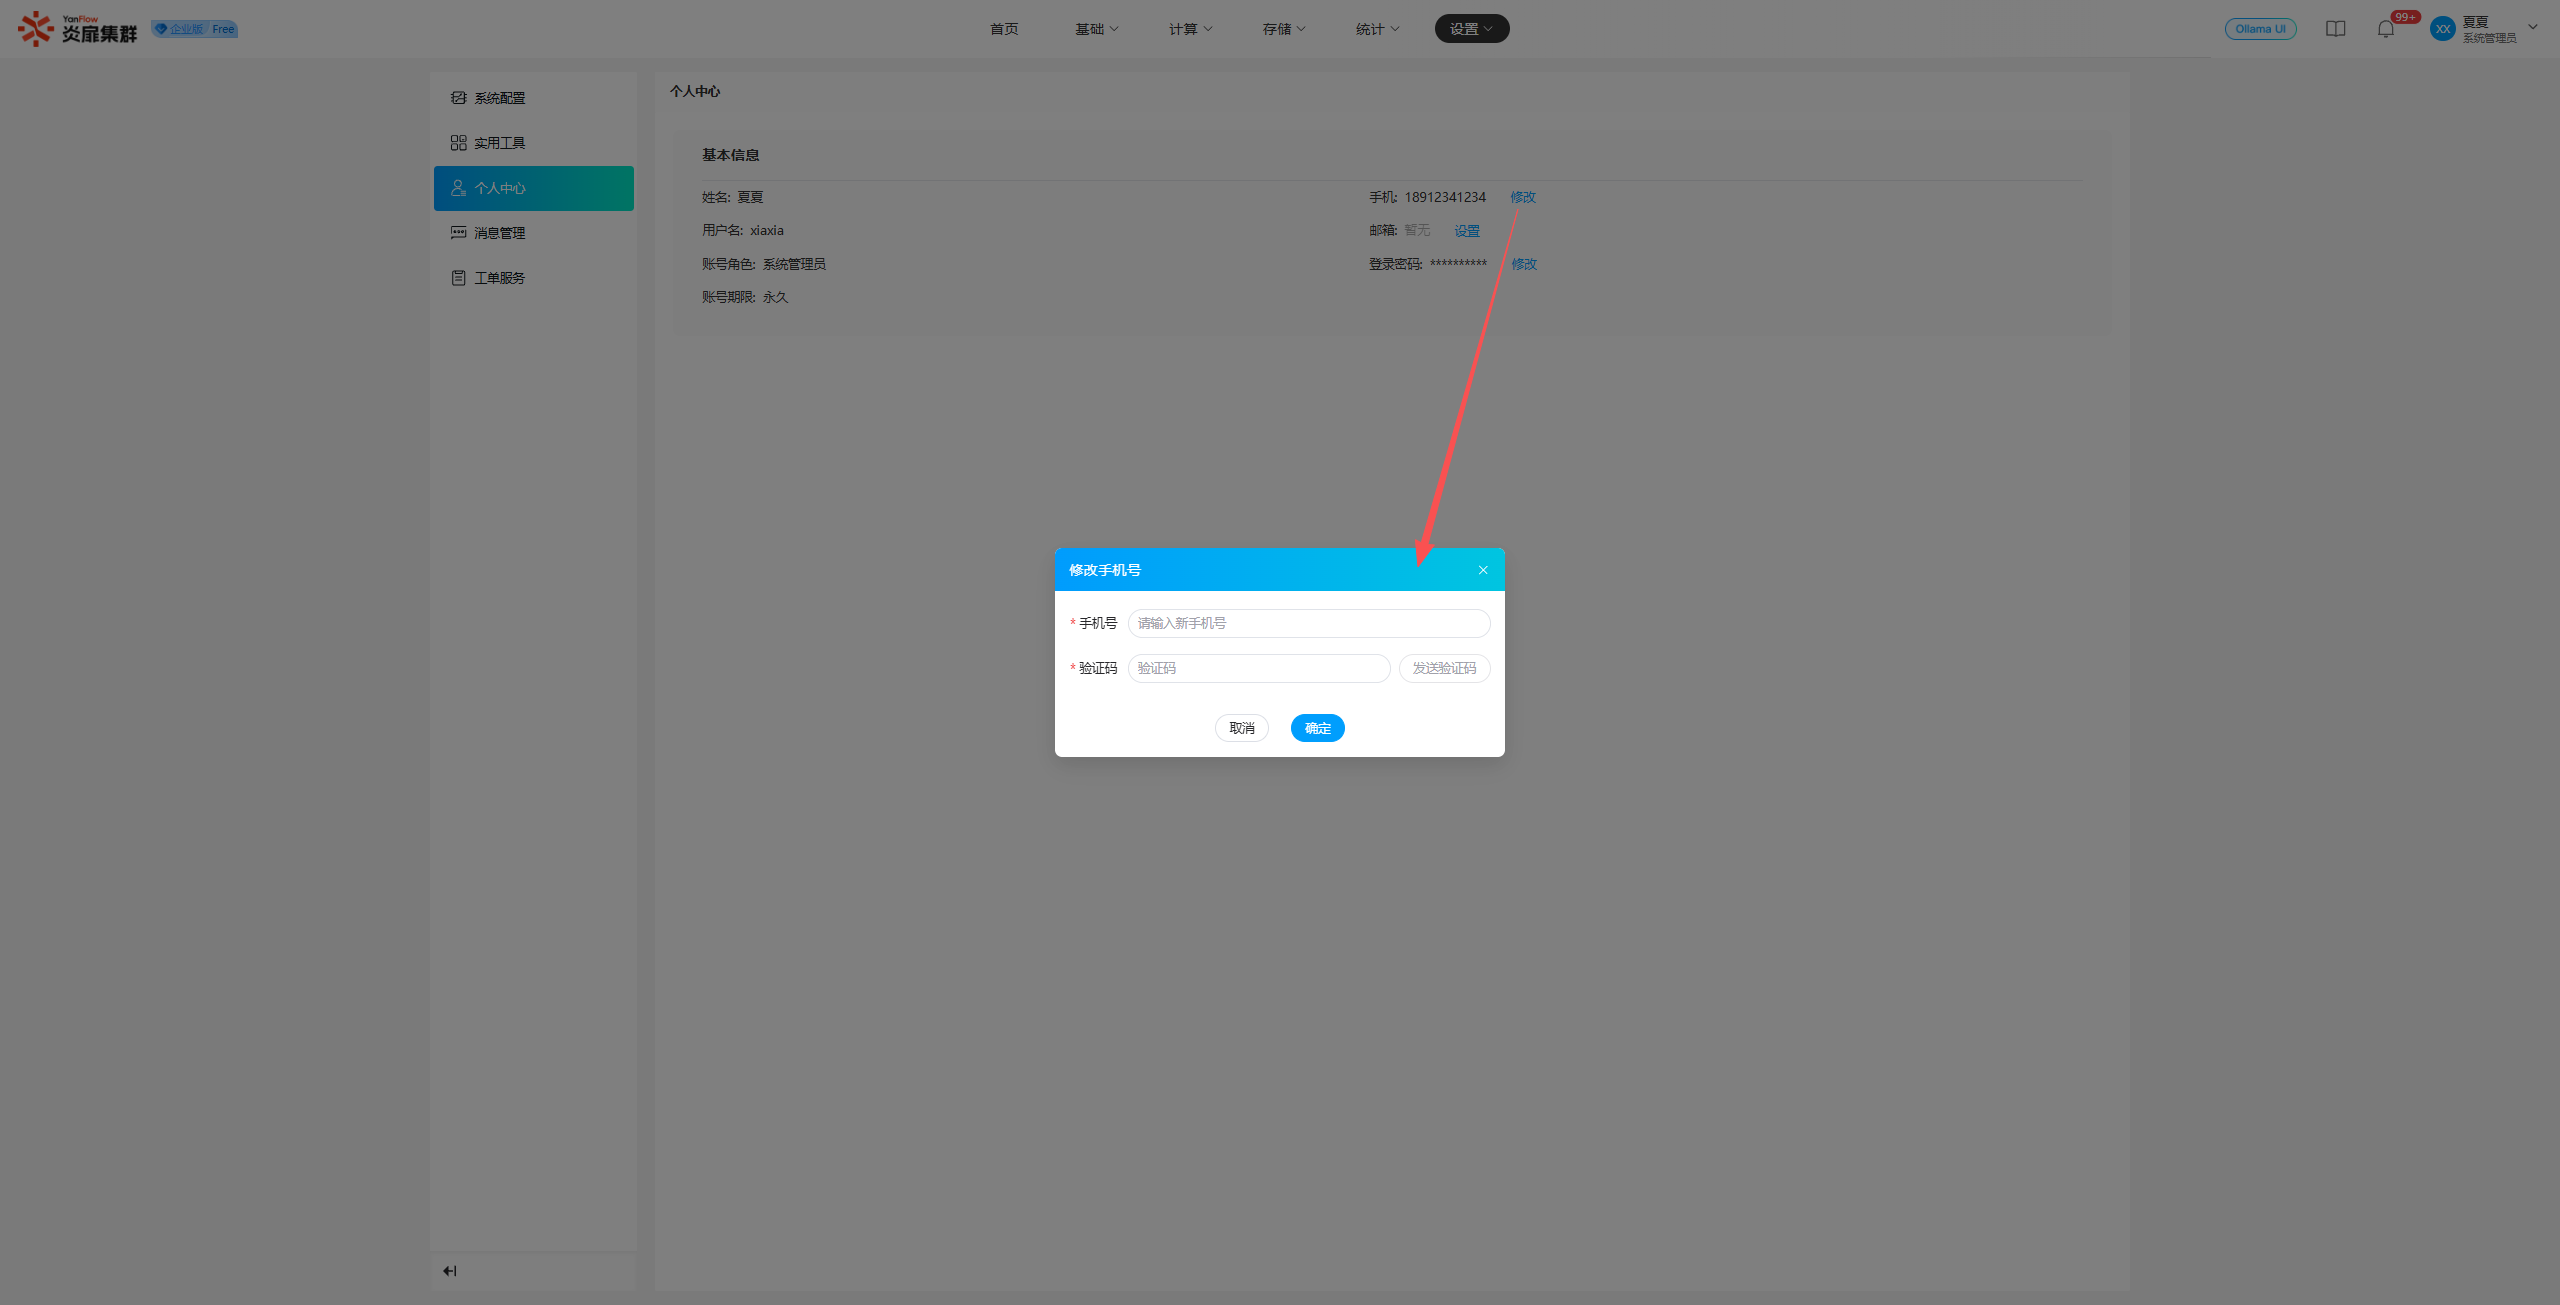
Set/Modify Email: Click Set or Modify next to the email, enter the email address and verification code, then click Confirm. Once validated, the email will be set or modified.
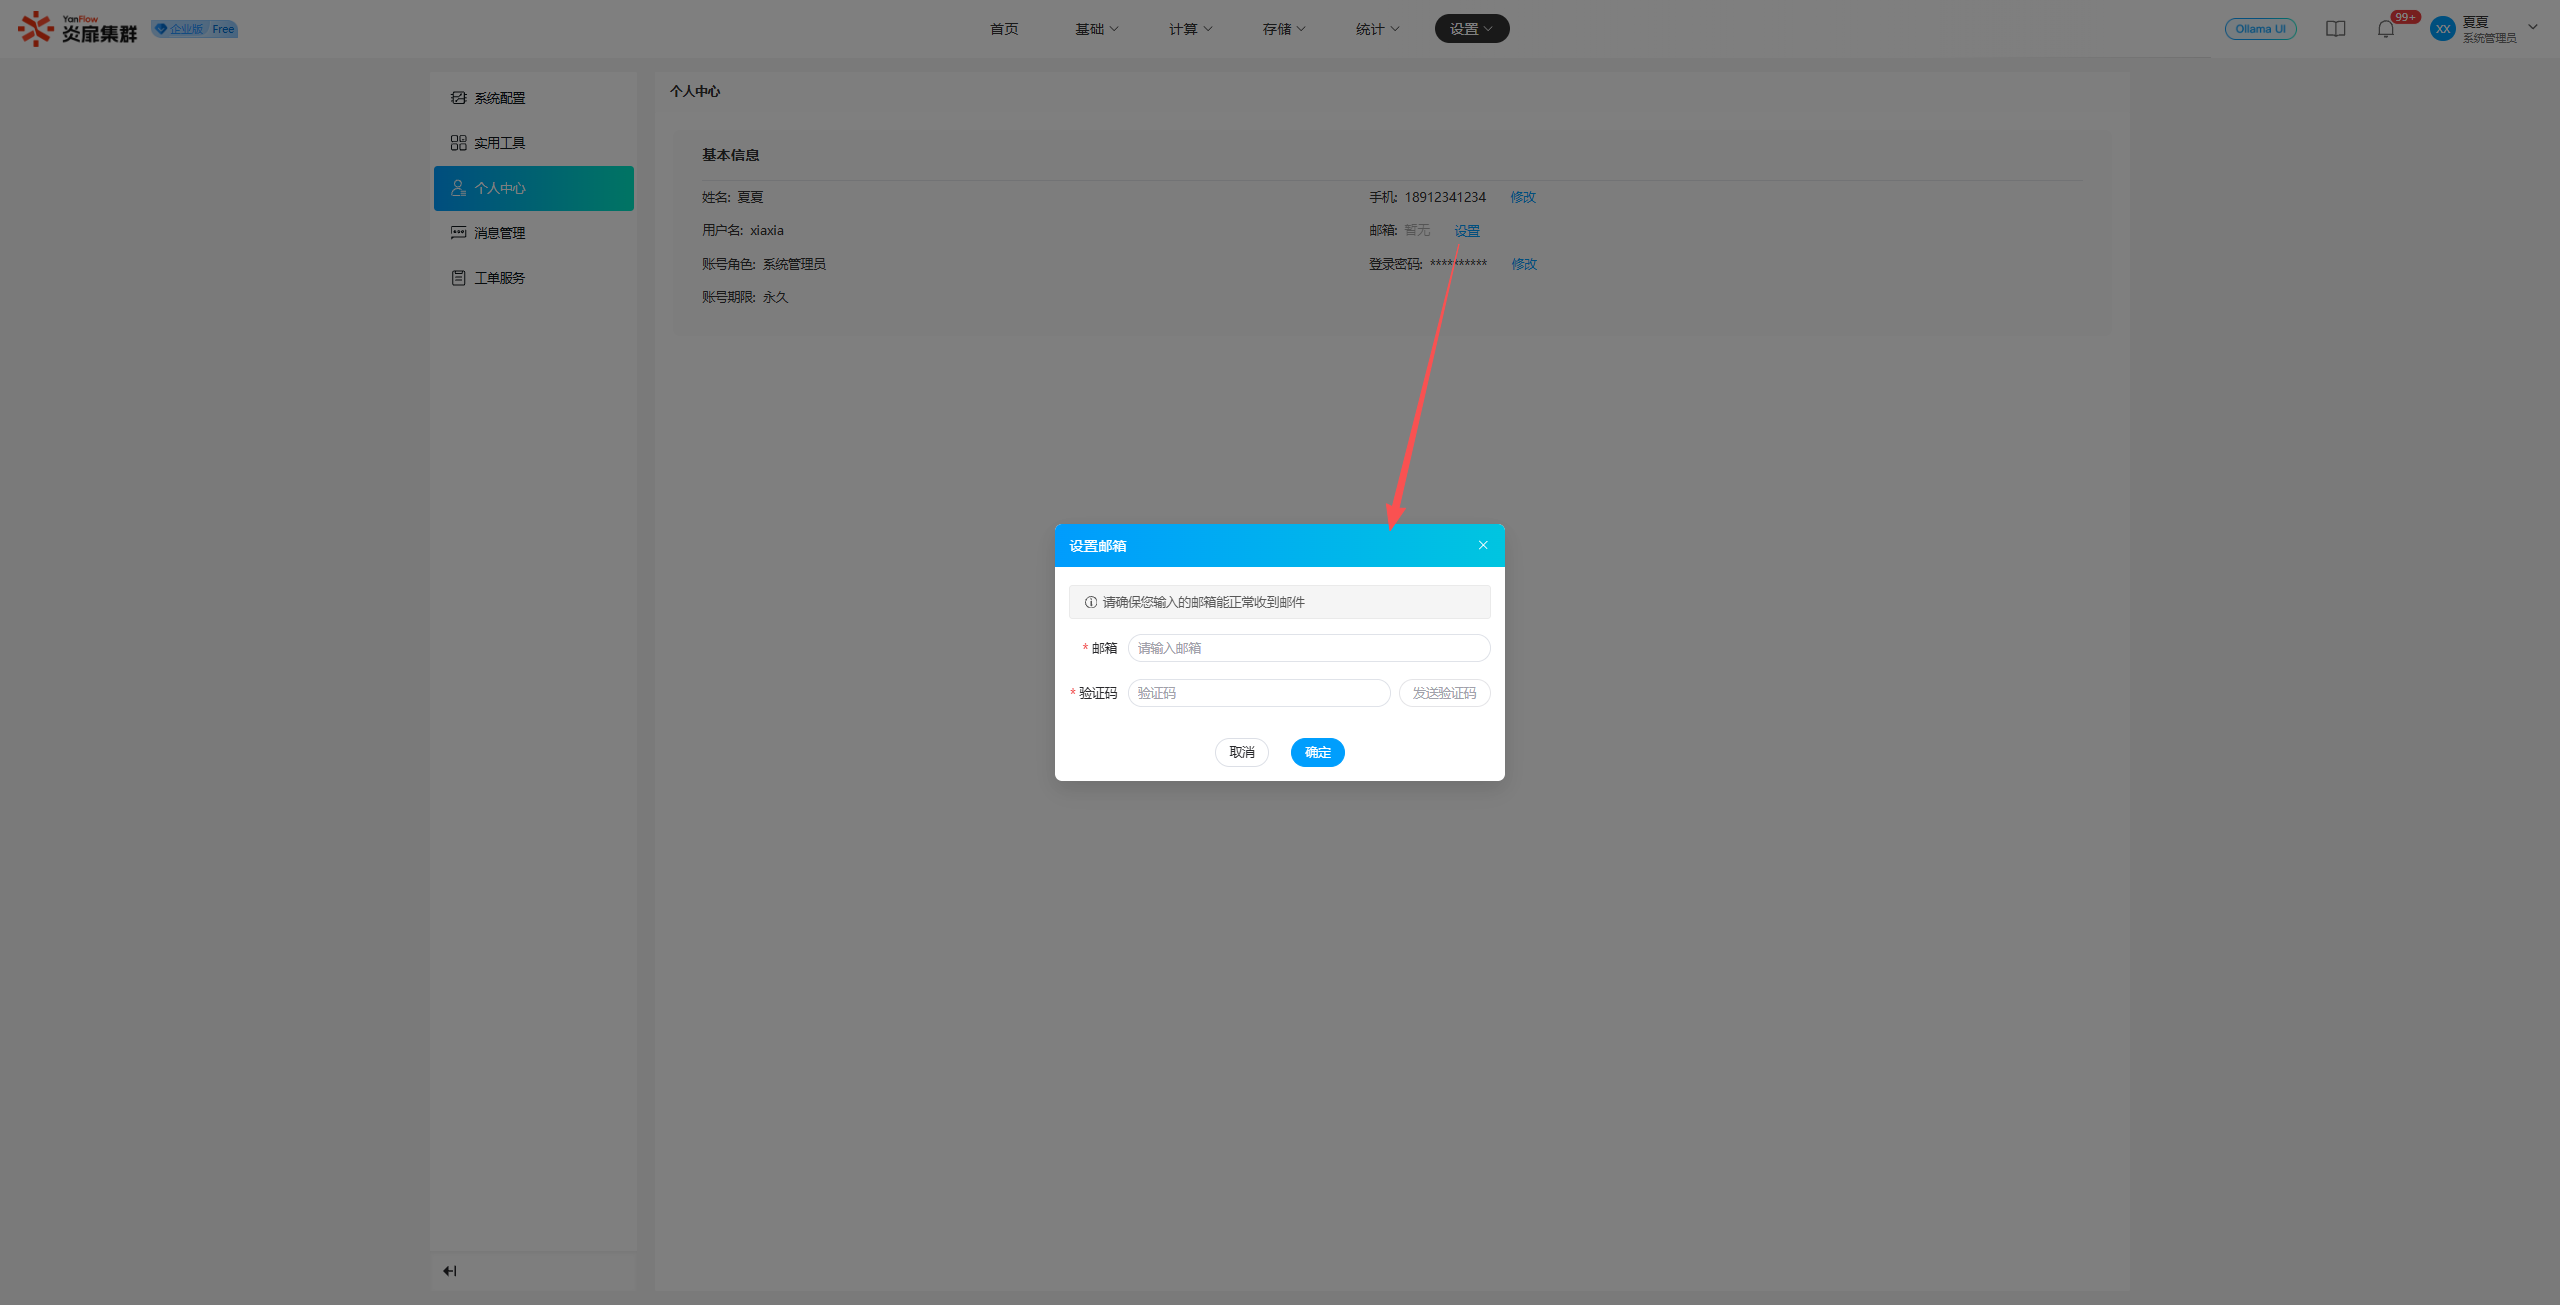
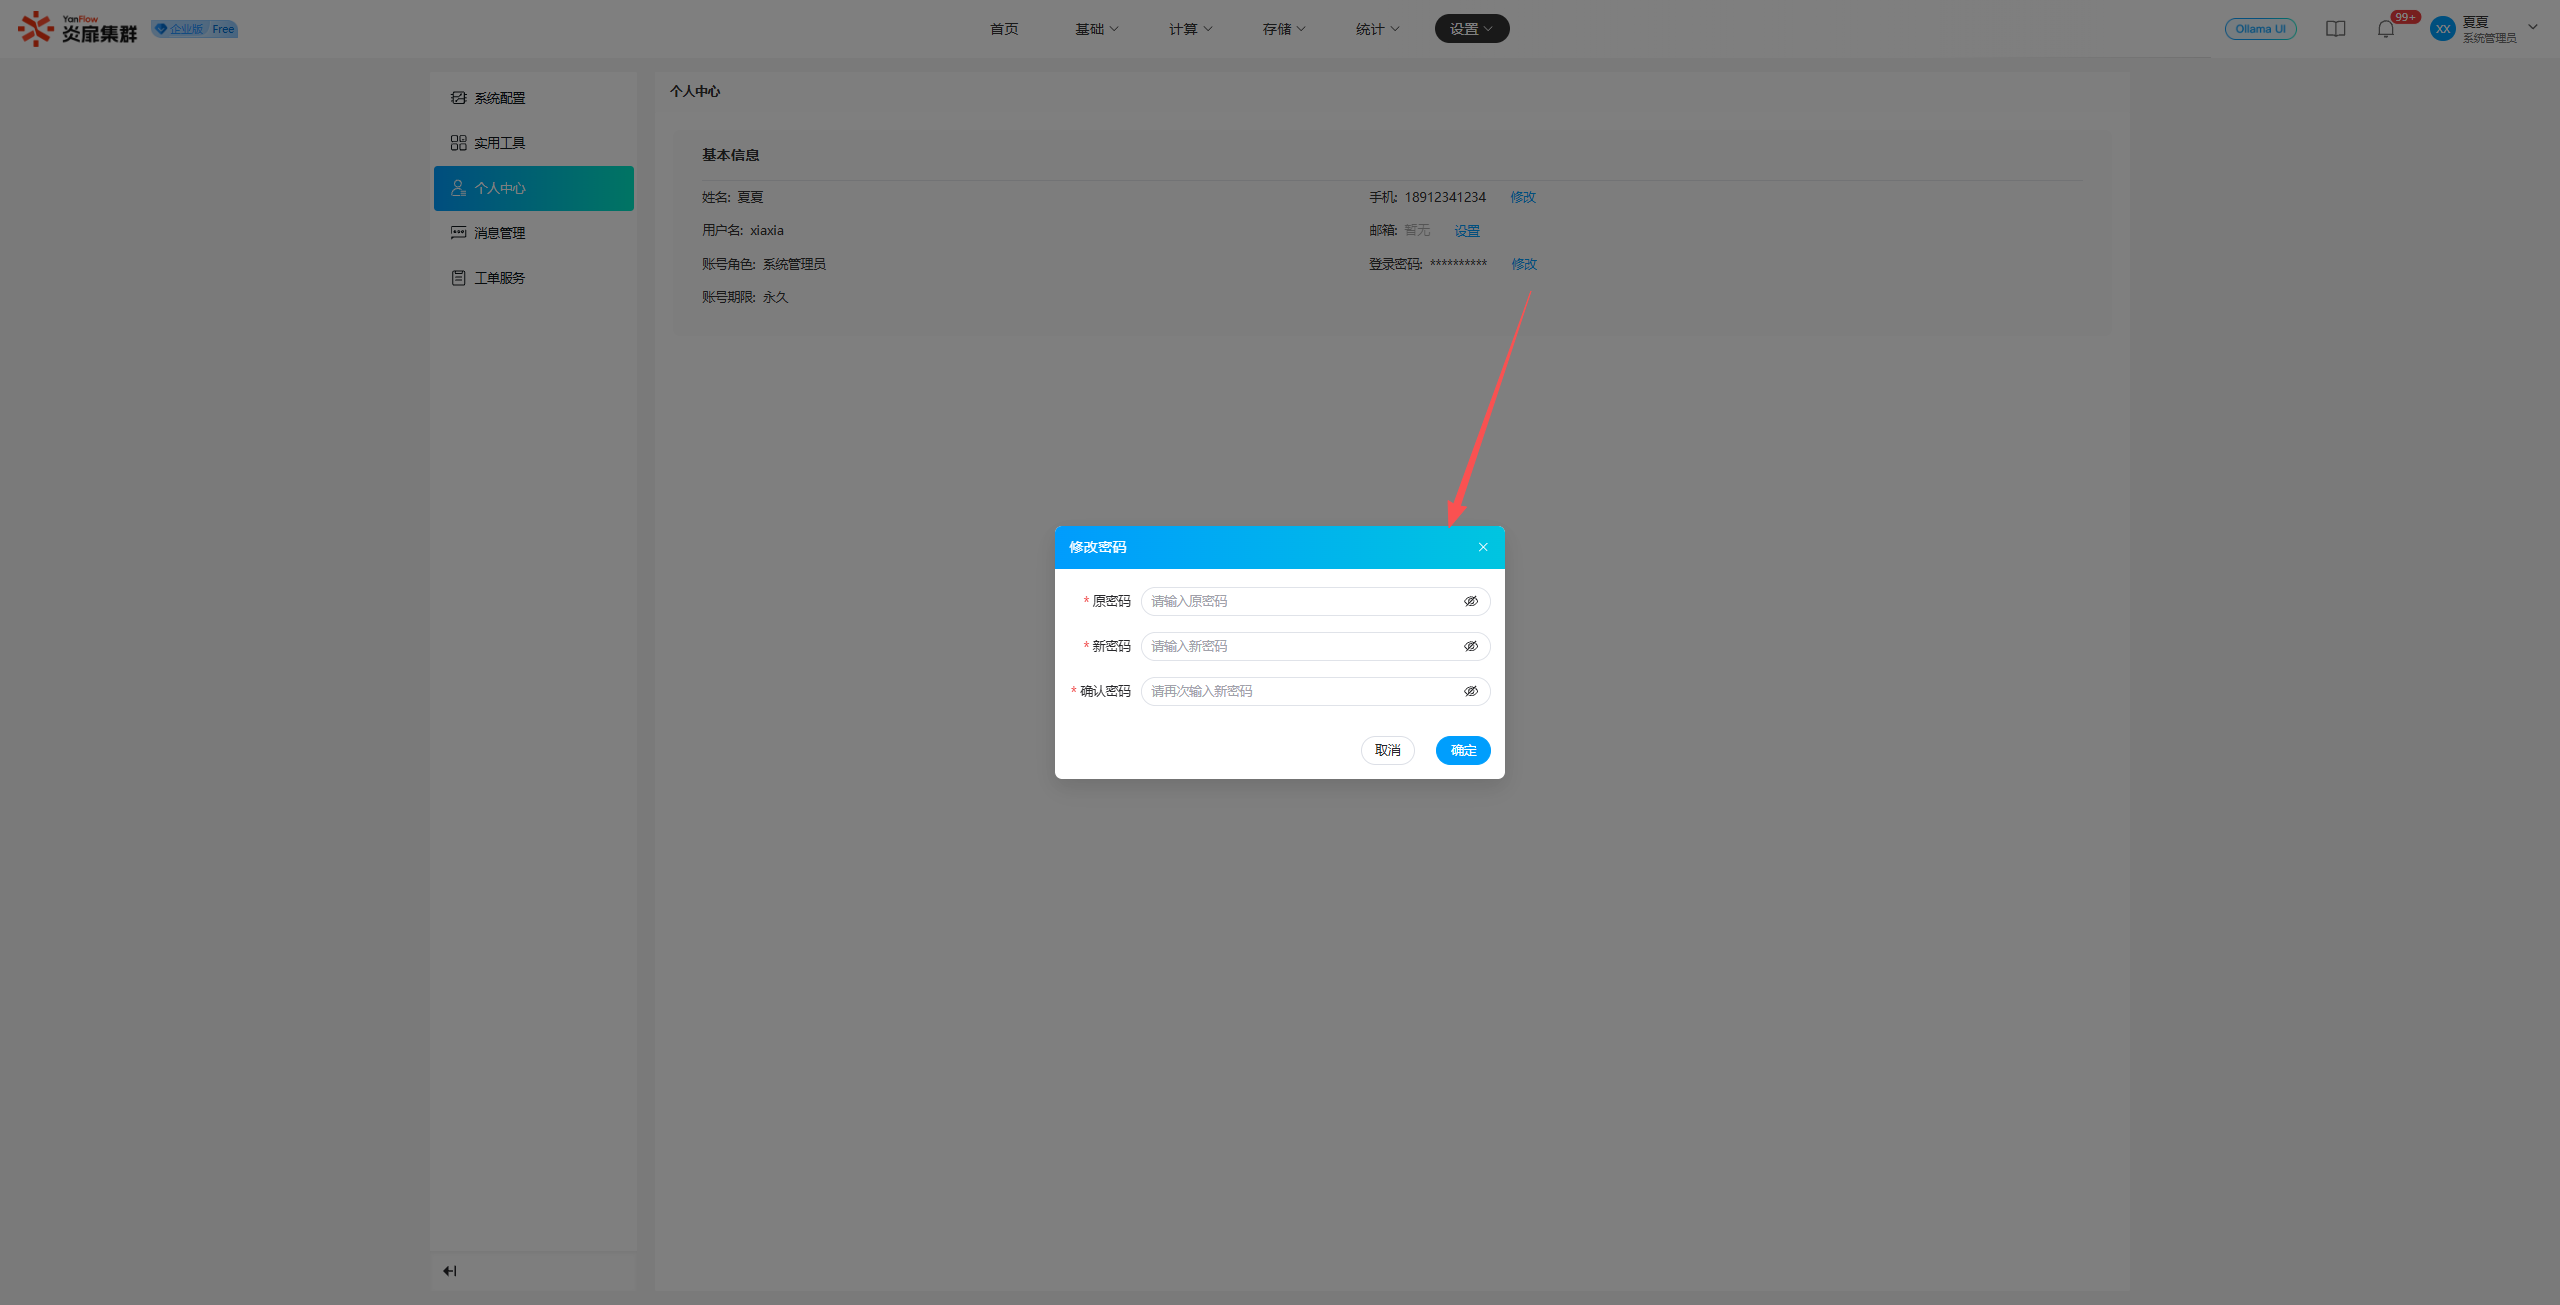
Modify Login Password: Click Modify next to the password, enter your Original Password, New Password, and Confirm New Password, then click Confirm. Once validated, the password will be changed, and you will be logged out and required to log in again.
Message Management
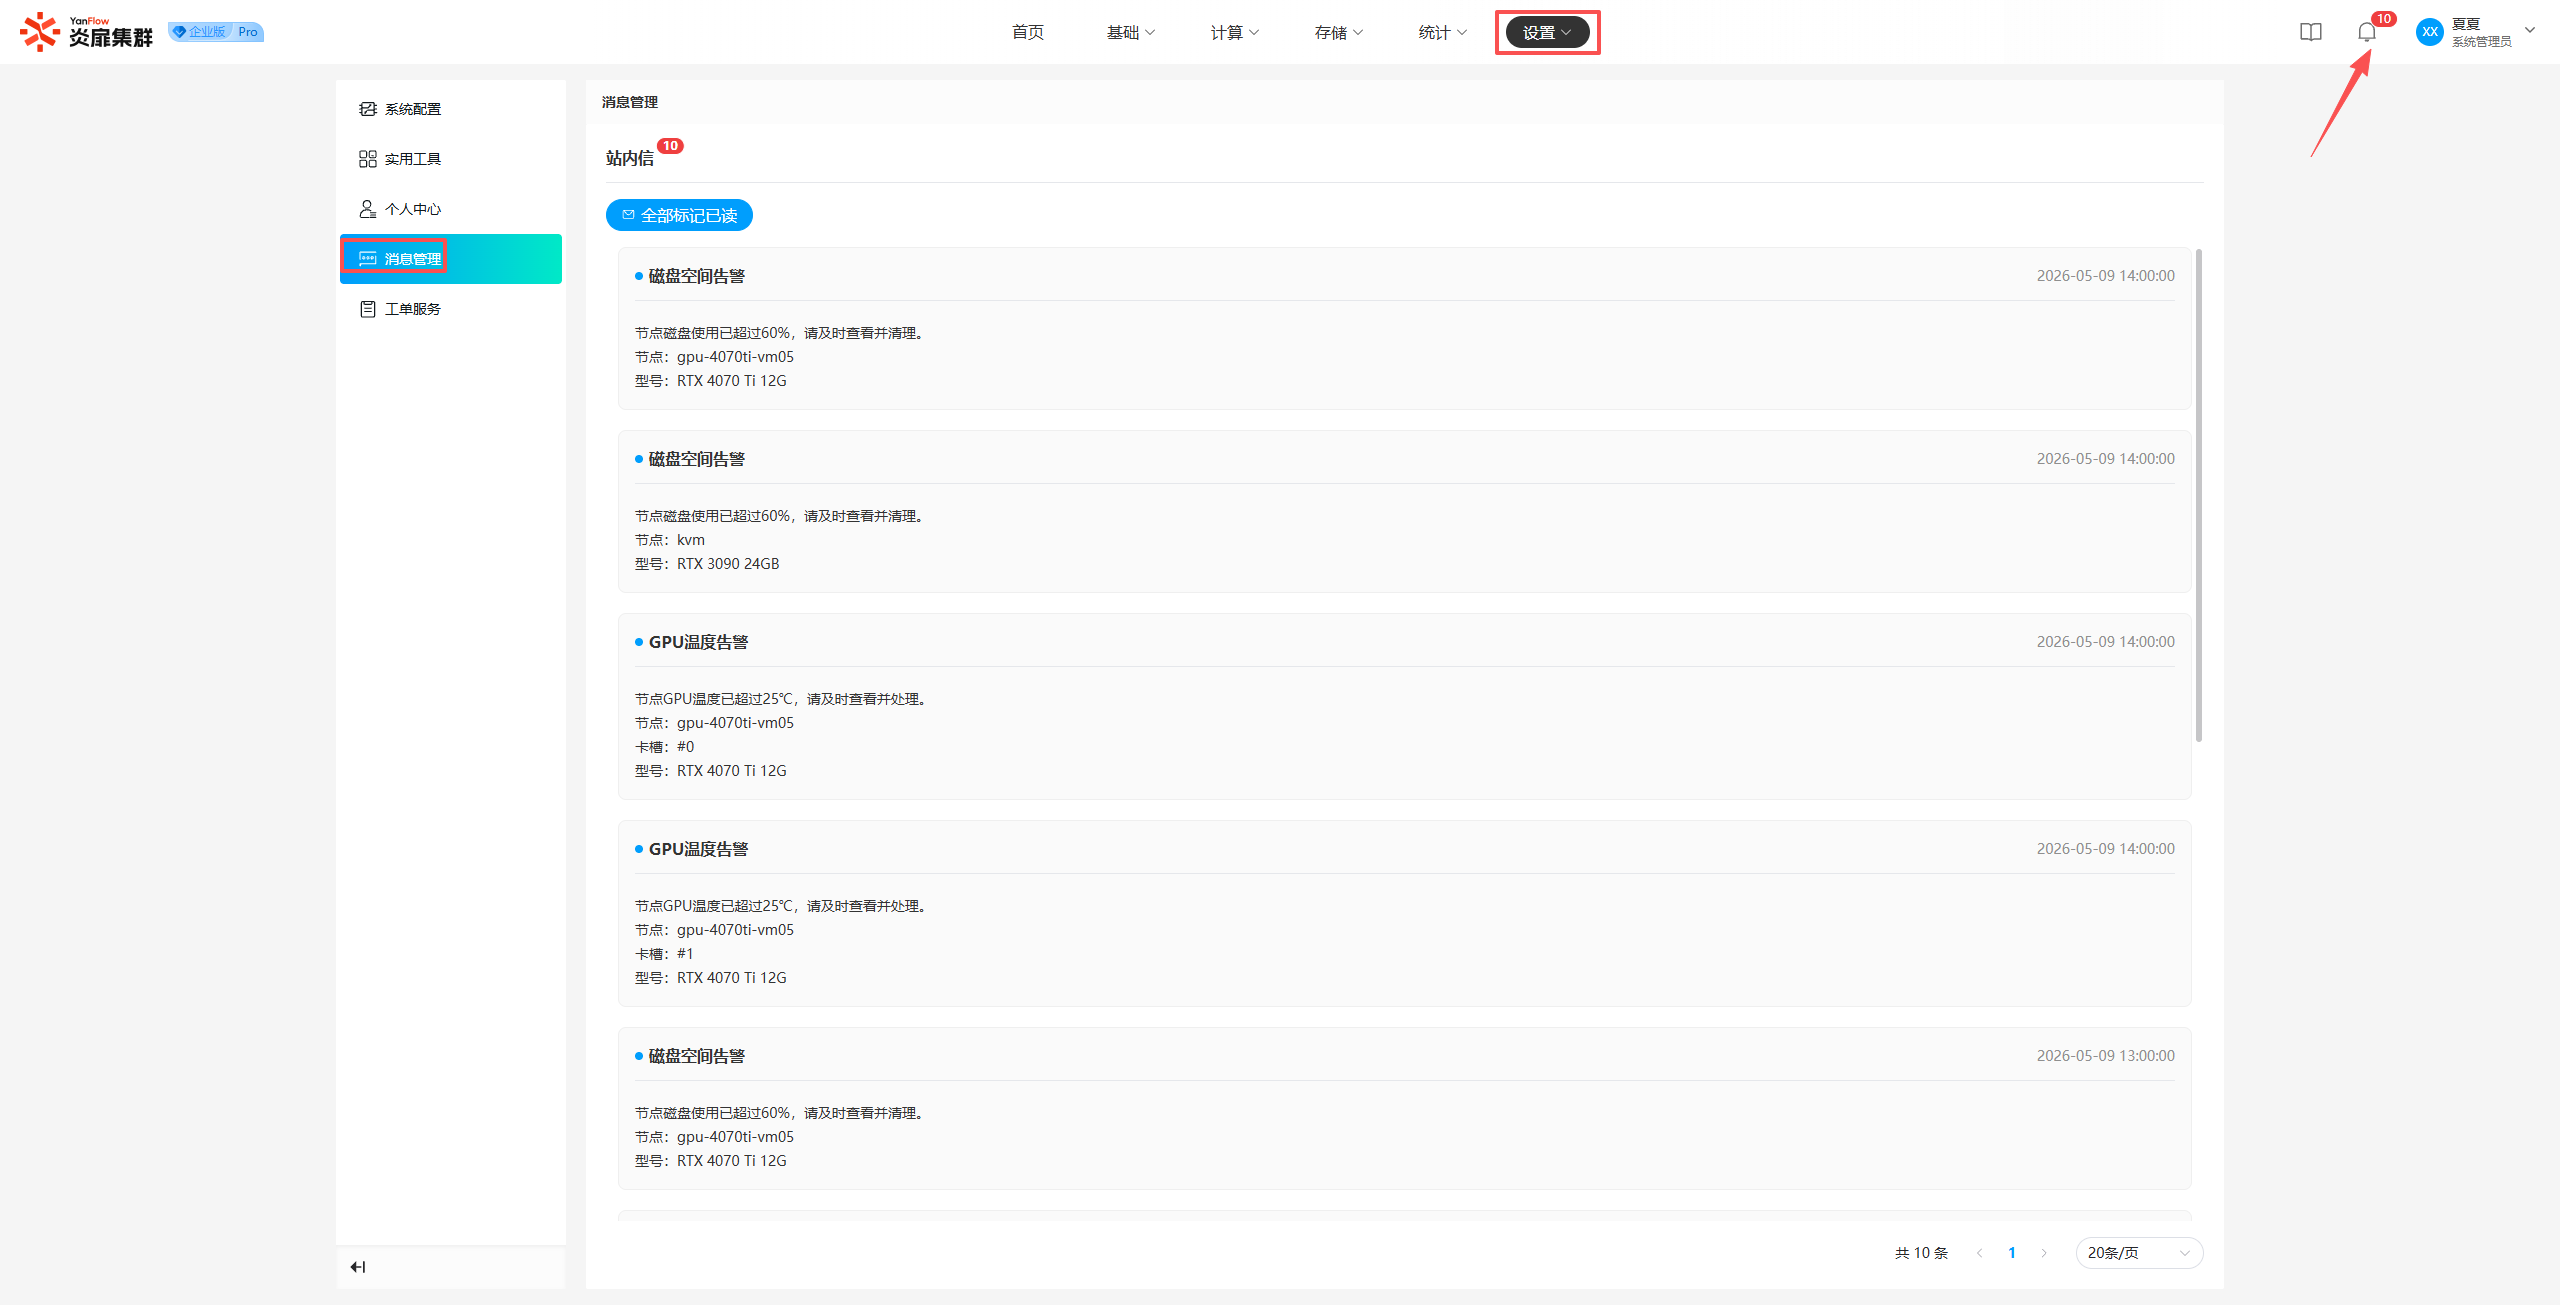
Click Settings - Message Management or click the Message Icon in the top right corner to enter the message management page, where you can view all messages pushed to you by the system. Unread messages are marked with an unread indicator. If there are unread messages, click Mark All as Read to set all messages to a read status.
Ticket Service
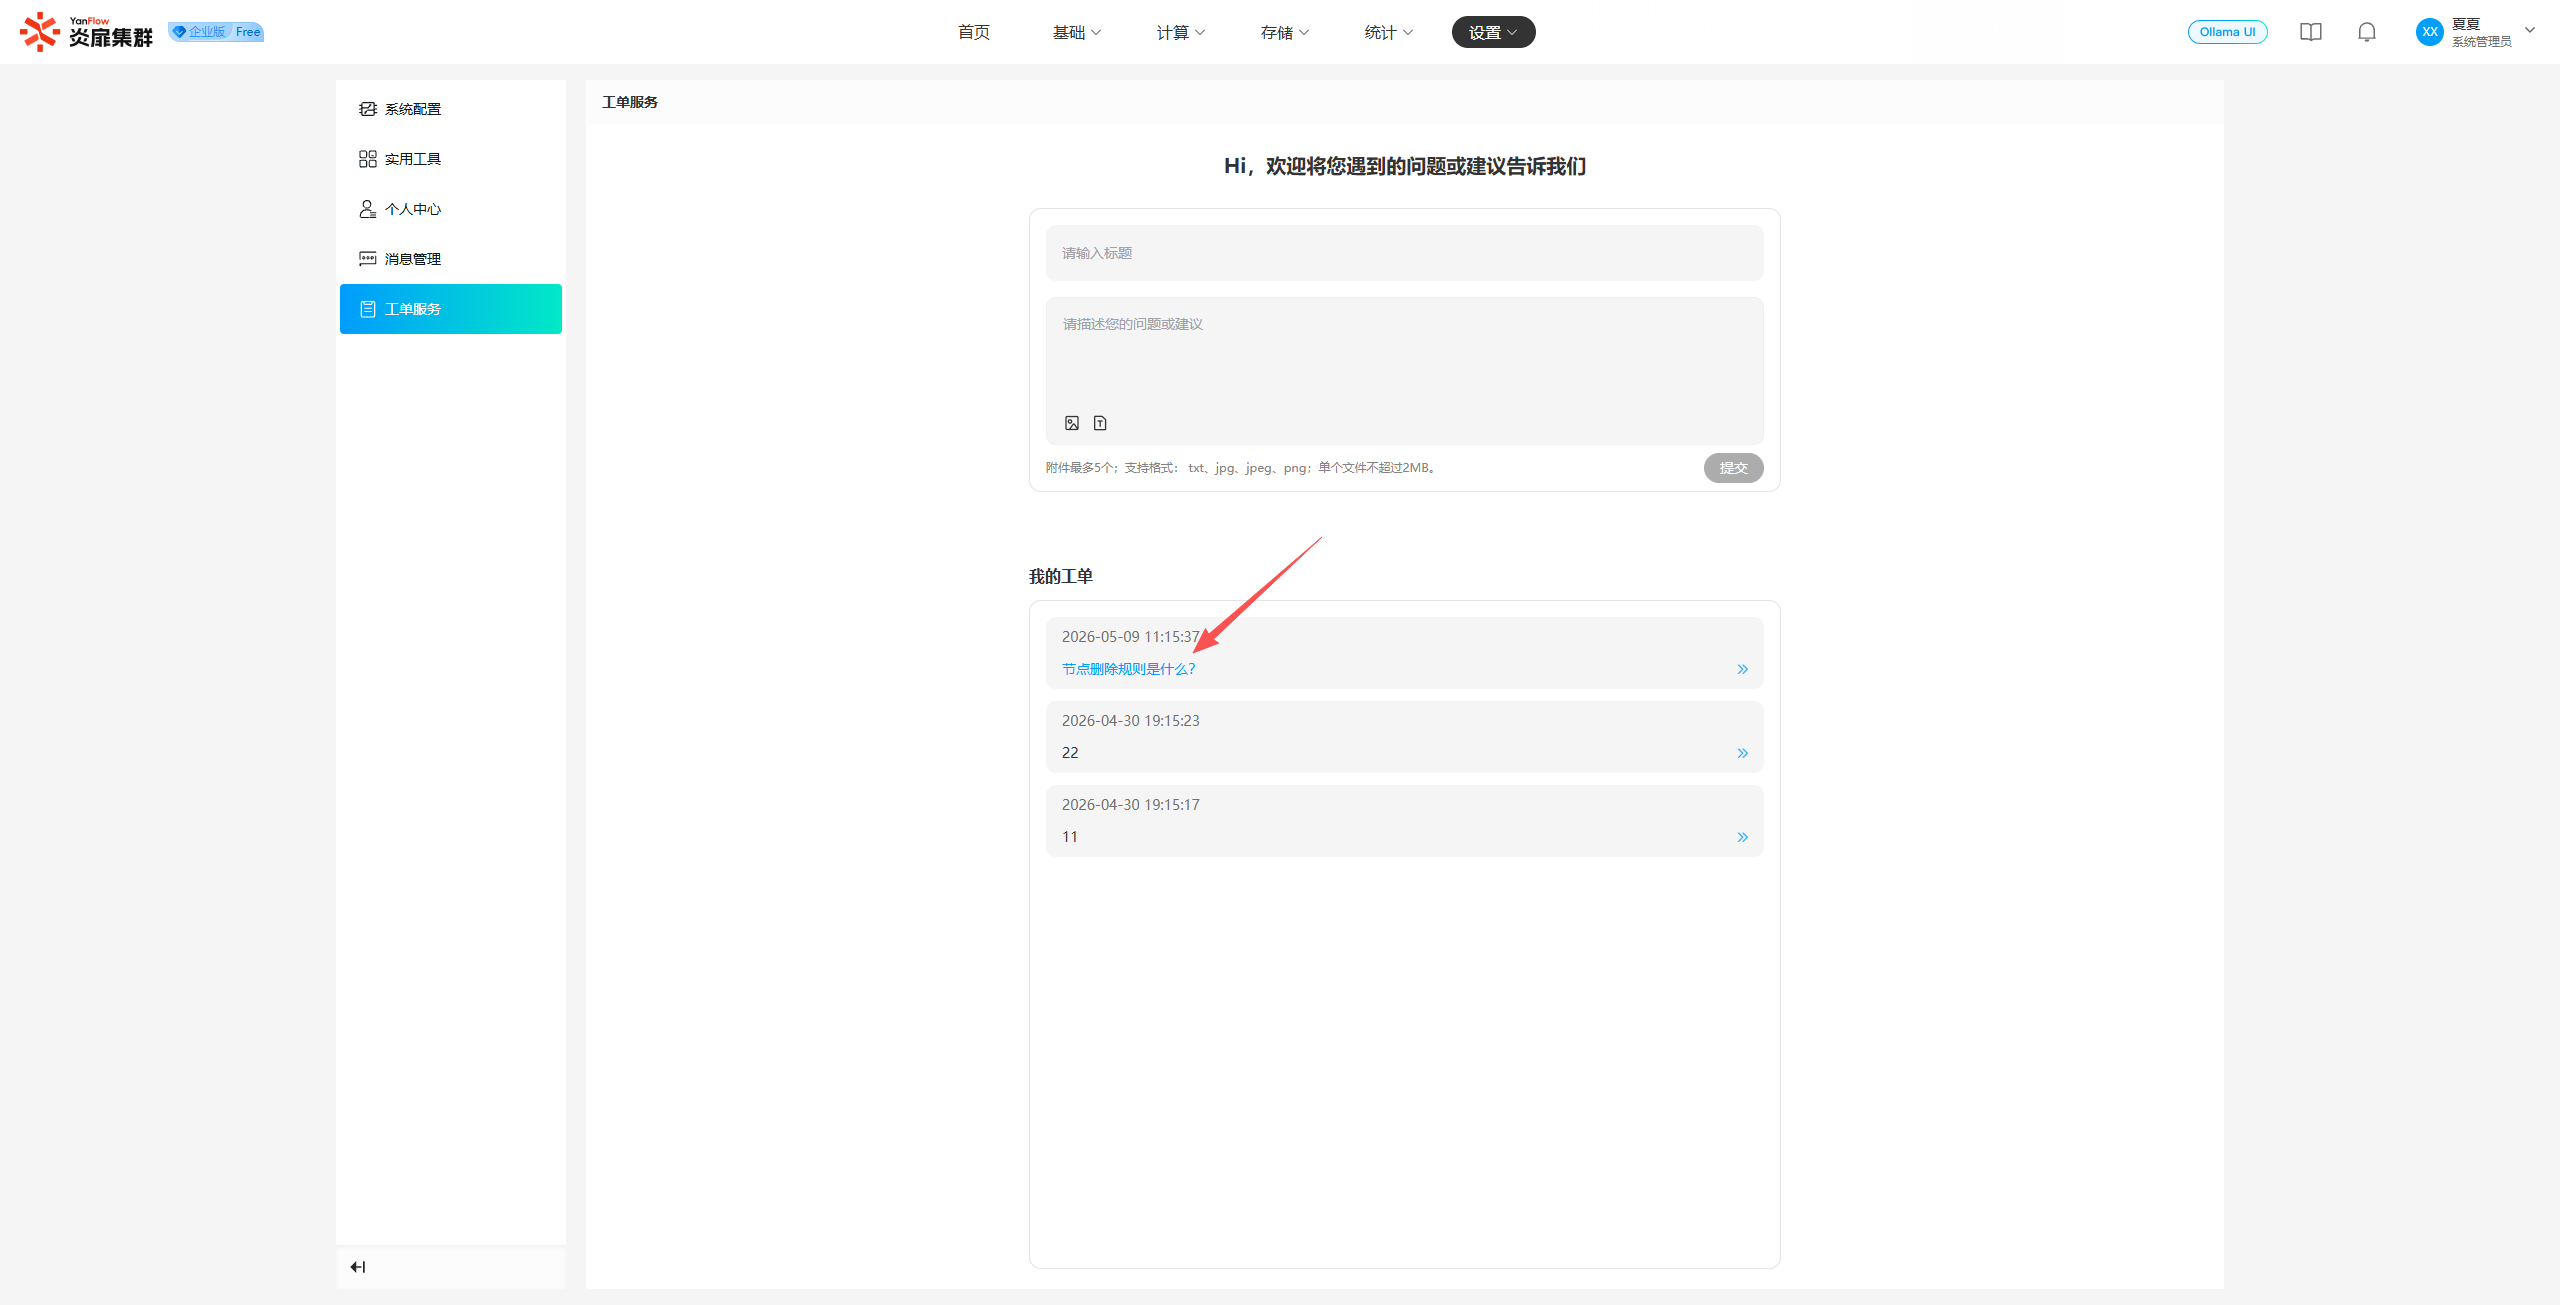
Submit Ticket: Click Settings - Ticket Service or click the Username in the top right corner and select Ticket Service. Enter a title and description, then click "Submit" to complete the ticket submission.
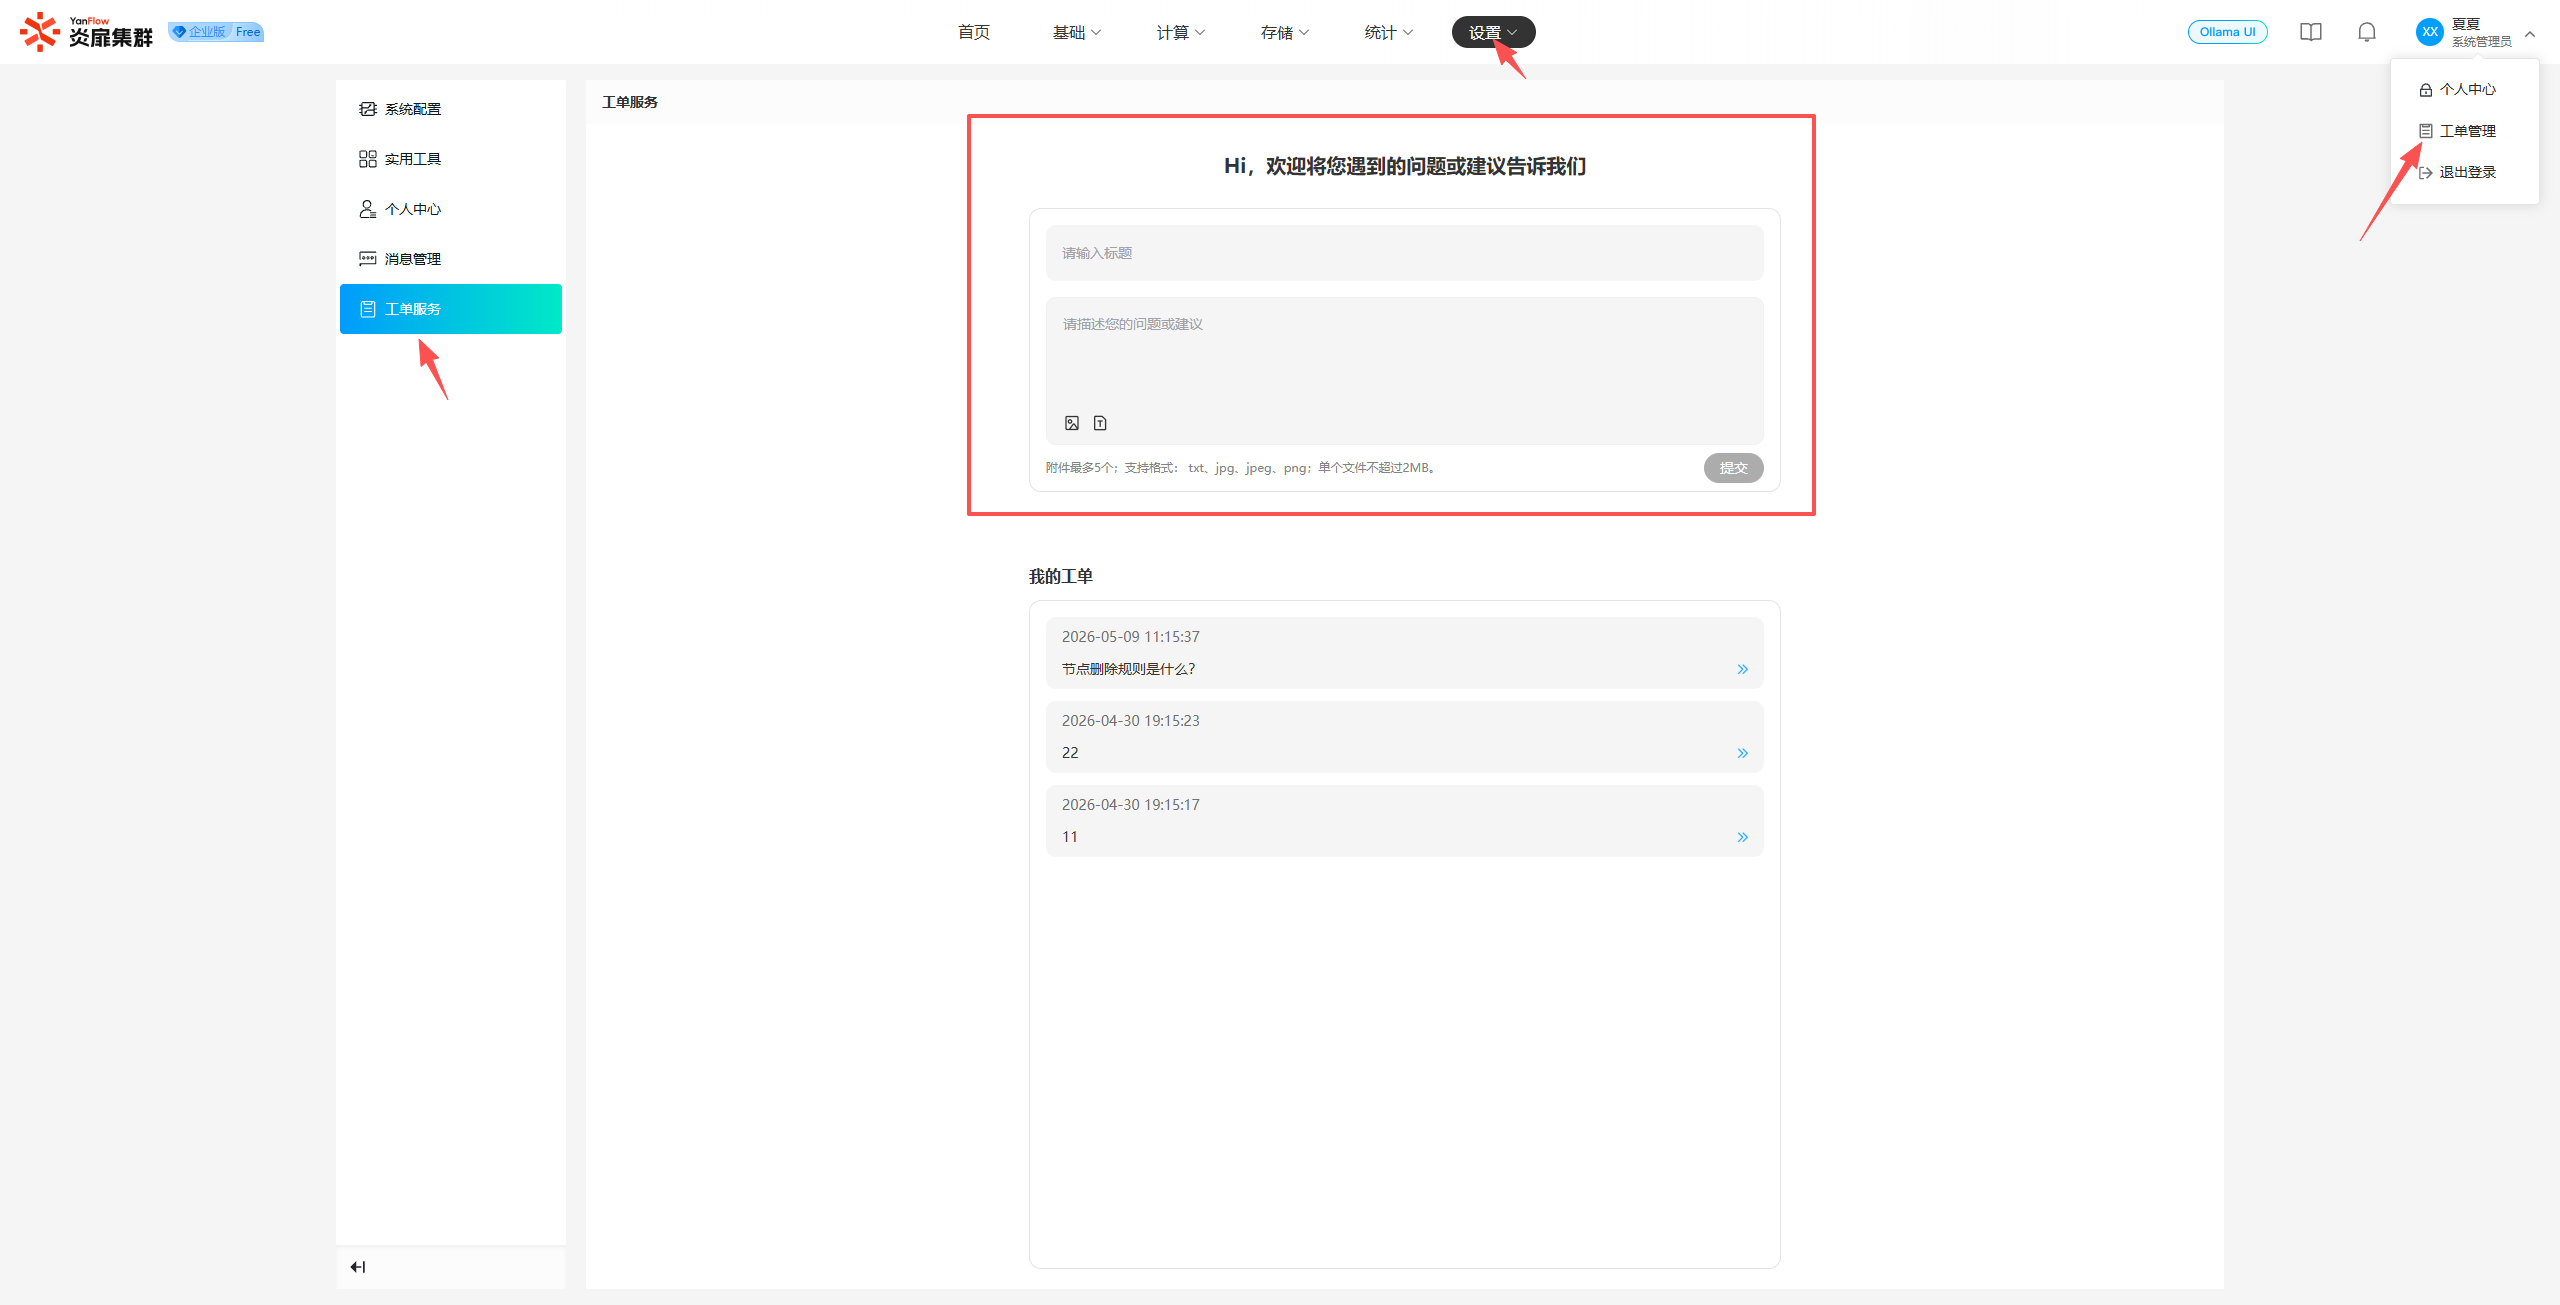
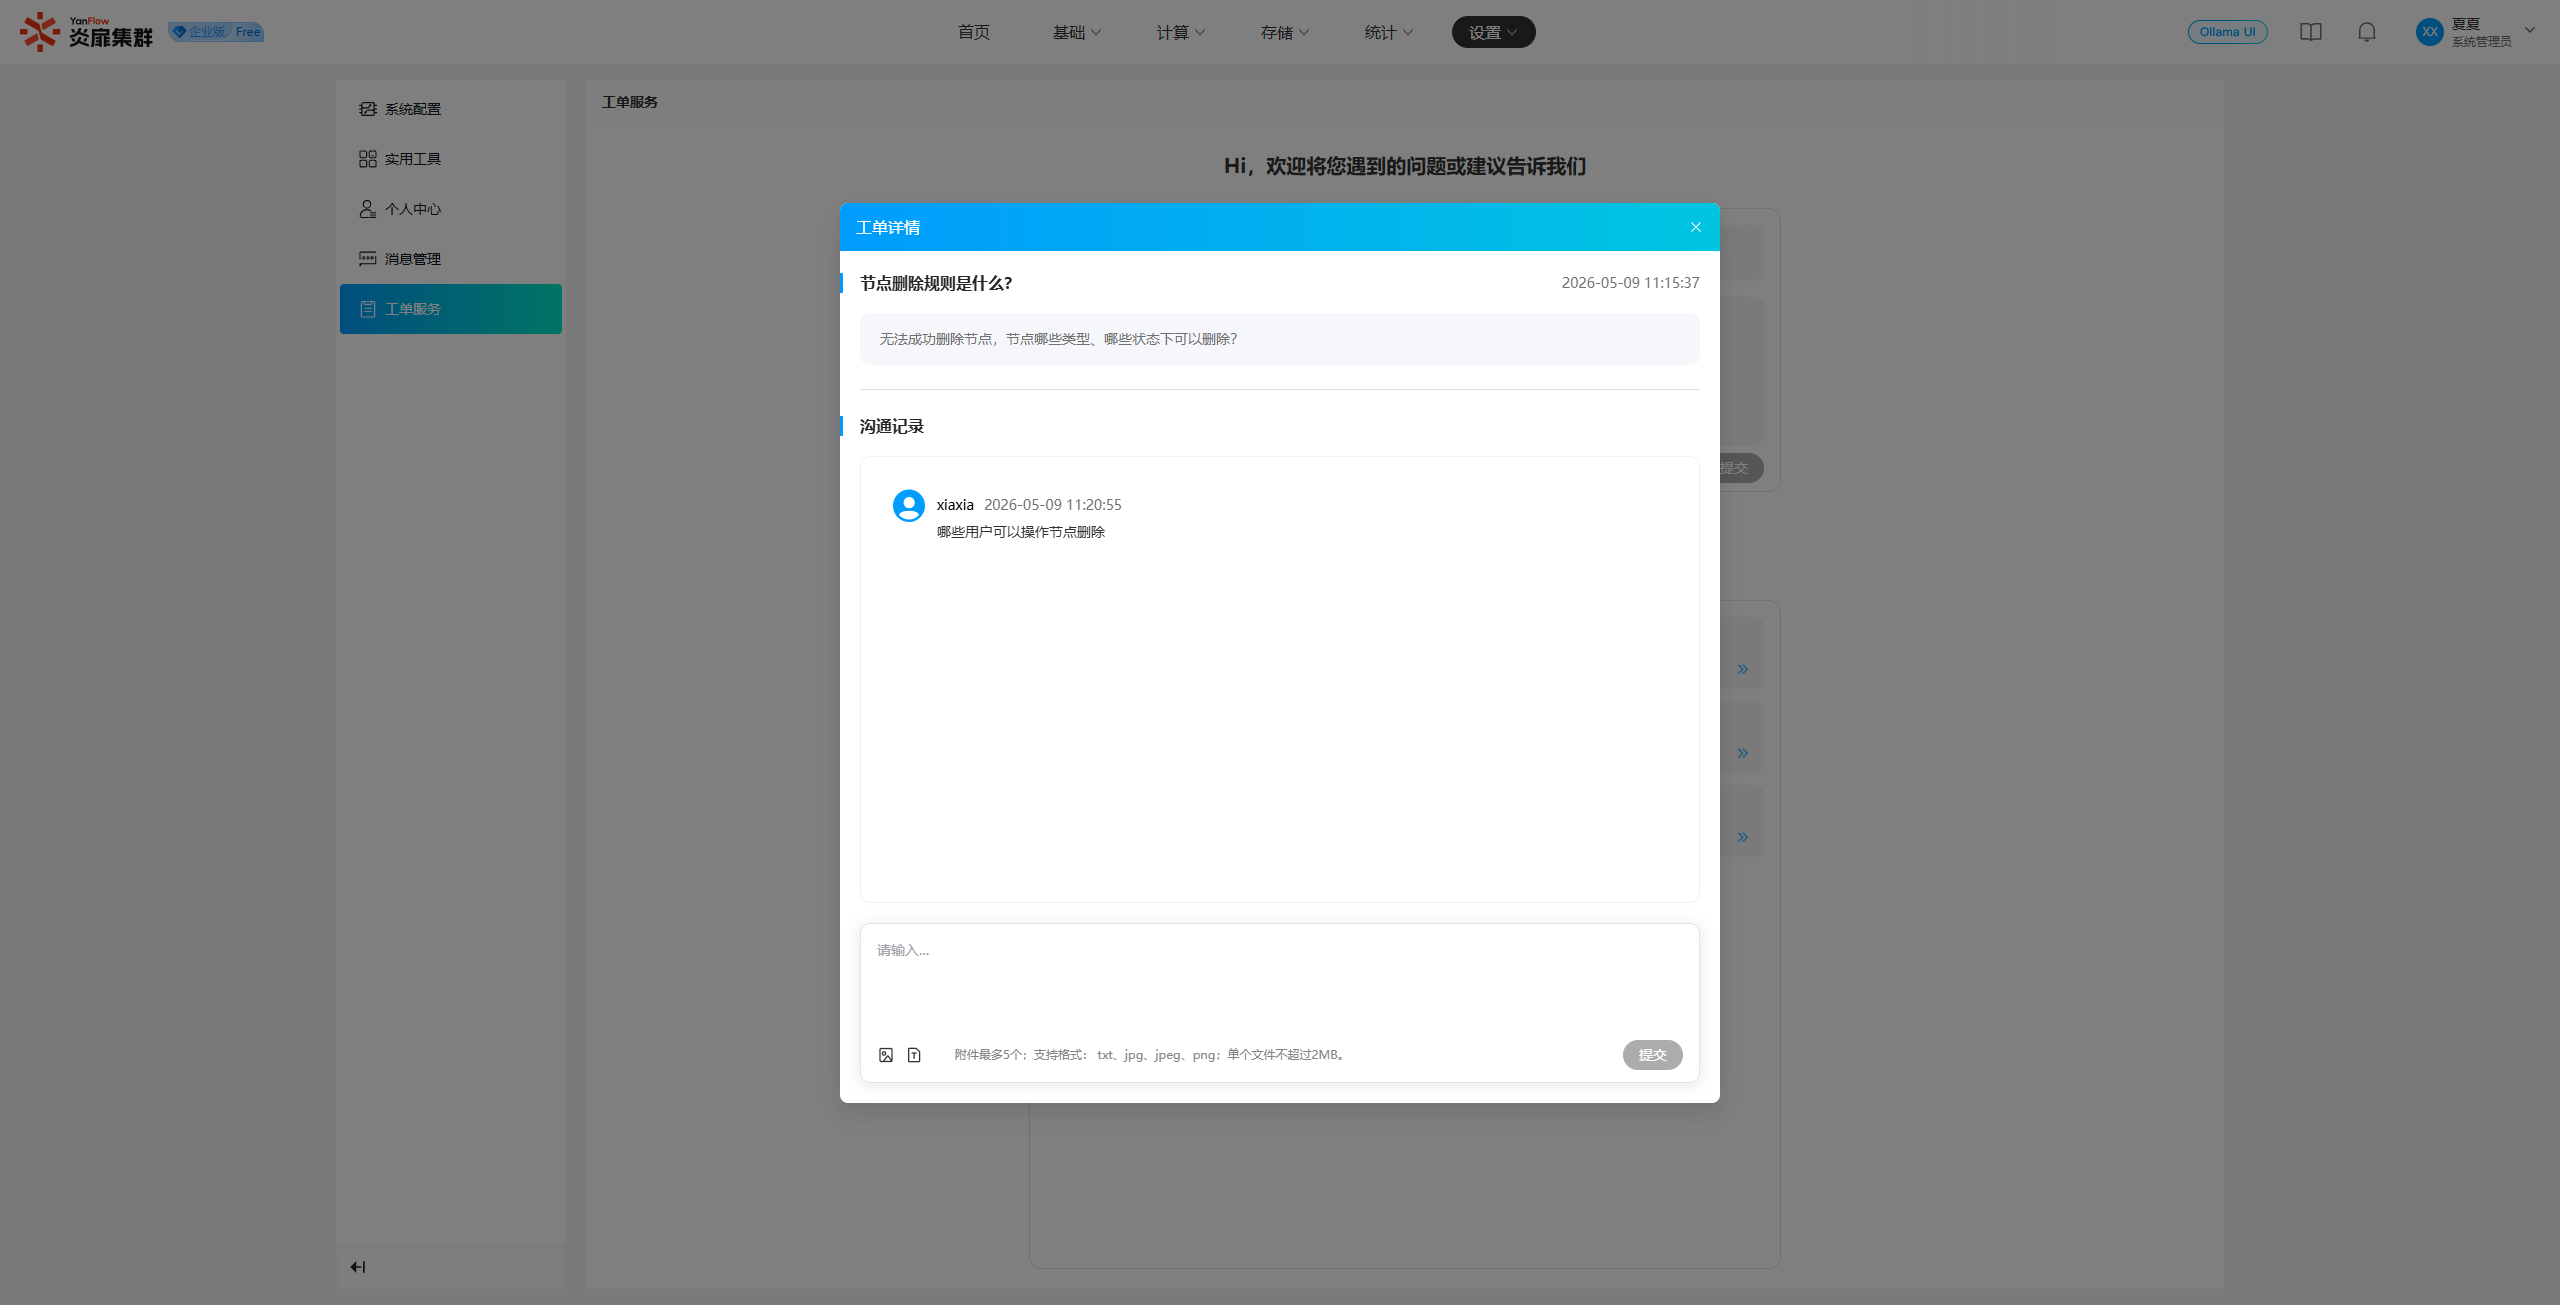
View Ticket: "My Tickets" displays a list of all historical tickets you have submitted. Click a ticket title to view its details, including the title, description, and communication records. Users and customer service can continue to leave messages and interact on historical tickets.